2002 BMW 745LI SEDAN display
[x] Cancel search: displayPage 26 of 208
At a glanceControlsDriving tipsCommunicationsNavigationEntertainmentMobilityReference
25
Voice commandVoice command system*The conceptThe voice command system allows you to
control operation of various vehicle
systems without ever removing your hands
from the steering wheel. The system oper-
ates on the basis of voice commands that
you will learn easily after using them a few
times. You issue your commands in the
form of instructions or in dialogs. The
dialog functions provide you with additional
support in the form of questions and infor-
mation.
The voice command system transforms
your commands and dialog answers into
control signals for the selected systems.
Please take the time to acquaint your-
self with how a particular system
operates before proceeding to control it
using the voice command system. At the
time of publication the voice command
system was available for use with the
English and German languages. Other
languages are currently in preparation.
When the voice command system is active
you can adjust the volume, refer to
page 141.
command system.<
>>...<< identifies commands used in the
voice command system. It is not necessary
to speak the words in parentheses.
>...< identifies the answers provided by the
voice command system.
Systems available for use with voice
command>Mobile phone, refer to page 158
>>Telephone (menu)<<
>Navigation system, refer to page 124
>>Navigation (menu)<< or
>>Navi (menu)<<>Radio, refer to page 140
>>Radio (menu)<<
>CD, refer to page 146
>>CD (menu)<<
>CD changer, refer to page 148
>>CD changer (menu)<<
>MiniDisc, refer to page 151
>>MiniDisc (menu)<<
>Cassette, refer to page 153
>>Tape (menu)<<
>Notebook, refer to page 28
>>Notepad (menu)<< or
>>Notebook (menu)<< or >>Note
recorder (menu)<<
Either the system that you are now control-
ling, or any current error messages will
appear in the Info Display, refer to page 14.
Voice commandsTo activate voice command systemActivate by briefly pressing the
button in the steering wheel.
A signal tone and "SVS" in the Info Display
indicate that the system is ready for use.
You automatically proceed to the orienta-
tion menu.
Except in dialogs, always press
the button again before issuing voice
commands.
During dialogs that include entry of text or
numbers, the information that the voice
command system has registered will
appear on the Info Display screen, refer to
page 14.To cancel voice command entryYou can terminate execution of a command
or dialog with >>Cancel<<, >>Exit<< or by
pressing the button in the steering
wheel.
Page 27 of 208
Voice command
26 The button must be used to terminate
unrestricted, open dialogs in which any text
might occur, such as those containing
names, notes, etc.
The system automatically switches
over to its telephone mode if you
receive a call during a dialog. The system
issues the voice message >Cancelled< and
"PROCESS TERMINATED" appears in the
Info Display, see Status displays below.<
Voice commandsThe voice command system operates on
the basis of specific, predefined
commands; these commands should be
spoken precisely as indicated. You can
listen to a selection from the command list
by activating the system, refer to page 26
and issuing the command >>Options<< or
>>What now<<.
The voice command system also features
an entry-level >>Main menu<< that allows
you to select individual accessories, refer
to page 26.Brief commandsAt the >>Main menu<< level you can use
"brief commands," refer to page 30 to
initiate direct execution of selected func-
tions without first proceeding to the
"systems" level.Special commands Special commands are available for
specific systems. In this Owner's Manual
you will find these commands in the
sections describing the individual systems.
Instructions for using the voice
command system are always identi-
fied by this pictogram.
>>>Pardon<< or >>Repeat<<
Repeats the last message issued by the
voice command system>>>Cancel<< or >>Exit<<
Terminates the voice command system
>>>Standard dialog<<
or >>Extended dialog<<
Comprehensive instructions and error
reports guide you through the system
>>>Short dialog<<
In this setting your guidance through the
system is provided exclusively in the form
of brief statements
>>>Help<<
Allows you to request information on
various systems
>>>Options<< or >>What now<<
Provides you with a listing of the
commands available for the selected
system. A corresponding list simulta-
neously appears in the Info Display, see
Status displays below
>>>Main menu<<
Provides access to submenus.
To make it easier for you to become
acquainted with the system, it is
preset to the >>Standard dialog<< or
>>Extended dialog<< mode at the
factory.<
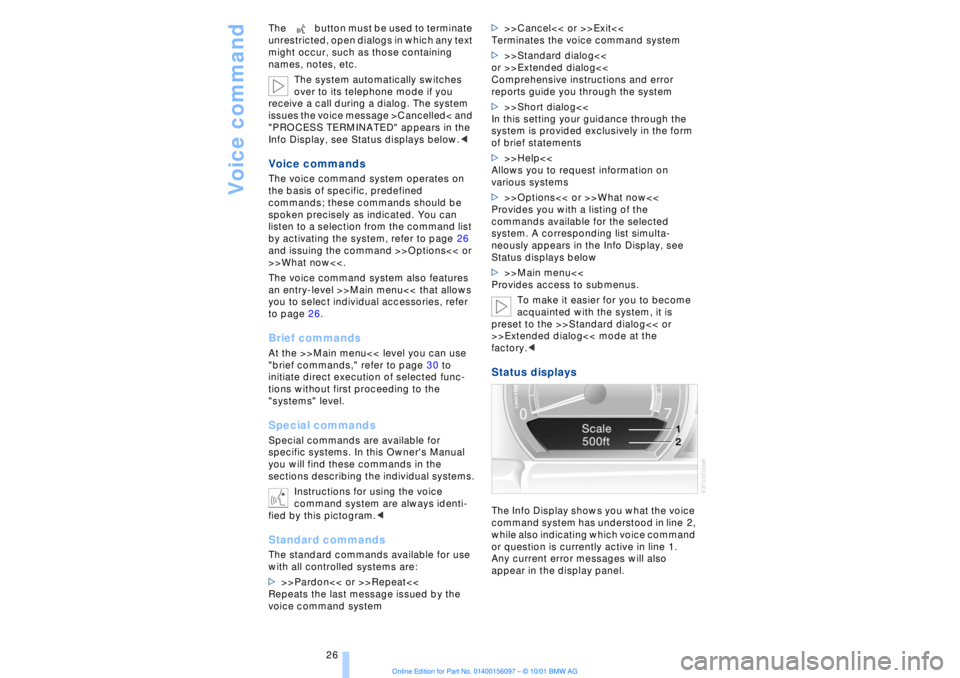
Status displaysThe Info Display shows you what the voice
command system has understood in line 2,
while also indicating which voice command
or question is currently active in line 1.
Any current error messages will also
appear in the display panel.
Page 30 of 208
At a glanceControlsDriving tipsCommunicationsNavigationEntertainmentMobilityReference
29
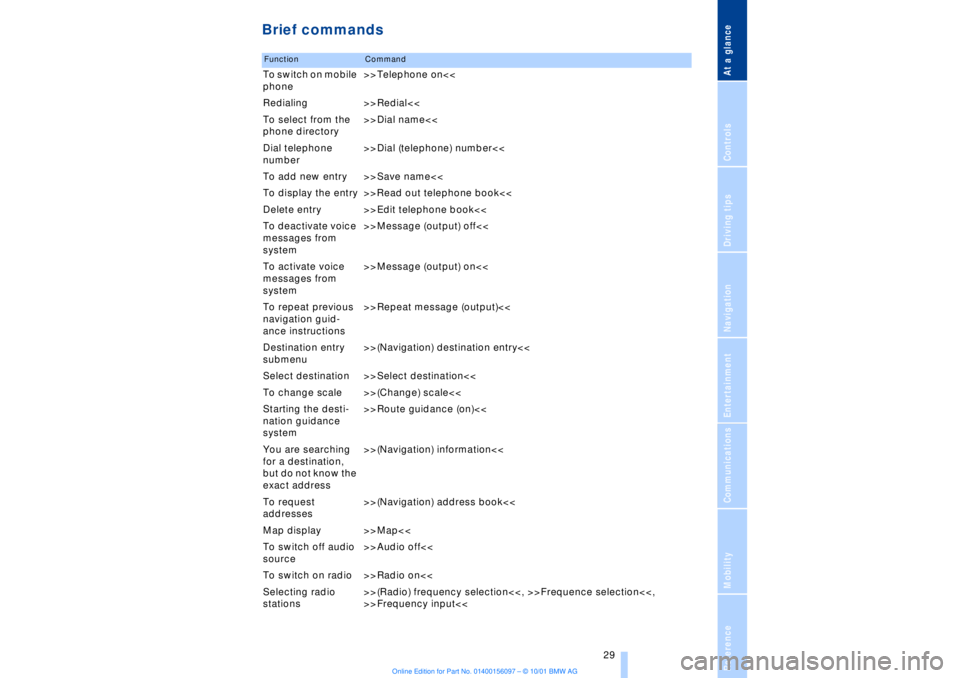
Brief commandsFunction
Command
To switch on mobile
phone>>Telephone on<<
Redialing >>Redial<<
To select from the
phone directory>>Dial name<<
Dial telephone
number>>Dial (telephone) number<<
To add new entry >>Save name<<
To display the entry >>Read out telephone book<<
Delete entry >>Edit telephone book<<
To deactivate voice
messages from
system>>Message (output) off<<
To activate voice
messages from
system>>Message (output) on<<
To repeat previous
navigation guid-
ance instructions>>Repeat message (output)<<
Destination entry
submenu>>(Navigation) destination entry<<
Select destination >>Select destination<<
To change scale >>(Change) scale<<
Starting the desti-
nation guidance
system>>Route guidance (on)<<
You are searching
for a destination,
but do not know the
exact address>>(Navigation) information<<
To request
addresses>>(Navigation) address book<<
Map display >>Map<<
To switch off audio
source>>Audio off<<
To switch on radio >>Radio on<<
Selecting radio
stations>>(Radio) frequency selection<<, >>Frequence selection<<,
>>Frequency input<<
Page 42 of 208

At a glanceControlsDriving tipsCommunicationsNavigationEntertainmentMobilityReference
41
>The hazard warning flashers for approx.
five minutes
>The high beams, which flash on and off
in the same rhythm.To arm and disarm the alarm system When you lock (or unlock) the vehicle,
either with the remote control unit or at the
door lock, the alarm system is armed (or
disarmed) at the same time.
The system indicates that is has been
correctly armed by switching on the hazard
warning flashers for a single cycle and by
emitting an acoustic signal.
You can have different acknowledg-
ment signals set to confirm arming
and disarming.<
Even with the alarm system armed, you can
open the luggage compartment lid using
the button 3on the remote control
unit, refer to page 36. The alarm system will
start to monitor the luggage compartment
lid again as soon as it is reclosed. Indicator lamp displays>The indicator lamp below the interior
rearview mirror flashes continuously: the
system is armed
>The indicator lamp flashes when the
system is armed: door(s), the hood or
luggage compartment lid are not
completely closed. Even if you do not close
the alerted area, the system begins to
monitor the remaining areas, and the indi-
cator lamp flashes continuously after
10 seconds. However, the interior motion
sensor is not activated >If the indicator lamp goes out when the
system is disarmed: no manipulation or
attempted intrusions have been detected in
the period since the system was armed
>If the indicator lamp flashes for roughly
5 minutes when you disarm the system, or
until the remote control unit is inserted in
the ignition lock: an attempted entry has
been detected in the period since the
system was armed.
Following triggering of an alarm, the indi-
cator lamp will flash continuously.
Avoiding unintentional alarms The tilt alarm sensor and interior motion
sensor may be switched off at the same
time. You can do this to prevent a false
alarm from being triggered (in garages with
elevator ramps, for instance), or when the
vehicle is transported by trailer or train:
Lock the vehicle, i. e., arm the alarm system
twice in a row by pressing button 2 on the
remote control unit twice in succession,
refer to page 36, or lock the vehicle twice
using the key, refer to page 37.
The indicator lamp flashes briefly and then
flashes continuously. The tilt alarm sensor
and the interior motion sensor are switched
off long as the system is armed.
If you desire, the
>tilt alarm sensor, and
>interior motion sensor
can be switched off permanently. Please
contact your BMW center for assistance.< Interior motion sensor In order for the interior motion sensor to
function properly, the windows and sliding/
tilt sunroof must be completely closed.
Be sure to deactivate the interior motion
sensor, see section on Avoiding uninten-
tional alarms, when you wish to leave the
windows or sliding/tilt sunroof open.
Page 51 of 208
Adjustments
50
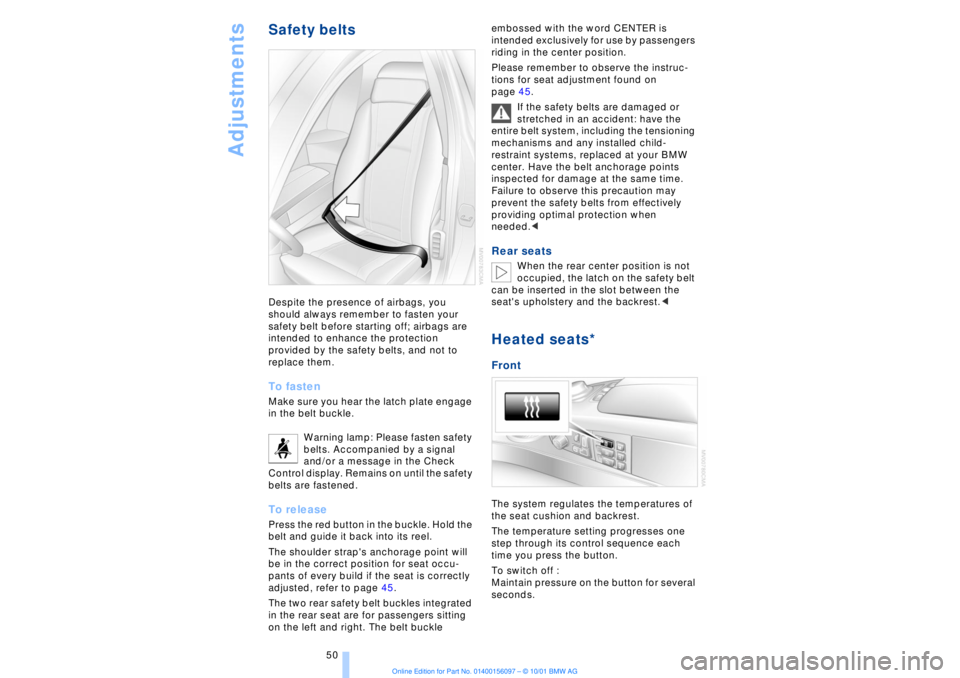
Safety beltsDespite the presence of airbags, you
should always remember to fasten your
safety belt before starting off; airbags are
intended to enhance the protection
provided by the safety belts, and not to
replace them. To fastenMake sure you hear the latch plate engage
in the belt buckle.
Warning lamp: Please fasten safety
belts. Accompanied by a signal
and/or a message in the Check
Control display. Remains on until the safety
belts are fastened. To releasePress the red button in the buckle. Hold the
belt and guide it back into its reel.
The shoulder strap's anchorage point will
be in the correct position for seat occu-
pants of every build if the seat is correctly
adjusted, refer to page 45.
The two rear safety belt buckles integrated
in the rear seat are for passengers sitting
on the left and right. The belt buckle embossed with the word CENTER is
intended exclusively for use by passengers
riding in the center position.
Please remember to observe the instruc-
tions for seat adjustment found on
page 45.
If the safety belts are damaged or
stretched in an accident: have the
entire belt system, including the tensioning
mechanisms and any installed child-
restraint systems, replaced at your BMW
center. Have the belt anchorage points
inspected for damage at the same time.
Failure to observe this precaution may
prevent the safety belts from effectively
providing optimal protection when
needed.<
Rear seats
When the rear center position is not
occupied, the latch on the safety belt
can be inserted in the slot between the
seat's upholstery and the backrest.<
Heated seats*Front The system regulates the temperatures of
the seat cushion and backrest.
The temperature setting progresses one
step through its control sequence each
time you press the button.
To switch off :
Maintain pressure on the button for several
seconds.
Page 55 of 208
Adjustments
54 3.Select "MFL." Continue to press the
controller until the desired function
appears:
>"Recirc. air"
In this mode the supply of outside air
remains blocked, refer to AUC Automatic
recirculated-air control on page 101
>"Navi info"
To repeat the most recent message from
the navigation system, refer to page 133
>"AUTO P"
To activate/deactivate Automatic Hold
refer to Automatic Hold on page 63.
You can select the displayed function using
button 1 in the steering wheel.
If you have activated the Automatic
hold feature, refer to page 63, you
can use button 1 to deactivate the system
for parking maneuvers, etc.<
Seat, mirror and steering
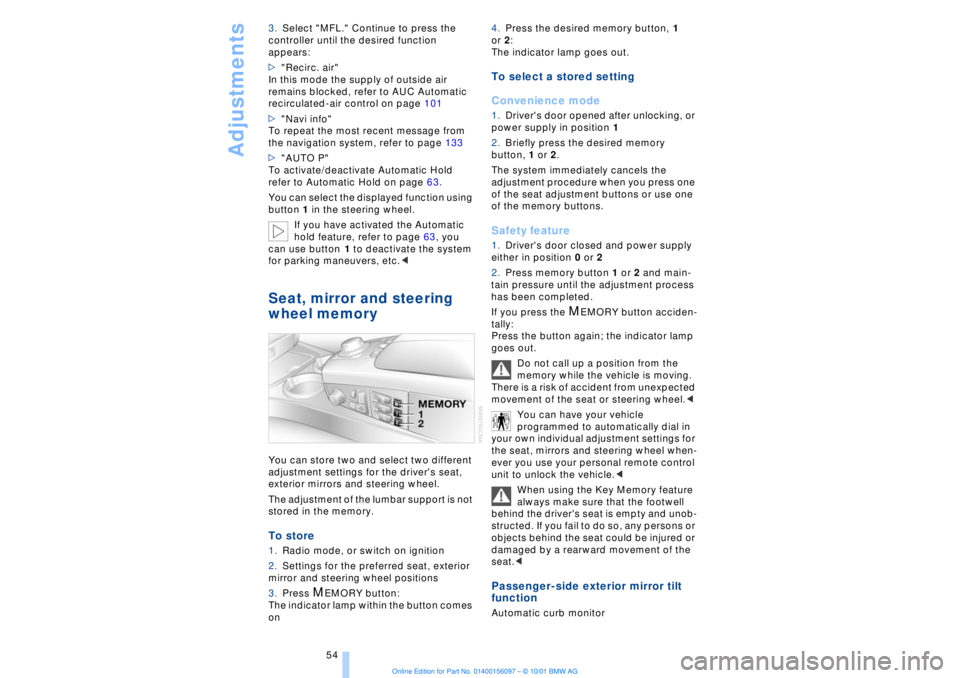
wheel memory You can store two and select two different
adjustment settings for the driver's seat,
exterior mirrors and steering wheel.
The adjustment of the lumbar support is not
stored in the memory. To store 1.Radio mode, or switch on ignition
2.Settings for the preferred seat, exterior
mirror and steering wheel positions
3.Press
M
EMORY button:
The indicator lamp within the button comes
on 4.Press the desired memory button, 1
or 2:
The indicator lamp goes out.
To select a stored setting
Convenience mode1.Driver's door opened after unlocking, or
power supply in position 1
2.Briefly press the desired memory
button, 1 or 2.
The system immediately cancels the
adjustment procedure when you press one
of the seat adjustment buttons or use one
of the memory buttons. Safety feature1.Driver's door closed and power supply
either in position 0 or 2
2.Press memory button 1 or 2 and main-
tain pressure until the adjustment process
has been completed.
If you press the
M
EMORY button acciden-
tally:
Press the button again; the indicator lamp
goes out.
Do not call up a position from the
memory while the vehicle is moving.
There is a risk of accident from unexpected
movement of the seat or steering wheel.<
You can have your vehicle
programmed to automatically dial in
your own individual adjustment settings for
the seat, mirrors and steering wheel when-
ever you use your personal remote control
unit to unlock the vehicle.<
When using the Key Memory feature
always make sure that the footwell
behind the driver's seat is empty and unob-
structed. If you fail to do so, any persons or
objects behind the seat could be injured or
damaged by a rearward movement of the
seat.<
Passenger-side exterior mirror tilt
function Automatic curb monitor
Page 62 of 208
At a glanceControlsDriving tipsCommunicationsNavigationEntertainmentMobilityReference
61
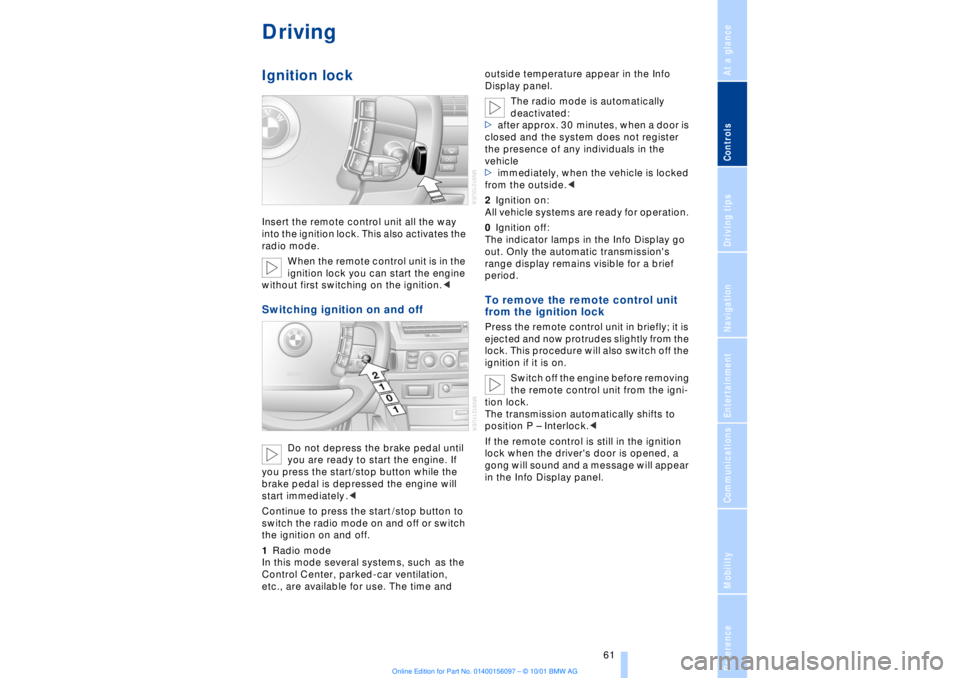
DrivingIgnition lockInsert the remote control unit all the way
into the ignition lock. This also activates the
radio mode.
When the remote control unit is in the
ignition lock you can start the engine
without first switching on the ignition.
you are ready to start the engine. If
you press the start/stop button while the
brake pedal is depressed the engine will
start immediately .<
Continue to press the start /stop button to
switch the radio mode on and off or switch
the ignition on and off.
1Radio mode
In this mode several systems, such as the
Control Center, parked-car ventilation,
etc., are available for use. The time and outside temperature appear in the Info
Display panel.
The radio mode is automatically
deactivated:
>after approx. 30 minutes, when a door is
closed and the system does not register
the presence of any individuals in the
vehicle
>immediately, when the vehicle is locked
from the outside.<
2Ignition on:
All vehicle systems are ready for operation.
0Ignition off:
The indicator lamps in the Info Display go
out. Only the automatic transmission's
range display remains visible for a brief
period.
To remove the remote control unit
from the ignition lock Press the remote control unit in briefly; it is
ejected and now protrudes slightly from the
lock. This procedure will also switch off the
ignition if it is on.
Switch off the engine before removing
the remote control unit from the igni-
tion lock.
The transmission automatically shifts to
position P Ð Interlock.<
If the remote control is still in the ignition
lock when the driver's door is opened, a
gong will sound and a message will appear
in the Info Display panel.
Page 64 of 208
At a glanceControlsDriving tipsCommunicationsNavigationEntertainmentMobilityReference
63
You have two separate options for
engaging the parking brake:
>Manually, by briefly pressing the button
>Automatically, through activation of the
Automatic Hold mode, refer to next
column.
An electrohydraulic mechanism then
engages the parking brakes to prevent the
rear wheels from turning whenever you
switch off the engine.
When the engine is running, parking brake
engagement is controlled by the brake
system's hydraulic circuits, which act on
the disc brakes at the front and rear
wheels. Brake pedal feel Because this function is activated using the
brake system's hydraulic circuits, the
response of the brake pedal may change
slightly. Engagement may also be accom-
panied by activation noise Ð this is normal. Manual engagement
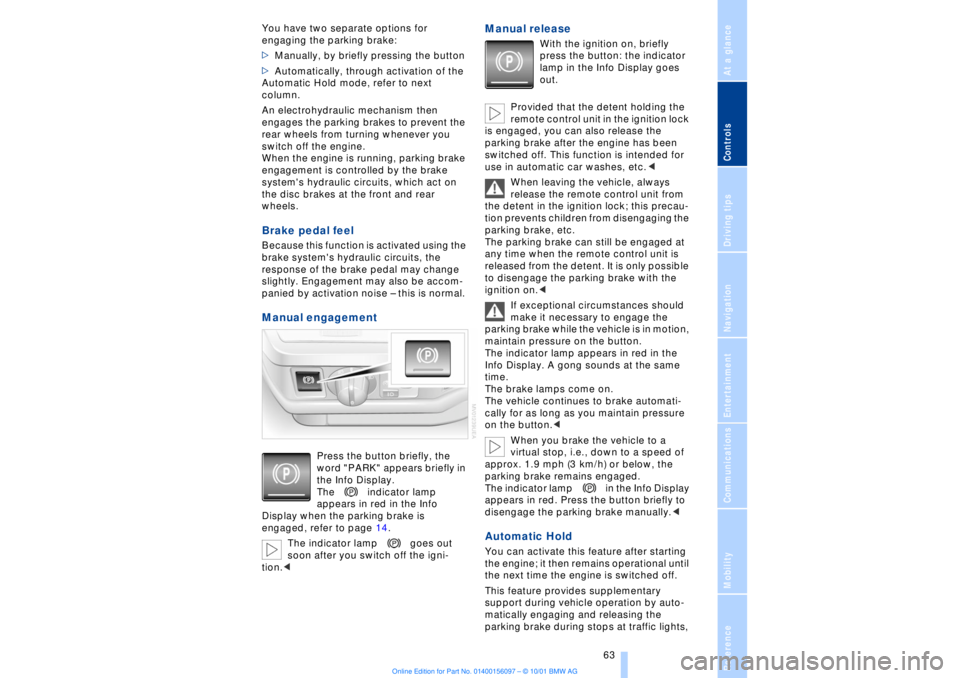
Press the button briefly, the
word "PARK" appears briefly in
the Info Display.
The indicator lamp
appears in red in the Info
Display when the parking brake is
engaged, refer to page 14.
The indicator lamp goes out
soon after you switch off the igni-
tion.<
Manual release
With the ignition on, briefly
press the button: the indicator
lamp in the Info Display goes
out.
Provided that the detent holding the
remote control unit in the ignition lock
is engaged, you can also release the
parking brake after the engine has been
switched off. This function is intended for
use in automatic car washes, etc.<
When leaving the vehicle, always
release the remote control unit from
the detent in the ignition lock; this precau-
tion prevents children from disengaging the
parking brake, etc.
The parking brake can still be engaged at
any time when the remote control unit is
released from the detent. It is only possible
to disengage the parking brake with the
ignition on.<
If exceptional circumstances should
make it necessary to engage the
parking brake while the vehicle is in motion,
maintain pressure on the button.
The indicator lamp appears in red in the
Info Display. A gong sounds at the same
time.
The brake lamps come on.
The vehicle continues to brake automati-
cally for as long as you maintain pressure
on the button.<
When you brake the vehicle to a
virtual stop, i.e., down to a speed of
approx. 1.9 mph (3 km/h) or below, the
parking brake remains engaged.
The indicator lamp in the Info Display
appears in red. Press the button briefly to
disengage the parking brake manually.<
Automatic Hold You can activate this feature after starting
the engine; it then remains operational until
the next time the engine is switched off.
This feature provides supplementary
support during vehicle operation by auto-
matically engaging and releasing the
parking brake during stops at traffic lights,