2002 BMW 525I SPORT WAGON change wheel
[x] Cancel search: change wheelPage 65 of 186

65n
OverviewControlsMaintenanceRepairsDataIndex
Vehicle Memory, Key MemoryThe system then relies on a bilateral
data exchange to identify the individual
user and dial in the selected settings
whenever the remote control unit is
used to disengage the door locks.
In order for you to distinguish between
different keys, colored decals are
supplied together with the keys.What the system can doYour BMW center can provide you with
details on the capabilities of the Vehicle
Memory and Key Memory systems. A
few examples follow below:
Examples for Vehicle Memory:
>Various signals as acknowledgment
when locking or unlocking your
vehicle
>Activates/deactivates the "Follow me
home" function.Examples for Key Memory:
>Locks the vehicle when you start off
>Automatically adjusts the driverÕs
seat, the exterior mirrors and the
steering wheel position to your
personal programmed settings when
you unlock the vehicle
>The automatic climate control
assumes your preset comfort settings
when you unlock the vehicle.
You will see this symbol through-
out the Owner's Manual. It is to
remind you at appropriate places of the
settings that are available to you.<
Page 71 of 186

71n
OverviewControlsMaintenanceRepairsDataIndex
Automatic transmission
*
Before leaving the vehicle when
the engine is running, shift the
selector lever to the "Park" or "Neutral"
position and apply the parking brake to
prevent the vehicle from rolling.
Never leave the vehicle unattended
with the engine running. An unattended
vehicle with a running engine repre-
sents a potential safety hazard.
If you should accidentally select
"Neutral" while traveling at high speed,
remove your foot from the accelerator
pedal immediately. Allow the engine
speed to drop to idle before selecting
the desired drive position. Damage
could otherwise occur due to excessive
engine speed.<
P ParkSelect only when the vehicle is
completely stopped. The transmission
locks to prevent the rear wheels from
turning.R ReverseSelect only when the vehicle is
completely stopped.
N NeutralSelect only if your journey is interrupted
for a longer period.D Drive
(automatic shift program)This position is designed for driving
under all normal operating conditions.
All forward gears are available.4 Ð Sport ProgramThe Sport Program is designed for
performance-oriented driving.
3 and 2 Ð shift limiterSelect this range when you wish to limit
gear changes (on steep uphill or down-
hill slopes, for instance). The transmis-
sion shifts up only as far as the selected
gear."Kickdown" In the "kickdown" mode, you achieve
maximum performance.
Depress the accelerator pedal past the
detent at the full-throttle position.
Page 74 of 186
74n
Automatic transmission with Steptronic
*
To prevent the vehicle from
starting off on its own, always
move the selector lever to position P or
N and engage the parking brake before
leaving your car with the engine
running. Do not leave the vehicle unat-
tended with the engine running. An
unattended vehicle with a running
engine represents a potential safety
hazard.
P ParkSelect "Park" only when the vehicle is
completely stopped. The transmission
locks to prevent the rear wheels from
turning.R ReverseSelect "Reverse" only when the vehicle
is completely stopped.N NeutralSelect "Neutral" only if your journey is
interrupted for a longer period.
D Drive
(automatic shift program)This position is designed for driving
under all normal operating conditions.
All forward gears are available."Kickdown"In the "kickdown" mode, you achieve
maximum acceleration and top speed
in position D.
Depress the accelerator pedal past the
detent at the full-throttle position.
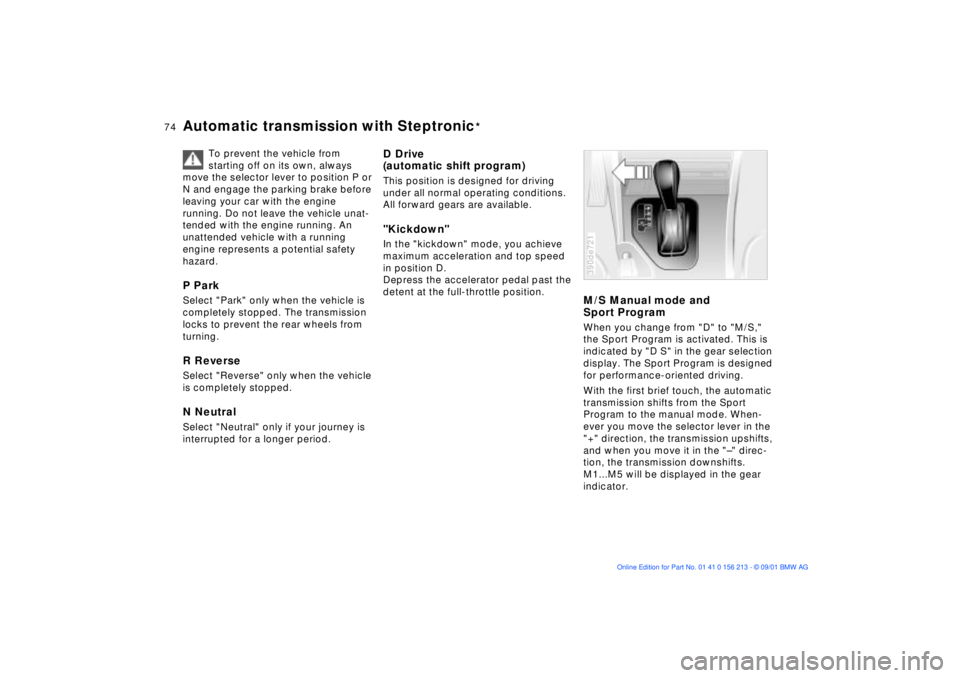
M/S Manual mode and
Sport ProgramWhen you change from "D" to "M/S,"
the Sport Program is activated. This is
indicated by "D S" in the gear selection
display. The Sport Program is designed
for performance-oriented driving.
With the first brief touch, the automatic
transmission shifts from the Sport
Program to the manual mode. When-
ever you move the selector lever in the
"+" direction, the transmission upshifts,
and when you move it in the "Ð" direc-
tion, the transmission downshifts.
M1...M5 will be displayed in the gear
indicator.390de721
Page 100 of 186
100n
Tire Pressure Monitor (RDC)*Loss of tire pressureIf, after a certain period of time, the air
pressure has gone down significantly
(which is normal for any tire), the yellow
indicator lamp comes on or the
message "CHECK TIRE PRESSURE"
appears in the Check Control.
This alerts you that you should have the
tires inflated to the specified pressures
as soon as possible.
If you are prompted to check the
tire pressure shortly after a
correction has been made, this indi-
cates that the corrected values were
not accurate. Please check the inflation
pressure again and make corrections
according to the inflation pressure
table.<
Flat tireIf there is a tire failure with a loss of air
pressure, the red indicator lamp comes
on or the message "TIRE DEFECT"
appears in the Check Control. In addi-
tion, a gong sounds.
If this occurs, reduce vehicle speed
immediately and stop the vehicle in a
safe location. Avoid hard brake applica-
tions. Do not oversteer. Replace the flat
tire.
The spare tire which is available in
your vehicle as standard equip-
ment is equipped with the electronics
required for RDC and, following activa-
tion of the system, is also monitored
after it is mounted.<
The RDC cannot alert you to
severe and sudden tire damage
caused by external factors.<
Have the tires changed at your
BMW center.
Your BMW center has the information
needed for working with RDC and is
equipped with the necessary special
tools.<
System interferenceDuring the period of the malfunction,
the yellow indicator lamp comes on
or the message "TIRECONTROL INAC-
TIVE" appears in the Check Control.
You will also see the same message
>in the event of a system fault
>if a wheel is mounted without the
RDC electronics
>if, in addition to the spare tire, addi-
tional wheels with RDC electronics
are on board.
Please contact your BMW center for
additional information.
Page 136 of 186

136n
Special characteristics of winter tires Snow chains
*
Choosing the right tireBMW recommends winter tires (M+S
radial tires) for operation under
inclement winter driving conditions.
While all-season tires (M+S designa-
tion) provide better winter traction than
summer tires with the load ratings H, V,
W, Y and ZR, they generally do not
achieve the performance of winter tires.
In the interests of safe tracking and
steering response, install radial tires
made by the same manufacturer and
with the same tread configuration on all
four wheels if you elect to mount winter
tires.Do not exceed specified
maximum speeds
Never exceed the maximum
speed for which the winter tires
are rated.
Unprofessional attempts by laymen to
service tires can lead to damage and
accidents.
Have this work performed by skilled
professionals only. Any BMW center
has the required technical knowledge
and the proper equipment and will be
happy to assist you.<
Tire condition, tire pressureWinter tires display a perceptible loss in
their ability to cope with winter driving
conditions once the tread wears to
below 0.16 in (4 mm), and should thus
be replaced.
Comply with the specified tire inflation
pressures Ñ and be sure to have the
wheel and tire assemblies balanced
every time you change the tires.BMW close-mesh tire chains
are
approved exclusively for use in combi-
nation with winter tires on the rear
wheel only. Comply with all manufac-
turer's safety precautions when
mounting the chains. Do not exceed a
speed of 30 mph (50 km/h) while
driving with mounted snow chains.
It is not possible to mount snow
chains on tires with 17-inch
wheels.<
Page 156 of 186
156n
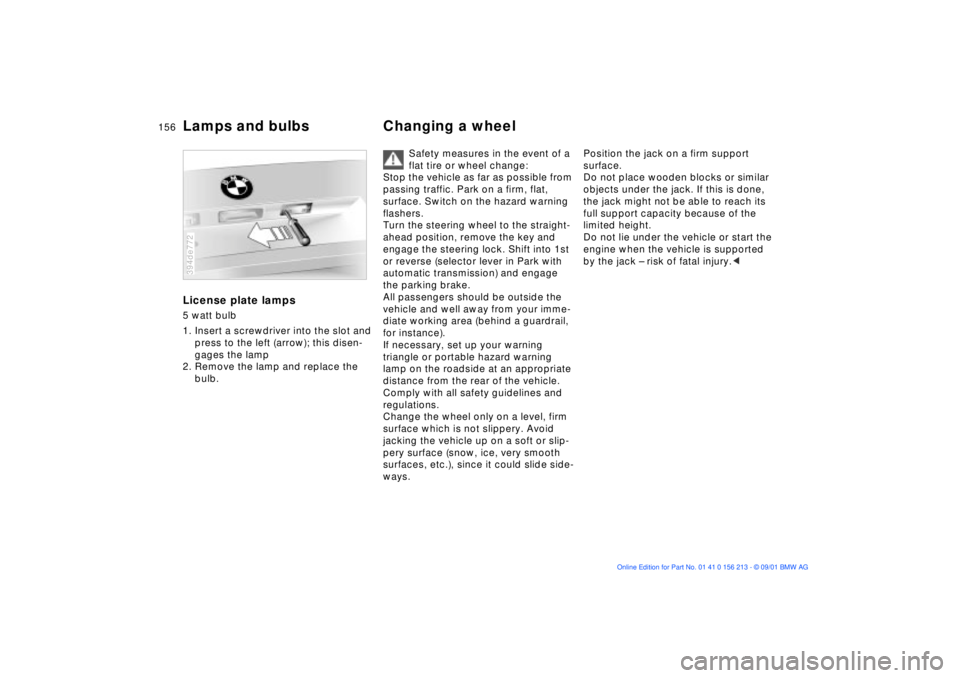
Lamps and bulbs Changing a wheelLicense plate lamps5 watt bulb
1. Insert a screwdriver into the slot and
press to the left (arrow); this disen-
gages the lamp
2. Remove the lamp and replace the
bulb.394de772
Safety measures in the event of a
flat tire or wheel change:
Stop the vehicle as far as possible from
passing traffic. Park on a firm, flat,
surface. Switch on the hazard warning
flashers.
Turn the steering wheel to the straight-
ahead position, remove the key and
engage the steering lock. Shift into 1st
or reverse (selector lever in Park with
automatic transmission) and engage
the parking brake.
All passengers should be outside the
vehicle and well away from your imme-
diate working area (behind a guardrail,
for instance).
If necessary, set up your warning
triangle or portable hazard warning
lamp on the roadside at an appropriate
distance from the rear of the vehicle.
Comply with all safety guidelines and
regulations.
Change the wheel only on a level, firm
surface which is not slippery. Avoid
jacking the vehicle up on a soft or slip-
pery surface (snow, ice, very smooth
surfaces, etc.), since it could slide side-
ways.
Position the jack on a firm support
surface.
Do not place wooden blocks or similar
objects under the jack. If this is done,
the jack might not be able to reach its
full support capacity because of the
limited height.
Do not lie under the vehicle or start the
engine when the vehicle is supported
by the jack Ð risk of fatal injury.<
Page 157 of 186
157n
OverviewControlsMaintenanceRepairsDataIndex
Changing a wheelWhat you will needIn order to avoid rattling noises later,
note the position of the tools when you
remove them and return them to their
original positions when you are through
using them.
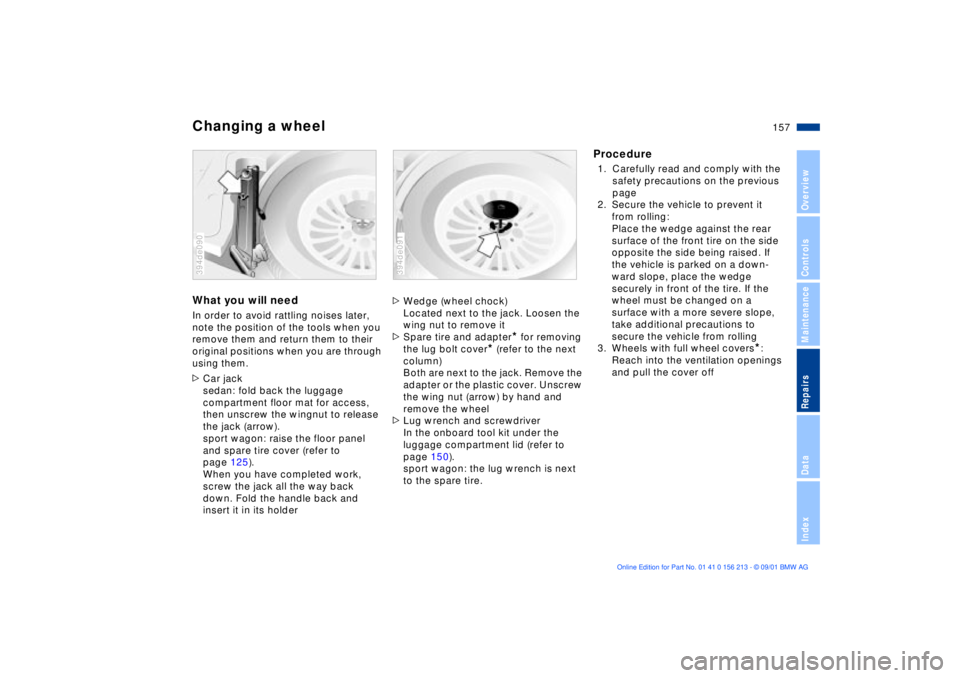
>Car jack
sedan: fold back the luggage
compartment floor mat for access,
then unscrew the wingnut to release
the jack (arrow).
sport wagon: raise the floor panel
and spare tire cover (refer to
page 125).
When you have completed work,
screw the jack all the way back
down. Fold the handle back and
insert it in its holder394de090
>Wedge (wheel chock)
Located next to the jack. Loosen the
wing nut to remove it
>Spare tire and adapter
* for removing
the lug bolt cover
* (refer to the next
column)
Both are next to the jack. Remove the
adapter or the plastic cover. Unscrew
the wing nut (arrow) by hand and
remove the wheel
>Lug wrench and screwdriver
In the onboard tool kit under the
luggage compartment lid (refer to
page 150).
sport wagon: the lug wrench is next
to the spare tire.
394de091
Procedure1. Carefully read and comply with the
safety precautions on the previous
page
2. Secure the vehicle to prevent it
from rolling:
Place the wedge against the rear
surface of the front tire on the side
opposite the side being raised. If
the vehicle is parked on a down-
ward slope, place the wedge
securely in front of the tire. If the
wheel must be changed on a
surface with a more severe slope,
take additional precautions to
secure the vehicle from rolling
3. Wheels with full wheel covers
*:
Reach into the ventilation openings
and pull the cover off
Page 180 of 186
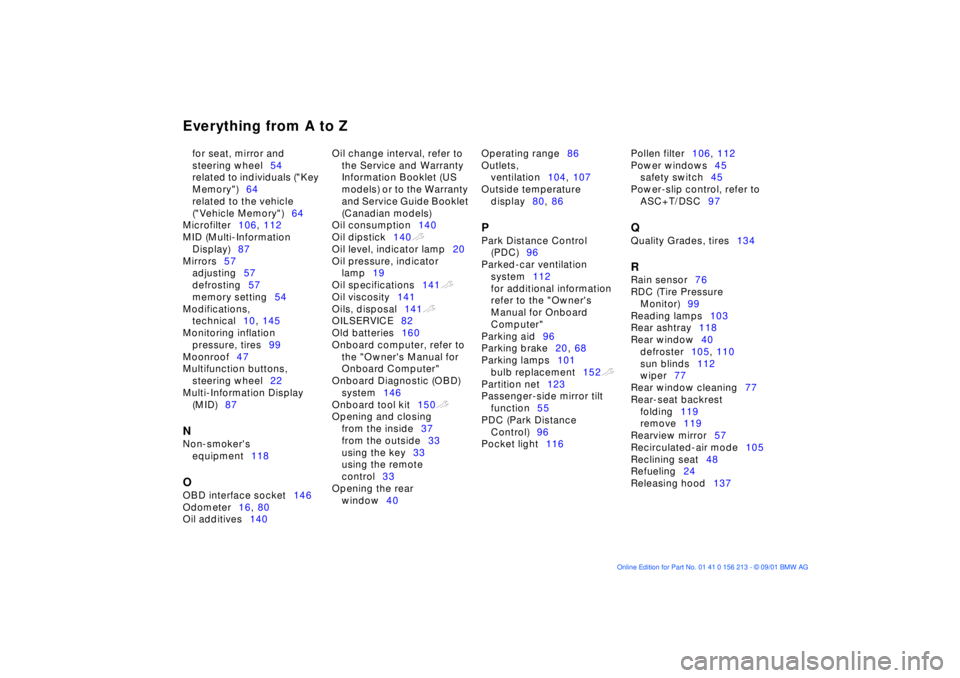
Everything from A to Zfor seat, mirror and
steering wheel54
related to individuals ("Key
Memory")64
related to the vehicle
("Vehicle Memory")64
Microfilter106, 112
MID (Multi-Information
Display)87
Mirrors57
adjusting57
defrosting57
memory setting54
Modifications,
technical10, 145
Monitoring inflation
pressure, tires99
Moonroof47
Multifunction buttons,
steering wheel22
Multi-Information Display
(MID)87 N
Non-smoker's
equipment118 O
OBD interface socket146
Odometer16, 80
Oil additives140 Oil change interval, refer to
the Service and Warranty
Information Booklet (US
models) or to the Warranty
and Service Guide Booklet
(Canadian models)
Oil consumption140
Oil dipstick140t
Oil level, indicator lamp20
Oil pressure, indicator
lamp19
Oil specifications141t
Oil viscosity141
Oils, disposal141t
OILSERVICE82
Old batteries160
Onboard computer, refer to
the "Owner's Manual for
Onboard Computer"
Onboard Diagnostic (OBD)
system146
Onboard tool kit150t
Opening and closing
from the inside37
from the outside33
using the key33
using the remote
control33
Opening the rear
window40 Operating range86
Outlets,
ventilation104, 107
Outside temperature
display80, 86
P
Park Distance Control
(PDC)96
Parked-car ventilation
system112
for additional information
refer to the "Owner's
Manual for Onboard
Computer"
Parking aid96
Parking brake20, 68
Parking lamps101
bulb replacement152t
Partition net123
Passenger-side mirror tilt
function55
PDC (Park Distance
Control)96
Pocket light116 Pollen filter106, 112
Power windows45
safety switch45
Power-slip control, refer to
ASC+T/DSC97
Q
Quality Grades, tires134 R
Rain sensor76
RDC (Tire Pressure
Monitor)99
Reading lamps103
Rear ashtray118
Rear window40
defroster105, 110
sun blinds112
wiper77
Rear window cleaning77
Rear-seat backrest
folding119
remove119
Rearview mirror57
Recirculated-air mode105
Reclining seat48
Refueling24
Releasing hood137