2002 BMW 525I SPORT WAGON lights
[x] Cancel search: lightsPage 19 of 186

19n
OverviewControlsMaintenanceRepairsDataIndex
Indicator and warning lamps
Technology that monitors itself
The system runs a check on the
warning and indicator lamps marked by
"
l
" each time you switch on the igni-
tion. They each light up once for
different periods of time.
If a fault should occur in one of these
systems, the corresponding lamp does
not go out after the engine is started or
it lights up while the vehicle is moving.
The following section describes how
you should respond.
Red: stop immediately
Battery charge current
l
The battery is no longer being
charged. This indicates a defect
in the alternator drive belt or in the
charging circuit of the alternator. Please
contact the nearest BMW center.
Stop and switch off the engine
immediately to prevent over-
heating and serious engine damage. If
the drive belt is defective, increased
steering effort is also required.
<
Engine oil pressure
l
May be accompanied by the
message "STOP!ENGINE
OILPRESS" in the Check Control
display panel
*
: stop the vehicle imme-
diately and switch off the engine. Check
the engine oil level; top up as required.
If the oil level is correct: please contact
the nearest BMW center.
Do not continue driving, as the
engine could sustain serious
damage from inadequate lubrication.
<
Tire Pressure Monitor (RDC)
*
l
Accompanied by an acoustic
warning signal: a tire failure has
occurred. Reduce vehicle speed imme-
diately and stop the vehicle. Avoid hard
brake applications. Do not oversteer.
For additional information: refer to
page 98
Parking brake
*
/
brake system hydraulic circuits
l
Comes on when you engage the
parking brake.
For additional information: refer to
page 68
Comes on although the parking brake
is released: have the brake fluid level
checked. Before continuing your
journey, be sure to read the notes on
pages 132 and 143
Also comes on with the message
"CHECK BRAKE LININGS" in the
Check Control.
Parking brake warning lamp
*
/
brake system hydraulic circuits
for Canadian models.
Page 21 of 186

21n
OverviewControlsMaintenanceRepairsDataIndex
Indicator and warning lamps
Self-leveling suspension
*
l
The level control system is inac-
tive. Please consult the nearest
BMW center.
For additional information: refer to
page 99
Automatic Stability Control plus
Traction (ASC+T)/Dynamic
Stability Control (DSC)
*
l
ASC+T/DSC has been deactivated,
either manually at the button or auto-
matically in response to a system
malfunction. In the event of a malfunc-
tion, have the system checked by your
BMW center.
For additional information: refer to
page 97
Engine-management system
*
There is a fault in the electronic
engine-management system.
You can continue to drive with reduced
engine output and engine speed.
Please have the system inspected by
your BMW center.
Service Engine Soon
l
If the indicator lamp comes on
either continuously or intermit-
tently, this indicates a fault in the emis-
sions-related electronic systems.
Although the vehicle remains opera-
tional, you should have the systems
checked by your BMW center at the
earliest possible opportunity.
For additional information: refer to
page 146
Service Engine Soon warning
lamp for Canadian models.
Check Filler Cap
*
l
If the indicator lamp comes on
although the fuel cap is secured
correctly: this indicates a malfunction in
the fuel system. Have the system
inspected at your BMW center at the
earliest opportunity.
Additional information: refer to page 25
Green: for your information
Turn signal
Flashes when the turn signal is
on. Rapid flashing indicates a
system malfunction.
For additional information: refer to
page 76
Cruise control
Lights up when the system is
switched on: available for oper-
ation via the multifunction steering
wheel.
For additional information: refer to
page 78
Front fog lamps
Lights up whenever you switch
on the front fog lamps.
For additional information: refer to
page 102
Blue: for your information
High beams
Lights up when the high beams
are on or the headlamp flasher
is actuated.
For additional information: refer to
pages 76 and 102
Page 43 of 186

43n
OverviewControlsMaintenanceRepairsDataIndex
Alarm systemTo arm and disarm the alarm
systemWhen the vehicle is locked or unlocked
with the key or the remote control, the
alarm system is also simultaneously
armed or disarmed.
You can have different acknowl-
edgment signals set to confirm
arming and disarming.<
You can also open the luggage
compartment lid/tailgate when the
system is armed by pressing the button
on the remote control (refer to page 35).
When you close the luggage compart-
ment lid/tailgate, the luggage compart-
ment is secured again.
Indicator lamp displays>The indicator lamp below the interior
rearview mirror flashes continuously:
the system is armed
>The indicator lamp flashes during
arming: door(s), the hood or luggage
compartment lid/tailgate are not
completely closed. Even if you do not
secure the indicated area, the system
begins to monitor the remaining
areas, and the indicator lamp flashes
continuously after 10 seconds.
However, the interior motion sensor
is not activated
>If the indicator lamp goes out when
the system is disarmed: no manipula-
tion or attempted intrusions have
been detected in the period since the
system was armed390de020
>If the indicator lamp flashes for
10 seconds when the system is
disarmed: an attempted entry has
been detected in the period since the
system was armed.
Following triggering of an alarm, the
indicator lamp will flash continuously.Avoiding unintentional alarmsThe tilt alarm sensor and interior motion
sensor may be switched off at the same
time. To prevent a false alarm from
being triggered (in garages with
elevator ramps, for instance), or when
the vehicle is transported by trailer or
train:
Lock the vehicle (arm the alarm system)
twice in succession: press button 2 on
the remote control transmitter twice
(refer to page 35), or turn the key in the
door lock to the right (lock) twice in
succession (refer to page 33).
The indicator lamp lights up briefly and
then flashes continuously. The tilt alarm
sensor and the interior motion sensor
are deactivated as long as the system is
armed.
Page 56 of 186
56n
Adjusting steering wheel Heated steering wheel
*
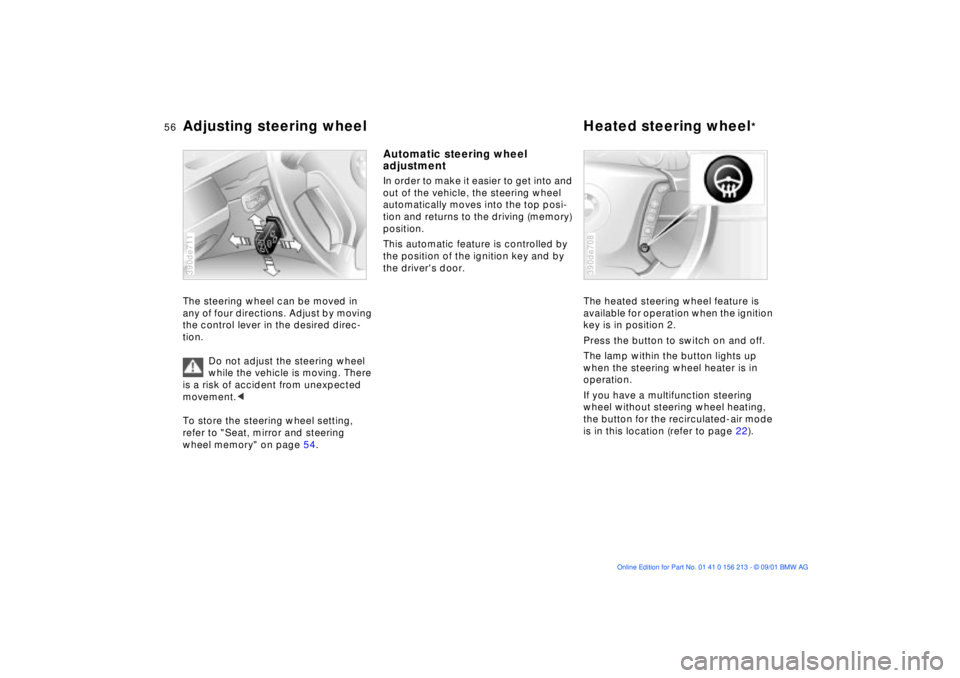
The steering wheel can be moved in
any of four directions. Adjust by moving
the control lever in the desired direc-
tion.
Do not adjust the steering wheel
while the vehicle is moving. There
is a risk of accident from unexpected
movement.<
To store the steering wheel setting,
refer to "Seat, mirror and steering
wheel memory" on page 54.390de711
Automatic steering wheel
adjustmentIn order to make it easier to get into and
out of the vehicle, the steering wheel
automatically moves into the top posi-
tion and returns to the driving (memory)
position.
This automatic feature is controlled by
the position of the ignition key and by
the driver's door.
The heated steering wheel feature is
available for operation when the ignition
key is in position 2.
Press the button to switch on and off.
The lamp within the button lights up
when the steering wheel heater is in
operation.
If you have a multifunction steering
wheel without steering wheel heating,
the button for the recirculated-air mode
is in this location (refer to page 22).
390de708
Page 68 of 186
68n
Switching off the engine Parking brakeTurn the ignition key to position 1 or 0.
Do not remove the ignition key
while the vehicle is rolling. The
steering locks, making it impossible to
steer the vehicle.
Always remove the ignition key and
engage the steering lock before leaving
the vehicle.
Vehicles with manual transmission:
Always engage the parking brake
when parking on hills and inclined
surfaces, as first gear or reverse may
not provide adequate resistance to
rolling.
Vehicles with automatic transmission:
Place the selector lever in "Park."<
Vehicles with automatic transmission:
The vehicle must be stationary and the
selector lever in "Park" before you can
remove the ignition key.
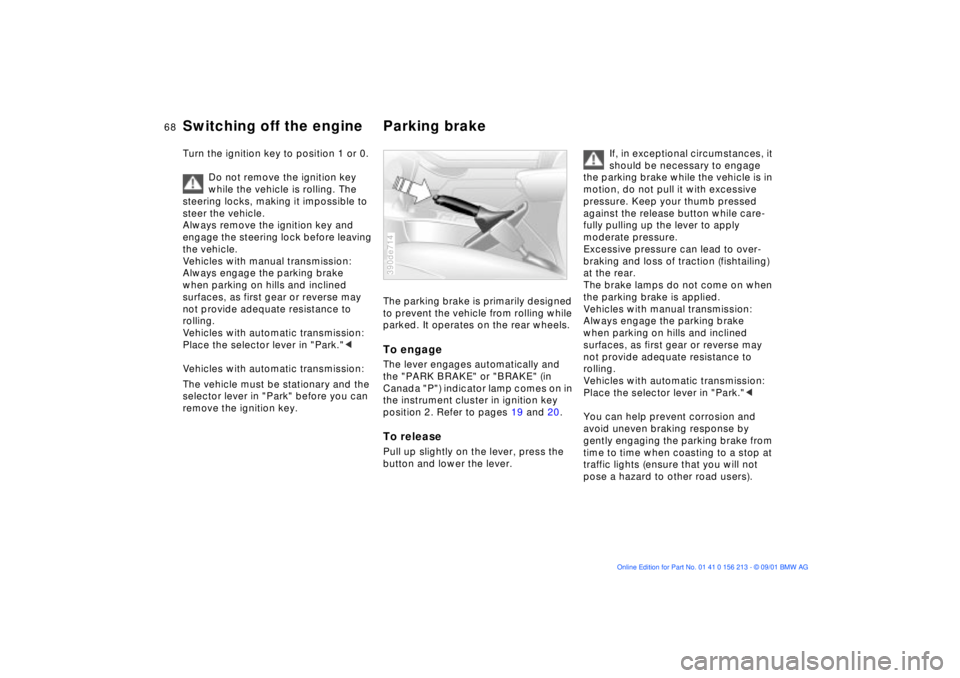
The parking brake is primarily designed
to prevent the vehicle from rolling while
parked. It operates on the rear wheels.To engageThe lever engages automatically and
the "PARK BRAKE" or "BRAKE" (in
Canada "P") indicator lamp comes on in
the instrument cluster in ignition key
position 2. Refer to pages 19 and 20.To releasePull up slightly on the lever, press the
button and lower the lever.390de714
If, in exceptional circumstances, it
should be necessary to engage
the parking brake while the vehicle is in
motion, do not pull it with excessive
pressure. Keep your thumb pressed
against the release button while care-
fully pulling up the lever to apply
moderate pressure.
Excessive pressure can lead to over-
braking and loss of traction (fishtailing)
at the rear.
The brake lamps do not come on when
the parking brake is applied.
Vehicles with manual transmission:
Always engage the parking brake
when parking on hills and inclined
surfaces, as first gear or reverse may
not provide adequate resistance to
rolling.
Vehicles with automatic transmission:
Place the selector lever in "Park."<
You can help prevent corrosion and
avoid uneven braking response by
gently engaging the parking brake from
time to time when coasting to a stop at
traffic lights (ensure that you will not
pose a hazard to other road users).
Page 77 of 186
77n
OverviewControlsMaintenanceRepairsDataIndex
Washer/Wiper system
Turn the rain sensor off in auto-
matic car washes. Failure to do so
could result in damage caused by
undesired wiper activation.<
Normal wiper speedThe system automatically reverts to
operation in the intermittent mode
whenever the vehicle is stationary (not
on vehicles with rain sensor
*).
Fast wiper speedThe wipers revert to operation at stan-
dard speed when the vehicle stops (not
on vehicles with rain sensor
*).
Clean the windshieldThe system sprays washer fluid against
the windshield and activates the wipers
for a brief period.
Intensive cleaning
*
As in setting 5. In addition, an intensive-
action washer fluid is first sprayed on
the windshield.
For changing the wiper blades, refer to
page 150.Cleaning headlights
*
When the headlights are on, they are
also cleaned automatically every fifth
time you activate the clean the wind-
shield (5) or intensive cleaning (6)
mode.
Do not use the washers if there is
any danger that the fluid will
freeze on the windshield, as your vision
could be obscured. Always use an anti-
freeze agent. Refer to page 139.
Do not use the washers when the reser-
voir is empty. This could cause damage
to the washer pump.< Windshield washer jetsThe windshield washer jets are warmed
automatically when the ignition key is in
position 2.
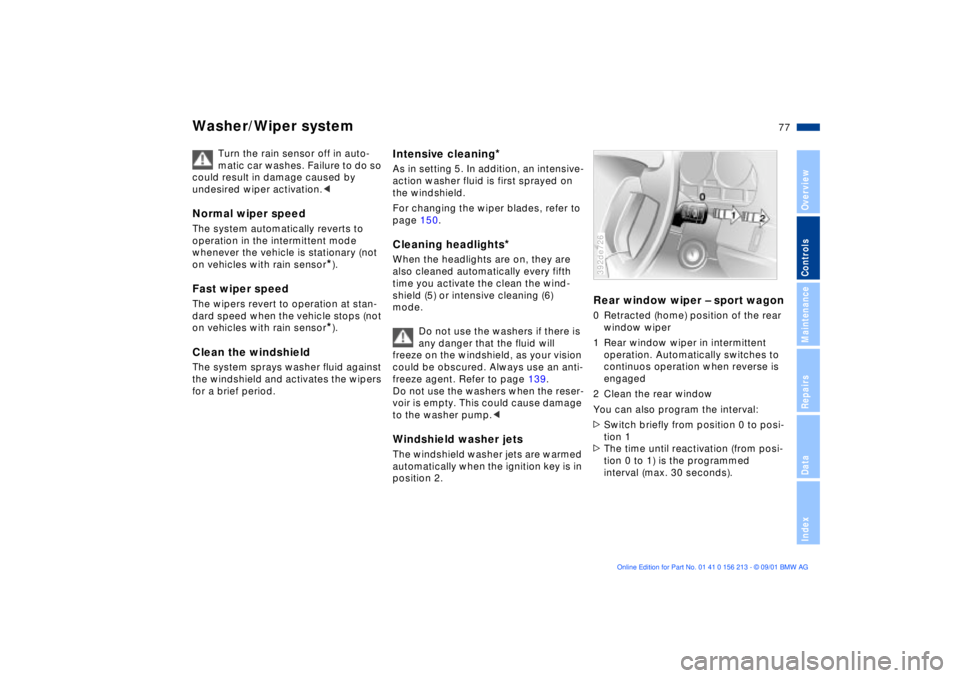
Rear window wiper Ð sport wagon0 Retracted (home) position of the rear
window wiper
1 Rear window wiper in intermittent
operation. Automatically switches to
continuos operation when reverse is
engaged
2 Clean the rear window
You can also program the interval:
>Switch briefly from position 0 to posi-
tion 1
>The time until reactivation (from posi-
tion 0 to 1) is the programmed
interval (max. 30 seconds).392de726
Page 82 of 186
82n
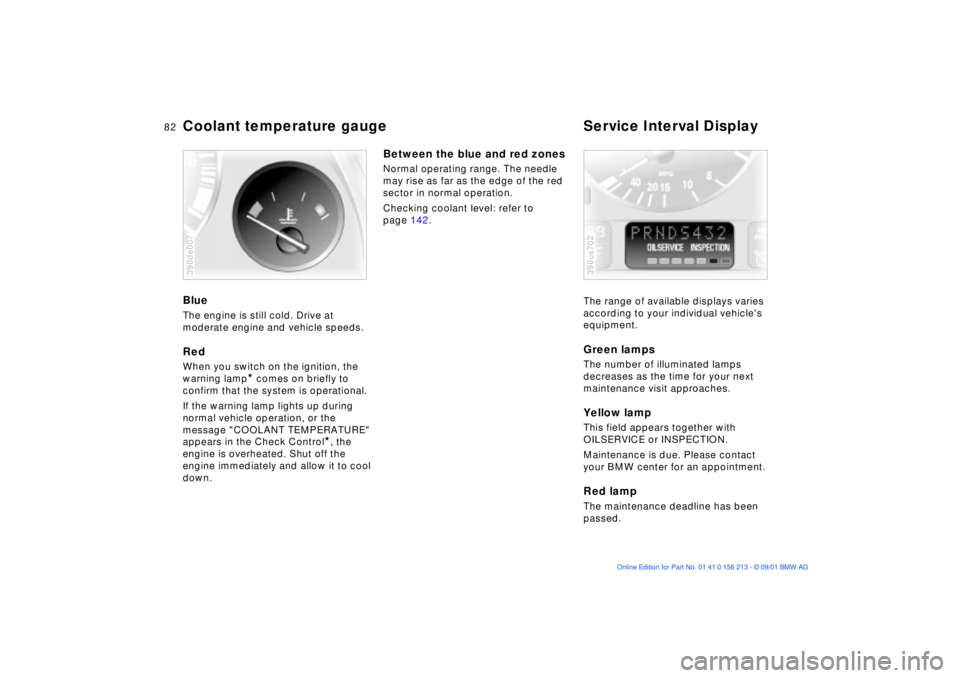
Coolant temperature gauge Service Interval DisplayBlueThe engine is still cold. Drive at
moderate engine and vehicle speeds.RedWhen you switch on the ignition, the
warning lamp
* comes on briefly to
confirm that the system is operational.
If the warning lamp lights up during
normal vehicle operation, or the
message "COOLANT TEMPERATURE"
appears in the Check Control
*, the
engine is overheated. Shut off the
engine immediately and allow it to cool
down.
390de007
Between the blue and red zonesNormal operating range. The needle
may rise as far as the edge of the red
sector in normal operation.
Checking coolant level: refer to
page 142.
The range of available displays varies
according to your individual vehicle's
equipment.
Green lampsThe number of illuminated lamps
decreases as the time for your next
maintenance visit approaches.Yellow lampThis field appears together with
OILSERVICE or INSPECTION.
Maintenance is due. Please contact
your BMW center for an appointment.Red lampThe maintenance deadline has been
passed.390us702
Page 83 of 186
83n
OverviewControlsMaintenanceRepairsDataIndex
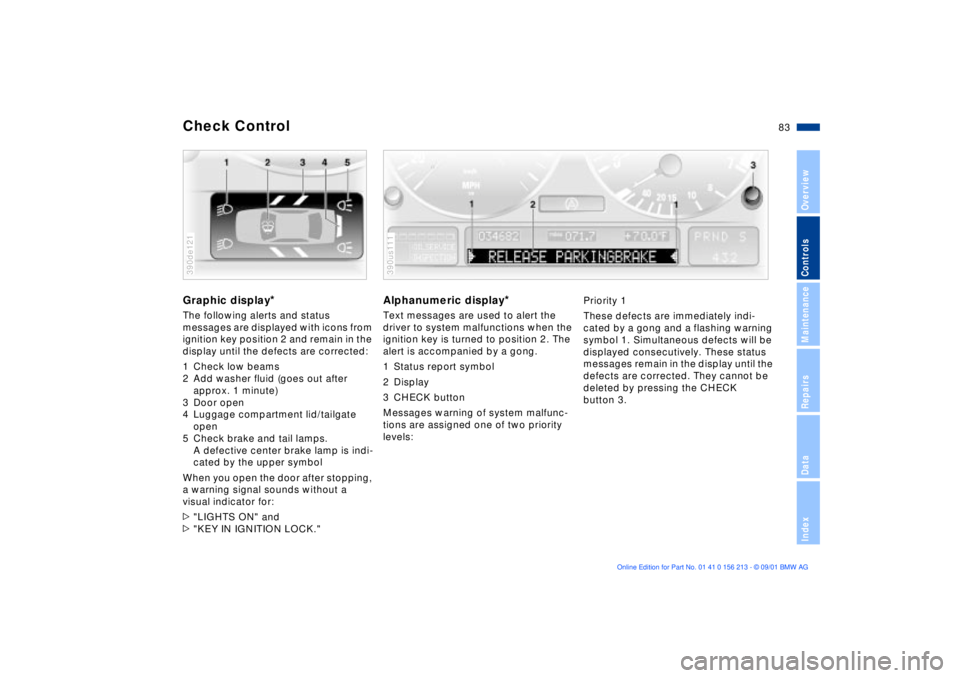
Check ControlGraphic display
*
The following alerts and status
messages are displayed with icons from
ignition key position 2 and remain in the
display until the defects are corrected:
1 Check low beams
2 Add washer fluid (goes out after
approx. 1 minute)
3 Door open
4 Luggage compartment lid/tailgate
open
5 Check brake and tail lamps.
A defective center brake lamp is indi-
cated by the upper symbol
When you open the door after stopping,
a warning signal sounds without a
visual indicator for:
>"LIGHTS ON" and
>"KEY IN IGNITION LOCK."390de121
Alphanumeric display
*
Text messages are used to alert the
driver to system malfunctions when the
ignition key is turned to position 2. The
alert is accompanied by a gong.
1 Status report symbol
2 Display
3 CHECK button
Messages warning of system malfunc-
tions are assigned one of two priority
levels:390us111
Priority 1
These defects are immediately indi-
cated by a gong and a flashing warning
symbol 1. Simultaneous defects will be
displayed consecutively. These status
messages remain in the display until the
defects are corrected. They cannot be
deleted by pressing the CHECK
button 3.