Page 265 of 372

To add oil, unscrew and remove the
engine oil f ill cap on top of the valve
cover. Pour in the oil, and install the
engine oil f ill cap. Tighten it securely.
Wait a f ew minutes and recheck the
oil level. Do not f ill above the upper
mark; you could damage the engine.Make sure the API Certif ication Seal
says ‘‘For Gasoline Engines.’’
Oil is a major contributor to your
engine’s perf ormance and longevity.
Always use a premium-grade 5W-20
detergent oil displaying the API
Certif ication Seal. This seal indicates
the oil is energy conserving, and that
it meets the American Petroleum
Institute’s latest requirements.
Genuine Honda Motor Oil is the
pref erred 5W-20 lubricant f or your
vehicle. It is highly recommended
that you use genuine Honda Motor
Oil in your vehicle f or optimum
engine protection.
CONT INUED
Recommended Oil
A dding Oil
Engine Oil
Maint enance261
E E N
NG GIINNE E O
OIILL F
FIILLL L C
CAA P
P
A
AP
PI
IC
CE ER
RT TI
IFFI ICCA A T
TI
IOON N S
SEEA
A L
L
01/09/07 12:37:03 31S3V610_266
Page 266 of 372
You may use a synthetic motor oil if
it meets the same requirements
given f or a conventional motor oil: it
displays the API Certif ication Seal,
and it is the proper weight as shown
on the chart. When using synthetic
oil, you must f ollow the oil and f ilter
change intervals given in the
maintenance schedule.
Your Acura does not require any oil
additives. Additives may adversely
af f ect your engine’s or transmission’s
perf ormance and durability.
5W-20 oil is f ormulated f or year-
round protection of your Acura, to
improve cold weather starting, and
to help your engine use less f uel.
If 5W-20 oil is not available, a 5W-30
oil may be used. However, it should
be replaced with 5W-20 at the next
oil change.
The oil’s viscosity or weight is
provided on the container’s label.
Select the oil f or your vehicle
according to this chart.
Engine Oil
Maint enance
Synthetic Oil
A dditives
262
A A
m
m b
bi
ieen n t
t T
Te
emm p
pe
erraat tuu r
ree
01/09/07 12:37:13 31S3V610_267
Page 267 of 372
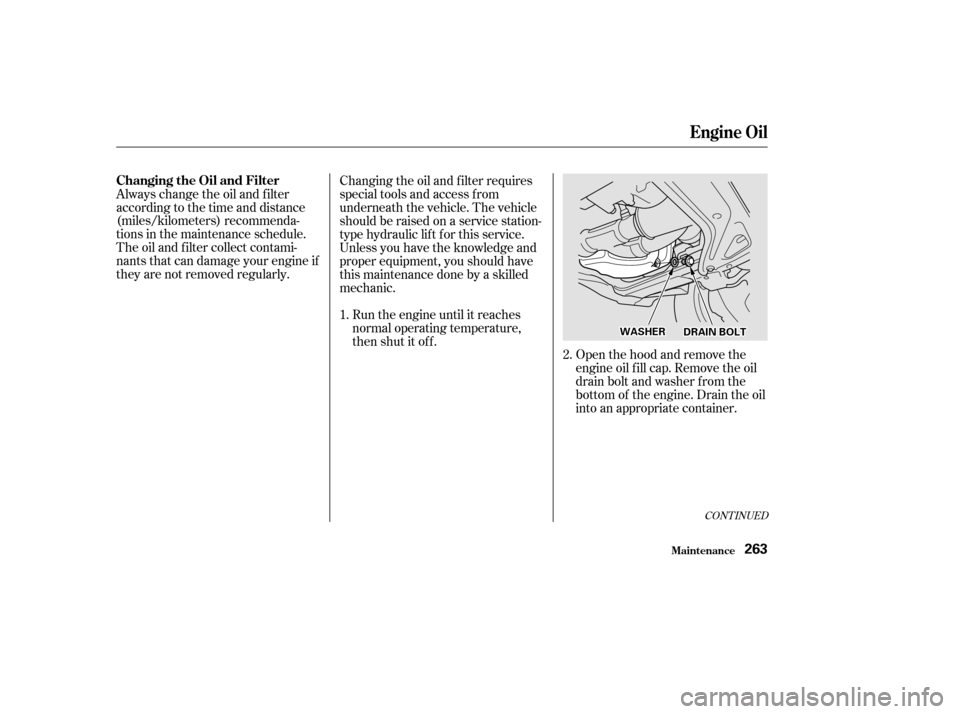
Open the hood and remove the
engine oil f ill cap. Remove the oil
drain bolt and washer f rom the
bottom of the engine. Drain the oil
into an appropriate container.
Always change the oil and f ilter
accordingtothetimeanddistance
(miles/kilometers) recommenda-
tions in the maintenance schedule.
The oil and f ilter collect contami-
nants that can damage your engine if
they are not removed regularly.
Changing the oil and f ilter requires
special tools and access f rom
underneath the vehicle. The vehicle
should be raised on a service station-
type hydraulic lif t f or this service.
Unless you have the knowledge and
proper equipment, you should have
this maintenance done by a skilled
mechanic.
Run the engine until it reaches
normal operating temperature,
then shut it off.
1.
2.
CONT INUED
Engine Oil
Maint enance
Changing the Oil and Filter
263
D DR
RAA I
INN B
BOOL LTT
W
WA
AS
SHH E
ER
R
01/09/07 12:37:21 31S3V610_268
Page 268 of 372

Install a new oil f ilter according to
instructions that come with it.
Put a new washer on the drain bolt,
then reinstall the drain bolt.
Tighten it to:Refill the engine with the recom-
mended oil.
Engine oil change capacity
(including f ilter):
Replace the engine oil f ill cap.
Start the engine. The oil pressure
indicator light should go out within
f ive seconds. If it does not, turn of f
the engine and reinspect your
work.
Let the engine run f or several
minutes and check the drain bolt
and oil f ilter f or leaks.
Turn of f the engine, let it sit f or
several minutes, then check the oil
level. If necessary, add oil to bring
the level to the upper mark on the
dipstick.
Remove the oil f ilter and let the
remaining oil drain. A special
wrench (available f rom your Acura
dealer) is required to remove the
f ilter. 9.
8. 7. 6.
4.
5. 3.
Engine Oil
Maint enance264
O OI ILL F
FIILLT T E
ER
R
29 lbf·ft (39 N·m , 4.0 kgf·m) 5.0 US qt (4.7
, 4.1 Imp qt)
Improper disposal of engine oil can be
harmf ul to the environment. If you
change your own oil, please dispose of
the used oil properly. Put it in a sealed
container and take it to a recycling
center. Do not discard it in a trash bin
or dump it on the ground.
01/09/07 12:37:31 31S3V610_269
Page 269 of 372

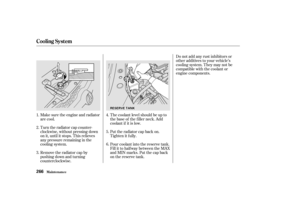
If the coolant level in the reserve
tank is at or below the MIN line, add
coolant to bring it up to the MAX line.
Inspect the cooling system f or leaks.
The coolant you add should always
be a mixture of 50 percent antif reeze
and 50 percent water. Never add
straight antif reeze or plain water.If the reserve tank is completely
empty, you should also check the
coolant level in the radiator.
Always use Honda All Season
Antif reeze/Coolant Type 2. This
coolant is pre-mixed with 50 percent
antif reeze and 50 percent water. It
does not require any additional
mixing.
If it is not available, you may use
another major-brand non-silicate
coolant as a temporary replacement.
Make sure it is a high-quality coolant
recommended f or aluminum engines.
However, continued use of any non-
Honda coolant can result in
corrosion, causing the cooling
system to malf unction or f ail. Have
the cooling system f lushed and
ref illed with Honda antif reeze/
coolant as soon as possible.
CONT INUED
A dding Engine Coolant
Cooling Syst em
Maint enance265
R RE
ES
SE ER
RV V E
E T
TA
A N
NK K
Removing the radiator cap
while the engine is hot can
cause the coolant to spray out,
seriously scalding you.
Always let the engine and
radiator cool down before
removing the radiator cap.
01/09/07 12:37:40 31S3V610_270
Page 270 of 372
Make sure the engine and radiator
are cool.
Turn the radiator cap counter-
clockwise, without pressing down
on it, until it stops. This relieves
any pressure remaining in the
cooling system.
Remove the radiator cap by
pushing down and turning
counterclockwise.The coolant level should be up to
the base of the f iller neck. Add
coolant if it is low.
Put the radiator cap back on.
Tighten it f ully.
Pour coolant into the reserve tank.
Fill it to half way between the MAX
and MIN marks. Put the cap back
on the reserve tank.Do not add any rust inhibitors or
other additives to your vehicle’s
cooling system. They may not be
compatible with the coolant or
engine components.
3. 4.
5.
6.
1.
2.
Cooling Syst em
Maint enance266
R RE
ES
SE ER
RV V E
E T
TA
A N
NK K
01/09/07 12:37:51 31S3V610_271
Page 271 of 372
CONT INUED
Turn the ignition ON (II). Set the
Climate control system to 90°F(32
°C). Turn the ignition off.
Openthehood.Makesurethe
engine and radiator are cool to the
touch.
Remove the radiator cap.Loosen the drain plug on the
bottom of the radiator. The
coolant will drain through the
splash guard.
Thecoolingsystemshouldbe
completely drained and ref illed with
new coolant according to the time
and distance recommendations in
the maintenance schedule. Only use
Honda All Season Antif reeze/
Coolant Type 2. Use of any non-
Honda coolant or plain water can
result in corrosion and deposits in
the cooling system.
Draining the coolant requires access
to the underside of the vehicle.
Unless you have the tools and
knowledge, you should have this
maintenance done by a skilled
mechanic.
1.
3.
2.
Replacing Engine Coolant
Cooling Syst em
Maint enance267
D D
R
RAA I
INN P
PL
LUUG G
01/09/07 12:38:01 31S3V610_272
Page 272 of 372
When the coolant stops draining,
tightenthedrainplugatthe
bottom of the radiator.
Tighten the drain bolt at the rear
of the engine cylinder block
securely.
Tightening torque:
Remove the reserve tank f rom its
holder by pulling it straight up.
Drain the coolant, then put the
tank back in its holder.
Install a rubber hose on the drain
bolt in the back of the engine
block. Loosen the drain bolt. 6.
4. 5. 7.
Cooling Syst em
Maint enance268
R RE
ES
SE ER
RV V E
E T
TA
A N
NK K
H
H O
OL LDD E
ER
R R
RE
ES
SE ER
RV V E
E
T
T A
A N
NK K C
CAA P
P
D
D
R
RAA I
INN B
BOOL LTT
7 lbf·ft (10 N·m , 1.0 kgf·m)
01/09/07 12:38:11 31S3V610_273