Page 20 of 132

INSTRUMENT AND CONTROL FUNCTIONS
3-5
3
EAU03565
Speedometer unit The speedometer unit is equipped with
the following:l
a digital speedometer (which
shows riding speed)
l
an odometer (which shows the to-
tal distance traveled)
l
two tripmeters (which show the
distance traveled since they were
last set to zero)
l
a fuel reserve tripmeter (which
shows the distance traveled on the
fuel reserve)
l
a clockOdometer and tripmeter modes
Pushing the “SELECT” button switches
the display between the odometer
mode “ODO” and the tripmeter modes
“TRIP 1” and “TRIP 2” in the following
order:
ODO
® TRIP 1
® TRIP 2
® ODO
If the fuel level warning light comes on
(see page 3-4), the odometer display
will automatically change to the fuel re-
serve tripmeter mode “TRIP F” and
start counting the distance traveled
from that point. In that case, pushing
the “SELECT” button switches the dis-
play between the various tripmeter and
odometer modes in the following order:
TRIP F
® TRIP 1
® TRIP 2
® ODO
®
TRIP FTo reset a tripmeter, select it by push-
ing the “SELECT” button, and then
push the “RESET” button. If you do not
reset the fuel reserve tripmeter manu-
ally, it will reset itself automatically and
the display will return to “TRIP 1” after
refueling and traveling 5 km.
NOTE:@ After resetting the fuel reserve tripme-
ter, the display will return to “TRIP 1”,
unless a different mode had been pre-
viously selected; in that case, the dis-
play automatically returns to the prior
mode. @Clock mode
To change the display to the clock
mode, push both the “SELECT” and
“RESET” buttons.
To change the display back to the
odometer modes, push the “SELECT”
button.
1. Speedometer
2. Odometer/tripmeters/clock
3. “RESET” button
4. “SELECT” buttonE_5jc.book Page 5 Monday, January 22, 2001 12:12 PM
Page 23 of 132

INSTRUMENT AND CONTROL FUNCTIONS
3-8
3 Push the “RES/ACC” side of the cruise
control switch to reactivate the system.
The traveling speed will return to the
previously set speed. The “RES” indi-
cator light will flash during this time and
then go off. Once the cruise control
system is reactivated, the “SET” indica-
tor light will come on.
Push the “CRUISE” switch to the right
to turn the cruise control system off
completely.
EWA00019
WARNING
_ If the cruise control system is defec-
tive, the “SET” and “RES” indicator
lights will flash simultaneously. If
this occurs, turn the cruise control
system off and have a Yamaha deal-
er check it. _
EAU01779
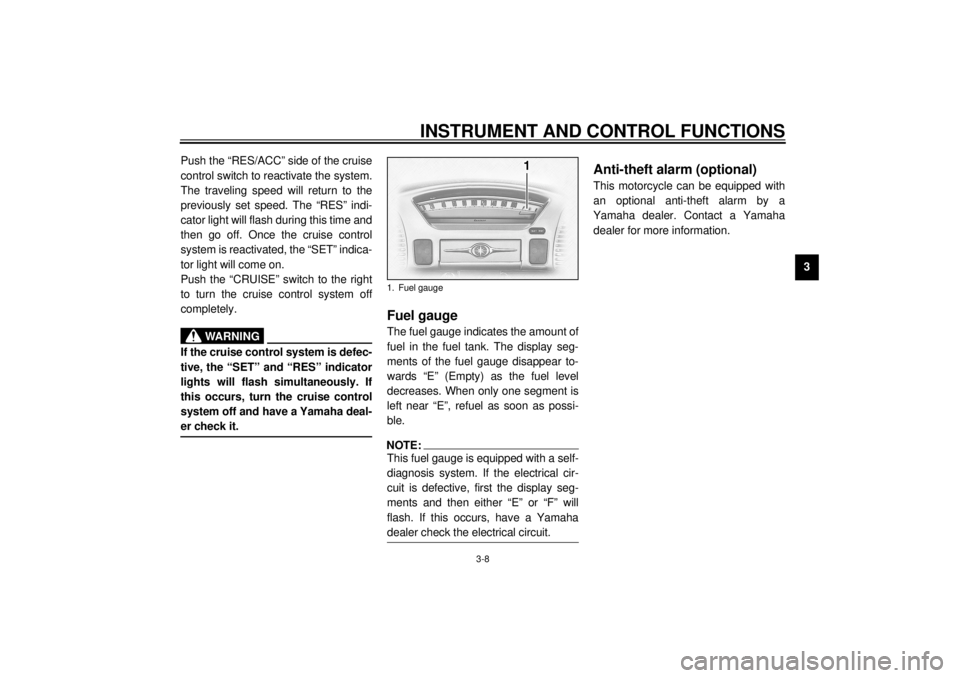
Fuel gauge The fuel gauge indicates the amount of
fuel in the fuel tank. The display seg-
ments of the fuel gauge disappear to-
wards “E” (Empty) as the fuel level
decreases. When only one segment is
left near “E”, refuel as soon as possi-
ble.NOTE:@ This fuel gauge is equipped with a self-
diagnosis system. If the electrical cir-
cuit is defective, first the display seg-
ments and then either “E” or “F” will
flash. If this occurs, have a Yamaha
dealer check the electrical circuit. @
EAU00109
Anti-theft alarm (optional) This motorcycle can be equipped with
an optional anti-theft alarm by a
Yamaha dealer. Contact a Yamaha
dealer for more information.
1. Fuel gauge
E_5jc.book Page 8 Monday, January 22, 2001 12:12 PM
Page 43 of 132

AUDIO SYSTEM
4-2
4
WARNING
_ l
It is dangerous to operate the
audio system controls while
riding. Never take your hands
off the handlebars while riding.
l
Keep the volume at a low
enough level to be aware of traf-
fic conditions and ensure
safety.
_CAUTION:_ l
Do not use the audio system for
a long period of time when the
engine is not running as the bat-
tery may discharge.
l
The control unit, cassette deck
and speakers are water-resis-
tant; however, it is good prac-
tice to cover them with a plastic
bag when washing the motor-
cycle.
l
When cleaning the control unit
display, use a neutral detergent.
Never use strong abrasive
cleaning products, fuel (gaso-
line), thinner, etc.
_
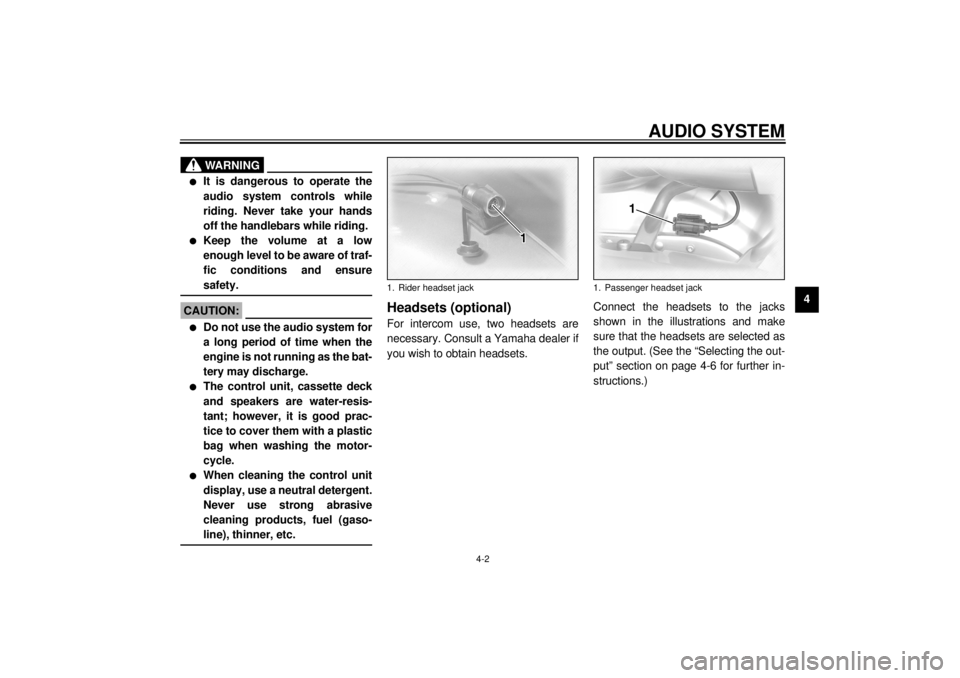
Headsets (optional) For intercom use, two headsets are
necessary. Consult a Yamaha dealer if
you wish to obtain headsets.Connect the headsets to the jacks
shown in the illustrations and make
sure that the headsets are selected as
the output. (See the “Selecting the out-
put” section on page 4-6 for further in-
structions.)1. Rider headset jack
1. Passenger headset jack
E_5jc.book Page 2 Monday, January 22, 2001 12:12 PM
Page 44 of 132

AUDIO SYSTEM
4-3
4
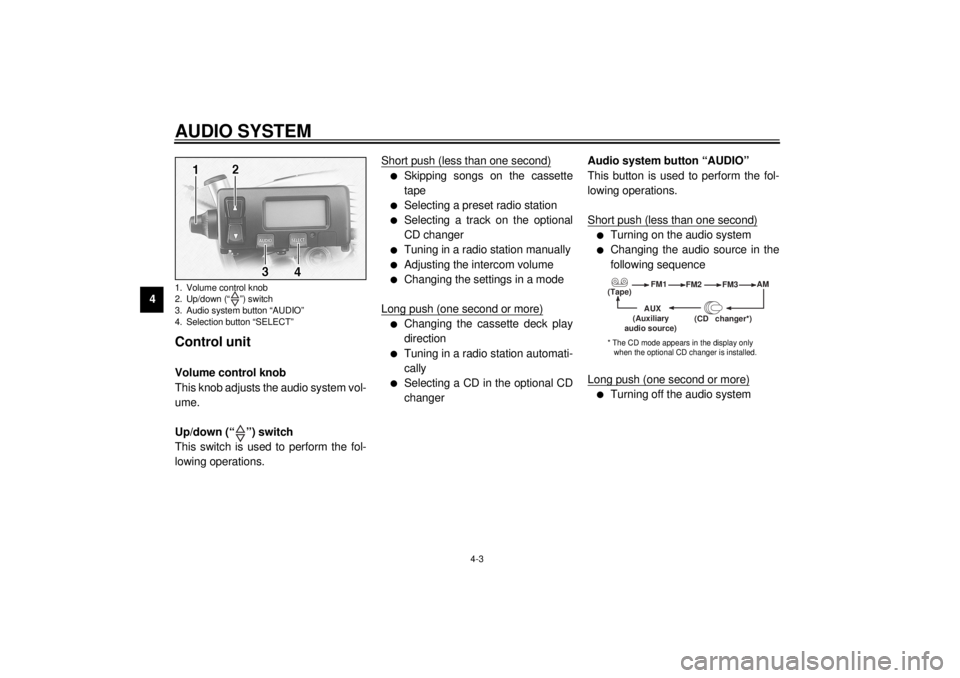
Control unit Volume control knob
This knob adjusts the audio system vol-
ume.
Up/down (“ ”) switch
This switch is used to perform the fol-
lowing operations.Short push (less than one second)
l
Skipping songs on the cassette
tape
l
Selecting a preset radio station
l
Selecting a track on the optional
CD changer
l
Tuning in a radio station manually
l
Adjusting the intercom volume
l
Changing the settings in a mode
Long push (one second or more)
l
Changing the cassette deck play
direction
l
Tuning in a radio station automati-
cally
l
Selecting a CD in the optional CD
changerAudio system button “AUDIO”
This button is used to perform the fol-
lowing operations.
Short push (less than one second)
l
Turning on the audio system
l
Changing the audio source in the
following sequence
Long push (one second or more)
l
Turning off the audio system
1. Volume control knob
2. Up/down (“ ”) switch
3. Audio system button “AUDIO”
4. Selection button “SELECT”
(Tape)FM1
FM2
FM3AM
AUX
(CD changer
*)
(Auxiliary
audio source)
* The CD mode appears in the display only
when the optional CD changer is installed.
E_5jc.book Page 3 Monday, January 22, 2001 12:12 PM
Page 45 of 132
AUDIO SYSTEM
4-4
4 Selection button “SELECT”
This button is used to perform the fol-
lowing operations.
Short push (less than two seconds)
l
Changing modes in the following
sequence
l
Programming preset radio stations
Long push (two seconds or more)
l
Selecting the preset radio station
programming mode
(Output)BASS TREBFAD
(Auto
volume)
(Intercom
volume)
Radio SP/HS
(Treble)
frequency(Fade )
1
2IC
AV
1
2This mode does not appear in the display when
the headsets are selected as the output.
This mode appears in the display only when one
of the radio frequency bands is selected as the au- dio source.
E_5jc.book Page 4 Monday, January 22, 2001 12:12 PM
Page 46 of 132

AUDIO SYSTEM
4-5
4
Making basic settings Turning on/off the audio system
To turn the power on1. Make sure that the key is in the
“ACC” or “ON” position.
2. Push the “AUDIO” button once for
less than one second.
To turn the power offPush the “AUDIO” button once for one
second or more.Adjusting the audio system volume
Turn the volume control knob until the
desired audio system volume is dis-
played (e.g., “Vo:10”). The audio sys-
tem volume can be set between “0”
and “30”. After the adjustment is made,
the audio system returns to normal op-
eration and the current audio mode ap-
pears in the display.
Making mode settings General procedure
The following setting procedure applies
to the audio system and optional CD
changer.NOTE:_ In order to make settings in any of the
audio system modes, make sure that
the audio system is selected. If neces-
sary, push the “AUDIO” button for less
than one second. _1. Push the “AUDIO” button for less
than one second.
2. Repeatedly push the “SELECT”
button for less than one second
until the desired mode appears in
the display. With each press of the
button, the mode changes in the
following sequence.
E_5jc.book Page 5 Monday, January 22, 2001 12:12 PM
Page 47 of 132

AUDIO SYSTEM
4-6
4
3. While the selected mode is dis-
played (for about five seconds),
repeatedly push either side of the
up/down switch for less than one
second until the desired setting is
displayed.Selecting the output (speakers or
headsets)
1. Repeatedly push the “SELECT”
button for less than one second
until either “SP” (speakers) or “HS”
and “ ” (headsets) appear in the
display.
2. Push either side of the up/down
switch for less than one second to
change the setting.
NOTE:_ The speakers and headsets cannot be
used at the same time. _
Adjusting the bass level
1. Repeatedly push the “SELECT”
button for less than one second
until “BASS” appears at the bot-
tom of the display.
2. Repeatedly push either side of the
up/down switch for less than one
second until the desired level is
displayed. The bass level can be
set between “-6” and “+6”.
(Output)BASS TREBFAD
(Auto
volume)
(Intercom
volume)
Radio SP/HS
(Treble)
frequency(Fade )
1
2IC
AV
1
2This mode does not appear in the display when
the headsets are selected as the output.
This mode appears in the display only when one
of the radio frequency bands is selected as the au- dio source.
E_5jc.book Page 6 Monday, January 22, 2001 12:12 PM
Page 48 of 132

AUDIO SYSTEM
4-7
4
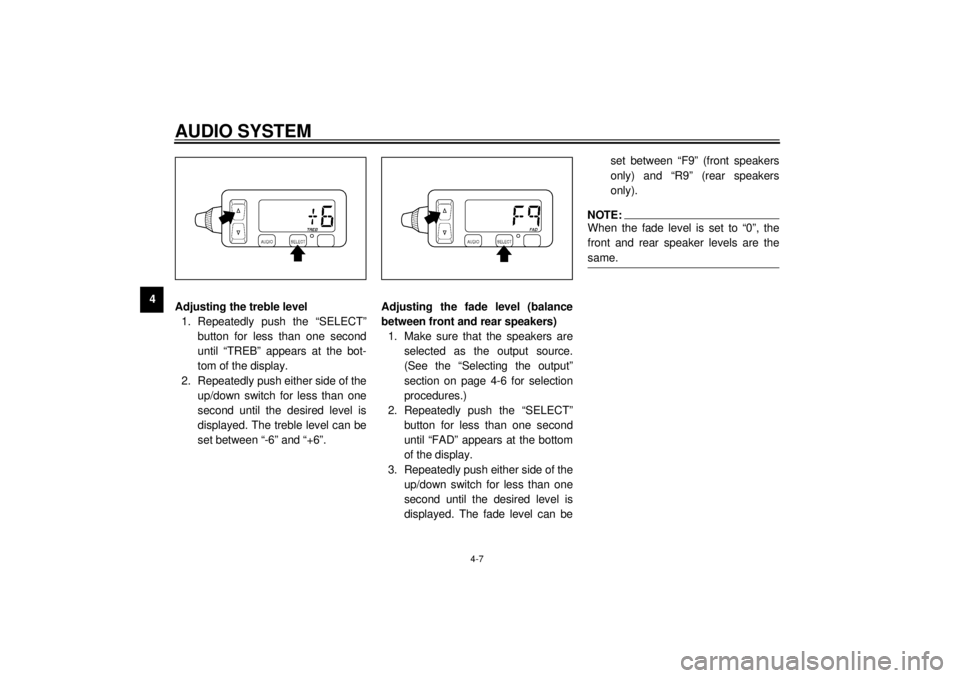
Adjusting the treble level
1. Repeatedly push the “SELECT”
button for less than one second
until “TREB” appears at the bot-
tom of the display.
2. Repeatedly push either side of the
up/down switch for less than one
second until the desired level is
displayed. The treble level can be
set between “-6” and “+6”.Adjusting the fade level (balance
between front and rear speakers)
1. Make sure that the speakers are
selected as the output source.
(See the “Selecting the output”
section on page 4-6 for selection
procedures.)
2. Repeatedly push the “SELECT”
button for less than one second
until “FAD” appears at the bottom
of the display.
3. Repeatedly push either side of the
up/down switch for less than one
second until the desired level is
displayed. The fade level can beset between “F9” (front speakers
only) and “R9” (rear speakers
only).
NOTE:_ When the fade level is set to “0”, the
front and rear speaker levels are the
same. _
E_5jc.book Page 7 Monday, January 22, 2001 12:12 PM