Page 65 of 106
PERIODIC MAINTENANCE AND MINOR REPAIR
6-20
6 7. Tighten the locknut at the clutch
lever and the crankcase.
EAU00696
Adjusting the brake lever free
play The brake lever free play should mea-
sure 10–15 mm as shown. Periodically
check the brake lever free play and, if
necessary, adjust it as follows.1. Loosen the locknut at the brake
lever.
2. To increase the brake lever free
play, turn the adjusting bolt in di-
rection
a. To decrease the brake
lever free play, turn the adjusting
bolt in direction
b.
3. Tighten the locknut.1. Locknut
2. Brake lever free play adjusting bolt
a. Brake lever free play
E_5bn.book Page 20 Wednesday, October 4, 2000 7:51 PM
Page 66 of 106

PERIODIC MAINTENANCE AND MINOR REPAIR
6-21
6
EW000099
WARNING
@ l
After adjusting the brake lever
free play, check the free play
and make sure that the brake is
working properly.
l
A soft or spongy feeling in the
brake lever can indicate the
presence of air in the hydraulic
system. If there is air in the hy-
draulic system, have a Yamaha
dealer bleed the system before
operating the motorcycle. Air in
the hydraulic system will dimin-
ish the braking performance,
which may result in loss of con-
trol and an accident.
@
EAU00711*
Adjusting the brake pedal
position and free play
EW000104
WARNING
@ It is advisable to have a Yamaha
dealer make these adjustments. @NOTE:@ The brake pedal position should be ad-
justed before adjusting the brake pedal
free play. @
Brake pedal position
The brake pedal should be positioned
approximately 85 mm [XVS650] or
108 mm [XVS650A] above the top of
the footrest as shown. Periodically
check the brake pedal position and, if
necessary, adjust it as follows.
a. Distance between brake pedal and footrest
b. Brake pedal free playXVS650
a. Distance between brake pedal and footrestXVS650A
E_5bn.book Page 21 Wednesday, October 4, 2000 7:51 PM
Page 67 of 106

PERIODIC MAINTENANCE AND MINOR REPAIR
6-22
6 1. Loosen the locknut at the brake
pedal.
2. To raise the brake pedal, turn the
adjusting bolt in direction
a. To
lower the brake pedal, turn the ad-
justing bolt in direction
b.
3. Tighten the locknut.
EW000105
WARNING
@ After adjusting the brake pedal
height, the brake pedal free play
must be adjusted. @
Brake pedal free play
The brake pedal free play should mea-
sure 20–30 mm at the brake pedal end.
Periodically check the brake pedal free
play and, if necessary, adjust it as fol-
lows.
To increase the brake pedal free play,
turn the adjusting nut at the brake rod
in direction
a. To decrease the brake
pedal free play, turn the adjusting nut in
direction
b.
EAU00713
Adjusting the rear brake light
switch The rear brake light switch, which is ac-
tivated by the brake pedal, is properly
adjusted when the brake light comes
on just before braking takes effect. If
necessary, adjust the brake light switch
as follows.
Turn the adjusting nut while holding the
rear brake light switch in place. To
make the brake light come on earlier,
turn the adjusting nut in direction
a. To
make the brake light come on later,
turn the adjusting nut in direction
b.
1. Locknut
2. Brake pedal position adjusting bolt
1. Brake pedal free play adjusting nut
1. Rear brake light switch
2. Rear brake light switch adjusting nut
E_5bn.book Page 22 Wednesday, October 4, 2000 7:51 PM
Page 68 of 106

PERIODIC MAINTENANCE AND MINOR REPAIR
6-23
6
EAU00720
Checking the front brake pads
and rear brake shoes The front brake pads and the rear
brake shoes must be checked for wear
at the intervals specified in the periodic
maintenance and lubrication chart.
EAU01119
Front brake pads
Each front brake pad is provided with
wear indicator grooves, which allow
you to check the brake pad wear with-
out having to disassemble the brake.
To check the brake pad wear, check
the wear indicator grooves. If a brake
pad has worn to the point that the wear
indicators have almost disappeared,
have a Yamaha dealer replace the
brake pads as a set.
EAU00727
Rear brake shoes
The rear brake is provided with a wear
indicator, which allows you to check the
brake shoe wear without having to dis-
assemble the brake. To check the
brake shoe wear, check the position of
the wear indicator while applying the
brake. If a brake shoe has worn to the
point that the wear indicator reaches
the wear limit line, have a Yamaha
dealer replace the brake shoes as a
set.
1. Brake pad wear indicator grooveFront
1. Brake shoe wear limit line
2. Brake shoe wear indicatorRear
E_5bn.book Page 23 Wednesday, October 4, 2000 7:51 PM
Page 69 of 106

PERIODIC MAINTENANCE AND MINOR REPAIR
6-24
6
EAU03776
Checking the brake fluid level Insufficient brake fluid may allow air to
enter the brake system, possibly caus-
ing it to become ineffective.
Before riding, check that the brake fluid
is above the minimum level mark and
replenish if necessary. A low brake flu-
id level may indicate worn brake pads
and/or brake system leakage. If the
brake level is low, be sure to check the
brake pads for wear and the brake sys-
tem for leakage.Observe these precautions:
l
When checking the fluid level,
make sure that the top of the brake
fluid reservoir is level.
l
Use only the recommended quali-
ty brake fluid, otherwise the rubber
seals may deteriorate, causing
leakage and poor braking perfor-
mance.
l
Refill with the same type of brake
fluid. Mixing fluids may result in a
harmful chemical reaction and
lead to poor braking performance.
l
Be careful that water does not en-
ter the brake fluid reservoir when
refilling. Water will significantly
lower the boiling point of the fluid
and may result in vapor lock.
l
Brake fluid may deteriorate paint-
ed surfaces or plastic parts. Al-
ways clean up spilled fluid
immediately.
l
As the brake pads wear, it is nor-
mal for the brake fluid level to
gradually go down. However, if the
brake fluid level goes down sud-
denly, have a Yamaha dealer
check the cause.
1. Front brake reservoir
2. Minimum level markFront
Recommended brake fluid: DOT 4
E_5bn.book Page 24 Wednesday, October 4, 2000 7:51 PM
Page 70 of 106

PERIODIC MAINTENANCE AND MINOR REPAIR
6-25
6
EAU03238
Changing the brake fluid Have a Yamaha dealer change the
brake fluid at the intervals specified in
the periodic maintenance and lubrica-
tion chart. In addition, have the oil seals
of the brake master cylinder and caliper
as well as the brake hose replaced at
the intervals listed below or whenever
they are damaged or leaking.l
Oil seals: Replace every two
years.
l
Brake hose: Replace every four
years.
EAU02962
Checking and lubricating the
cables The operation of all control cables and
the condition of the cables should be
checked before each ride, and the ca-
bles and cable ends should be lubricat-
ed if necessary. If a cable is damaged
or does not move smoothly, have a
Yamaha dealer check or replace it.
EW000112
WARNING
@ Damage to the outer sheath may in-
terfere with proper cable operation
and will cause the inner cable to
rust. Replace a damaged cable as
soon as possible to prevent unsafe
conditions. @
EAU03764
Checking and lubricating the
throttle grip and cable The operation of the throttle grip and
the condition of the throttle cable
should be checked before each ride,
and the cable should be lubricated or
replaced if necessary.NOTE:_ Since the throttle grip must be removed
to access the throttle cable end, the
throttle grip and the cable should al-
ways be lubricated at the same time. _1. Remove the throttle grip by remov-
ing the screws.
2. Hold up the throttle cable, and
then apply several drops of oil to
the cable, allowing it to trickle into
the sheaths.
3. Grease the inside of the throttle
grip housing.
4. Grease the metal-to-metal contact
surface of the throttle grip, and
then install the grip by installing
the screws. Recommended lubricant:
Engine oil
E_5bn.book Page 25 Wednesday, October 4, 2000 7:51 PM
Page 71 of 106
PERIODIC MAINTENANCE AND MINOR REPAIR
6-26
6
EAU03370
Checking and lubricating the
brake and shift pedals The operation of the brake and shift
pedals should be checked before each
ride, and the pedal pivots should be lu-
bricated if necessary.
EAU03164
Checking and lubricating the
brake and clutch levers The operation of the brake and clutch
levers should be checked before each
ride, and the lever pivots should be lu-
bricated if necessary. Recommended lubricant:
Throttle cable:
Engine oil
Throttle grip housing and grip:
Lithium-soap-based grease
(all-purpose grease)
Recommended lubricant:
Lithium-soap-based grease
(all-purpose grease)
Recommended lubricant:
Lithium-soap-based grease
(all-purpose grease)
E_5bn.book Page 26 Wednesday, October 4, 2000 7:51 PM
Page 72 of 106
PERIODIC MAINTENANCE AND MINOR REPAIR
6-27
6
EAU03165
Checking and lubricating the
sidestand The operation of the sidestand should
be checked before each ride, and the
sidestand pivot and metal-to-metal
contact surfaces should be lubricated if
necessary.
EW000113
WARNING
@ If the sidestand does not move up
and down smoothly, have a Yamaha
dealer check or repair it. @
EAU02939
Checking the front fork The condition and operation of the front
fork must be checked as follows at the
intervals specified in the periodic main-
tenance and lubrication chart.
To check the condition
EW000115
WARNING
@ Securely support the motorcycle so
that there is no danger of it falling
over. @Check the inner tubes for scratches,
damage and excessive oil leakage.
Recommended lubricant:
Lithium-soap-based grease
(all-purpose grease)
E_5bn.book Page 27 Wednesday, October 4, 2000 7:51 PM
 1
1 2
2 3
3 4
4 5
5 6
6 7
7 8
8 9
9 10
10 11
11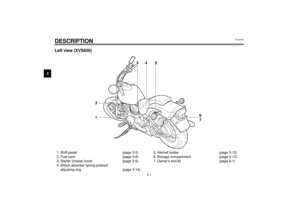 12
12 13
13 14
14 15
15 16
16 17
17 18
18 19
19 20
20 21
21 22
22 23
23 24
24 25
25 26
26 27
27 28
28 29
29 30
30 31
31 32
32 33
33 34
34 35
35 36
36 37
37 38
38 39
39 40
40 41
41 42
42 43
43 44
44 45
45 46
46 47
47 48
48 49
49 50
50 51
51 52
52 53
53 54
54 55
55 56
56 57
57 58
58 59
59 60
60 61
61 62
62 63
63 64
64 65
65 66
66 67
67 68
68 69
69 70
70 71
71 72
72 73
73 74
74 75
75 76
76 77
77 78
78 79
79 80
80 81
81 82
82 83
83 84
84 85
85 86
86 87
87 88
88 89
89 90
90 91
91 92
92 93
93 94
94 95
95 96
96 97
97 98
98 99
99 100
100 101
101 102
102 103
103 104
104 105
105

