Page 1593 of 1943
HV004±01
B11963
B11964
B11965
± HYBRID VEHICLE CONTROLHV BATTERY
HV±5
2001 PRIUS (RM778U)
DISASSEMBLY
1. REMOVE BATTERY MODULE SET BOLT
Turn the battery assembly upside down, remove the 76 battery
module bolts.
NOTICE:
When turning it over, prevent the flange from being de-
formed.
HINT:
When not removing a battery module, skip the operation of step
1.
2. REMOVE BATTERY COVER
Remove the 12 bolts, screw and battery cover.
3. REMOVE SERVICE PLUG
(a) Remove the rear RH and LH busbar module protectors.
(b) Remove the 2 nuts for busbar module.
(c) Remove the nut and wire harness protector.
Page 1594 of 1943
B12006
B11966
B11967
B11968
B11969
HV±6
± HYBRID VEHICLE CONTROLHV BATTERY
2001 PRIUS (RM778U)
(d) Remove the 3 bolts and service plug assembly.
4. REMOVE POWER CABLE FOR SMR
(a) Remove the front RH and LH busbar module protectors.
(b) Remove the 2 nuts, and disconnect the power cable from
the front busbar module.
(c) Remove the SMR cover from the SMR.
(d) Remove 2 bolts, and disconnect the power cable for
SMR.
5. REMOVE SMR
(a) Using the service plug, turn the interlock counterclock-
wise to unlock.
NOTICE:
When the interlock is damaged, be sure to replace it with
new one.
(b) Remove the 3 bolts and SMR.
6. REMOVE HV BATTERY THERMISTOR
7. REMOVE BATTERY ECU
(a) Disconnect the connector.
(b) Remove the 2 bolts and battery ECU.
Page 1595 of 1943
B11970
B11971
B11972
± HYBRID VEHICLE CONTROLHV BATTERY
HV±7
2001 PRIUS (RM778U)
8. REMOVE BATTERY HOSE
9. REMOVE BUSBAR MODULE
(a) Remove the 36 nuts, RH and LH rear busbar modules.
(b) Remove the 36 nuts, RH and LH front busbar modules.
10. REMOVE BATTERY CLAMP BOLT
Remove the 4 bolts and battery clamp bolt.
CAUTION:
Never remove the battery clamp bolt until 4 hours has
passed after the ignition switch is turned OFF. An explo-
sion due to expansion could occur.
11. REMOVE RH BATTERY BRACKET
Remove the 2 bolts and RH battery bracket.
CAUTION:
Never remove the RH battery bracket until 4 hours has
passed after the ignition switch is turned OFF. An explo-
sion due to expansion could occur.
12. REMOVE 38 HV BATTERY MODULES
Page 1597 of 1943

B11968
B11969
B11967
B11966
B12006
HV±10
± HYBRID VEHICLE CONTROLHV BATTERY
2001 PRIUS (RM778U) 4/6/01
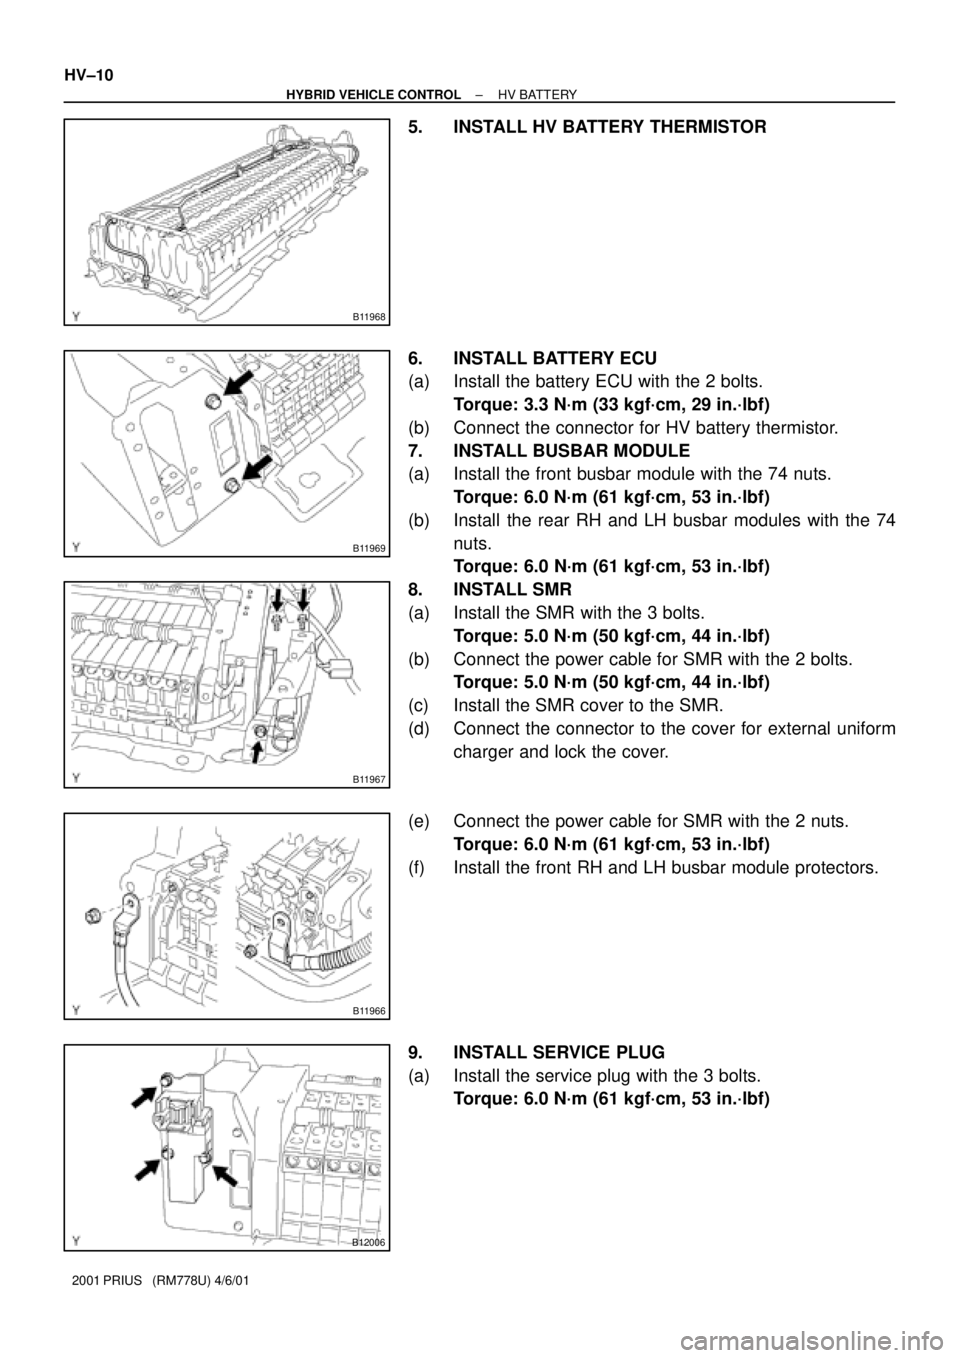
5. INSTALL HV BATTERY THERMISTOR
6. INSTALL BATTERY ECU
(a) Install the battery ECU with the 2 bolts.
Torque: 3.3 N´m (33 kgf´cm, 29 in.´lbf)
(b) Connect the connector for HV battery thermistor.
7. INSTALL BUSBAR MODULE
(a) Install the front busbar module with the 74 nuts.
Torque: 6.0 N´m (61 kgf´cm, 53 in.´lbf)
(b) Install the rear RH and LH busbar modules with the 74
nuts.
Torque: 6.0 N´m (61 kgf´cm, 53 in.´lbf)
8. INSTALL SMR
(a) Install the SMR with the 3 bolts.
Torque: 5.0 N´m (50 kgf´cm, 44 in.´lbf)
(b) Connect the power cable for SMR with the 2 bolts.
Torque: 5.0 N´m (50 kgf´cm, 44 in.´lbf)
(c) Install the SMR cover to the SMR.
(d) Connect the connector to the cover for external uniform
charger and lock the cover.
(e) Connect the power cable for SMR with the 2 nuts.
Torque: 6.0 N´m (61 kgf´cm, 53 in.´lbf)
(f) Install the front RH and LH busbar module protectors.
9. INSTALL SERVICE PLUG
(a) Install the service plug with the 3 bolts.
Torque: 6.0 N´m (61 kgf´cm, 53 in.´lbf)
Page 1598 of 1943
B11965
B11964
B11963
A
B
ScrewAA
A AB
B
C
± HYBRID VEHICLE CONTROLHV BATTERY
HV±11
2001 PRIUS (RM778U) 4/6/01
(b) Install the wire harness protector with the nut.
(c) Install the busbar module with 2 new nuts.
Torque: 5.4 N´m (55 kgf´cm, 48 in.´lbf)
10. INSTALL REAR RH AND LH BUSBAR MODULE PRO-
TECTOR
11. INSTALL BATTERY COVER
Install the battery cover with the 12 bolts and screw.
Torque:
Bolt A: 18 N´m (185 kgf´cm, 13 ft´lbf)
Bolt B: 8.0 N´m (80 kgf´cm, 71 in.´lbf)
Bolt C: 7.0 N´m (70 kgf´cm, 62 in.´lbf)
Screw: 6.0 N´m (61 kgf´cm, 53 in.´lbf)
12. INSTALL BATTERY MODULE SET BOLT
Turn the battery assembly upside down, install the 76 battery
module set bolts.
Torque: 4.0 N´m (40 kgf´cm, 35 in.´lbf)