Page 89 of 2572

'05 HIGHLANDER_U (L/O 0409)
359
2005 HIGHLANDER from Nov. '04 Prod. (OM48570U)
Check the interior of your vehicle. Wa-
ter and dirt can accumulate under the
floor mats and could cause corrosion. Oc-
casionally check under the mats to make
sure the area is dry. Be particularly care-
ful when transporting chemicals, cleans-
ers, fertilizers, salt, etc.; these should be
transported in proper containers. If a spill
or leak should occur, immediately clean
and dry the area.
Use mud shields on your wheels. If you
drive on salted or gravel roads, mud
shields help protect your vehicle. Full- size
shields, which come as near to the ground
as possible, are the best. We recommend
that the fittings and the area where the
shields are installed be treated to resist
corrosion. Your Toyota dealer will be
happy to assist in supplying and installing
the shields if they are recommended for
your area.
Keep your vehicle in a well ventilated
garage or a roofed place. Do not park
your vehicle in a damp, poorly venti-
lated garage. If you wash your vehicle in
the garage, or if you drive it covered with
water or snow, your garage may be so
damp as to cause corrosion. Even if your
garage is heated, a wet vehicle can cor-
rode if the ventilation is poor.Washing your Toyota
Keep your vehicle clean by regular
washing.
The following cases may cause weakness
to the paint or corrosion to the body and
parts. Wash your vehicle as soon as pos-
sible.
�When driving in a coastal area
�When driving on a road sprinkled with
antifreeze
�When exposed to coal tar, tree sap,
bird droppings and carcass of an insect
�When driving in areas where there is
a lot of smoke, soot, dust, iron dust or
chemical substances
�When the vehicle becomes remarkably
dirty with dust and mud
Hand- washing your Toyota
Work in the shade and wait until the
vehicle body is not hot to the touch.
CAUTION
When cleaning under floor or chassis,
be careful not to injure your hands.
1. Rinse off loose dirt with a hose. Re-
move any mud or road salt from the
underside of the vehicle or in the
wheel wells.
2. Wash with a mild car- wash soap,
mixed according to the manufacturer 's
instructions. Use a soft cotton mitt and
keep it wet by dipping it frequently into
the wash water. Do not rub hardÐlet
the soap and water remove the dirt.
Fuel filler door: Do not apply water (high-
pressure car wash, for example) at or
near the fuel tank inlet with the fuel filler
door opened. If the water enters the air
vent, you may experience trouble with re-
fueling or rough engine idling.
Plastic wheel ornaments: The plastic
wheel ornaments are damaged easily by
organic substances. If any organic sub-
stances splashes an ornament, be sure to
wash it off with water and check if the
ornament is damaged.
CAUTION
Do not attach the heavily damaged
plastic wheel ornament. It may fly off
the wheel and cause accidents while
the vehicle is moving.
Washing and waxing your
To y o t a
Page 150 of 2572

'05 HIGHLANDER_U (L/O 0409)
34
2005 HIGHLANDER from Nov. '04 Prod. (OM48570U)
TESTING THE SYSTEM
1. Open all the windows.
2. Set the system as described above.
The side doors and back door should
be locked with the key or wireless re-
mote control transmitter. Be sure to
wait until the indicator light starts flash-
ing.
3. Unlock any door from the inside. The
system should activate the alarm.
4. Stop the alarm as described above.
5. Repeat this operation for the other
doors and hood. When testing the
hood, also check that the system is
activated when the battery terminal is
disconnected and then reconnected.
If the system does not work properly,
have it checked by your Toyota dealer.
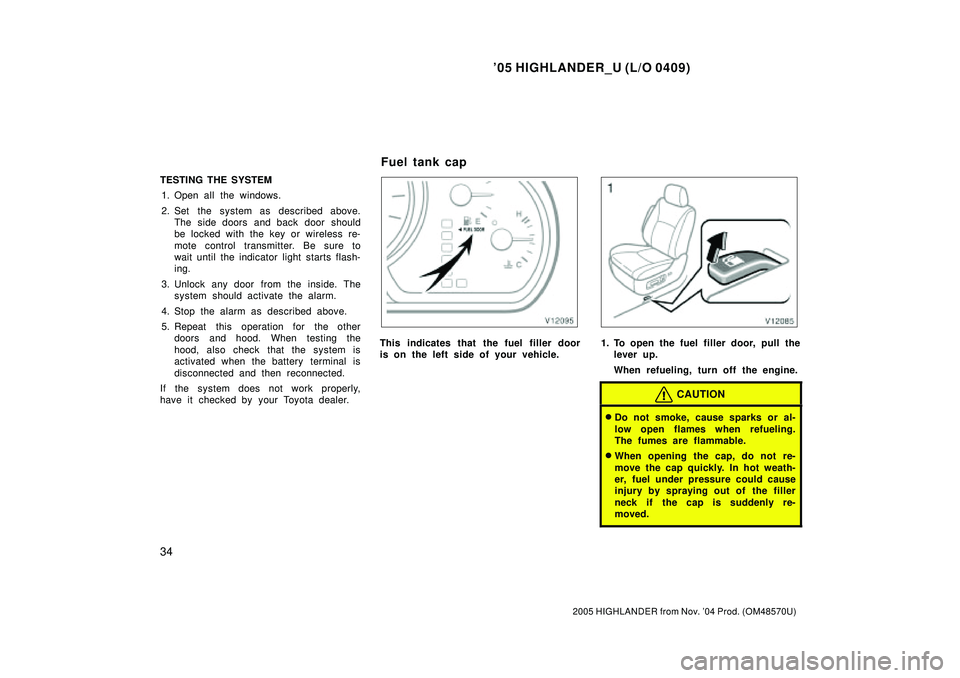
This indicates that the fuel filler door
is on the left side of your vehicle.1. To open the fuel filler door, pull the
lever up.
When refueling, turn off the engine.
CAUTION
�Do not smoke, cause sparks or al-
low open flames when refueling.
The fumes are flammable.
�When opening the cap, do not re-
move the cap quickly. In hot weath-
er, fuel under pressure could cause
injury by spraying out of the filler
neck if the cap is suddenly re-
moved.
Fuel tank cap
Page 151 of 2572

'05 HIGHLANDER_U (L/O 0409)
35
2005 HIGHLANDER from Nov. '04 Prod. (OM48570U)
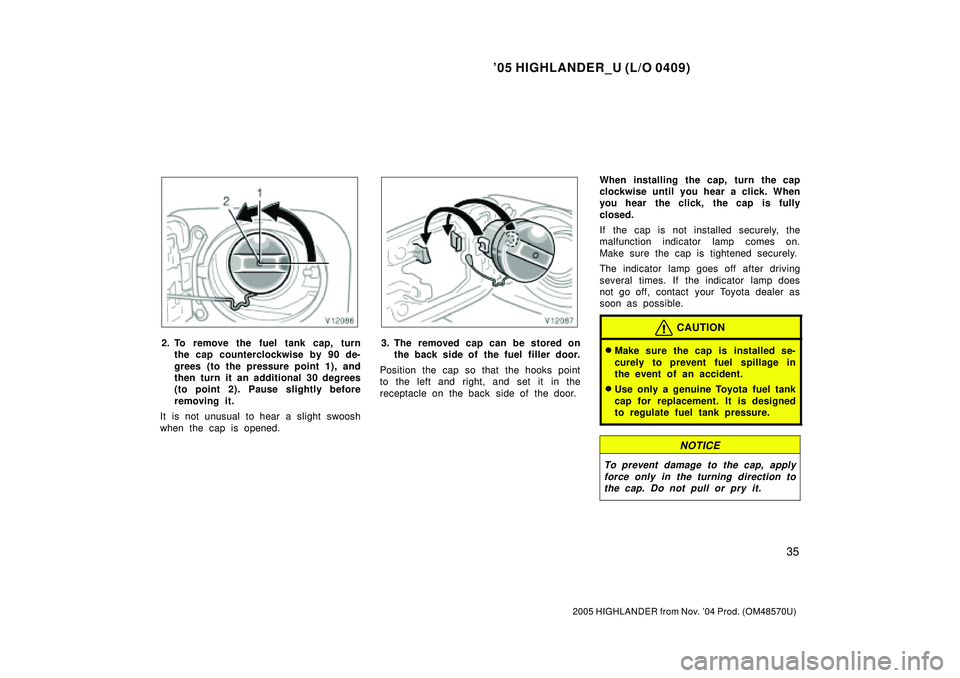
2. To remove the fuel tank cap, turn
the cap counterclockwise by 90 de-
grees (to the pressure point 1), and
then turn it an additional 30 degrees
(to point 2). Pause slightly before
removing it.
It is not unusual to hear a slight swoosh
when the cap is opened.3. The removed cap can be stored on
the back side of the fuel filler door.
Position the cap so that the hooks point
to the left and right, and set it in the
receptacle on the back side of the door.When installing the cap, turn the cap
clockwise until you hear a click. When
you hear the click, the cap is fully
closed.
If the cap is not installed securely, the
malfunction indicator lamp comes on.
Make sure the cap is tightened securely.
The indicator lamp goes off after driving
several times. If the indicator lamp does
not go off, contact your Toyota dealer as
soon as possible.
CAUTION
�Make sure the cap is installed se-
curely to prevent fuel spillage in
the event of an accident.
�Use only a genuine Toyota fuel tank
cap for replacement. It is designed
to regulate fuel tank pressure.
NOTICE
To prevent damage to the cap, apply
force only in the turning direction to
the cap. Do not pull or pry it.
Page 2391 of 2572

BODY PANEL REPLACEMENT
F16774
POINT
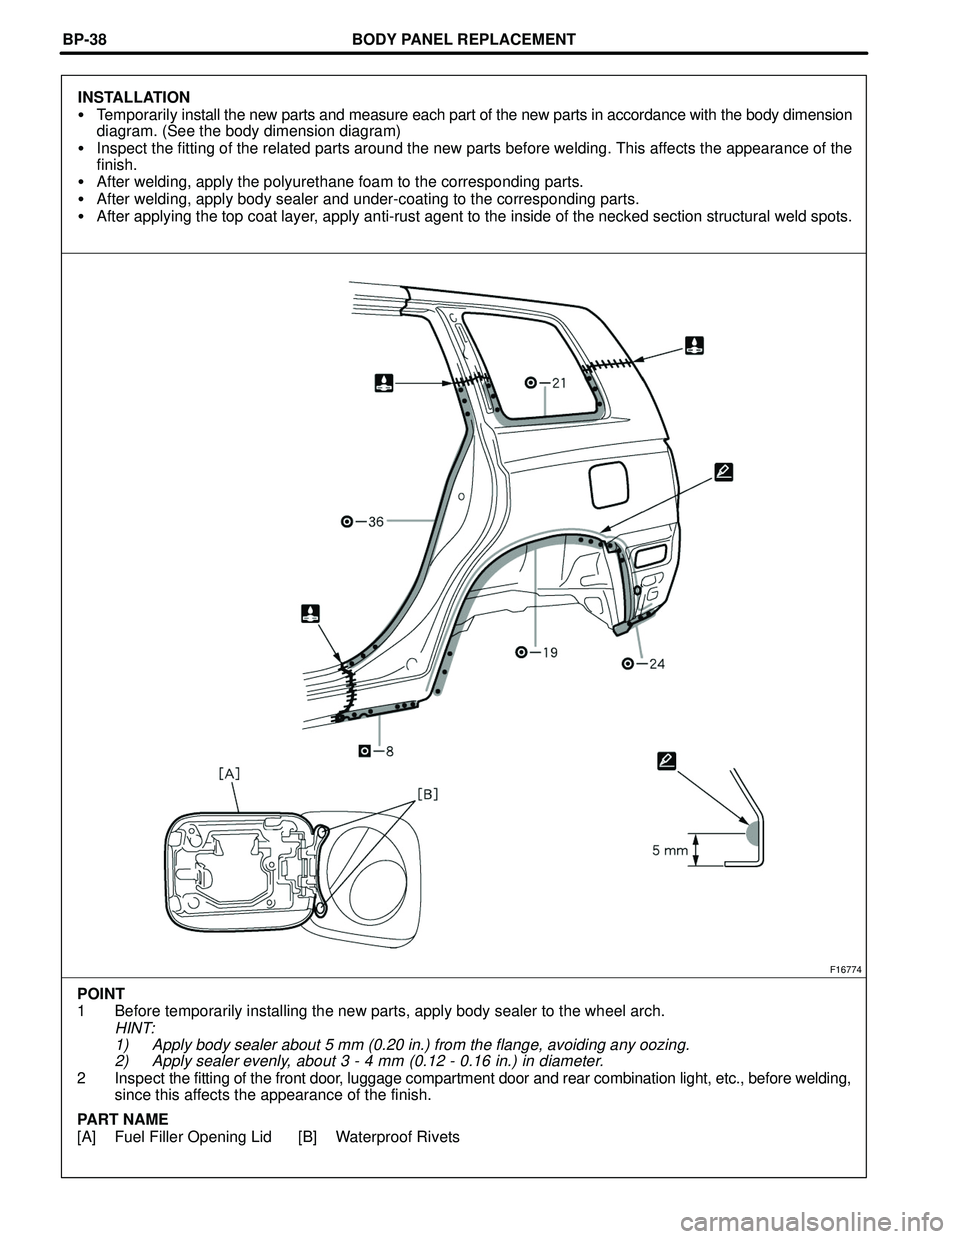
1 Before temporarily installing the new parts, apply body sealer to the wheel arch.
HINT:
1) Apply body sealer about 5 mm (0.20 in.) from the flange, avoiding any oozing.
2) Apply sealer evenly, about 3 - 4 mm (0.12 - 0.16 in.) in diameter.
2 Inspect the fitting of the front door, luggage compartment door and rear combination light, etc., before welding,
since this affects the appearance of the finish.
PART NAME
[A] Fuel Filler Opening Lid [B] Waterproof Rivets BP-38
INSTALLATION
�Temporarily install the new parts and measure each part of the new parts in accordance with the body dimension
diagram. (See the body dimension diagram)
�Inspect the fitting of the related parts around the new parts before welding. This affects the appearance of the
finish.
�After welding, apply the polyurethane foam to the corresponding parts.
�After welding, apply body sealer and under-coating to the corresponding parts.
�After applying the top coat layer, apply anti-rust agent to the inside of the necked section structural weld spots.