Page 24 of 263

PREGNANT WOMEN
NISSAN recommends that pregnant women
use seat belts. The seat belt should be worn
snug, and always position the lap belt as
low as possible around the hips, not the
waist. Place the shoulder belt over your
shoulder and across your chest. Never run
the lap/shoulder belt over your abdominal
area. Contact your doctor for specific rec-
ommendations.
INJURED PERSONS
NISSAN recommends that injured persons
use seat belts, depending on the injury.
Check with your doctor for specific recom-
mendations.
THREE-POINT TYPE SEAT BELT
WITH RETRACTOR
WARNING
OEvery person who drives or rides in
this vehicle should use a seat belt at
all times. Children should be prop-
erly restrained and, if appropriate, in
a child restraint.
O
Do not ride in a moving vehicle when
the seatback is reclined. This can be
dangerous. The shoulder belt will not
be against your body. In an accidentyou could be thrown into it and re-
ceive neck or other serious injuries.
You could also slide under the lap belt
and receive serious internal injuries.
OFor most effective protection when
the vehicle is in motion, the seat
should be upright. Always sit well
back in the seat and adjust the seat
belt properly.
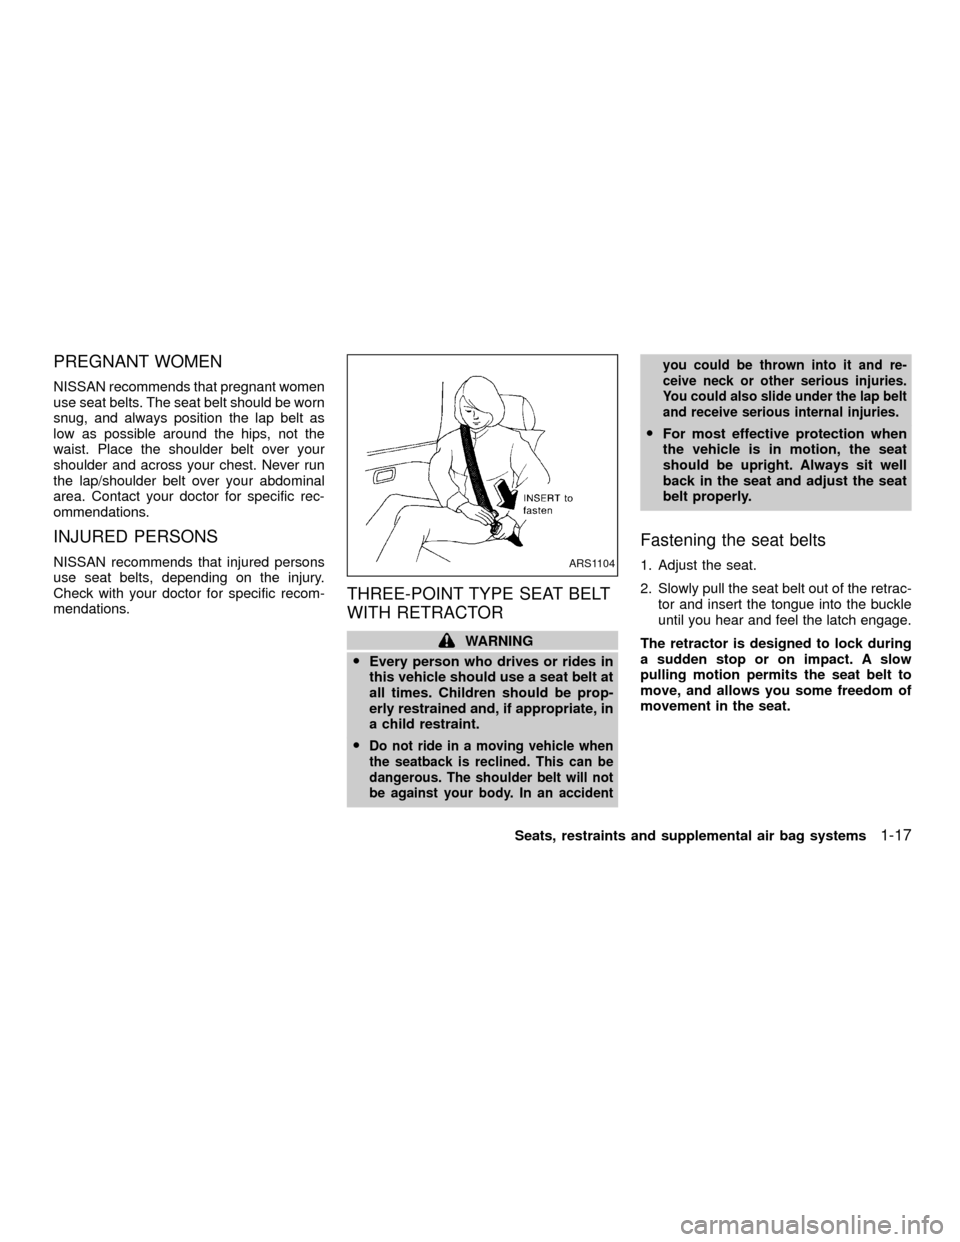
Fastening the seat belts
1. Adjust the seat.
2. Slowly pull the seat belt out of the retrac-
tor and insert the tongue into the buckle
until you hear and feel the latch engage.
The retractor is designed to lock during
a sudden stop or on impact. A slow
pulling motion permits the seat belt to
move, and allows you some freedom of
movement in the seat.ARS1104
Seats, restraints and supplemental air bag systems1-17
ZX
Page 25 of 263

3. Position the lap belt portionlow on the
hipsas shown.
4. Pull the shoulder belt portion toward the
retractor to take up extra slack.
The front passenger seat belt has a cinch-
ing mechanism for child restraint installa-
tion. It is referred to as the automatic locking
mode.
When the cinching mechanism is activated
the seat belt cannot be extracted again until
the seat belt tongue is detached from the
buckle and the seat belt is fully retracted.See ``Child restraints '' later in this section for
more information.
The automatic locking mode should be
used only for child restraint installation.
During normal seat belt use by a passen-
ger, the locking mode should not be
activated. If it is activated it may cause
uncomfortable seat belt tension.
Unfastening the seat belts
To unfasten the seat belt, press the button
on the buckle. The seat belt automatically
retracts.
Checking seat belt operation
Seat belt retractors are designed to lock
seat belt movement by two separate meth-
ods:
1) When the seat belt is pulled quickly from
the retractor.
2) When the vehicle slows down rapidly.
ARS1189ARS1054
1-18Seats, restraints and supplemental air bag systems
ZX
Page 31 of 263

OFor a front-facing child restraint, if
the seat position where it is installed
has a 3-point type lap/shoulder belt,
check to make sure the shoulder belt
does not go in front of the child's
face or neck. If it does, put the shoul-
der belt behind the child restraint. If
you must install a front-facing child
restraint in the front seat, see ªInstal-
lation on front passenger seatº later
in this section for details.
OWhen your child restraint is not in
use, keep it secured with a seat belt
to prevent it from being thrown
around in case of a sudden stop or
accident.
CAUTION
ORemember that a child restraint left
in a closed vehicle can become very
hot. Check the seating surface and
buckles before placing your child in
the child restraint.
OThe three-point belt in your vehicle
is equipped with an automatic lock-
ing mode retractor which must be
used when installing a child re-
straint.
OFailure to use the retractor's locking
mode will result in the child restraint
not being properly secured. The re-
straint could tip over or otherwise be
unsecured and cause injury to the
child in a sudden stop or collision.
INSTALLATION ON REAR SEAT
CENTER POSITION
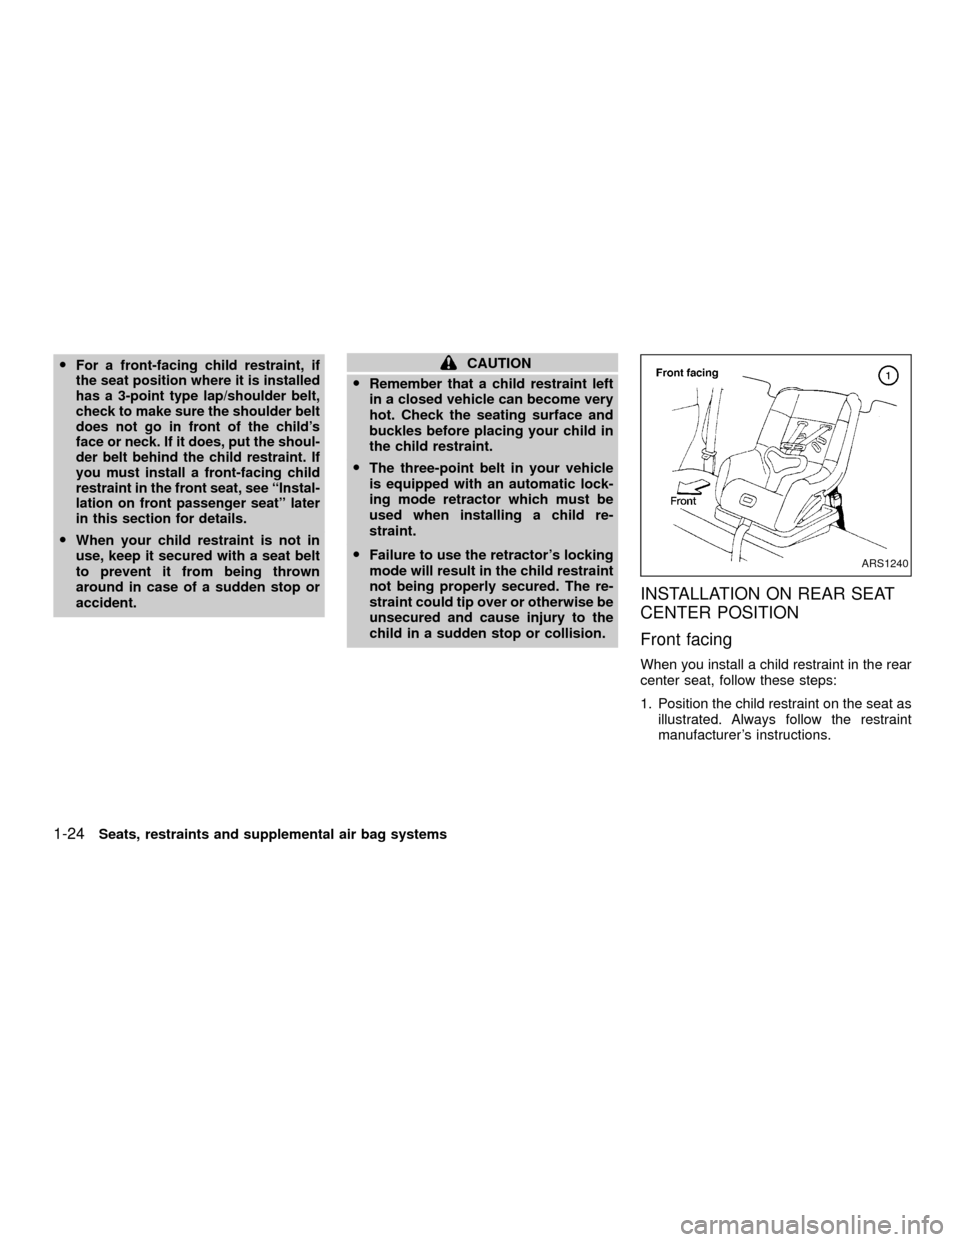
Front facing
When you install a child restraint in the rear
center seat, follow these steps:
1. Position the child restraint on the seat as
illustrated. Always follow the restraint
manufacturer's instructions.
ARS1240
1-24Seats, restraints and supplemental air bag systems
ZX
Page 34 of 263

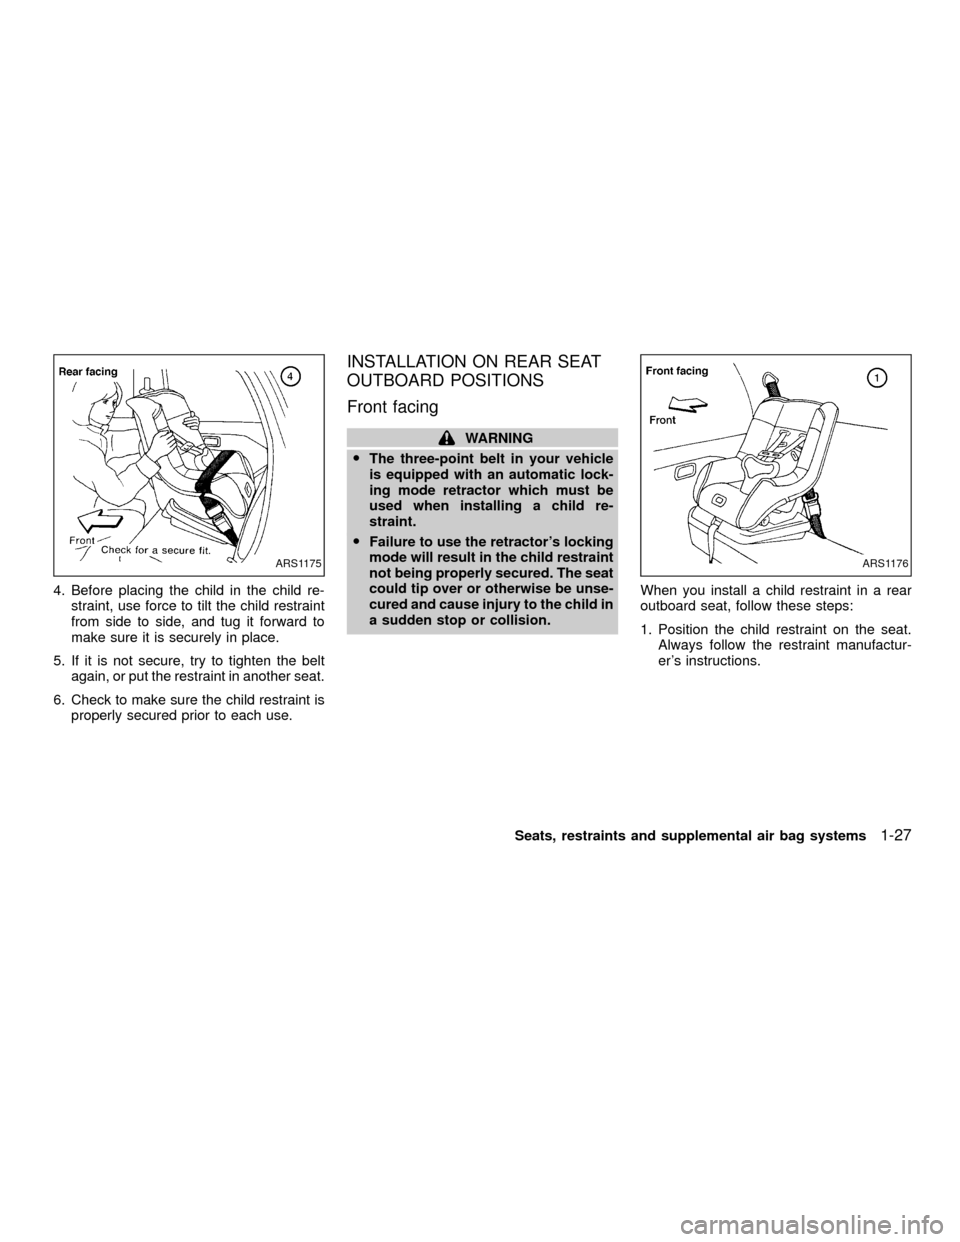
4. Before placing the child in the child re-
straint, use force to tilt the child restraint
from side to side, and tug it forward to
make sure it is securely in place.
5. If it is not secure, try to tighten the belt
again, or put the restraint in another seat.
6. Check to make sure the child restraint is
properly secured prior to each use.
INSTALLATION ON REAR SEAT
OUTBOARD POSITIONS
Front facing
WARNING
OThe three-point belt in your vehicle
is equipped with an automatic lock-
ing mode retractor which must be
used when installing a child re-
straint.
OFailure to use the retractor's locking
mode will result in the child restraint
not being properly secured. The seat
could tip over or otherwise be unse-
cured and cause injury to the child in
a sudden stop or collision.When you install a child restraint in a rear
outboard seat, follow these steps:
1. Position the child restraint on the seat.
Always follow the restraint manufactur-
er's instructions.
ARS1175ARS1176
Seats, restraints and supplemental air bag systems1-27
ZX
Page 35 of 263
2. Route the seat belt tongue through the
child restraint and insert it into the buckle
until you hear and feel the latch engage.
Be sure to follow the child restraint manu-
facturer's instructions for belt routing.3. Pull on the shoulder belt until all of the
belt is fully extended. At this time, the belt
retractor is in the automatic locking mode
(child restraint mode). It reverts back to
emergency locking mode when the belt is
fully retracted.4. Allow the belt to retract. Pull up on the
shoulder belt to remove any slack in the
belt.
ARS1177ARS1178ARS1179
1-28Seats, restraints and supplemental air bag systems
ZX
Page 36 of 263

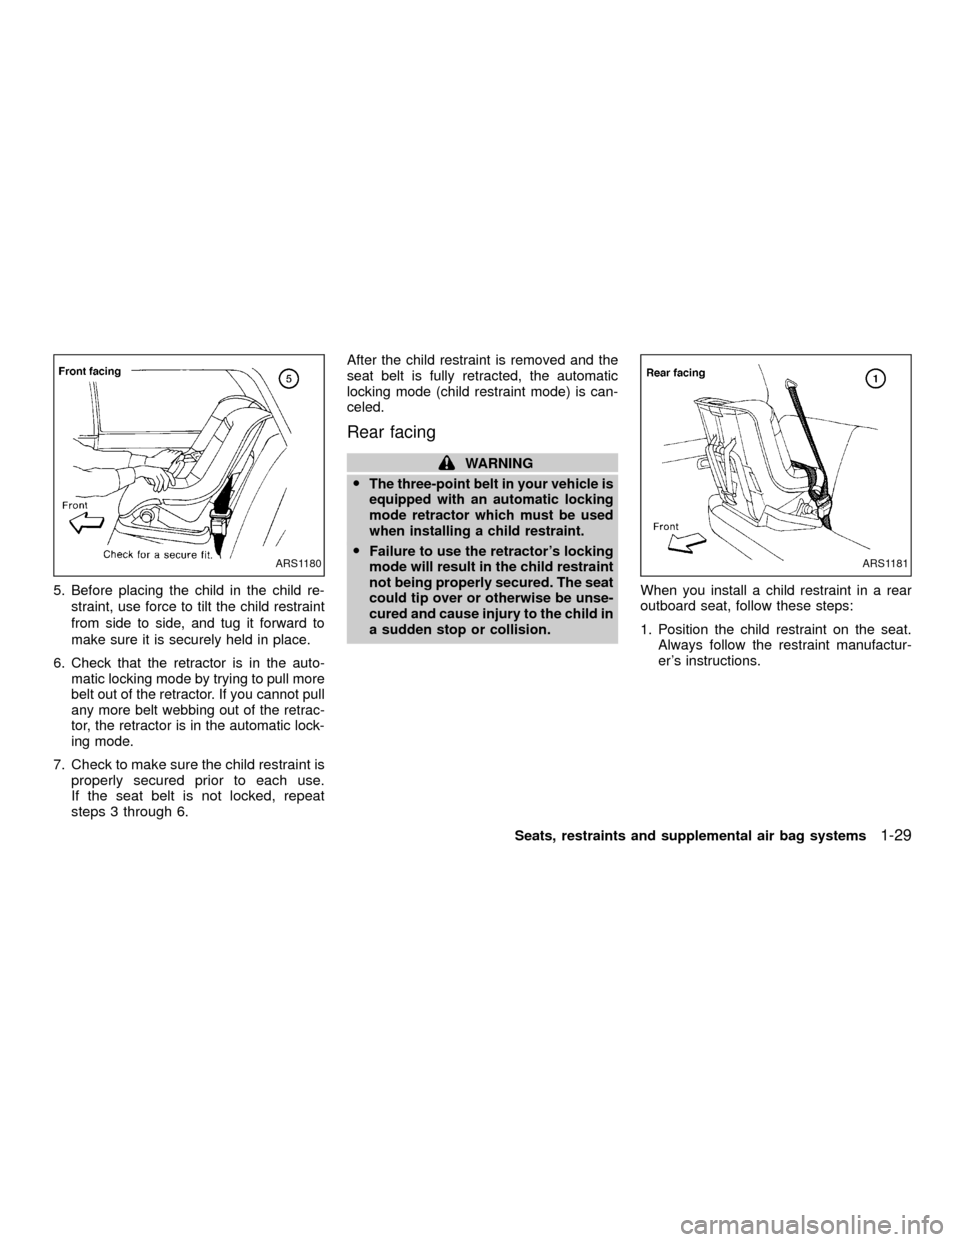
5. Before placing the child in the child re-
straint, use force to tilt the child restraint
from side to side, and tug it forward to
make sure it is securely held in place.
6. Check that the retractor is in the auto-
matic locking mode by trying to pull more
belt out of the retractor. If you cannot pull
any more belt webbing out of the retrac-
tor, the retractor is in the automatic lock-
ing mode.
7.
Check to make sure the child restraint is
properly secured prior to each use.
If the seat belt is not locked, repeat
steps 3 through 6.
After the child restraint is removed and the
seat belt is fully retracted, the automatic
locking mode (child restraint mode) is can-
celed.
Rear facing
WARNING
O
The three-point belt in your vehicle is
equipped with an automatic locking
mode retractor which must be used
when installing a child restraint.
OFailure to use the retractor's locking
mode will result in the child restraint
not being properly secured. The seat
could tip over or otherwise be unse-
cured and cause injury to the child in
a sudden stop or collision.When you install a child restraint in a rear
outboard seat, follow these steps:
1. Position the child restraint on the seat.
Always follow the restraint manufactur-
er's instructions.ARS1180ARS1181
Seats, restraints and supplemental air bag systems1-29
ZX
Page 37 of 263
2. Route the seat belt tongue through the
child restraint and insert it into the buckle
until you hear and feel the latch engage.
Be sure to follow the child restraint manu-
facturer's instructions for belt routing.3. Pull on the shoulder belt until all of the
belt is fully extended. At this time, the belt
retractor is in the automatic locking mode
(child restraint mode). It reverts back to
emergency locking mode when the belt is
fully retracted.4. Allow the belt to retract. Pull up on the
shoulder belt to remove any slack in the
belt.
ARS1182ARS1183ARS1184
1-30Seats, restraints and supplemental air bag systems
ZX
Page 38 of 263
5. Before placing the child in the child re-
straint, use force to tilt the child restraint
from side to side, and tug it forward to
make sure it is securely held in place.
6. Check that the retractor is in the auto-
matic locking mode by trying to pull more
belt out of the retractor. If you cannot pull
any more belt webbing out of the retrac-
tor, the retractor is in the automatic lock-
ing mode.
7.
Check to make sure the child restraint is
properly secured prior to each use.
If the seat belt is not locked, repeat
steps 3 through 6.
After the child restraint is removed and the
seat belt is fully retracted, the automatic
locking mode (child restraint mode) is can-
celed.
ARS1185WRS0071
Seats, restraints and supplemental air bag systems1-31
ZX