Page 41 of 263

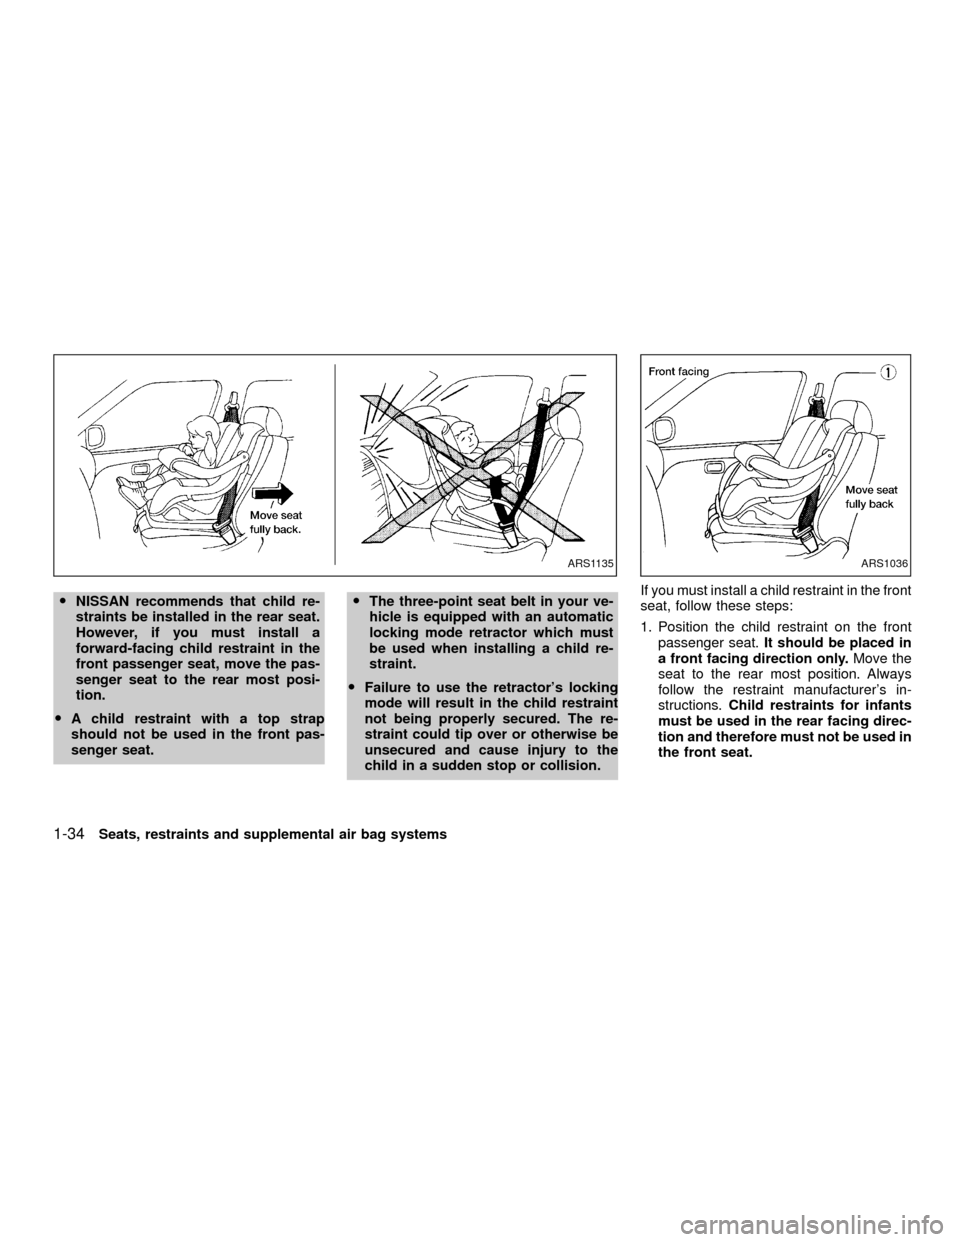
ONISSAN recommends that child re-
straints be installed in the rear seat.
However, if you must install a
forward-facing child restraint in the
front passenger seat, move the pas-
senger seat to the rear most posi-
tion.
OA child restraint with a top strap
should not be used in the front pas-
senger seat.OThe three-point seat belt in your ve-
hicle is equipped with an automatic
locking mode retractor which must
be used when installing a child re-
straint.
OFailure to use the retractor's locking
mode will result in the child restraint
not being properly secured. The re-
straint could tip over or otherwise be
unsecured and cause injury to the
child in a sudden stop or collision.If you must install a child restraint in the front
seat, follow these steps:
1. Position the child restraint on the front
passenger seat.It should be placed in
a front facing direction only.Move the
seat to the rear most position. Always
follow the restraint manufacturer's in-
structions.Child restraints for infants
must be used in the rear facing direc-
tion and therefore must not be used in
the front seat.
ARS1135ARS1036
1-34Seats, restraints and supplemental air bag systems
ZX
Page 42 of 263
2. Route the seat belt tongue through the
child restraint and insert it into the buckle
until you hear and feel the latch engage.
Be sure to follow the child restraint manu-
facturer's instructions for belt routing.3. Pull on the shoulder belt until all of the
belt is fully extended. At this time, the belt
retractor is in the automatic locking mode
(child restraint mode). It reverts back to
emergency locking mode when the belt is
fully retracted.4. Allow the seat belt to retract slightly. Pull
up on the seat belt to remove any slack in
the belt.
ARS1073ARS1034ARS1074
Seats, restraints and supplemental air bag systems1-35
ZX
Page 43 of 263
5. Before placing the child in the child re-
straint, use force to tilt the child restraint
from side to side, and tug it forward to
make sure it is securely held in place.
6.
Check that the retractor is in the automatic
locking mode by trying to pull more seat
belt out of the retractor. If you cannot pull
any more seat belt webbing out of the
retractor, the retractor is in the automatic
locking mode.
7. Check to make sure the child restraint is
properly secured prior to each use. If the
seat belt is not locked, repeat steps 3
through 6.After the child restraint is removed and the
seat belt is fully retracted, the automatic
locking mode (child restraint mode) is can-
celed.
ARS1079
1-36Seats, restraints and supplemental air bag systems
ZX
Page 69 of 263

ODo not leave children unattended in-
side the vehicle. They could unknow-
ingly activate switches or controls
and become trapped in a window.
Unattended children could become
involved in serious accidents.
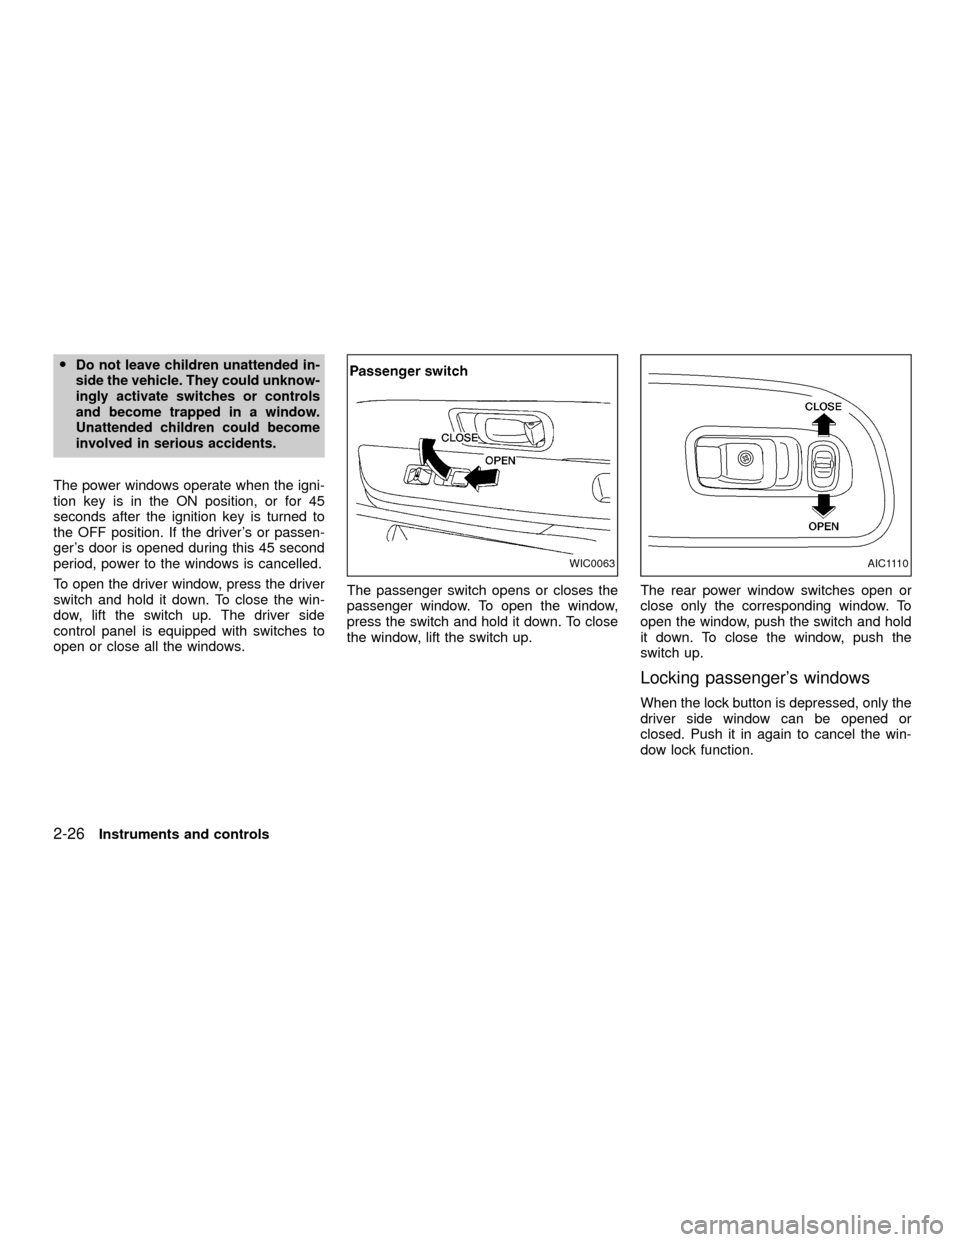
The power windows operate when the igni-
tion key is in the ON position, or for 45
seconds after the ignition key is turned to
the OFF position. If the driver's or passen-
ger's door is opened during this 45 second
period, power to the windows is cancelled.
To open the driver window, press the driver
switch and hold it down. To close the win-
dow, lift the switch up. The driver side
control panel is equipped with switches to
open or close all the windows.The passenger switch opens or closes the
passenger window. To open the window,
press the switch and hold it down. To close
the window, lift the switch up.The rear power window switches open or
close only the corresponding window. To
open the window, push the switch and hold
it down. To close the window, push the
switch up.
Locking passenger's windows
When the lock button is depressed, only the
driver side window can be opened or
closed. Push it in again to cancel the win-
dow lock function.
WIC0063AIC1110
2-26Instruments and controls
ZX
Page 70 of 263
Automatic operation
To fully open the driver window, completely
press the driver window switch down and
release it; it need not be held. To stop the
window, lift the switch up while the window
is opening.
MANUAL WINDOWS
The side windows can be opened or closed
by turning the hand crank on each door.
To open a window on the driver side, turn
the crank clockwise. To close a window, turn
the crank counterclockwise.
To open a window on the passenger side,
turn the crank counterclockwise. To close a
window, turn the crank clockwise.
TILTING THE SKYROOF
Pull the handle down, then push the handle
up to the fully tilted position.The skyroof
cannot be removed.
WARNING
In an accident you could be thrown
from the vehicle through an open sky-
roof. Always use seat belts and child
restraints.
AIC1121AIC0648A I C 1111
SKYROOF
(if so equipped)
Instruments and controls2-27
ZX
Page 74 of 263

3 Pre-driving checks and adjustments
Key .........................................................................3-2
Doors ......................................................................3-2
Locking with key ................................................3-2
Locking with inside lock knob............................3-3
Locking with power door lock switch.................3-3
Child safety rear door lock ................................3-4
Multi-remote control system (if so equipped).........3-4
How to use multi-remote control system...........3-4
Battery replacement ..........................................3-7
Hood .......................................................................3-8
Rear door ...............................................................3-9
Roof rack with gear basket (if so equipped) ........3-10Step rail ................................................................3-12
Fuel filler lid ..........................................................3-13
Fuel filler cap ...................................................3-13
Steering wheel .....................................................3-14
Tilt operation ....................................................3-14
Sun visors.............................................................3-14
Vanity mirror ....................................................3-14
Mirrors ..................................................................3-15
Inside mirror.....................................................3-15
Outside mirrors ................................................3-15
Outside mirror remote control
(if so equipped)................................................3-16
ZX
Page 75 of 263

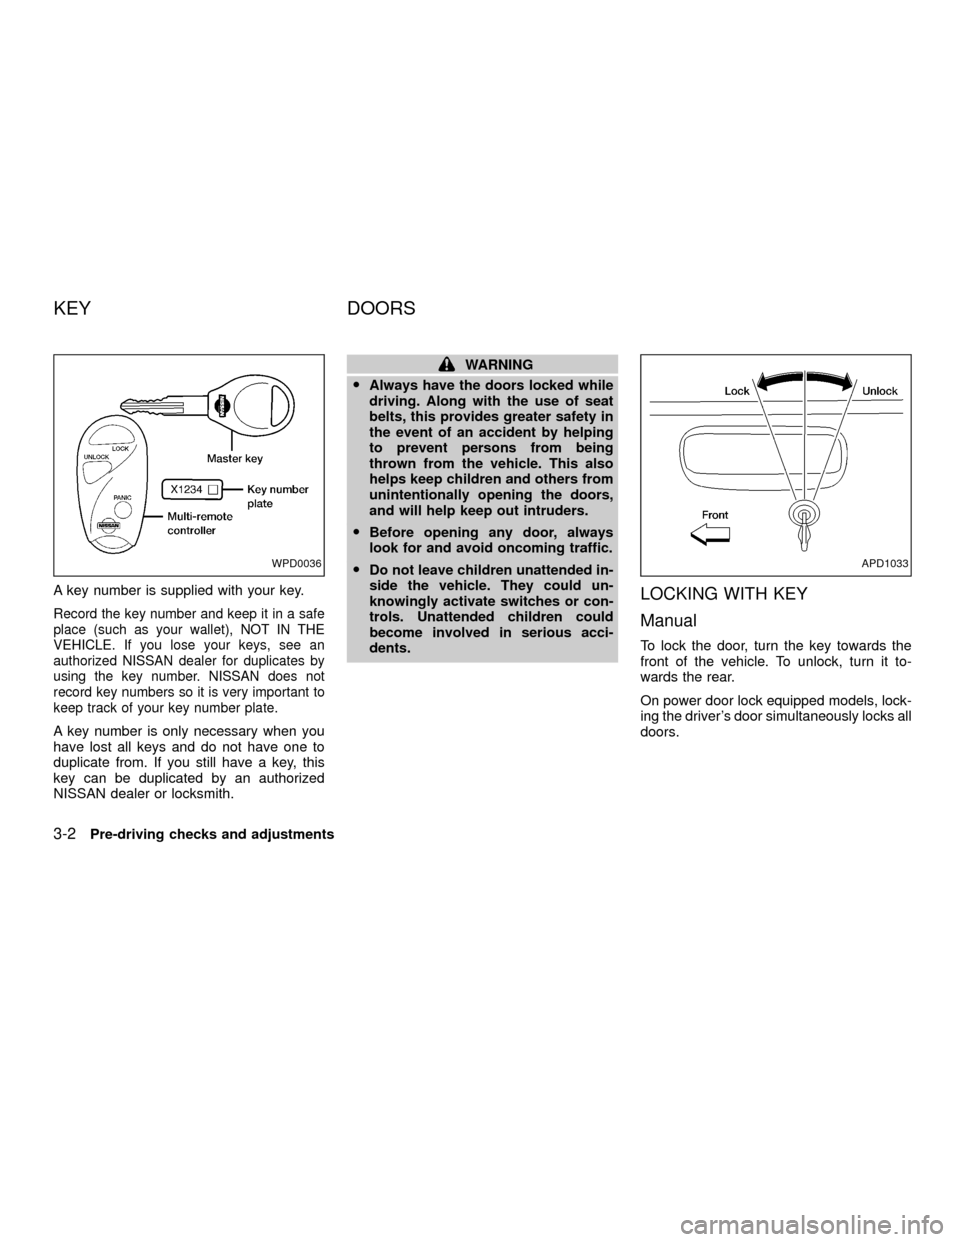
A key number is supplied with your key.
Record the key number and keep it in a safe
place (such as your wallet), NOT IN THE
VEHICLE. If you lose your keys, see an
authorized NISSAN dealer for duplicates by
using the key number. NISSAN does not
record key numbers so it is very important to
keep track of your key number plate.
A key number is only necessary when you
have lost all keys and do not have one to
duplicate from. If you still have a key, this
key can be duplicated by an authorized
NISSAN dealer or locksmith.
WARNING
OAlways have the doors locked while
driving. Along with the use of seat
belts, this provides greater safety in
the event of an accident by helping
to prevent persons from being
thrown from the vehicle. This also
helps keep children and others from
unintentionally opening the doors,
and will help keep out intruders.
OBefore opening any door, always
look for and avoid oncoming traffic.
ODo not leave children unattended in-
side the vehicle. They could un-
knowingly activate switches or con-
trols. Unattended children could
become involved in serious acci-
dents.
LOCKING WITH KEY
Manual
To lock the door, turn the key towards the
front of the vehicle. To unlock, turn it to-
wards the rear.
On power door lock equipped models, lock-
ing the driver's door simultaneously locks all
doors.
WPD0036APD1033
KEY DOORS
3-2Pre-driving checks and adjustments
ZX
Page 77 of 263

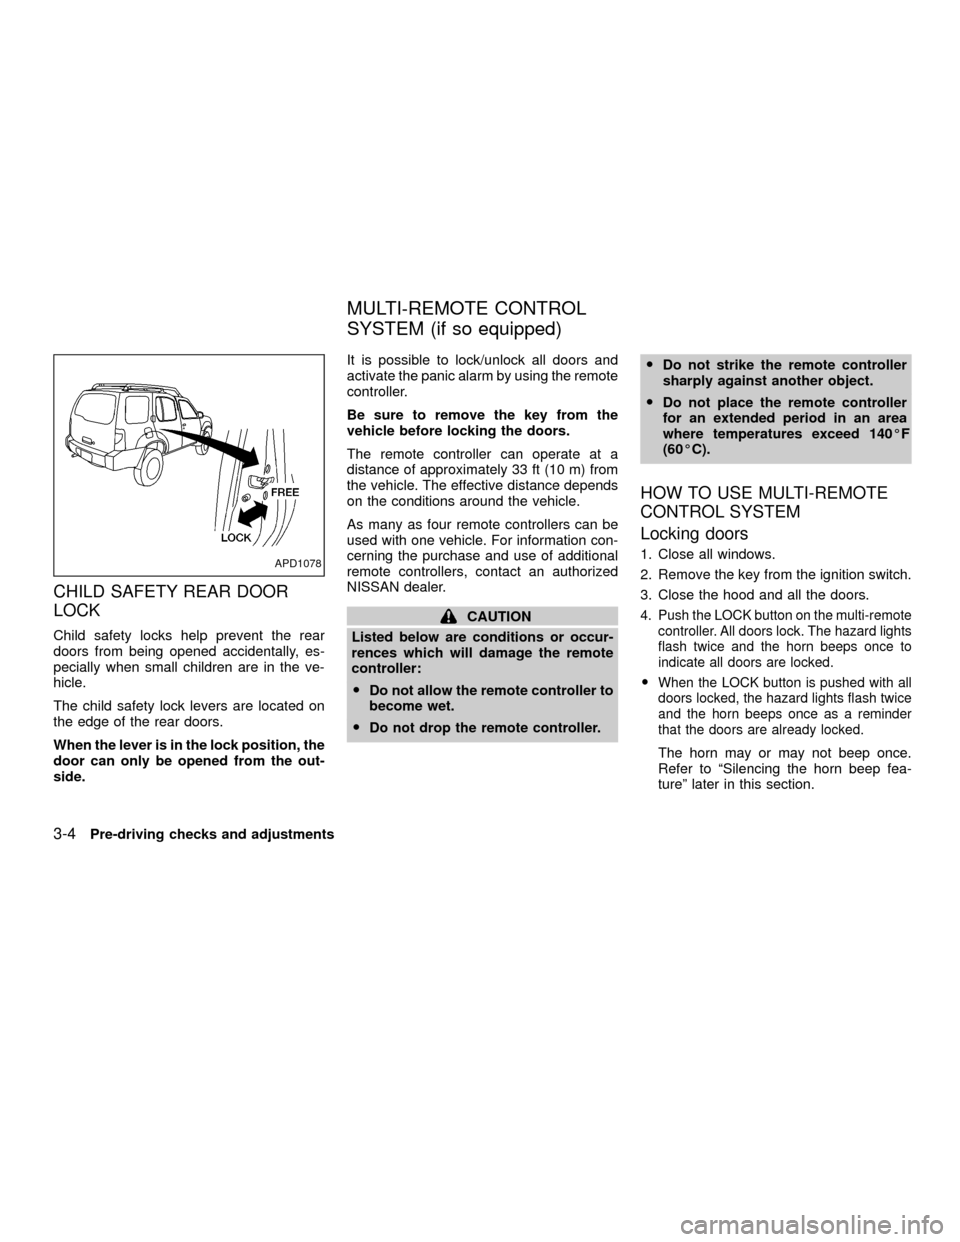
CHILD SAFETY REAR DOOR
LOCK
Child safety locks help prevent the rear
doors from being opened accidentally, es-
pecially when small children are in the ve-
hicle.
The child safety lock levers are located on
the edge of the rear doors.
When the lever is in the lock position, the
door can only be opened from the out-
side.It is possible to lock/unlock all doors and
activate the panic alarm by using the remote
controller.
Be sure to remove the key from the
vehicle before locking the doors.
The remote controller can operate at a
distance of approximately 33 ft (10 m) from
the vehicle. The effective distance depends
on the conditions around the vehicle.
As many as four remote controllers can be
used with one vehicle. For information con-
cerning the purchase and use of additional
remote controllers, contact an authorized
NISSAN dealer.
CAUTION
Listed below are conditions or occur-
rences which will damage the remote
controller:
ODo not allow the remote controller to
become wet.
ODo not drop the remote controller.ODo not strike the remote controller
sharply against another object.
ODo not place the remote controller
for an extended period in an area
where temperatures exceed 140ÉF
(60ÉC).
HOW TO USE MULTI-REMOTE
CONTROL SYSTEM
Locking doors
1. Close all windows.
2. Remove the key from the ignition switch.
3. Close the hood and all the doors.
4. Push the LOCK button on the multi-remote
controller. All doors lock. The hazard lights
flash twice and the horn beeps once to
indicate all doors are locked.
OWhen the LOCK button is pushed with all
doors locked, the hazard lights flash twice
and the horn beeps once as a reminder
that the doors are already locked.
The horn may or may not beep once.
Refer to ªSilencing the horn beep fea-
tureº later in this section.
APD1078
MULTI-REMOTE CONTROL
SYSTEM (if so equipped)
3-4Pre-driving checks and adjustments
ZX