2001 NISSAN XTERRA child restraint
[x] Cancel search: child restraintPage 38 of 263
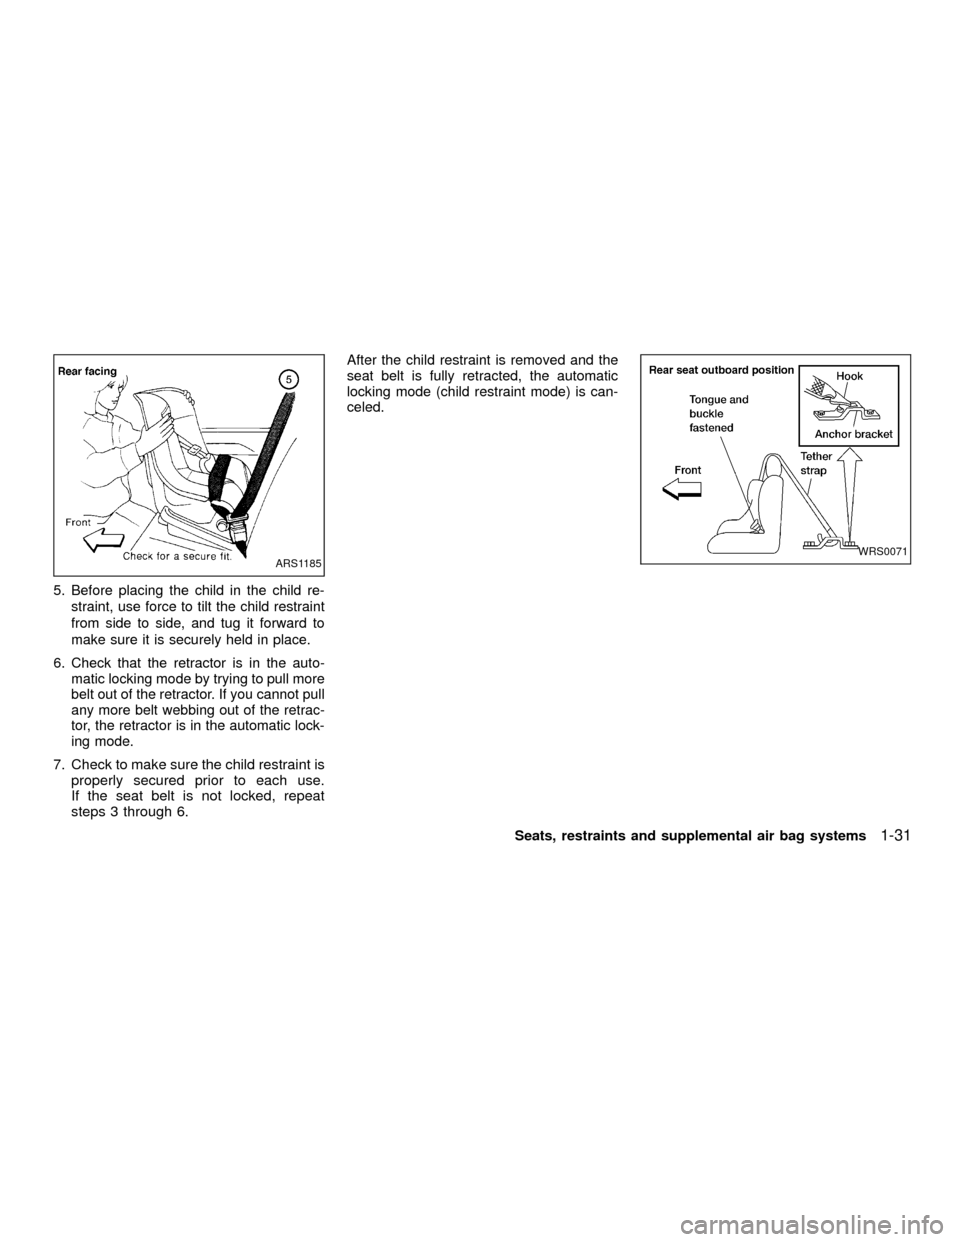
5. Before placing the child in the child re-
straint, use force to tilt the child restraint
from side to side, and tug it forward to
make sure it is securely held in place.
6. Check that the retractor is in the auto-
matic locking mode by trying to pull more
belt out of the retractor. If you cannot pull
any more belt webbing out of the retrac-
tor, the retractor is in the automatic lock-
ing mode.
7.
Check to make sure the child restraint is
properly secured prior to each use.
If the seat belt is not locked, repeat
steps 3 through 6.
After the child restraint is removed and the
seat belt is fully retracted, the automatic
locking mode (child restraint mode) is can-
celed.
ARS1185WRS0071
Seats, restraints and supplemental air bag systems1-31
ZX
Page 39 of 263
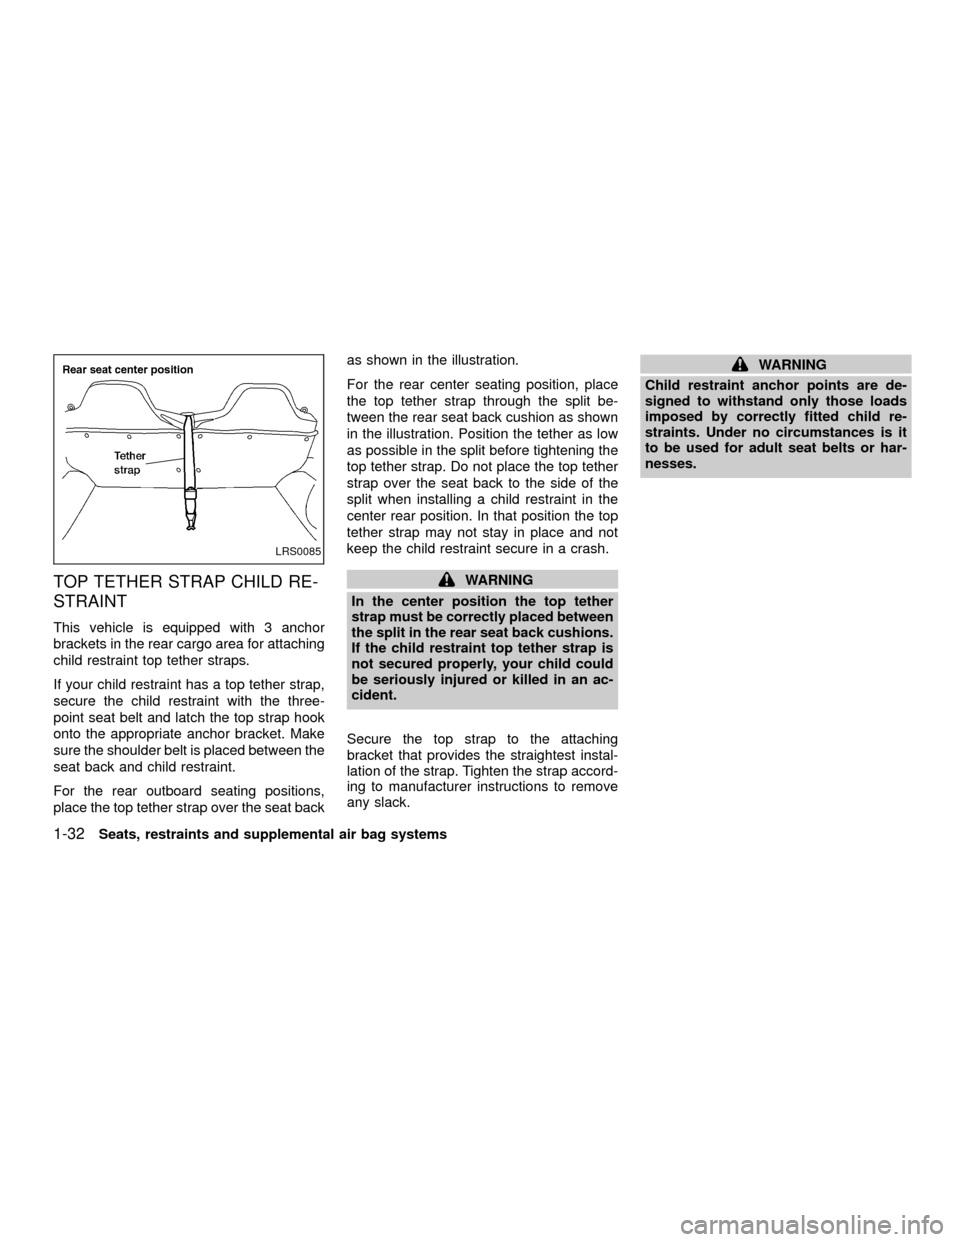
TOP TETHER STRAP CHILD RE-
STRAINT
This vehicle is equipped with 3 anchor
brackets in the rear cargo area for attaching
child restraint top tether straps.
If your child restraint has a top tether strap,
secure the child restraint with the three-
point seat belt and latch the top strap hook
onto the appropriate anchor bracket. Make
sure the shoulder belt is placed between the
seat back and child restraint.
For the rear outboard seating positions,
place the top tether strap over the seat backas shown in the illustration.
For the rear center seating position, place
the top tether strap through the split be-
tween the rear seat back cushion as shown
in the illustration. Position the tether as low
as possible in the split before tightening the
top tether strap. Do not place the top tether
strap over the seat back to the side of the
split when installing a child restraint in the
center rear position. In that position the top
tether strap may not stay in place and not
keep the child restraint secure in a crash.
WARNING
In the center position the top tether
strap must be correctly placed between
the split in the rear seat back cushions.
If the child restraint top tether strap is
not secured properly, your child could
be seriously injured or killed in an ac-
cident.
Secure the top strap to the attaching
bracket that provides the straightest instal-
lation of the strap. Tighten the strap accord-
ing to manufacturer instructions to remove
any slack.
WARNING
Child restraint anchor points are de-
signed to withstand only those loads
imposed by correctly fitted child re-
straints. Under no circumstances is it
to be used for adult seat belts or har-
nesses.
LRS0085
1-32Seats, restraints and supplemental air bag systems
ZX
Page 40 of 263
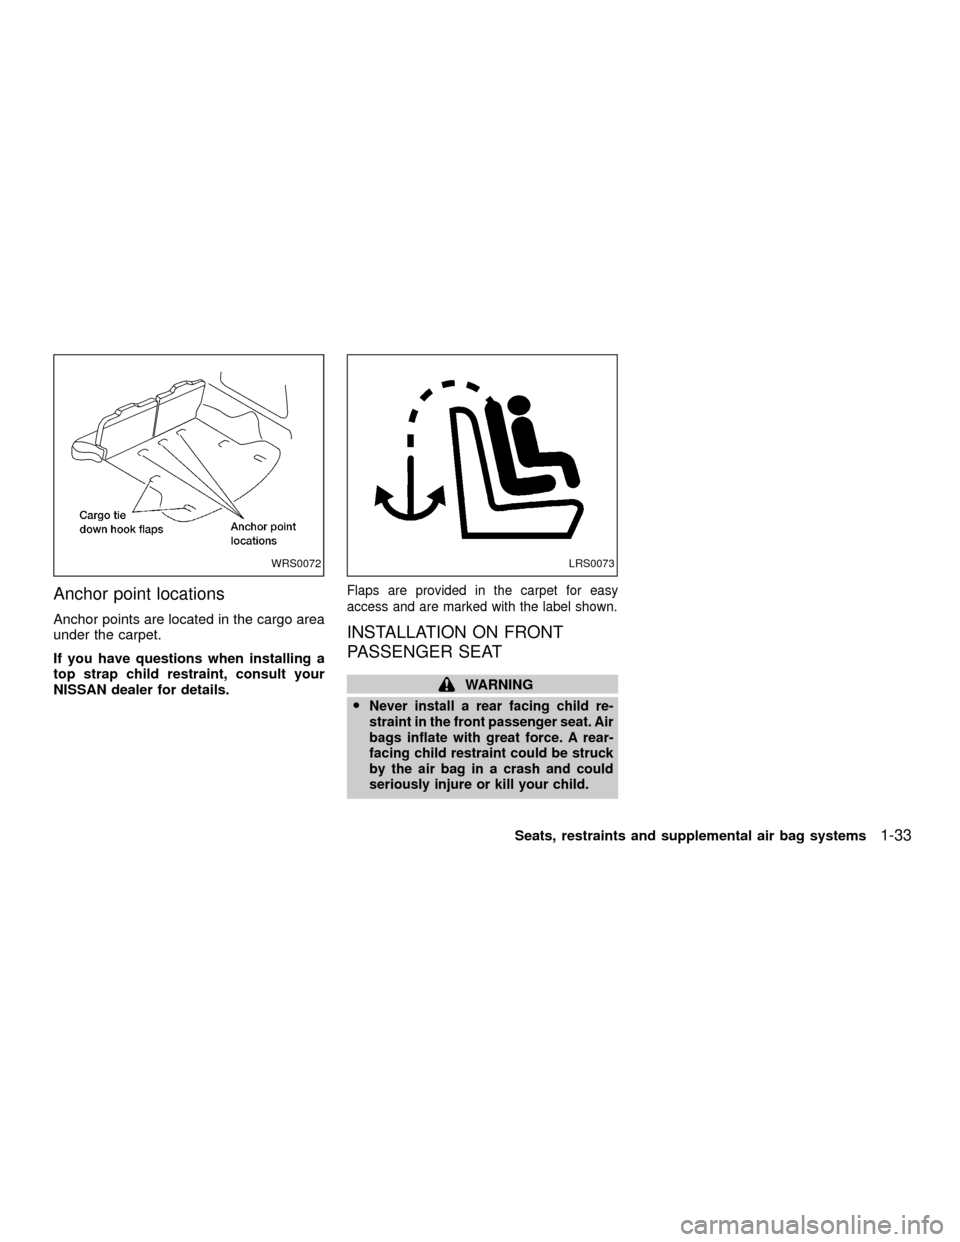
Anchor point locations
Anchor points are located in the cargo area
under the carpet.
If you have questions when installing a
top strap child restraint, consult your
NISSAN dealer for details.
Flaps are provided in the carpet for easy
access and are marked with the label shown.
INSTALLATION ON FRONT
PASSENGER SEAT
WARNING
O
Never install a rear facing child re-
straint in the front passenger seat. Air
bags inflate with great force. A rear-
facing child restraint could be struck
by the air bag in a crash and could
seriously injure or kill your child.
WRS0072LRS0073
Seats, restraints and supplemental air bag systems1-33
ZX
Page 41 of 263
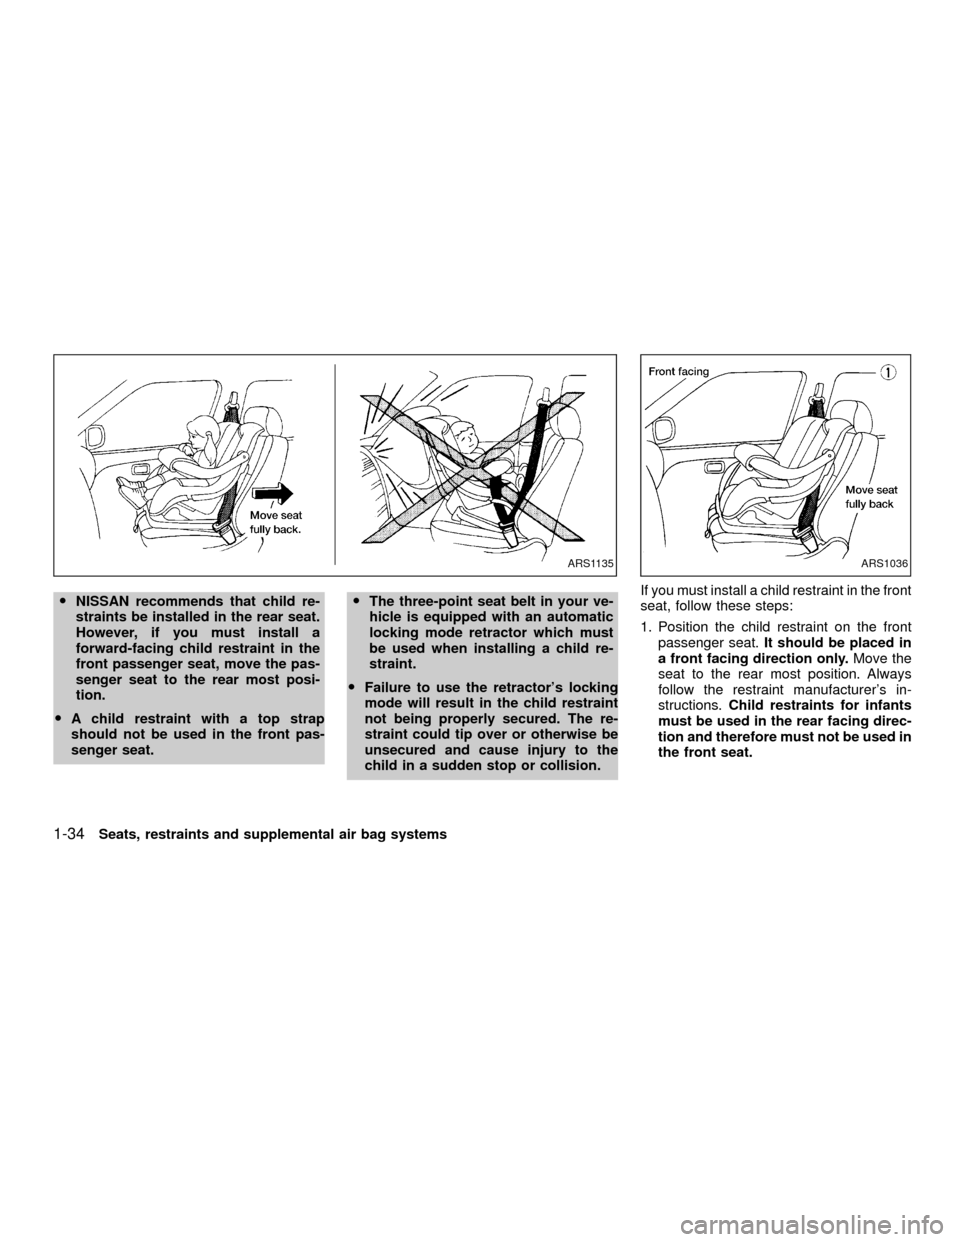
ONISSAN recommends that child re-
straints be installed in the rear seat.
However, if you must install a
forward-facing child restraint in the
front passenger seat, move the pas-
senger seat to the rear most posi-
tion.
OA child restraint with a top strap
should not be used in the front pas-
senger seat.OThe three-point seat belt in your ve-
hicle is equipped with an automatic
locking mode retractor which must
be used when installing a child re-
straint.
OFailure to use the retractor's locking
mode will result in the child restraint
not being properly secured. The re-
straint could tip over or otherwise be
unsecured and cause injury to the
child in a sudden stop or collision.If you must install a child restraint in the front
seat, follow these steps:
1. Position the child restraint on the front
passenger seat.It should be placed in
a front facing direction only.Move the
seat to the rear most position. Always
follow the restraint manufacturer's in-
structions.Child restraints for infants
must be used in the rear facing direc-
tion and therefore must not be used in
the front seat.
ARS1135ARS1036
1-34Seats, restraints and supplemental air bag systems
ZX
Page 42 of 263
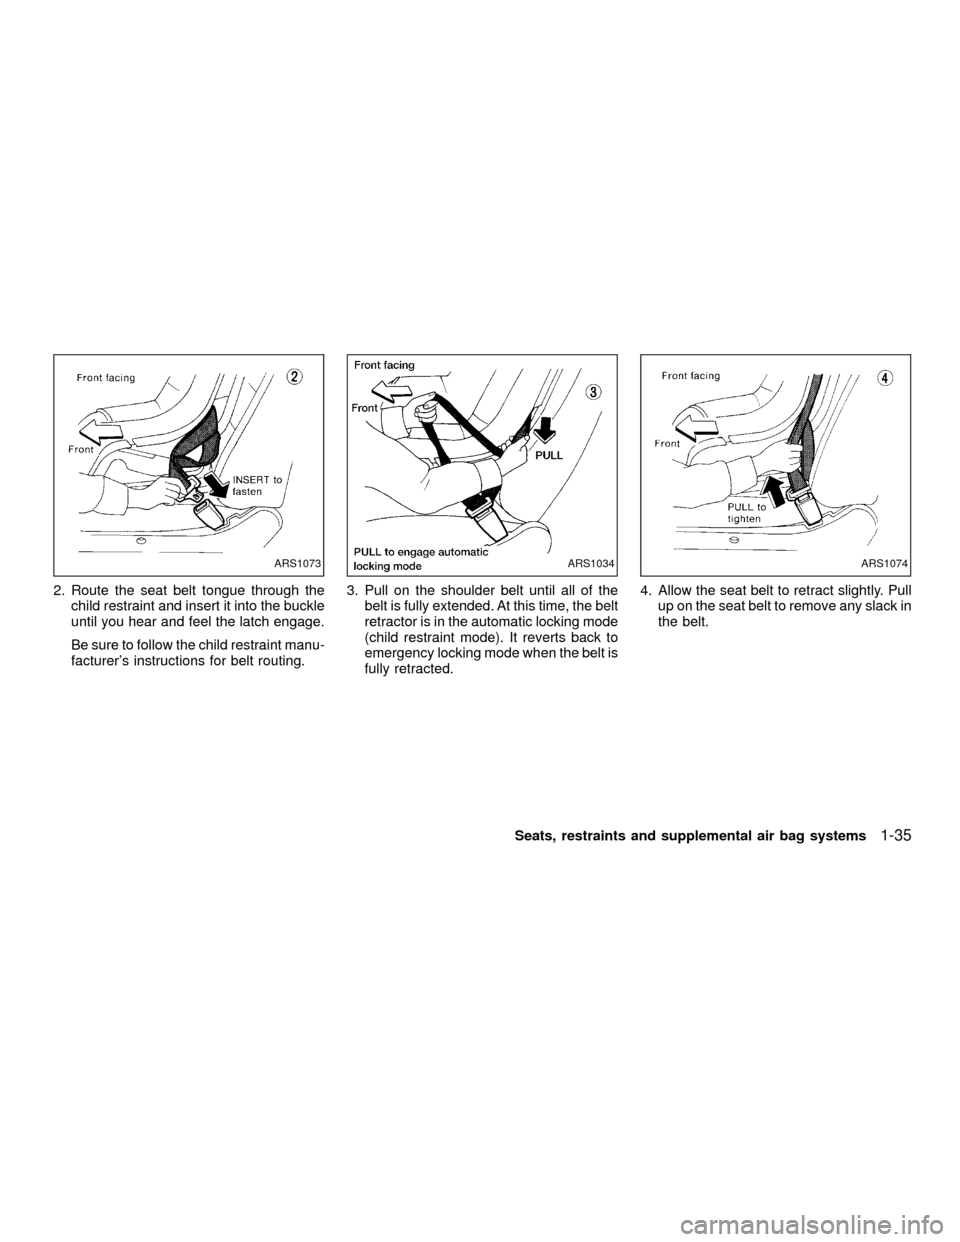
2. Route the seat belt tongue through the
child restraint and insert it into the buckle
until you hear and feel the latch engage.
Be sure to follow the child restraint manu-
facturer's instructions for belt routing.3. Pull on the shoulder belt until all of the
belt is fully extended. At this time, the belt
retractor is in the automatic locking mode
(child restraint mode). It reverts back to
emergency locking mode when the belt is
fully retracted.4. Allow the seat belt to retract slightly. Pull
up on the seat belt to remove any slack in
the belt.
ARS1073ARS1034ARS1074
Seats, restraints and supplemental air bag systems1-35
ZX
Page 43 of 263
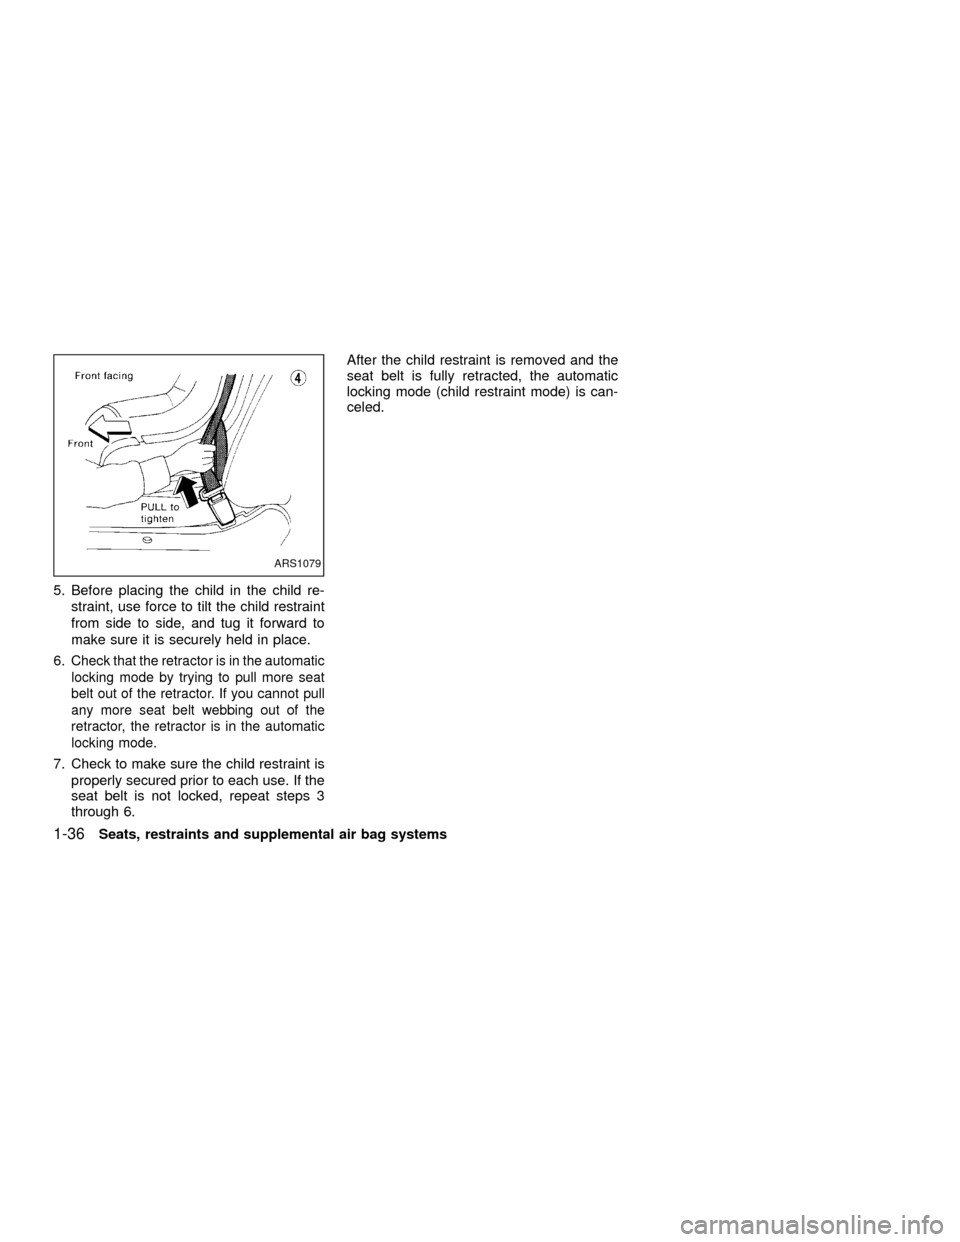
5. Before placing the child in the child re-
straint, use force to tilt the child restraint
from side to side, and tug it forward to
make sure it is securely held in place.
6.
Check that the retractor is in the automatic
locking mode by trying to pull more seat
belt out of the retractor. If you cannot pull
any more seat belt webbing out of the
retractor, the retractor is in the automatic
locking mode.
7. Check to make sure the child restraint is
properly secured prior to each use. If the
seat belt is not locked, repeat steps 3
through 6.After the child restraint is removed and the
seat belt is fully retracted, the automatic
locking mode (child restraint mode) is can-
celed.
ARS1079
1-36Seats, restraints and supplemental air bag systems
ZX
Page 70 of 263
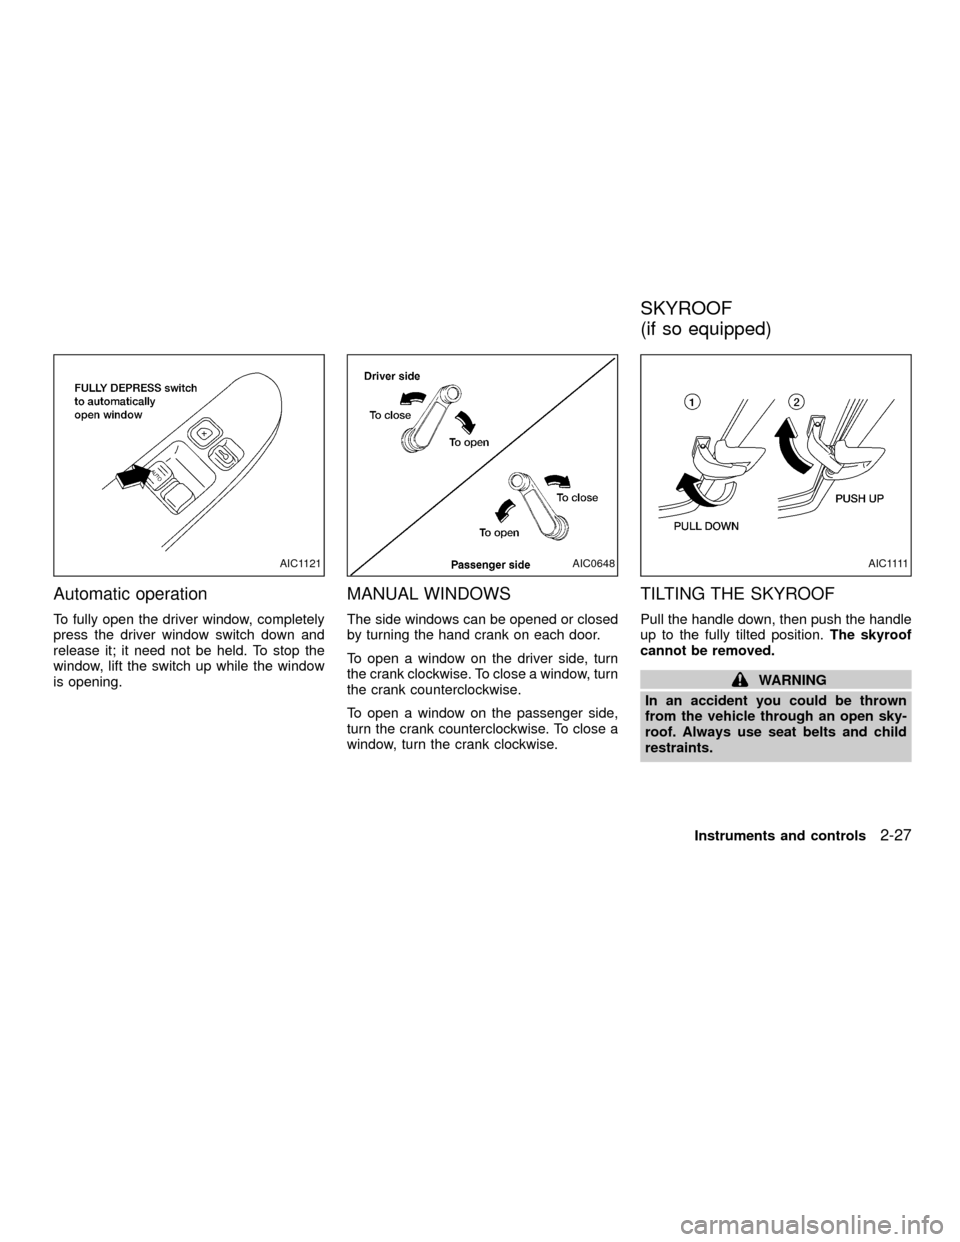
Automatic operation
To fully open the driver window, completely
press the driver window switch down and
release it; it need not be held. To stop the
window, lift the switch up while the window
is opening.
MANUAL WINDOWS
The side windows can be opened or closed
by turning the hand crank on each door.
To open a window on the driver side, turn
the crank clockwise. To close a window, turn
the crank counterclockwise.
To open a window on the passenger side,
turn the crank counterclockwise. To close a
window, turn the crank clockwise.
TILTING THE SKYROOF
Pull the handle down, then push the handle
up to the fully tilted position.The skyroof
cannot be removed.
WARNING
In an accident you could be thrown
from the vehicle through an open sky-
roof. Always use seat belts and child
restraints.
AIC1121AIC0648A I C 1111
SKYROOF
(if so equipped)
Instruments and controls2-27
ZX
Page 256 of 263
11 Index
A
Air bag (See supplemental restraint
system) ........................................................ 1-9
Air bag warning light .................................. 1-13
Air cleaner housing filter ............................ 8-20
Air conditioner
Air conditioner operation ........................ 4-5
Air conditioner service ............................ 4-9
Air conditioner specification label ....... 10-14
Air conditioner system refrigerant and
lubrication recommendations ................ 10-8
Heater and air conditioner controls ........ 4-3
Air flow charts .............................................. 4-6
Alarm system (See theft warning) ............. 2-12
Anchor point locations ............................... 1-33
Antenna...................................................... 4-37
Anti-lock brake system (ABS).................... 5-24
Anti-lock brake warning light ....................... 2-8
Ashtray (See cigarette lighter and
ashtray) ...................................................... 2-20
Audio system
FM-AM radio with cassette player and
compact disc (CD) player ..................... 4-17
FM-AM radio with compact disc (CD)
changer ................................................. 4-24
FM-AM radio with compact disc (CD)
player .................................................... 4-10
Steering wheel audio control switch ..... 4-37Auto-lock free-running hubs ...................... 5-19
Automatic
Automatic power window switch .......... 2-27
Automatic transmission fluid (ATF)....... 8-13
Driving with automatic transmission ....... 5-9
Transmission selector lever lock
release .................................................. 5-12
B
Battery........................................................ 8-16
Battery replacement (See multi-remote
control system) ............................................ 3-7
Before starting the engine ........................... 5-8
Belts (See drive belts) ............................... 8-18
Brake
Anti-lock brake system (ABS) .............. 5-24
Brake booster ....................................... 8-25
Brake fluid ................................... 10-3, 8-15
Brake pedal .......................................... 8-24
Brake system ........................................ 5-23
Brake warning light ................................. 2-8
Brake wear indicators .................. 2-11, 8-25
Parking brake check ............................. 8-24
Parking brake operation ....................... 5-14
Break-in schedule ...................................... 5-17
Bulb check/instrument panel ....................... 2-7C
Capacities and recommended fuel/
lubricants.................................................... 10-2
Car phone or CB radio .............................. 4-38
Cargo (See vehicle loading
information) .............................................. 10-15
Check engine indicator light
(See malfunction indicator light) ................ 2-11
Child restraint with top tether strap ........... 1-32
Child restraints ........................................... 1-22
Child safety rear door lock .......................... 3-4
Cigarette lighter (accessory) and
ashtray ....................................................... 2-20
Cleaning exterior and interior ...................... 7-2
Clock .......................................................... 4-12
Clutch
Clutch fluid ............................................ 8-15
Clutch pedal.......................................... 8-26
Cold weather driving .................................. 5-25
Controls
Audio controls (steering wheel) ............ 4-37
Heater and air conditioner controls ........ 4-3
Coolant
Capacities and recommended fuel/
lubricants .............................................. 10-2
Changing engine coolant........................ 8-6
Checking engine coolant level ............... 8-5
ZX