2001 NISSAN XTERRA check engine light
[x] Cancel search: check engine lightPage 135 of 263

ON (Normal operating position) (3)
This position turns on the ignition system
and electrical accessories.
START (4)
This position starts the engine. As soon as
the engine has started, release the key. It
automatically returns to the ON position.OMake sure the area around the vehicle is
clear.
OCheck fluid levels such as engine oil,
coolant, brake and clutch fluid, and win-
dow washer fluid as frequently as pos-
sible, at least whenever you refuel.
OCheck that all windows and lights are
clean.
OVisually inspect tires for their appearance
and condition. Also check tires for proper
inflation.
OLock all doors.
OPosition seat and adjust head restraints.
OAdjust inside and outside mirrors.
OFasten seat belts and ask all passengers
to do likewise.
OCheck the operation of warning lights
when key is turned to the ON (3) position.
See9Warning/Indicator lights and
chimes9in the9Instruments and controls9
section.1. Apply the parking brake.
2.Automatic transmission:
Move the selector lever to P (Park) or N
(Neutral). P (Park) is preferred.
The shift lever cannot be moved out of
P (Park) and into any of the other gear
positions if the ignition key is turned
to OFF or if the key is removed from
the ignition switch.
The starter is designed not to operate
if the selector lever is in one of the
driving positions.
Manual transmission:
Move the gearshift lever to N (Neutral),
and fully depress the clutch pedal to the
floor while starting the engine.
The starter is designed not to operate
unless the clutch pedal is fully de-
pressed.
3.With your foot off the accelerator
pedal,turn the ignition key to START.
Release the key when the engine starts.
If the engine starts, but fails to run, repeat
the above procedure.
BEFORE STARTING THE
ENGINESTARTING THE ENGINE
5-8Starting and driving
ZX
Page 176 of 263

8 Do-it-yourself
Maintenance precautions .......................................8-2
Engine compartment check locations ....................8-3
Engine cooling system ...........................................8-5
Checking engine coolant level ..........................8-5
Changing engine coolant ..................................8-6
Engine oil ...............................................................8-9
Checking engine oil level ..................................8-9
Changing engine oil ........................................8-10
Changing engine oil filter.................................8-12
Automatic transmission fluid ................................8-13
Temperature conditions for checking ..............8-13
Power steering fluid..............................................8-14
Brake and clutch fluid...........................................8-15
Window washer fluid ............................................8-16
Window washer fluid reservoir ........................8-16
Battery ..................................................................8-16
Jump starting ...................................................8-17
Drive belts ............................................................8-18
Spark plugs ..........................................................8-19
Replacing spark plugs .....................................8-19
Air cleaner ............................................................8-20Windshield wiper blades ......................................8-22
Cleaning ..........................................................8-22
Replacing .........................................................8-22
Parking brake and brake pedal ............................8-24
Checking parking brake...................................8-24
Checking brake pedal .....................................8-24
Brake booster ..................................................8-25
Clutch pedal .........................................................8-26
Checking clutch pedal .....................................8-26
Fuses ....................................................................8-27
Passenger compartment .................................8-27
Multi-remote controller battery replacement ........8-28
Lights ....................................................................8-29
Headlights ........................................................8-29
Fog lights (if so equipped)...............................8-31
Exterior and interior lights ...............................8-32
Wheels and tires ..................................................8-34
Tire pressure ...................................................8-34
Types of tires ...................................................8-34
Tire chains .......................................................8-35
Changing wheels and tires ..............................8-36
ZX
Page 187 of 263
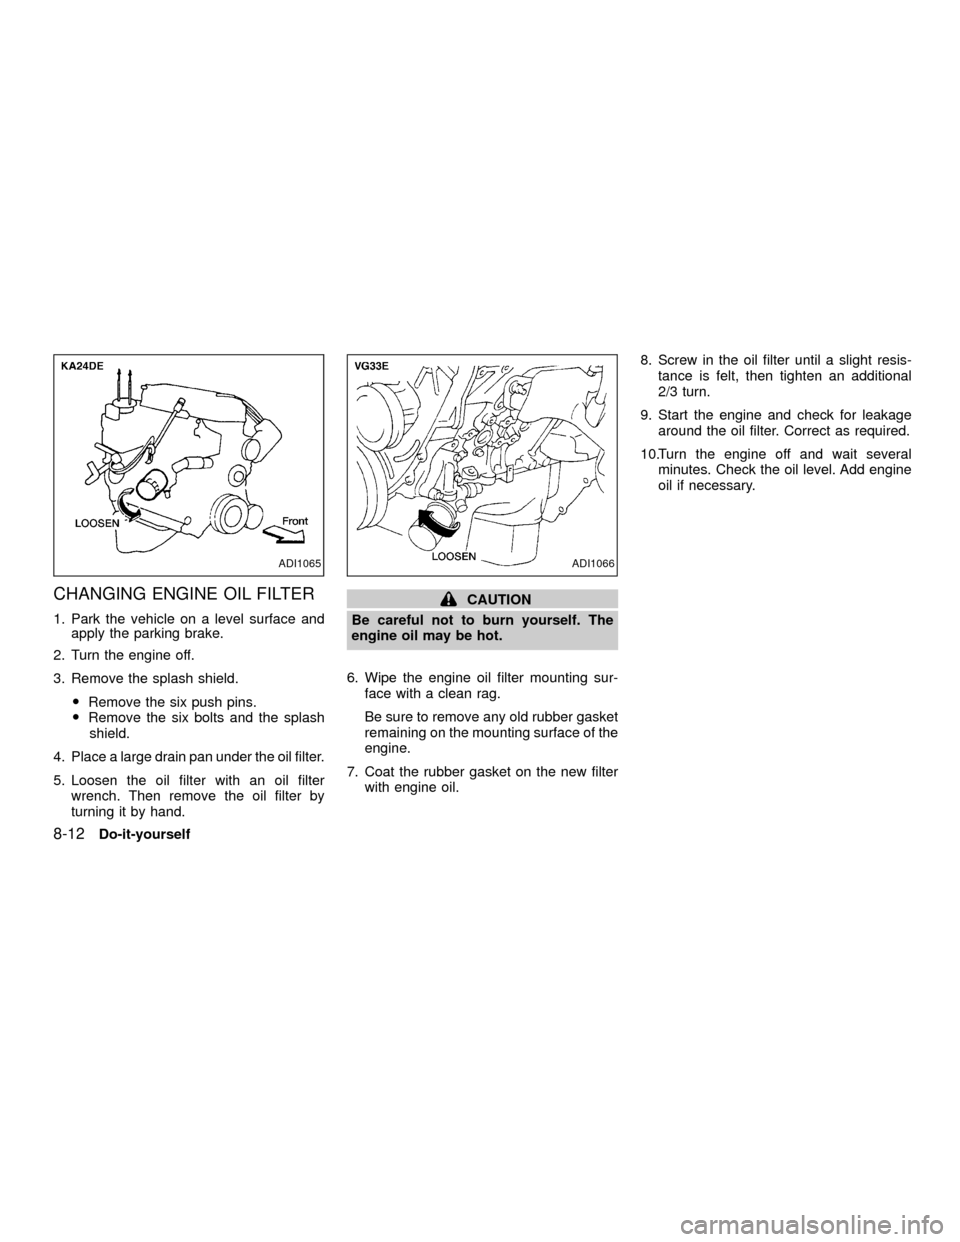
CHANGING ENGINE OIL FILTER
1. Park the vehicle on a level surface and
apply the parking brake.
2. Turn the engine off.
3. Remove the splash shield.
ORemove the six push pins.
ORemove the six bolts and the splash
shield.
4. Place a large drain pan under the oil filter.
5. Loosen the oil filter with an oil filter
wrench. Then remove the oil filter by
turning it by hand.
CAUTION
Be careful not to burn yourself. The
engine oil may be hot.
6. Wipe the engine oil filter mounting sur-
face with a clean rag.
Be sure to remove any old rubber gasket
remaining on the mounting surface of the
engine.
7. Coat the rubber gasket on the new filter
with engine oil.8. Screw in the oil filter until a slight resis-
tance is felt, then tighten an additional
2/3 turn.
9. Start the engine and check for leakage
around the oil filter. Correct as required.
10.Turn the engine off and wait several
minutes. Check the oil level. Add engine
oil if necessary.
ADI1065ADI1066
8-12Do-it-yourself
ZX
Page 191 of 263
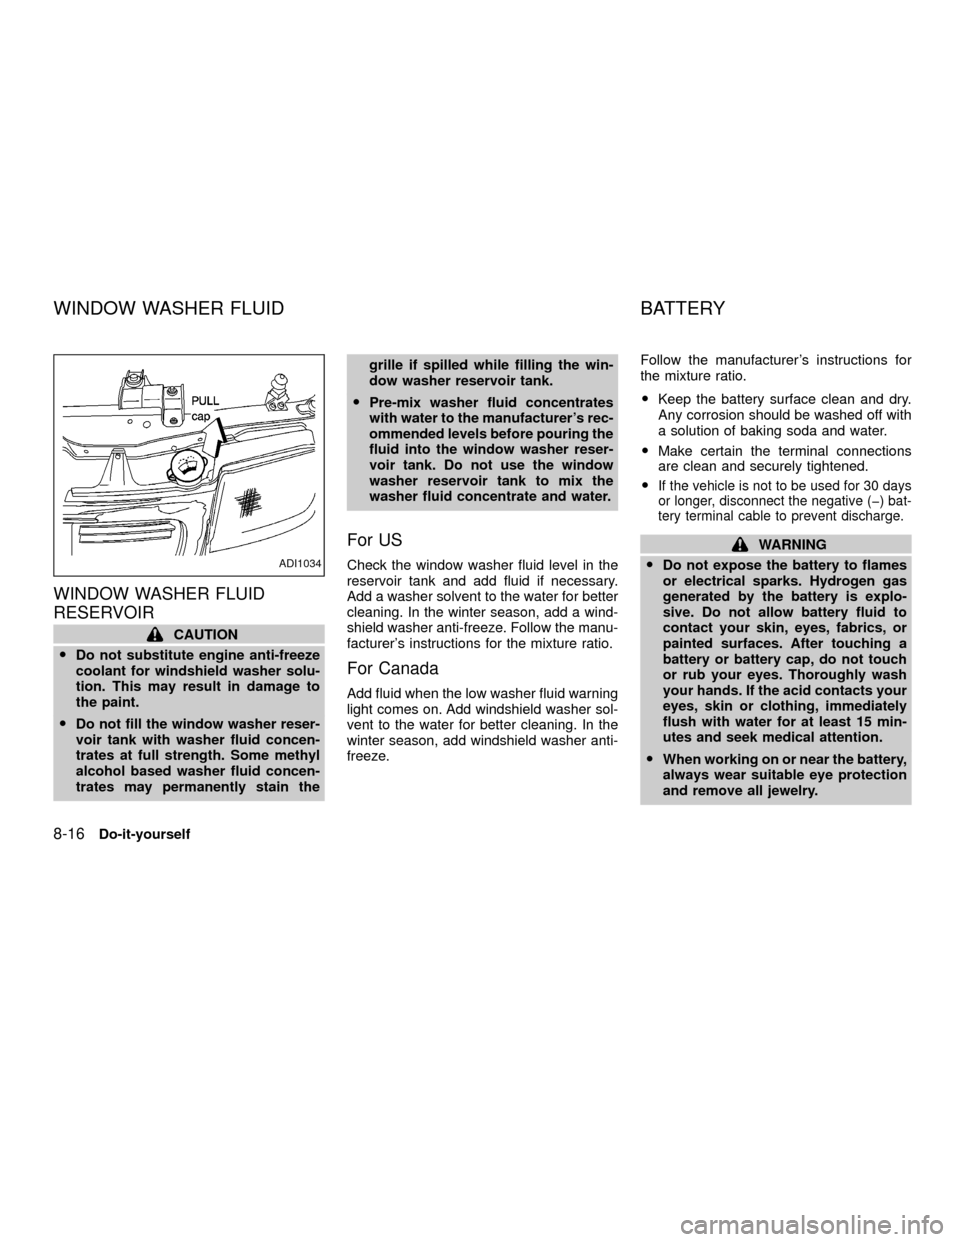
WINDOW WASHER FLUID
RESERVOIR
CAUTION
ODo not substitute engine anti-freeze
coolant for windshield washer solu-
tion. This may result in damage to
the paint.
ODo not fill the window washer reser-
voir tank with washer fluid concen-
trates at full strength. Some methyl
alcohol based washer fluid concen-
trates may permanently stain thegrille if spilled while filling the win-
dow washer reservoir tank.
OPre-mix washer fluid concentrates
with water to the manufacturer's rec-
ommended levels before pouring the
fluid into the window washer reser-
voir tank. Do not use the window
washer reservoir tank to mix the
washer fluid concentrate and water.
For US
Check the window washer fluid level in the
reservoir tank and add fluid if necessary.
Add a washer solvent to the water for better
cleaning. In the winter season, add a wind-
shield washer anti-freeze. Follow the manu-
facturer's instructions for the mixture ratio.
For Canada
Add fluid when the low washer fluid warning
light comes on. Add windshield washer sol-
vent to the water for better cleaning. In the
winter season, add windshield washer anti-
freeze.Follow the manufacturer's instructions for
the mixture ratio.
OKeep the battery surface clean and dry.
Any corrosion should be washed off with
a solution of baking soda and water.
OMake certain the terminal connections
are clean and securely tightened.
O
If the vehicle is not to be used for 30 days
or longer, disconnect the negative (þ) bat-
tery terminal cable to prevent discharge.
WARNING
ODo not expose the battery to flames
or electrical sparks. Hydrogen gas
generated by the battery is explo-
sive. Do not allow battery fluid to
contact your skin, eyes, fabrics, or
painted surfaces. After touching a
battery or battery cap, do not touch
or rub your eyes. Thoroughly wash
your hands. If the acid contacts your
eyes, skin or clothing, immediately
flush with water for at least 15 min-
utes and seek medical attention.
OWhen working on or near the battery,
always wear suitable eye protection
and remove all jewelry.
ADI1034
WINDOW WASHER FLUID BATTERY
8-16Do-it-yourself
ZX
Page 200 of 263
Self-adjusting brakes
Your vehicle is equipped with self-adjusting
brakes.
The front disc-type brakes self-adjust every
time the brake pedal is applied. The rear
drum-type brakes on two-wheel drive trucks
self-adjust every time the parking brake is
applied. The rear drum-type brakes on four-
wheel drive trucks self-adjust every time the
brake pedal is applied. If the brake pedal
goes down farther than normal, it may be
due to a lack of adjustment of the rear drum
brakes. Apply the parking brake several
times.
WARNING
If the brake pedal height does not re-
turn to normal, see an authorized NIS-
SAN dealer and have it checked.
Brake pad wear indicators
The disc brake pads on your vehicle have
audible wear indicators. When a brake pad
requires replacement, it will make a high
pitched scraping or screeching sound when
the vehicle is in motion whether or not the
brake pedal is depressed. Have the brakeschecked as soon as possible if the wear
indicator sound is heard.
Under some driving or climate conditions,
occasional brake squeak, squeal or other
noise may be heard. Occasional brake
noise during light to moderate stops is nor-
mal and does not affect the function or
performance of the brake system.
The rear drum brakes (if so equipped) do
not have audible wear indicators. Should
you ever hear an unusually loud noise from
the rear drum brakes, have them inspected
as soon as possible by an authorized NIS-
SAN dealer.
Proper brake inspection intervals should
be followed.For more information regard-
ing brake inspections, see the appropriate
maintenance schedule information in the
``Maintenance Schedule'' section of this
manual.
BRAKE BOOSTER
Check the brake booster function with the
following steps:
1. With the engine off, press and release
the brake pedal several times. When
brake pedal movement (distance oftravel) remains the same from one pedal
application to the next, continue on to
next step.
2. While depressing the brake pedal, start
the engine. The pedal height should drop
a little.
3. With the brake pedal depressed, stop the
engine. Keeping the pedal depressed for
about 30 seconds, the pedal height
should not change.
4. Run the engine for one minute without
depressing the brake pedal, then turn it
off. Depress the brake pedal several
times. The pedal travel distance will de-
crease gradually with each depression
as the vacuum is released from the
booster.
If the brakes do not operate properly, have
the brakes checked by an authorized
NISSAN dealer.
Do-it-yourself
8-25
ZX
Page 230 of 263
![NISSAN XTERRA 2001 WD22 / 1.G Owners Manual ever, you may use unleaded gasoline with
an octane rating as low as 85 AKI in high
altitude areas (over 4,000 ft [1,219 m]) such
as: Colorado, Montana, New Mexico, Utah,
Wyoming, northeastern Nevada, NISSAN XTERRA 2001 WD22 / 1.G Owners Manual ever, you may use unleaded gasoline with
an octane rating as low as 85 AKI in high
altitude areas (over 4,000 ft [1,219 m]) such
as: Colorado, Montana, New Mexico, Utah,
Wyoming, northeastern Nevada,](/manual-img/5/650/w960_650-229.png)
ever, you may use unleaded gasoline with
an octane rating as low as 85 AKI in high
altitude areas (over 4,000 ft [1,219 m]) such
as: Colorado, Montana, New Mexico, Utah,
Wyoming, northeastern Nevada, southern
Idaho, western South Dakota, western Ne-
braska, and the part of Texas which is
directly south of New Mexico.
Using unleaded gasoline with an octane
rating lower than stated above can cause
persistent, heavy ``spark knock.'' (``Spark
knock'' is a metallic rapping noise.) If
severe, this can lead to engine damage. If
you detect a persistent heavy spark
knock even when using gasoline of the
stated octane rating, or if you hear steady
spark knock while holding a steady speed
on level roads, have an authorized NIS-
SAN dealer correct the condition. Failure
to correct the condition is misuse of the
vehicle, for which NISSAN is not respon-
sible.
Incorrect ignition timing may result in spark
knock, after-run and/or overheating, which
may cause excessive fuel consumption or
engine damage. If any of the above symp-
toms are encountered, have your vehicle
checked at an authorized NISSAN dealer.However, now and then you may notice
light spark knock for a short time while
accelerating or driving up hills. This is
no cause for concern, because you get
the greatest fuel benefit when there is
light spark knock for a short time under
heavy engine load.
Technical and consumer information
10-5
ZX
Page 249 of 263
4) Connect the tow harness connector
(SAE J1239) to your trailer.
5) Confirm proper vehicle and trailer
stop/turn lamp operation.
6) When towing is completed, disconnect
the tow harness from the trailer and the
vehicle. Store the tow harness in the
glove box. Reinstall the connector cap to
the vehicle harness.
If you need further assistance in wiring
a trailer to your NISSAN, contact an autho-
rized NISSAN dealer.
Always confirm proper vehicle and
trailer stop/turn lamp operation every
time the trailer light circuits are con-
nected for use.
Trailer brakes
If your trailer is equipped with a braking
system, make sure it conforms to Federal
and/or local regulations and that it is prop-
erly installed.
WARNING
Never connect a trailer brake system
directly to the vehicle brake system.
Pre-towing tips
OBe certain your vehicle maintains a level
position when a loaded and/or unloaded
trailer is hitched. Do not drive the vehicle
if it has an abnormal nose-up or nose-
down condition; check for improper
tongue load, overload, worn suspension
or other possible causes of either condi-
tion.
OAlways secure items in the trailer to
prevent load shift while driving.
OBe certain your outside mirrors conform
to all federal, state or local regulations. If
not, install any mirrors required for towing
before driving the vehicle.
Trailer towing tips
In order to gain skill and an understanding
of the vehicle's behavior, you should prac-
tice turning, stopping and backing up in an
area which is free from traffic. Steering,
stability and braking performance will be
somewhat different than under normal driv-
ing conditions.
OAlways secure items in the trailer to
prevent load shift while driving.
O
Avoid abrupt starts, acceleration or stops.
OAvoid sharp turns or lane changes.
OAlways drive your vehicle at a moderate
speed.
OAlways block the wheels on both vehicle
and trailer when parking. Parking on a
slope is not recommended; however, if
you must do so, and if your vehicle is
equipped with automatic transmission,
first block the wheels and apply the park-
ing brake, and then move the transmis-
sion shift selector lever into the P (Park)
position. If you move the shift lever to the
P (Park) position before blocking the
wheels and applying the parking brake,
transmission damage could occur.
OWhen going down a hill, shift into a lower
gear and use the engine braking effect.
When ascending a long grade, downshift
the transmission to a lower gear and
reduce speed to reduce chances of en-
gine overloading and/or overheating.
However, for long steep grades, do not
stay in 1st or 2nd gear when driving
above 35 MPH (56 km/h).
OIf the engine coolant rises to an ex-
tremely high temperature when the air
conditioning system is on, turn off the air
conditioner. Coolant heat can be addi-
10-24Technical and consumer information
ZX
Page 256 of 263
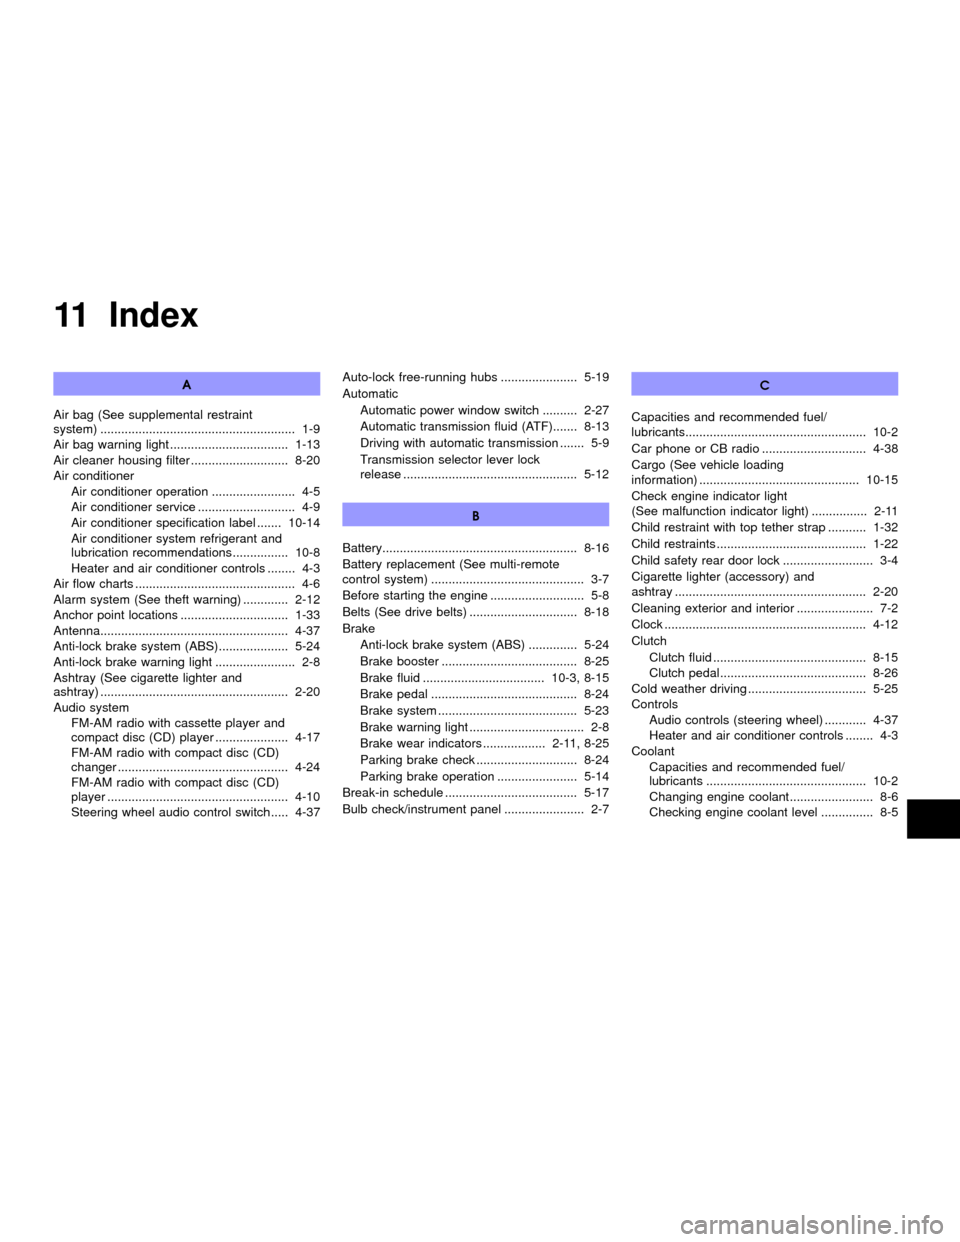
11 Index
A
Air bag (See supplemental restraint
system) ........................................................ 1-9
Air bag warning light .................................. 1-13
Air cleaner housing filter ............................ 8-20
Air conditioner
Air conditioner operation ........................ 4-5
Air conditioner service ............................ 4-9
Air conditioner specification label ....... 10-14
Air conditioner system refrigerant and
lubrication recommendations ................ 10-8
Heater and air conditioner controls ........ 4-3
Air flow charts .............................................. 4-6
Alarm system (See theft warning) ............. 2-12
Anchor point locations ............................... 1-33
Antenna...................................................... 4-37
Anti-lock brake system (ABS).................... 5-24
Anti-lock brake warning light ....................... 2-8
Ashtray (See cigarette lighter and
ashtray) ...................................................... 2-20
Audio system
FM-AM radio with cassette player and
compact disc (CD) player ..................... 4-17
FM-AM radio with compact disc (CD)
changer ................................................. 4-24
FM-AM radio with compact disc (CD)
player .................................................... 4-10
Steering wheel audio control switch ..... 4-37Auto-lock free-running hubs ...................... 5-19
Automatic
Automatic power window switch .......... 2-27
Automatic transmission fluid (ATF)....... 8-13
Driving with automatic transmission ....... 5-9
Transmission selector lever lock
release .................................................. 5-12
B
Battery........................................................ 8-16
Battery replacement (See multi-remote
control system) ............................................ 3-7
Before starting the engine ........................... 5-8
Belts (See drive belts) ............................... 8-18
Brake
Anti-lock brake system (ABS) .............. 5-24
Brake booster ....................................... 8-25
Brake fluid ................................... 10-3, 8-15
Brake pedal .......................................... 8-24
Brake system ........................................ 5-23
Brake warning light ................................. 2-8
Brake wear indicators .................. 2-11, 8-25
Parking brake check ............................. 8-24
Parking brake operation ....................... 5-14
Break-in schedule ...................................... 5-17
Bulb check/instrument panel ....................... 2-7C
Capacities and recommended fuel/
lubricants.................................................... 10-2
Car phone or CB radio .............................. 4-38
Cargo (See vehicle loading
information) .............................................. 10-15
Check engine indicator light
(See malfunction indicator light) ................ 2-11
Child restraint with top tether strap ........... 1-32
Child restraints ........................................... 1-22
Child safety rear door lock .......................... 3-4
Cigarette lighter (accessory) and
ashtray ....................................................... 2-20
Cleaning exterior and interior ...................... 7-2
Clock .......................................................... 4-12
Clutch
Clutch fluid ............................................ 8-15
Clutch pedal.......................................... 8-26
Cold weather driving .................................. 5-25
Controls
Audio controls (steering wheel) ............ 4-37
Heater and air conditioner controls ........ 4-3
Coolant
Capacities and recommended fuel/
lubricants .............................................. 10-2
Changing engine coolant........................ 8-6
Checking engine coolant level ............... 8-5
ZX