2001 NISSAN XTERRA key battery
[x] Cancel search: key batteryPage 72 of 263
4. Align the two lock bolts on the rear edge
of sun shade with the lock nuts. Turn
each lock bolt clockwise to securely lock
the sun shade in place.
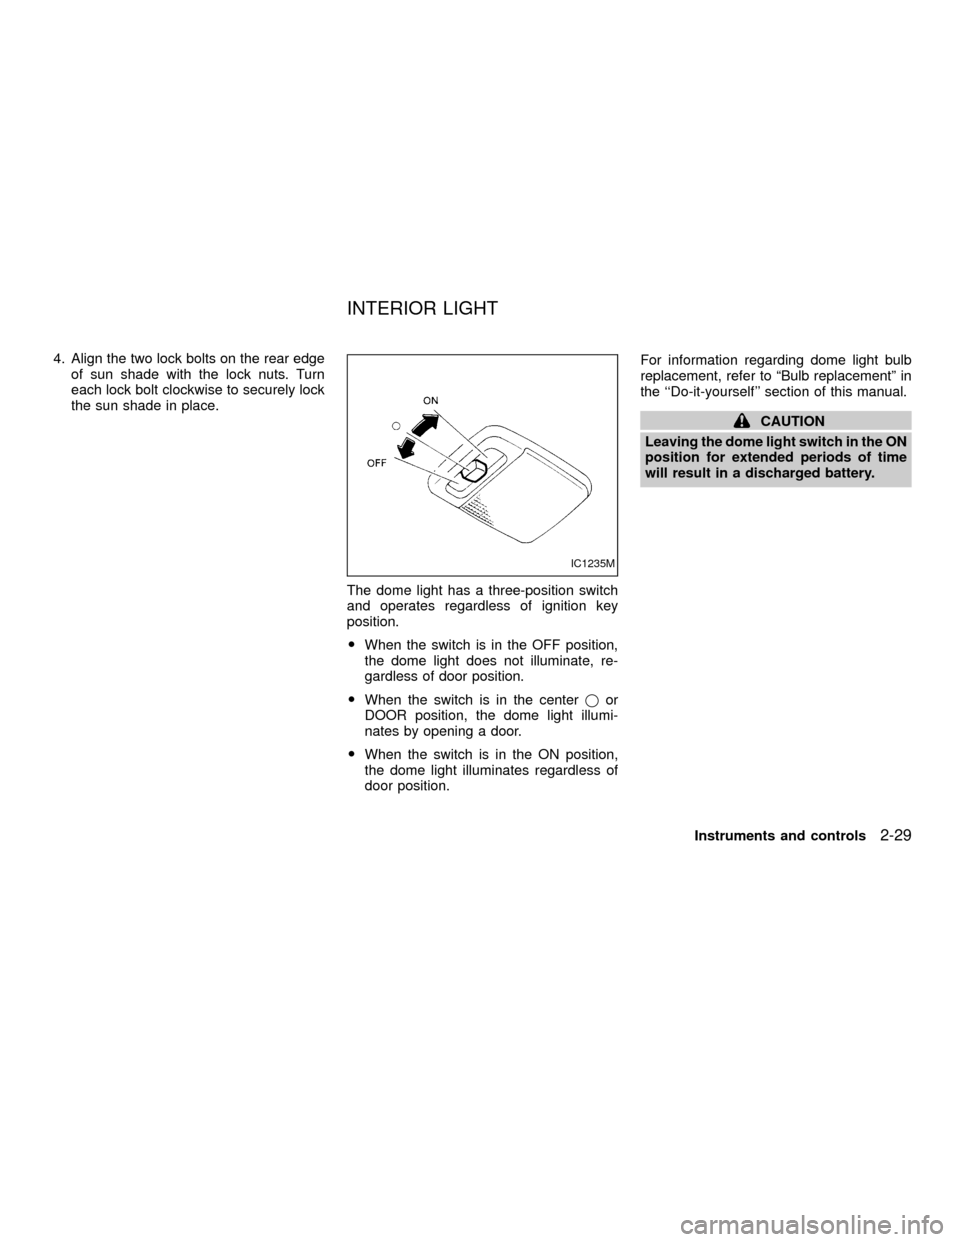
The dome light has a three-position switch
and operates regardless of ignition key
position.
OWhen the switch is in the OFF position,
the dome light does not illuminate, re-
gardless of door position.
OWhen the switch is in the centerjor
DOOR position, the dome light illumi-
nates by opening a door.
OWhen the switch is in the ON position,
the dome light illuminates regardless of
door position.For information regarding dome light bulb
replacement, refer to ªBulb replacementº in
the ``Do-it-yourself'' section of this manual.
CAUTION
Leaving the dome light switch in the ON
position for extended periods of time
will result in a discharged battery.
IC1235M
INTERIOR LIGHT
Instruments and controls2-29
ZX
Page 73 of 263
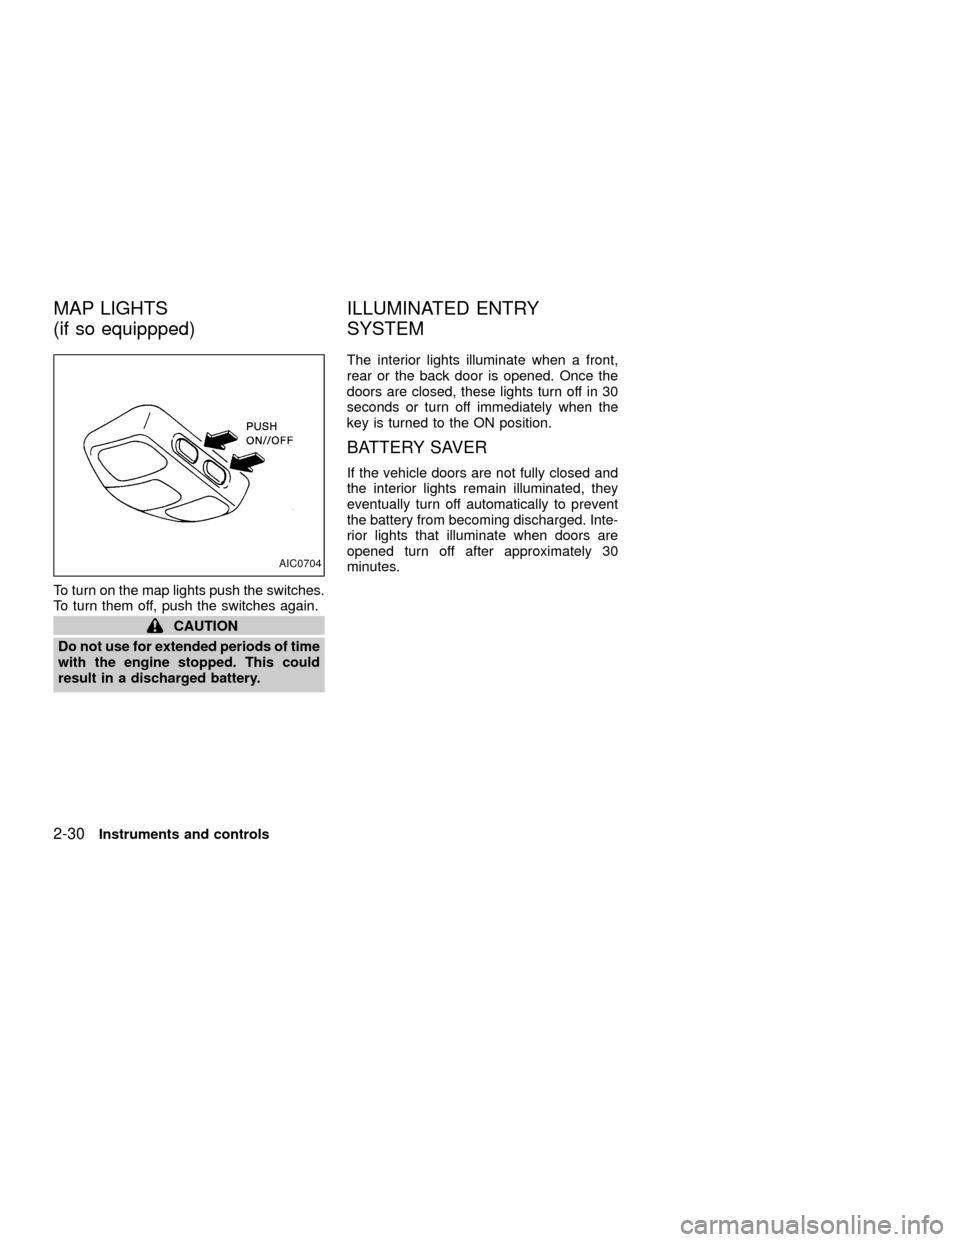
To turn on the map lights push the switches.
To turn them off, push the switches again.
CAUTION
Do not use for extended periods of time
with the engine stopped. This could
result in a discharged battery.The interior lights illuminate when a front,
rear or the back door is opened. Once the
doors are closed, these lights turn off in 30
seconds or turn off immediately when the
key is turned to the ON position.
BATTERY SAVER
If the vehicle doors are not fully closed and
the interior lights remain illuminated, they
eventually turn off automatically to prevent
the battery from becoming discharged. Inte-
rior lights that illuminate when doors are
opened turn off after approximately 30
minutes.
AIC0704
MAP LIGHTS
(if so equippped)ILLUMINATED ENTRY
SYSTEM
2-30Instruments and controls
ZX
Page 74 of 263

3 Pre-driving checks and adjustments
Key .........................................................................3-2
Doors ......................................................................3-2
Locking with key ................................................3-2
Locking with inside lock knob............................3-3
Locking with power door lock switch.................3-3
Child safety rear door lock ................................3-4
Multi-remote control system (if so equipped).........3-4
How to use multi-remote control system...........3-4
Battery replacement ..........................................3-7
Hood .......................................................................3-8
Rear door ...............................................................3-9
Roof rack with gear basket (if so equipped) ........3-10Step rail ................................................................3-12
Fuel filler lid ..........................................................3-13
Fuel filler cap ...................................................3-13
Steering wheel .....................................................3-14
Tilt operation ....................................................3-14
Sun visors.............................................................3-14
Vanity mirror ....................................................3-14
Mirrors ..................................................................3-15
Inside mirror.....................................................3-15
Outside mirrors ................................................3-15
Outside mirror remote control
(if so equipped)................................................3-16
ZX
Page 103 of 263
SCAN tuning
Push the SEEK/SCAN tuning button
or
for more than 1.5 seconds. SCAN ap-
pears in the display window. SCAN tuning
begins from high to low frequencies or low
to high frequencies, depending on which
button is pressed. SCAN tuning stops at
each broadcasting station for five seconds.
Pushing the button again during this five
second period stops SCAN tuning and the
radio remains tuned to that station.
Station memory operations
Six stations can be set for the AM band. 12
stations can be set for the FM band (six for
FM1, six for FM2).
1. Push band select button (FM/AM) to se-
lect AM, FM1, or FM2. The selected band
illuminates in the display.
2. Tune to the desired station.
3. Push the desired station select button for
more than 1.5 seconds. The radio mutes
when the select button is pushed.
4. When the indicator illuminates in the
display and the sound resumes, memo-
rizing is complete.5. Other station select buttons can be set in
the same manner.If the battery cable is disconnected, or if the
radio fuse opens, the radio memory is can-
celled. In that case, reset the desired stations.
COMPACT DISC (CD) player op-
eration
Turn the ignition key to the ACC or ON
position, and carefully insert the compact
disc into the slot with the label side up. The
compact disc is automatically pulled into the
slot and starts to play.
If the radio is already operating, it automati-
cally turns off and the compact disc begins
to play.
CAUTION
Do not force the compact disc into the
slot. This could damage the player.
CD button
When this button is pushed with the compact
disc loaded and the radio playing, the radio
turns off and the compact disc starts to play.
When power/volume control knob is pushedwhile the compact disc is playing, the com-
pact disc stops playing.
FF (Fast forward), REW
(Rewind)
When the
orbutton is pushed
while the compact disc is playing, the com-
pact disc plays at an increased speed while
fast forwarding or rewinding. When the but-
ton is released, the compact disc returns to
normal play speed.
APS (Automatic Program
Search) FF, APS REW
When thebutton is pushed while the
compact disc is playing, the selection fol-
lowing the present one starts to play from
the beginning. Push or hold the
but-
ton several times to skip several selections.
Each time the button is pushed, the CD
advances one selection. (When the last
selection on the compact disc is skipped,
the first selection is played.)
When thebutton is pushed, the selec-
tion being played returns to the beginning.
Push or hold the
button several
times to skip back several selections. Each
4-14Heater, air conditioner and audio systems
ZX
Page 109 of 263
Station memory operations
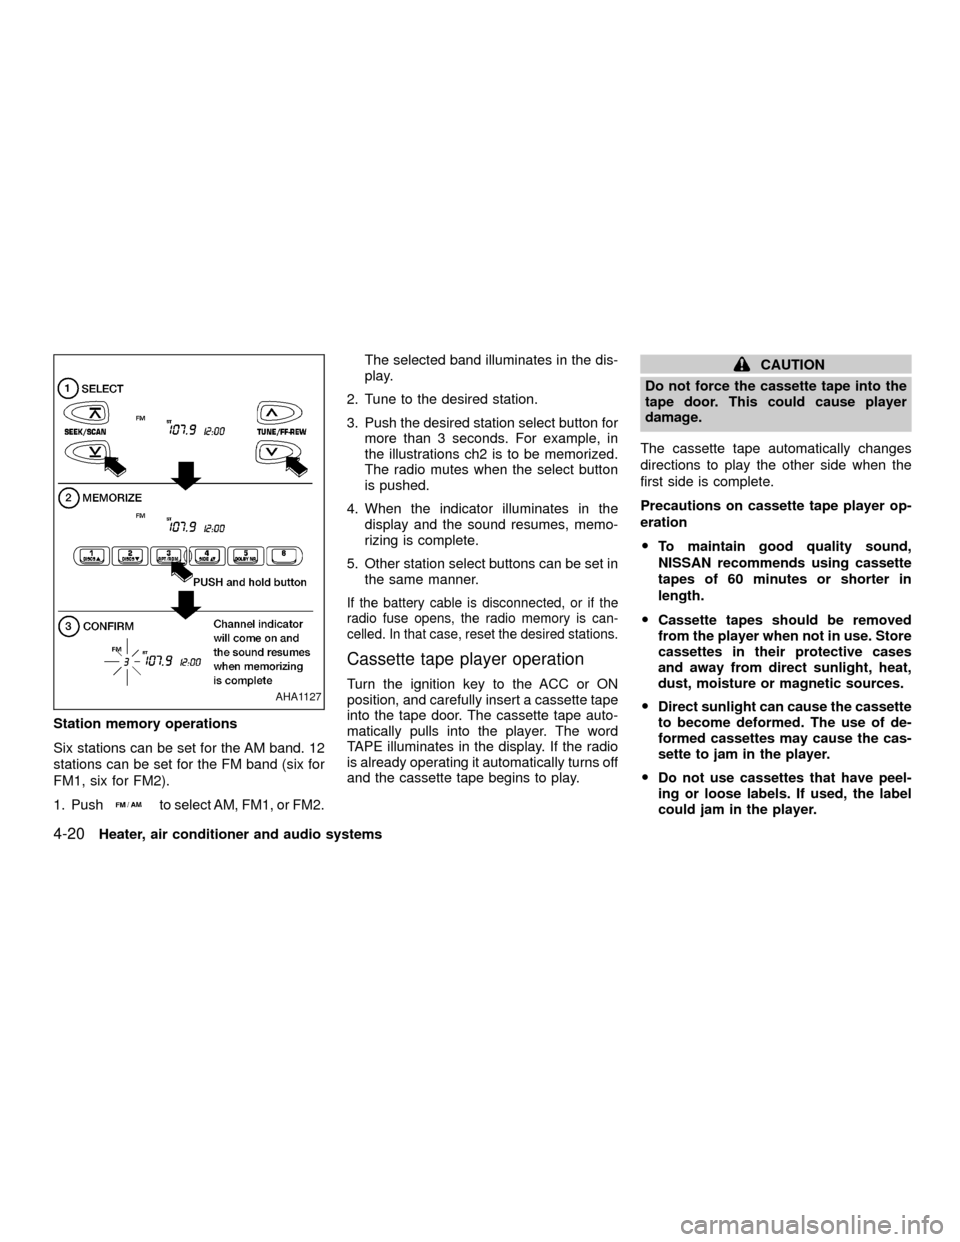
Six stations can be set for the AM band. 12
stations can be set for the FM band (six for
FM1, six for FM2).
1. Push
to select AM, FM1, or FM2.The selected band illuminates in the dis-
play.
2. Tune to the desired station.
3. Push the desired station select button for
more than 3 seconds. For example, in
the illustrations ch2 is to be memorized.
The radio mutes when the select button
is pushed.
4. When the indicator illuminates in the
display and the sound resumes, memo-
rizing is complete.
5. Other station select buttons can be set in
the same manner.
If the battery cable is disconnected, or if the
radio fuse opens, the radio memory is can-
celled. In that case, reset the desired stations.
Cassette tape player operation
Turn the ignition key to the ACC or ON
position, and carefully insert a cassette tape
into the tape door. The cassette tape auto-
matically pulls into the player. The word
TAPE illuminates in the display. If the radio
is already operating it automatically turns off
and the cassette tape begins to play.
CAUTION
Do not force the cassette tape into the
tape door. This could cause player
damage.
The cassette tape automatically changes
directions to play the other side when the
first side is complete.
Precautions on cassette tape player op-
eration
OTo maintain good quality sound,
NISSAN recommends using cassette
tapes of 60 minutes or shorter in
length.
OCassette tapes should be removed
from the player when not in use. Store
cassettes in their protective cases
and away from direct sunlight, heat,
dust, moisture or magnetic sources.
ODirect sunlight can cause the cassette
to become deformed. The use of de-
formed cassettes may cause the cas-
sette to jam in the player.
ODo not use cassettes that have peel-
ing or loose labels. If used, the label
could jam in the player.
AHA1127
4-20Heater, air conditioner and audio systems
ZX
Page 128 of 263

5 Starting and driving
Precautions when starting and driving ...................5-2
Exhaust gas (carbon monoxide) .......................5-2
Three-way catalyst ............................................5-3
On-pavement and off-road driving
precautions ........................................................5-3
Avoiding collision and rollover ...........................5-3
Drinking alcohol/drugs and driving ....................5-4
Driving safety precautions .................................5-4
Ignition switch .........................................................5-6
Automatic transmission .....................................5-6
Manual transmission..........................................5-7
Key positions .....................................................5-7
Before starting the engine ......................................5-8
Starting the engine .................................................5-8
Driving the vehicle ..................................................5-9
Automatic transmission (if so equipped) ...........5-9
Manual transmission........................................5-13
Parking brake .......................................................5-14
Cruise control (if so equipped) .............................5-15
Precautions on cruise control ..........................5-15
Cruise control operations ................................5-16Break-in schedule ................................................5-17
Increasing fuel economy ......................................5-17
Using four-wheel drive .........................................5-18........................5-18
Transfer case shifting procedures ...................5-18
Auto-lock free-running hubs ............................5-19
Parking/parking on hills ........................................5-22
Power steering .....................................................5-23
Brake system........................................................5-23
Braking precautions .........................................5-23
Anti-lock brake system (ABS) .........................5-24
Cold weather driving ............................................5-25
Freeing a frozen door lock ..............................5-25
Anti-freeze .......................................................5-25
Battery .............................................................5-25
Draining of coolant water ................................5-25
Tire equipment.................................................5-26
Special winter equipment ................................5-26
Driving on snow or ice.....................................5-26
Engine block heater (if so equipped) ..............5-27
ZX
Page 133 of 263
correctly could result in loss of con-
trol and/or a rollover accident.
OAlways use tires of the same type,
size, brand, construction (bias, bias
belted or radial), and tread pattern
on all four wheels. Install tire chains
on the rear wheels when driving on
slippery roads and drive carefully.
OBe sure to check the brakes immedi-
ately after driving in mud or water.
See ``Brake system'' later in this sec-
tion for ``Wet brakes''.
OAvoid parking your vehicle on steep
hills. If you get out of the vehicle and
it rolls forward, backward or side-
ways, you could be injured.
OWhenever you drive off-road
through sand, mud or water as deep
as the wheel hub, more frequent
maintenance may be required. See
``Periodic maintenance'' in the
``Maintenance'' section of this
manual.
AUTOMATIC TRANSMISSION
On automatic transmission models, the ig-
nition lock is designed so the key cannot be
turned to LOCK and removed until the shift
selector lever is moved to the P (Park)
position.
When removing the key from the ignition,
make sure the shift selector lever is in the P
(Park) position.
If the key cannot be turned to the LOCK
position, proceed as follows to remove the key:
1) Move the shift selector lever into the P
(Park) position.2) Turn the ignition key slightly in the ON
direction.
3) Turn the key toward the LOCK position.
4) Remove the key.
The shift lever is designed so it cannot be
moved out of P (Park) and into any of the
other gear positions if the ignition key is
turned to OFF or if the key is removed from
the switch.
The shift lever can be moved if the igni-
tion switch is in the ACC position. This
allows the vehicle to be moved if the
battery is discharged. The shift lever can
also be moved if the ignition switch is in
the ON position and the foot brake pedal
is depressed.
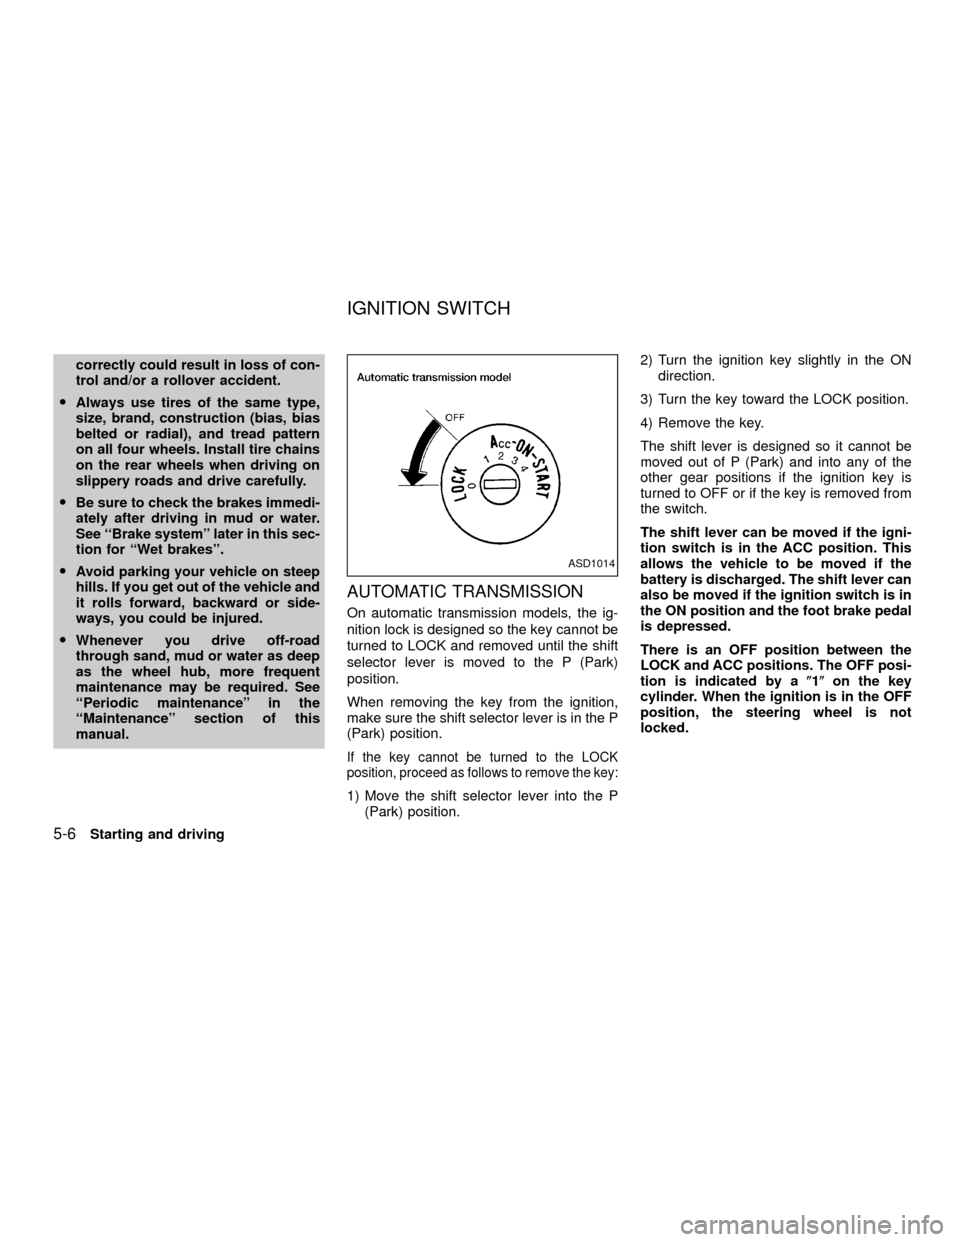
There is an OFF position between the
LOCK and ACC positions. The OFF posi-
tion is indicated by a(1(on the key
cylinder. When the ignition is in the OFF
position, the steering wheel is not
locked.
ASD1014
IGNITION SWITCH
5-6Starting and driving
ZX
Page 137 of 263

The shift lever cannot be moved out of P
(Park) and into any of the other gear
positions if the ignition key is turned to
LOCK or if the key is removed.
The shift lever can be moved if the igni-
tion switch is in the ACC or OFF position
without depressing the foot brake pedal.
This allows the vehicle to be moved if the
battery is discharged.
Shifting
Push the button to shift into P (Park), R
(Reverse) or from D (Drive) to 2. All other
positions can be selected without pushing
the button.
P (Park)
Use this selector position when the vehicle
is parked or when starting the engine. Al-
ways be sure the vehicle is at a complete
stop. For maximum safety, depress the
brake pedal, then push in the shift lever
button and move the lever to the P (Park)
position. Apply the parking brake. Whenparking on a hill, apply the parking brake
first, then shift the lever into the P (Park)
position.
Shifting from P (Park)
If the ignition switch is in the ON position
and the foot brake pedal is depressed, but
the shift selector lever still cannot be moved
out of P (Park), follow these instructions.
1. Turn the ignition key to the LOCK posi-
tion.
2. Apply the parking brake.
ASD1024
5-10Starting and driving
ZX