2001 NISSAN QUEST stop start
[x] Cancel search: stop startPage 96 of 304
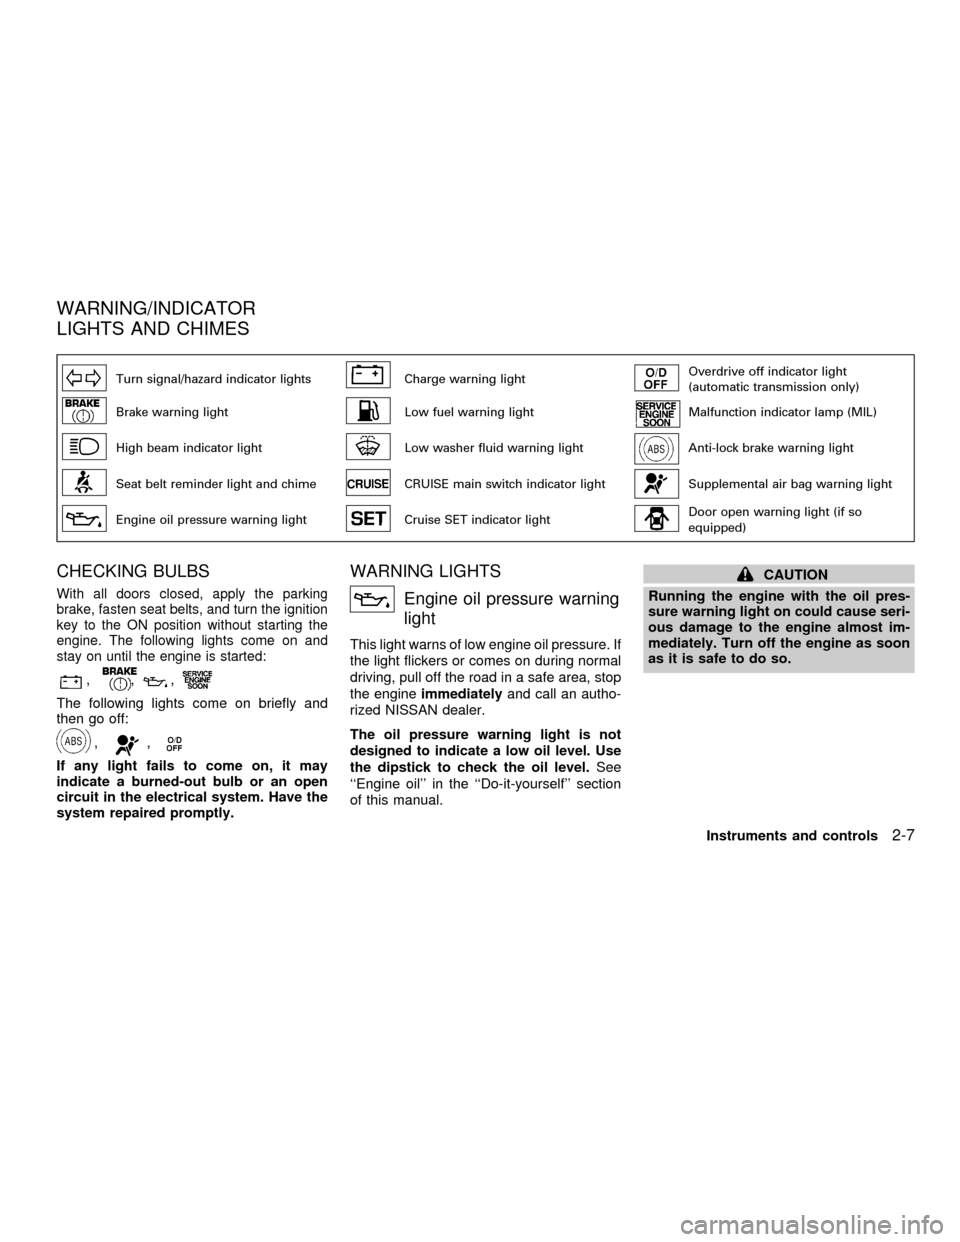
Turn signal/hazard indicator lightsCharge warning lightOverdrive off indicator light
(automatic transmission only)
Brake warning lightLow fuel warning lightMalfunction indicator lamp (MIL)
High beam indicator lightLow washer fluid warning lightAnti-lock brake warning light
Seat belt reminder light and chimeCRUISE main switch indicator lightSupplemental air bag warning light
Engine oil pressure warning lightCruise SET indicator lightDoor open warning light (if so
equipped)
CHECKING BULBS
With all doors closed, apply the parking
brake, fasten seat belts, and turn the ignition
key to the ON position without starting the
engine. The following lights come on and
stay on until the engine is started:
,,,
The following lights come on briefly and
then go off:
,,
If any light fails to come on, it may
indicate a burned-out bulb or an open
circuit in the electrical system. Have the
system repaired promptly.
WARNING LIGHTS
Engine oil pressure warning
light
This light warns of low engine oil pressure. If
the light flickers or comes on during normal
driving, pull off the road in a safe area, stop
the engineimmediatelyand call an autho-
rized NISSAN dealer.
The oil pressure warning light is not
designed to indicate a low oil level. Use
the dipstick to check the oil level.See
``Engine oil'' in the ``Do-it-yourself'' section
of this manual.
CAUTION
Running the engine with the oil pres-
sure warning light on could cause seri-
ous damage to the engine almost im-
mediately. Turn off the engine as soon
as it is safe to do so.
WARNING/INDICATOR
LIGHTS AND CHIMES
Instruments and controls2-7
ZX
Page 98 of 304
applied, stop the vehicle and perform the
following:
1.
Check the brake fluid level. Add brake fluid
as necessary. See ``Brake fluid'' in the
``Do-it-yourself'' section of this manual.
2. If the brake fluid level is correct, have the
warning system checked by an autho-
rized NISSAN dealer.
WARNING
cYour brake system may not be work-
ing properly if the warning light is
on. Driving could be dangerous. If
you judge it to be safe, drive care-
fully to the nearest service station
for repairs. Otherwise, have your ve-
hicle towed because driving it could
be dangerous.
cPressing the brake pedal with the
engine stopped and/or low brake
fluid level may increase your stop-
ping distance and braking will re-
quire greater pedal effort as well as
pedal travel.
cIf the brake fluid level is below the
MINIMUM or MIN mark on the brakefluid reservoir, do not drive until the
brake system has been checked at a
NISSAN dealer.
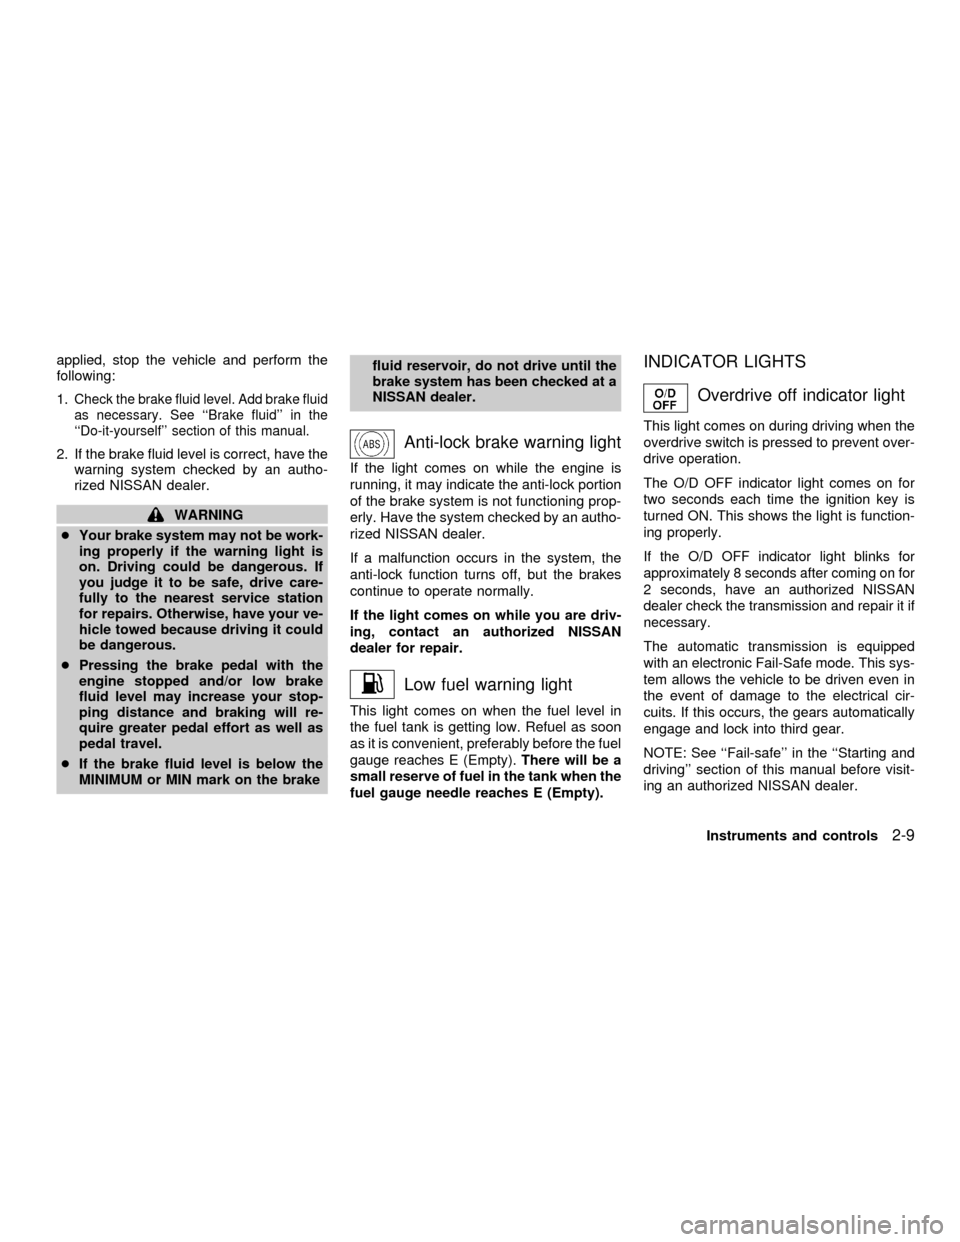
Anti-lock brake warning light
If the light comes on while the engine is
running, it may indicate the anti-lock portion
of the brake system is not functioning prop-
erly. Have the system checked by an autho-
rized NISSAN dealer.
If a malfunction occurs in the system, the
anti-lock function turns off, but the brakes
continue to operate normally.
If the light comes on while you are driv-
ing, contact an authorized NISSAN
dealer for repair.
Low fuel warning light
This light comes on when the fuel level in
the fuel tank is getting low. Refuel as soon
as it is convenient, preferably before the fuel
gauge reaches E (Empty).There will be a
small reserve of fuel in the tank when the
fuel gauge needle reaches E (Empty).
INDICATOR LIGHTS
Overdrive off indicator light
This light comes on during driving when the
overdrive switch is pressed to prevent over-
drive operation.
The O/D OFF indicator light comes on for
two seconds each time the ignition key is
turned ON. This shows the light is function-
ing properly.
If the O/D OFF indicator light blinks for
approximately 8 seconds after coming on for
2 seconds, have an authorized NISSAN
dealer check the transmission and repair it if
necessary.
The automatic transmission is equipped
with an electronic Fail-Safe mode. This sys-
tem allows the vehicle to be driven even in
the event of damage to the electrical cir-
cuits. If this occurs, the gears automatically
engage and lock into third gear.
NOTE: See ``Fail-safe'' in the ``Starting and
driving'' section of this manual before visit-
ing an authorized NISSAN dealer.
Instruments and controls
2-9
ZX
Page 102 of 304

pressing thebutton on the multi-
remote controller.
The alarm is activated when:
ca door is unlocked or opened without
using the key or the multi-remote control-
ler. This includes unlocking the doors
with the inside door lock switch.
cthe hood is opened.
cthe ignition is placed into the ACC, ON,
or START position without the key in the
ignition.
How to stop the alarm
The alarm stops only by unlocking a door
with the key or by pressing the
button on
the multi-remote controller.
The alarm does not stop if the ignition
key is turned to the ACC or ON position.
Silencing the horn beep feature
If desired, the horn beep feature can be
deactivated using the multi-remote control-
ler. The instructions are on the back of the
multi-remote controller.
To deactivate:Press and hold the
and
buttonsfor at least two seconds.
The hazard lights will flash three times to
confirm that the horn beep feature has been
deactivated.
To activate:Press and hold the
and
buttonsfor at least two seconds once
more.
The hazard lights will flash three times to
confirm that the horn beep feature has been
reactivated.
Deactivating the horn feature does not si-
lence the horn if the alarm is triggered.
If the system does not operate as de-
scribed above, have it checked by an
authorized NISSAN dealer.
AIC1037
Instruments and controls2-13
ZX
Page 138 of 304
completely closed before opening the
fuel door.
WARNING
cGasoline is extremely flammable and
highly explosive under certain con-
ditions. You could be burned or se-
riously injured if it is misused or
mishandled. Always stop the engine
and do not smoke or allow open
flames or sparks near the vehicle
when refueling.
c
Fuel may be under pressure. Turn the
cap one-half turn, and wait for any
``hissing'' sound to stop to prevent
fuel from spraying out and possibly
causing personal injury. Then re-
move the cap.
cDo not attempt to top off the fuel
tank after the fuel pump nozzle shuts
off automatically. Continued refuel-
ing may cause fuel overflow, result-
ing in fuel spray and possibly a fire.
cUse only an original equipment type
fuel filler cap as a replacement. It has
a built-in safety valve needed for
proper operation of the fuel system
and emission control system. Anincorrect cap can result in a serious
malfunction and possible injury.
cNever pour fuel into the throttle body
to attempt to start your vehicle.
CAUTION
cIf fuel is spilled on the vehicle body,
flush it away with water to avoid
paint damage.
cTighten until the fuel filler cap clicks.
Failure to tighten the fuel filler cap
properly may cause the
mal-
function indicator lamp (MIL) to illu-
minate. If the
lamp illuminates
because the fuel filler cap is loose or
missing, tighten or install the cap
and continue to drive the vehicle.
The
lamp should turn off after
a few driving trips. If thelamp
does not turn off after a few driving
trips, have the vehicle inspected by
an authorized NISSAN dealer.
cFor additional information, see the
``Malfunction indicator lamp (MIL)''
in the ``Instrument and controls''
section earlier in this manual.
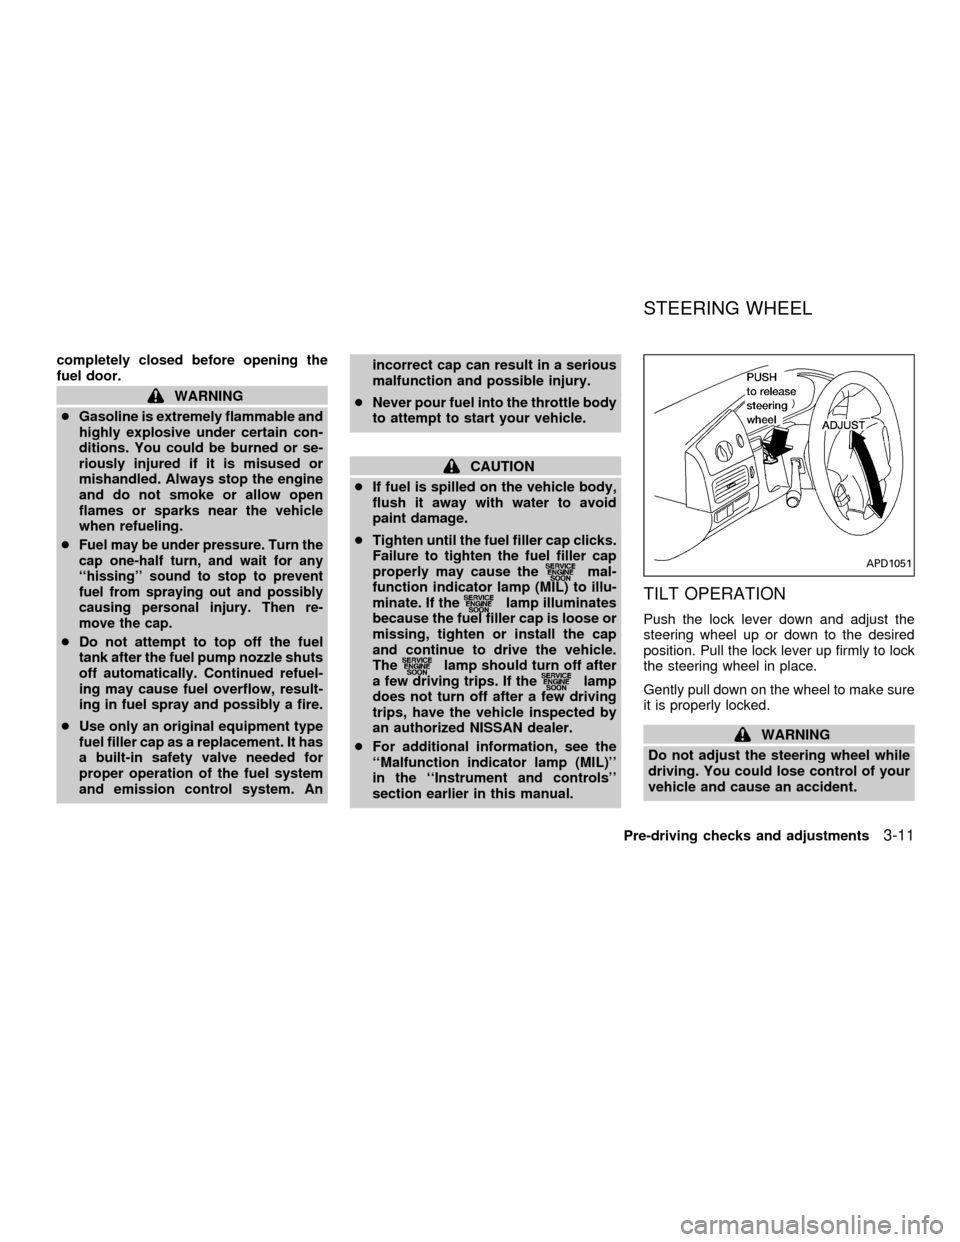
TILT OPERATION
Push the lock lever down and adjust the
steering wheel up or down to the desired
position. Pull the lock lever up firmly to lock
the steering wheel in place.
Gently pull down on the wheel to make sure
it is properly locked.
WARNING
Do not adjust the steering wheel while
driving. You could lose control of your
vehicle and cause an accident.
APD1051
STEERING WHEEL
Pre-driving checks and adjustments3-11
ZX
Page 147 of 304
OFF position
The OFF position shuts off the air supply to
all outlets and stops all fan operations. Use
the OFF position to prevent cold air from
entering the passenger compartment under
cold outside conditions before the engine is
warmed up.
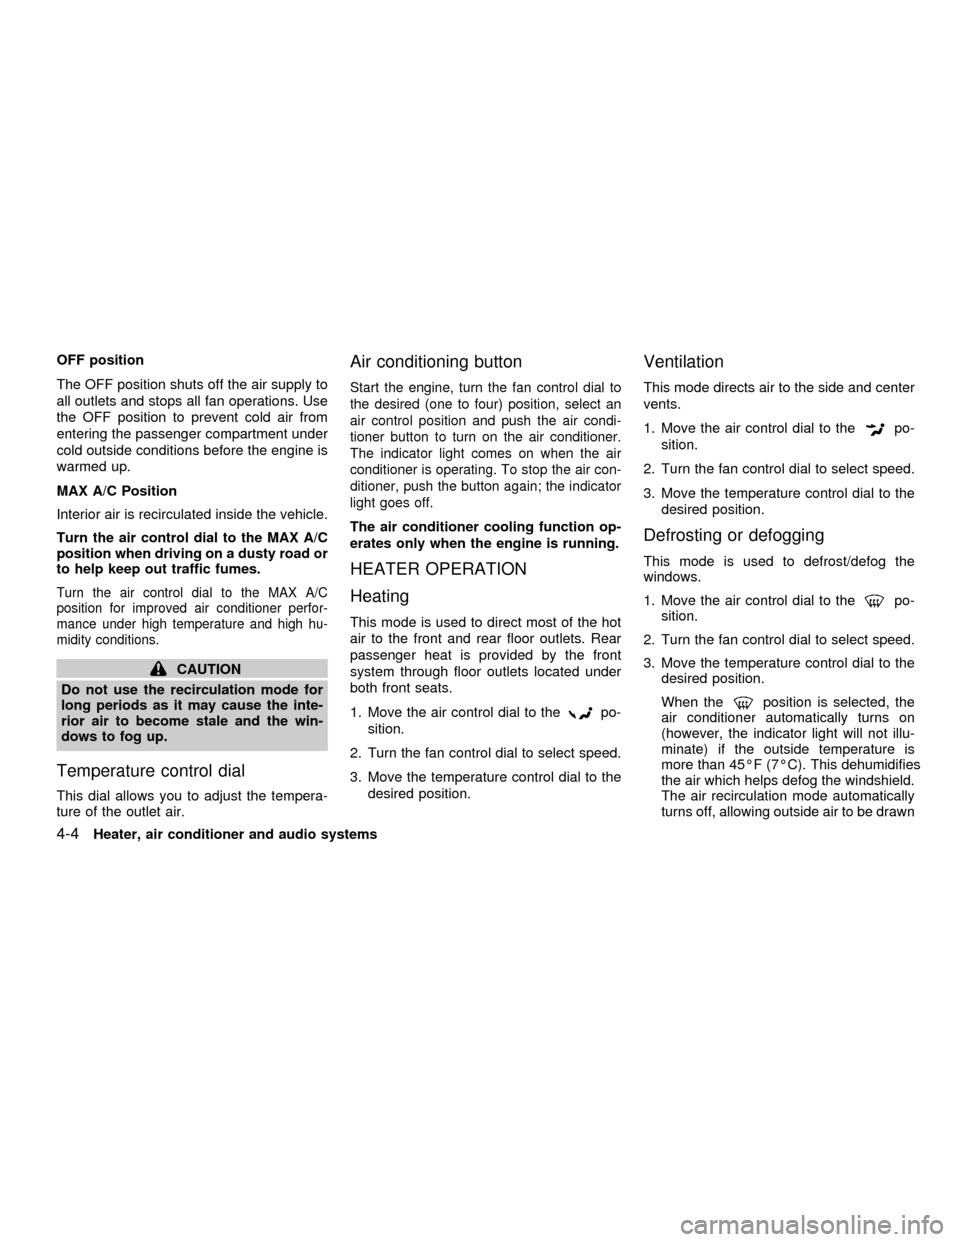
MAX A/C Position
Interior air is recirculated inside the vehicle.
Turn the air control dial to the MAX A/C
position when driving on a dusty road or
to help keep out traffic fumes.
Turn the air control dial to the MAX A/C
position for improved air conditioner perfor-
mance under high temperature and high hu-
midity conditions.
CAUTION
Do not use the recirculation mode for
long periods as it may cause the inte-
rior air to become stale and the win-
dows to fog up.
Temperature control dial
This dial allows you to adjust the tempera-
ture of the outlet air.
Air conditioning button
Start the engine, turn the fan control dial to
the desired (one to four) position, select an
air control position and push the air condi-
tioner button to turn on the air conditioner.
The indicator light comes on when the air
conditioner is operating. To stop the air con-
ditioner, push the button again; the indicator
light goes off.
The air conditioner cooling function op-
erates only when the engine is running.
HEATER OPERATION
Heating
This mode is used to direct most of the hot
air to the front and rear floor outlets. Rear
passenger heat is provided by the front
system through floor outlets located under
both front seats.
1. Move the air control dial to the
po-
sition.
2. Turn the fan control dial to select speed.
3. Move the temperature control dial to the
desired position.
Ventilation
This mode directs air to the side and center
vents.
1. Move the air control dial to the
po-
sition.
2. Turn the fan control dial to select speed.
3. Move the temperature control dial to the
desired position.
Defrosting or defogging
This mode is used to defrost/defog the
windows.
1. Move the air control dial to the
po-
sition.
2. Turn the fan control dial to select speed.
3. Move the temperature control dial to the
desired position.
When the
position is selected, the
air conditioner automatically turns on
(however, the indicator light will not illu-
minate) if the outside temperature is
more than 45ÉF (7ÉC). This dehumidifies
the air which helps defog the windshield.
The air recirculation mode automatically
turns off, allowing outside air to be drawn
4-4Heater, air conditioner and audio systems
ZX
Page 173 of 304
PLAY/STOP
Push the CD, AM, or FM button while the
cassette tape is playing to stop the tape.
Push the TAPE button to play the tape.
Changing the direction of tape play
Push the SIDE 1-2 select button to switch
sides on the tape. The display will change
from TAPE 1 PLAY to TAPE 2 PLAY.
FF (Fast Forward), REW (Rewind)
Push the REW or FF button for the desired
direction.
When REW is pushed TAPE 1 REW illumi-
nates on the display (TAPE 2 REW will
illuminate if on side 2). When FF is pushed
TAPE 2 FF illuminates on the display (TAPE
2 FF will illuminate if on side 2). To stop the
FF or REW function, press the FF or REW
button again or the TAPE button.
Dolby NR (Noise Reduction)
Push the
button for Dolby NR encoded
tapes to reduce high frequency tape noise.
When activated, a
appears in the dis-
play window.
Dolby NR is manufactured under license
from Dolby Laboratories Licensing Corpora-tion. ``Dolby NR'' and the double-D symbol
are trademarks of Dolby Laboratories Li-
censing Corporation.
AMS (Automatic Music Search)
Pushing the seek button while playing a
cassette tape activates the Automatic Music
Search (AMS) mode. Press
SEEK to
rewind the tape to the previous selection, or
press SEEK
to forward the tape to the
nest selection.
This system searches for the blank intervals
between selections. If there is a blank inter-
val within one program or there is no interval
between programs, the system may not
stop in the desired or expected location.
Metal or chrome tape usage
The cassette player is automatically set to
high performance play when playing a metal
or chrome tape.
TAPE EJECT
Push the EJ button. The cassette tape
automatically come out.
Compact Disc (CD) player opera-
tion
Turn the ignition key to the ACC or ONposition and carefully insert the compact
disc into the slot with the label side up. The
compact disc is automatically pulled into the
slot and starts to play.
If the radio or cassette tape is already
operating, it automatically turns off and the
compact disc begins to play.
CAUTION
Do not force the compact disc into the
slot. This could damage the player.
TAPE/CD
When the CD side of the TAPE/CD button is
pushed with the compact disc loaded and
the tape or the radio playing, the tape or
radio turns off and the compact disc starts to
play.
FF (Fast Forward), REW (Rewind)
When the FF or REW button is pushed
while the compact disc is playing, the com-
pact disc plays at an increased speed while
fast forwarding or rewinding. When the but-
ton is released, the compact disc returns to
normal play speed.
4-30Heater, air conditioner and audio systems
ZX
Page 181 of 304
cTo avoid draining the vehicle bat-
tery, do not operate the system more
than 15 minutes without starting the
engine.
Video Cassette Player (VCP) con-
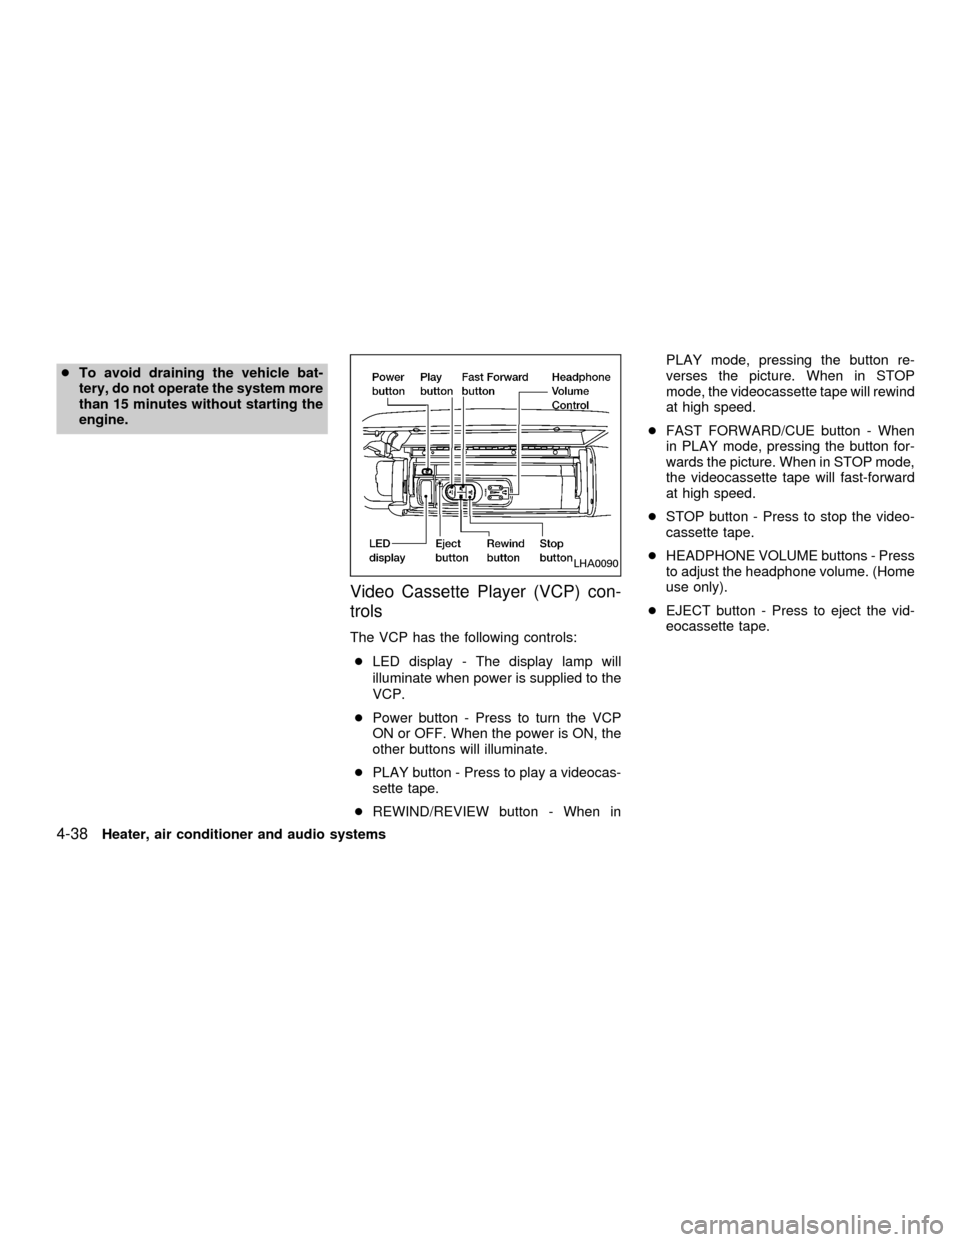
trols
The VCP has the following controls:
cLED display - The display lamp will
illuminate when power is supplied to the
VCP.
cPower button - Press to turn the VCP
ON or OFF. When the power is ON, the
other buttons will illuminate.
cPLAY button - Press to play a videocas-
sette tape.
cREWIND/REVIEW button - When inPLAY mode, pressing the button re-
verses the picture. When in STOP
mode, the videocassette tape will rewind
at high speed.
cFAST FORWARD/CUE button - When
in PLAY mode, pressing the button for-
wards the picture. When in STOP mode,
the videocassette tape will fast-forward
at high speed.
cSTOP button - Press to stop the video-
cassette tape.
cHEADPHONE VOLUME buttons - Press
to adjust the headphone volume. (Home
use only).
cEJECT button - Press to eject the vid-
eocassette tape.
LHA0090
4-38Heater, air conditioner and audio systems
ZX
Page 183 of 304
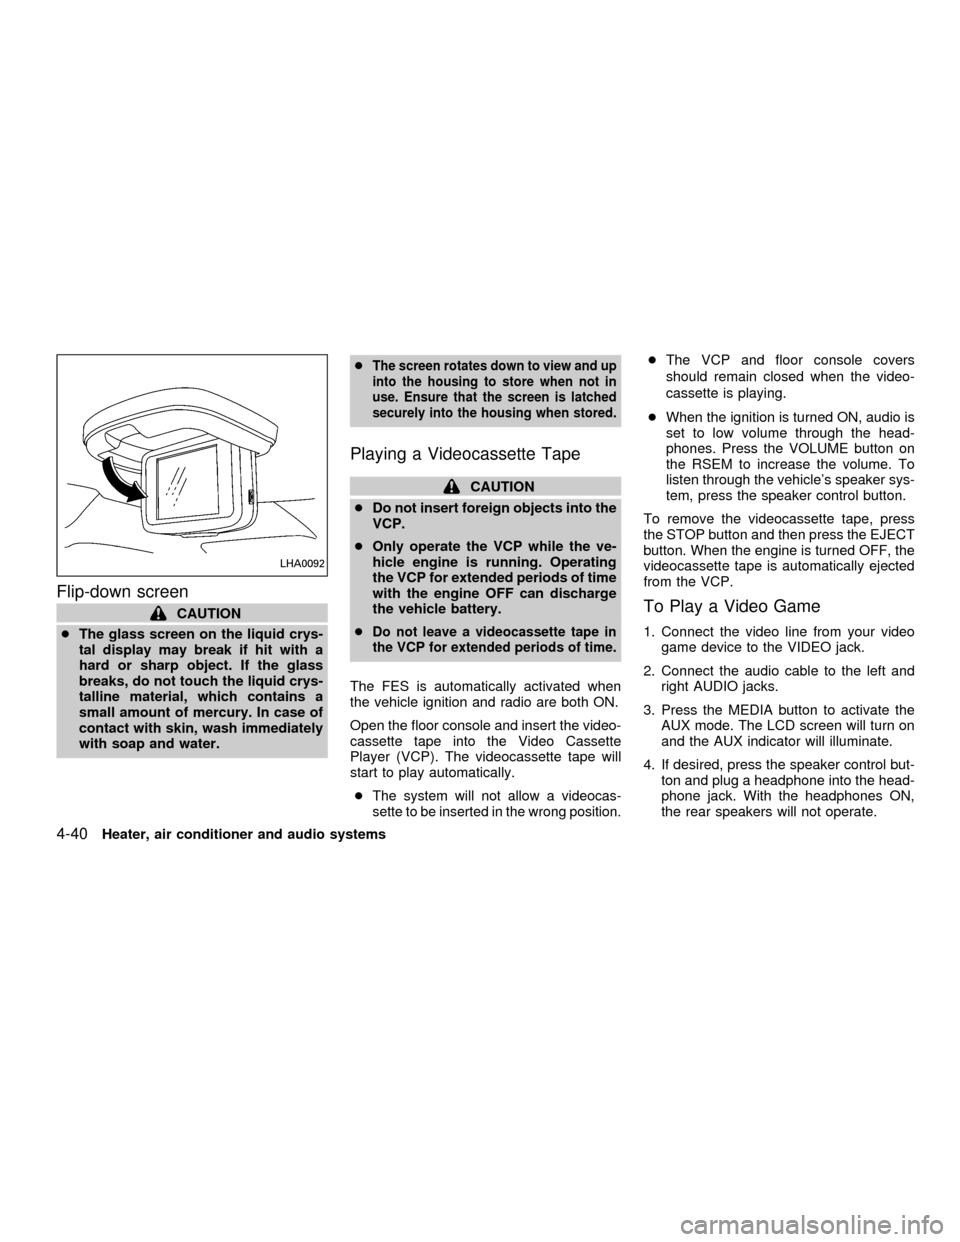
Flip-down screen
CAUTION
cThe glass screen on the liquid crys-
tal display may break if hit with a
hard or sharp object. If the glass
breaks, do not touch the liquid crys-
talline material, which contains a
small amount of mercury. In case of
contact with skin, wash immediately
with soap and water.c
The screen rotates down to view and up
into the housing to store when not in
use. Ensure that the screen is latched
securely into the housing when stored.
Playing a Videocassette Tape
CAUTION
cDo not insert foreign objects into the
VCP.
cOnly operate the VCP while the ve-
hicle engine is running. Operating
the VCP for extended periods of time
with the engine OFF can discharge
the vehicle battery.
c
Do not leave a videocassette tape in
the VCP for extended periods of time.
The FES is automatically activated when
the vehicle ignition and radio are both ON.
Open the floor console and insert the video-
cassette tape into the Video Cassette
Player (VCP). The videocassette tape will
start to play automatically.
c
The system will not allow a videocas-
sette to be inserted in the wrong position.
cThe VCP and floor console covers
should remain closed when the video-
cassette is playing.
cWhen the ignition is turned ON, audio is
set to low volume through the head-
phones. Press the VOLUME button on
the RSEM to increase the volume. To
listen through the vehicle's speaker sys-
tem, press the speaker control button.
To remove the videocassette tape, press
the STOP button and then press the EJECT
button. When the engine is turned OFF, the
videocassette tape is automatically ejected
from the VCP.
To Play a Video Game
1. Connect the video line from your video
game device to the VIDEO jack.
2. Connect the audio cable to the left and
right AUDIO jacks.
3. Press the MEDIA button to activate the
AUX mode. The LCD screen will turn on
and the AUX indicator will illuminate.
4. If desired, press the speaker control but-
ton and plug a headphone into the head-
phone jack. With the headphones ON,
the rear speakers will not operate.
LHA0092
4-40Heater, air conditioner and audio systems
ZX