2001 NISSAN FRONTIER key battery
[x] Cancel search: key batteryPage 84 of 290

Installing the sunroof
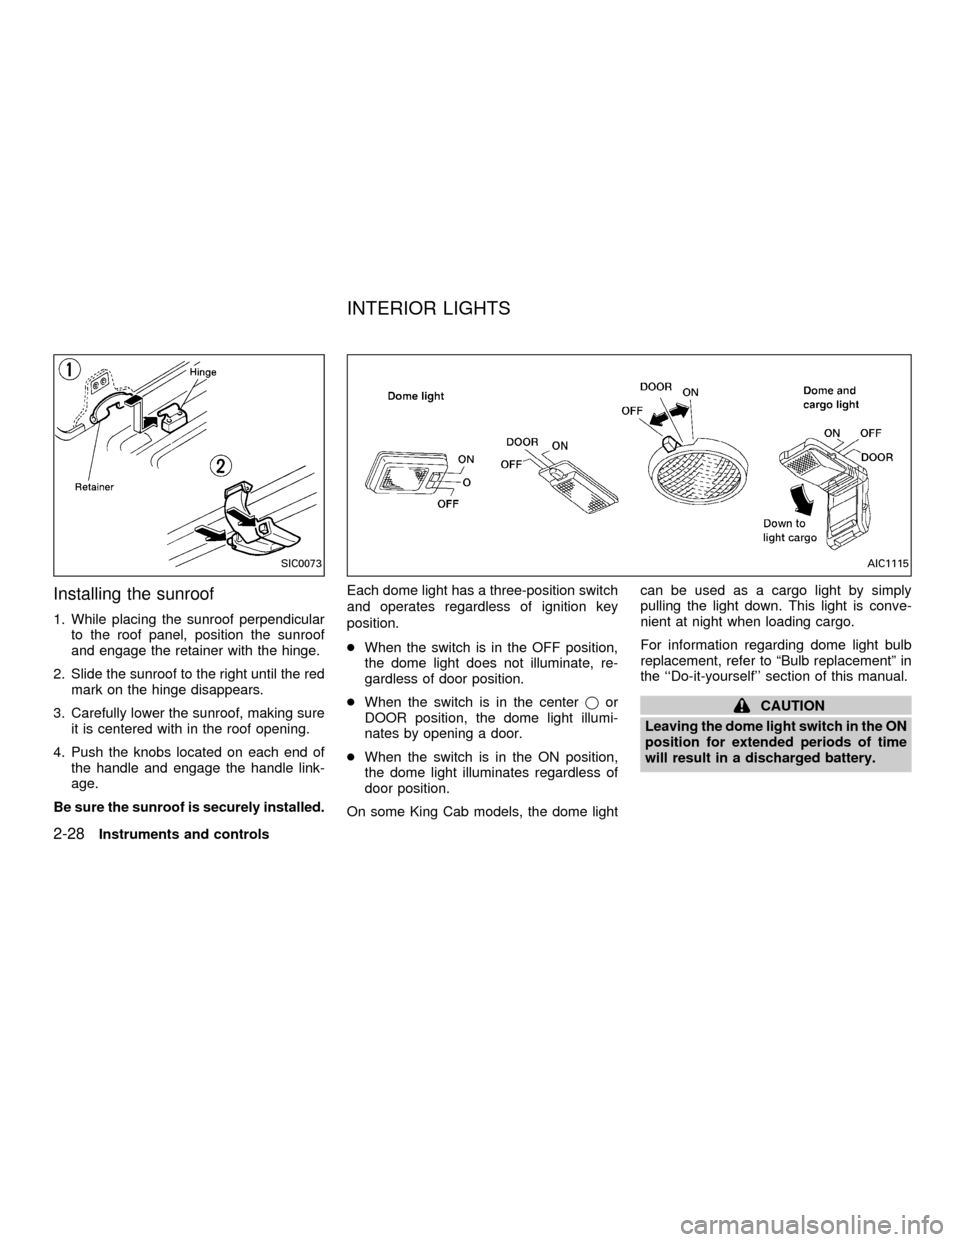
1. While placing the sunroof perpendicular
to the roof panel, position the sunroof
and engage the retainer with the hinge.
2. Slide the sunroof to the right until the red
mark on the hinge disappears.
3. Carefully lower the sunroof, making sure
it is centered with in the roof opening.
4. Push the knobs located on each end of
the handle and engage the handle link-
age.
Be sure the sunroof is securely installed.Each dome light has a three-position switch
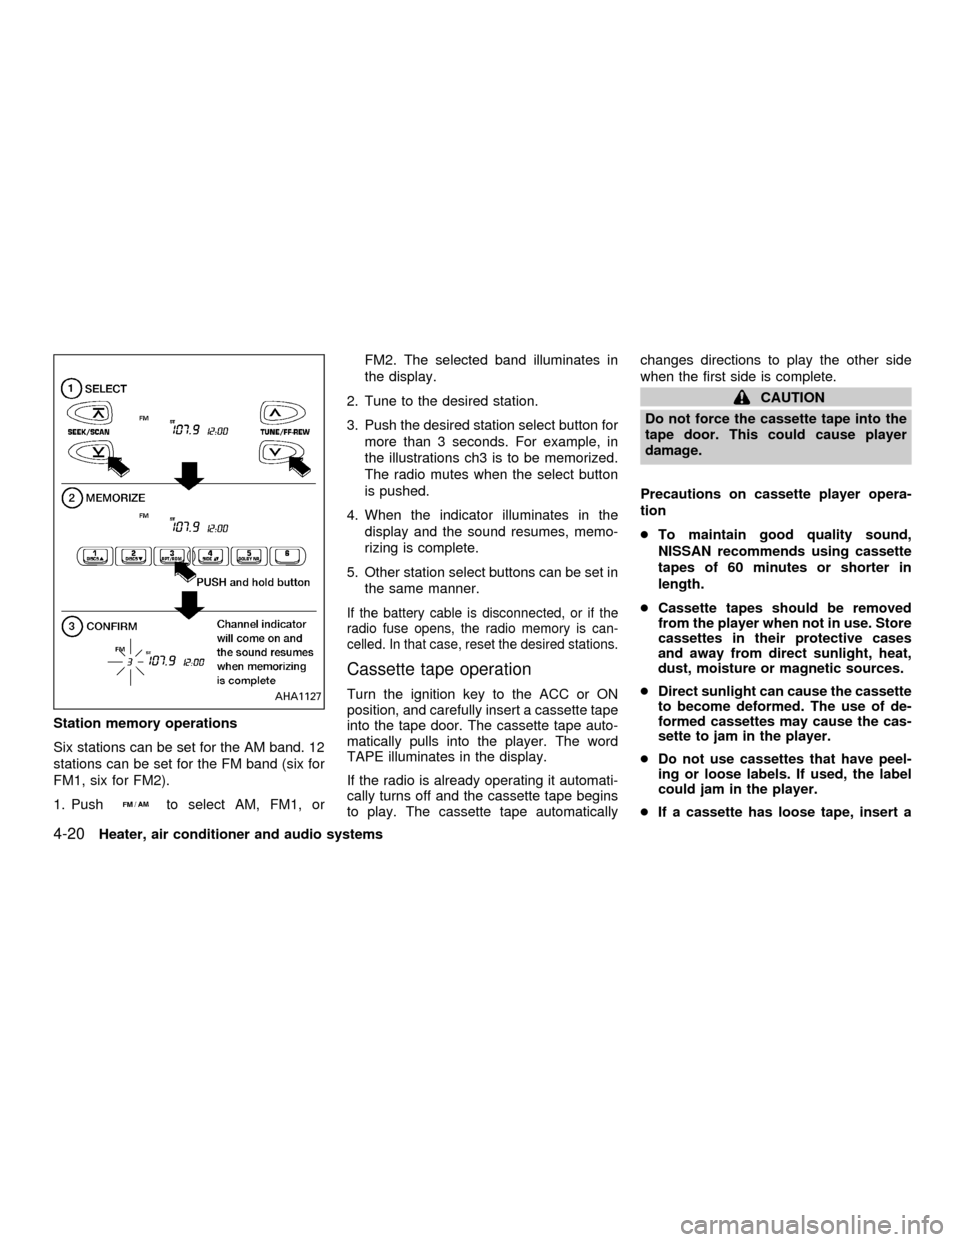
and operates regardless of ignition key
position.
cWhen the switch is in the OFF position,
the dome light does not illuminate, re-
gardless of door position.
cWhen the switch is in the centerjor
DOOR position, the dome light illumi-
nates by opening a door.
cWhen the switch is in the ON position,
the dome light illuminates regardless of
door position.
On some King Cab models, the dome lightcan be used as a cargo light by simply
pulling the light down. This light is conve-
nient at night when loading cargo.
For information regarding dome light bulb
replacement, refer to ªBulb replacementº in
the ``Do-it-yourself'' section of this manual.
CAUTION
Leaving the dome light switch in the ON
position for extended periods of time
will result in a discharged battery.
SIC0073AIC1115
INTERIOR LIGHTS
2-28Instruments and controls
ZX
Page 85 of 290

To turn on the map lights push the switches.
To turn them off, push the switches again.
CAUTION
Do not use for extended periods of time
with the engine stopped. This could
result in a discharged battery.The interior lights illuminate when a front or
rear door (crew cab only) is opened. Once
the doors are closed, these lights turn off in
30 seconds or turn off immediately when the
key is turned to the ON position.
BATTERY SAVER
If the vehicle doors are not fully closed and
the interior lights remain illuminated, they
eventually turn off automatically to prevent
the battery from becoming discharged. Inte-
rior lights that illuminate when doors are
opened turn off after approximately 30
minutes.
AIC0704
MAP LIGHTS
(if so equipped)ILLUMINATED ENTRY
SYSTEM
Instruments and controls2-29
ZX
Page 87 of 290

3 Pre-driving checks and adjustments
Key .........................................................................3-2
Doors ......................................................................3-2
Locking with key ................................................3-2
Locking with inside lock knob............................3-3
Locking with power door lock switch.................3-3
Child safety rear door lock
(Crew Cab models only)....................................3-4
Multi-remote control system (if so equipped).........3-4
How to use multi-remote control system...........3-4
Battery replacement ..........................................3-7
Hood .......................................................................3-8
Roof rack (if so equipped)......................................3-9
Step rail (if so equipped) ......................................3-11
Fuel filler lid ..........................................................3-11Fuel filler cap ...................................................3-11
Steering wheel .....................................................3-12
Tilt operation (if so equipped) .........................3-12
Sun visors.............................................................3-13
Vanity mirror (if so equipped) ..........................3-13
Mirrors ..................................................................3-13
Inside mirror.....................................................3-13
Outside mirrors ................................................3-13
Outside mirror remote control
(if so equipped)................................................3-14
Truck box..............................................................3-15
Tailgate ............................................................3-15
Tie down hooks ...............................................3-17
ZX
Page 118 of 290

SCAN tuning
Push the SEEK/SCAN tuning buttonor
for more than 1.5 seconds. SCAN ap-
pears in the display window. SCAN tuning
begins from high to low frequencies or low to
high frequencies, depending on which but-
ton is pressed. SCAN tuning stops at each
broadcasting station for five seconds. Push-
ing the button again during this five second
period stops SCAN tuning and the radio
remains tuned to that station.
Station memory operations
Six stations can be set for the AM band. 12
stations can be set for the FM band (six for
FM1, six for FM2).
1. Push the band select button (FM/AM) to
select AM, FM1, or FM2. The selected
band illuminates in the display.
2. Tune to the desired station.
3. Push the desired station select button for
more than 1.5 seconds. The radio mutes
when the select button is pushed.
4. When the indicator illuminates in the
display and the sound resumes, memo-
rizing is complete.5. Other station select buttons can be set in
the same manner.
If the battery cable is disconnected, or if the
radio fuse opens, the radio memory is can-
celled. In that case, reset the desired stations.
Compact disc (CD) player operation
Turn the ignition key to the ACC or ON
position and carefully insert the compact
disc into the slot with the label side up. The
compact disc is automatically pulled into the
slot and starts to play.
If the radio is already operating, it automati-
cally turns off and the compact disc begins
to play.
CAUTION
Do not force the compact disc into the
slot. This could damage the player.
CD button
When this button is pushed with the com-
pact disc loaded and the radio playing, the
radio turns off and compact disc starts to
play.
FF (Fast forward) REW
(Rewind)
When the
orbutton is pushed
while the compact disc is playing, the com-
pact disc plays at an increased speed while
fast forwarding or rewinding. When the but-
ton is released, the compact disc returns to
normal play speed.
APS (Automatic Program
Search) FF, APS REW
When the
button is pushed while the
compact disc is playing, the selection fol-
lowing the present one starts to play from
the beginning. Push or hold the
but-
ton several times to skip several selections.
Each time the button is pushed, the CD
advances one selection. (When the last
selection on the compact disc is skipped,
the first selection is played.)
When the
button is pushed, the se-
lection being played returns to the begin-
ning. Push or hold the
button several
times to skip back several selections. Each
time the button is pushed, the CD moves
back one selection.
4-14Heater, air conditioner and audio systems
ZX
Page 124 of 290

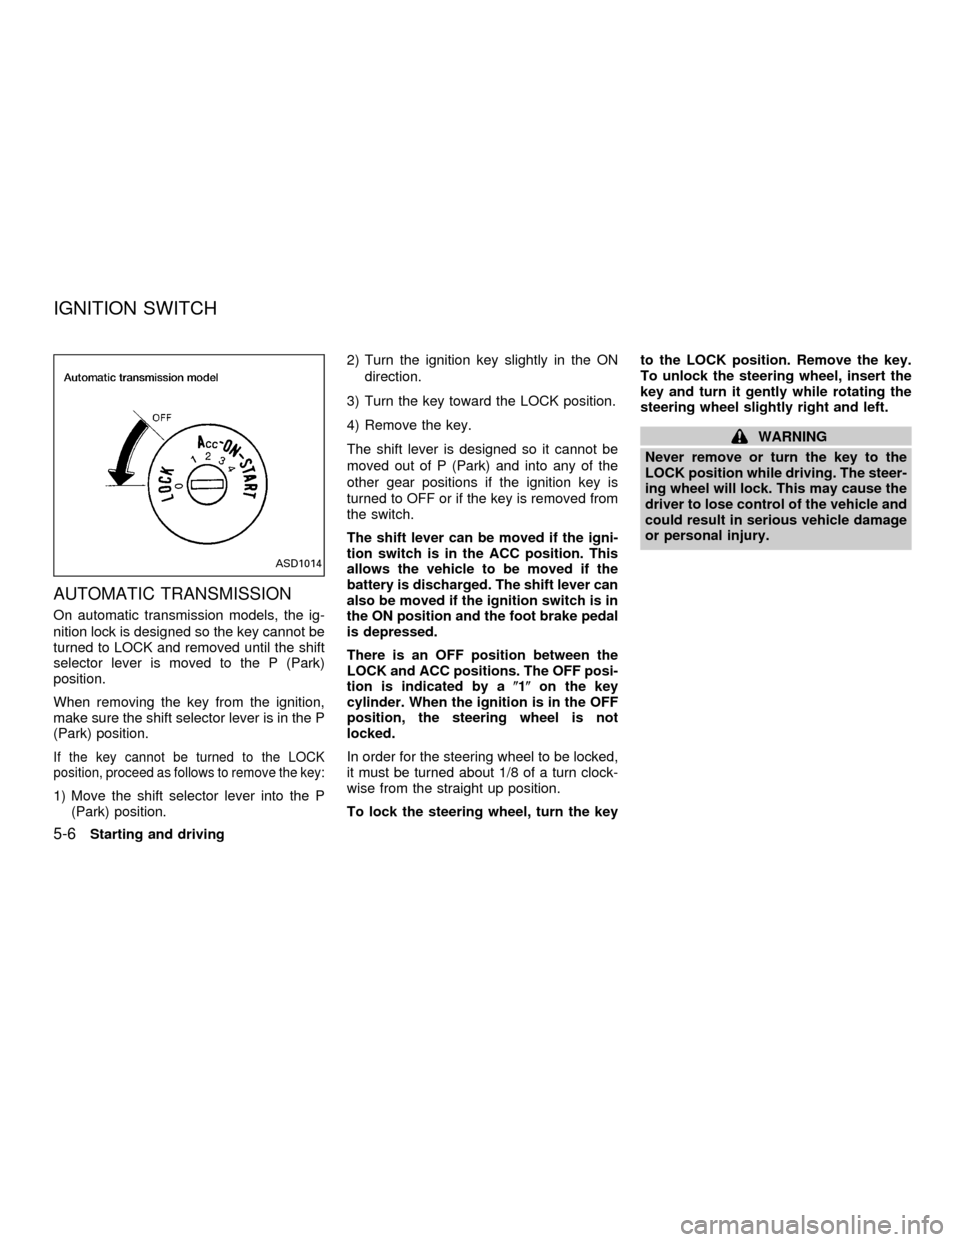
Station memory operations
Six stations can be set for the AM band. 12
stations can be set for the FM band (six for
FM1, six for FM2).
1. Push
to select AM, FM1, orFM2. The selected band illuminates in
the display.
2. Tune to the desired station.
3. Push the desired station select button for
more than 3 seconds. For example, in
the illustrations ch3 is to be memorized.
The radio mutes when the select button
is pushed.
4. When the indicator illuminates in the
display and the sound resumes, memo-
rizing is complete.
5. Other station select buttons can be set in
the same manner.
If the battery cable is disconnected, or if the
radio fuse opens, the radio memory is can-
celled. In that case, reset the desired stations.
Cassette tape operation
Turn the ignition key to the ACC or ON
position, and carefully insert a cassette tape
into the tape door. The cassette tape auto-
matically pulls into the player. The word
TAPE illuminates in the display.
If the radio is already operating it automati-
cally turns off and the cassette tape begins
to play. The cassette tape automaticallychanges directions to play the other side
when the first side is complete.
CAUTION
Do not force the cassette tape into the
tape door. This could cause player
damage.
Precautions on cassette player opera-
tion
cTo maintain good quality sound,
NISSAN recommends using cassette
tapes of 60 minutes or shorter in
length.
cCassette tapes should be removed
from the player when not in use. Store
cassettes in their protective cases
and away from direct sunlight, heat,
dust, moisture or magnetic sources.
cDirect sunlight can cause the cassette
to become deformed. The use of de-
formed cassettes may cause the cas-
sette to jam in the player.
cDo not use cassettes that have peel-
ing or loose labels. If used, the label
could jam in the player.
cIf a cassette has loose tape, insert a
AHA1127
4-20Heater, air conditioner and audio systems
ZX
Page 145 of 290

5 Starting and driving
Precautions when starting and driving ...................5-2
Exhaust gas (carbon monoxide) .......................5-2
Three-way catalyst ............................................5-2
On-pavement and offroad driving
precautions ........................................................5-3
Avoiding collision and rollover ...........................5-3
Drinking alcohol/drugs and driving ....................5-4
Driving safety precautions .................................5-4
Ignition switch .........................................................5-6
Automatic transmission .....................................5-6
Manual transmission..........................................5-7
Key positions .....................................................5-7
Before starting the engine ......................................5-8
Starting the engine .................................................5-8
Driving the vehicle ..................................................5-9
Automatic transmission (if so equipped) ...........5-9
Manual transmission........................................5-15
Parking brake .......................................................5-16
Cruise control (if so equipped) .............................5-17
Precautions on cruise control ..........................5-17
Cruise control operations ................................5-18Break-in schedule ................................................5-19
Increasing fuel economy ......................................5-20
Using four-wheel drive .........................................5-20
Transfer case shifting procedures ...................5-21
Auto-lock free-running hubs ............................5-21
Parking/parking on hills ........................................5-24
Power steering .....................................................5-25
Brake system........................................................5-25
Braking precautions .........................................5-25
Anti-lock brake system (ABS) .........................5-26
Cold weather driving ............................................5-27
Freeing a frozen door lock ..............................5-27
Anti-freeze .......................................................5-27
Battery .............................................................5-27
Draining of coolant water ................................5-27
Tire equipment.................................................5-28
Special winter equipment ................................5-28
Driving on snow or ice.....................................5-28
Engine block heater (if so equippped) ............5-29
ZX
Page 150 of 290

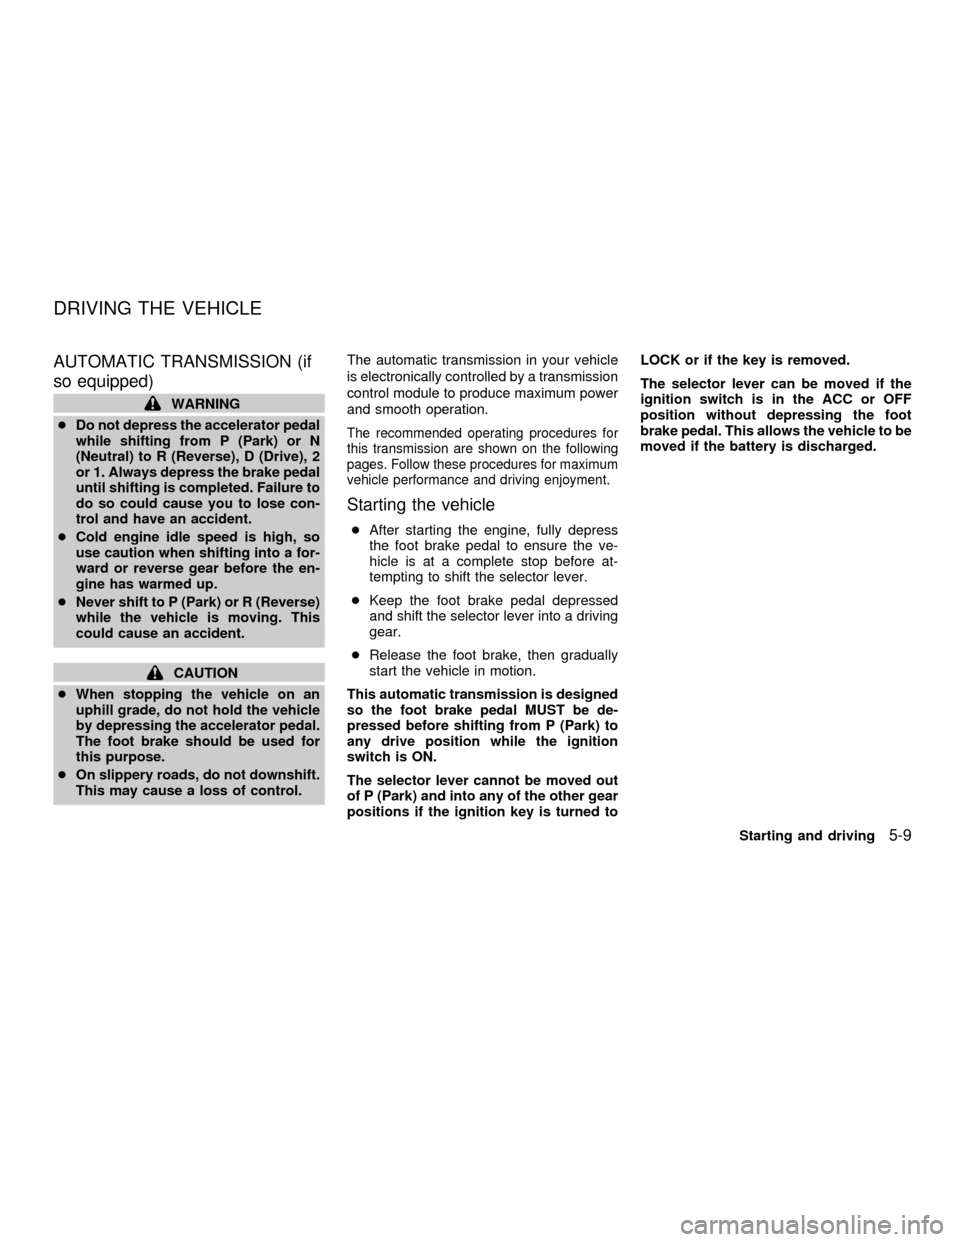
AUTOMATIC TRANSMISSION
On automatic transmission models, the ig-
nition lock is designed so the key cannot be
turned to LOCK and removed until the shift
selector lever is moved to the P (Park)
position.
When removing the key from the ignition,
make sure the shift selector lever is in the P
(Park) position.
If the key cannot be turned to the LOCK
position, proceed as follows to remove the key:
1) Move the shift selector lever into the P
(Park) position.2) Turn the ignition key slightly in the ON
direction.
3) Turn the key toward the LOCK position.
4) Remove the key.
The shift lever is designed so it cannot be
moved out of P (Park) and into any of the
other gear positions if the ignition key is
turned to OFF or if the key is removed from
the switch.
The shift lever can be moved if the igni-
tion switch is in the ACC position. This
allows the vehicle to be moved if the
battery is discharged. The shift lever can
also be moved if the ignition switch is in
the ON position and the foot brake pedal
is depressed.
There is an OFF position between the
LOCK and ACC positions. The OFF posi-
tion is indicated by a(1(on the key
cylinder. When the ignition is in the OFF
position, the steering wheel is not
locked.
In order for the steering wheel to be locked,
it must be turned about 1/8 of a turn clock-
wise from the straight up position.
To lock the steering wheel, turn the keyto the LOCK position. Remove the key.
To unlock the steering wheel, insert the
key and turn it gently while rotating the
steering wheel slightly right and left.
WARNING
Never remove or turn the key to the
LOCK position while driving. The steer-
ing wheel will lock. This may cause the
driver to lose control of the vehicle and
could result in serious vehicle damage
or personal injury.
ASD1014
IGNITION SWITCH
5-6Starting and driving
ZX
Page 153 of 290

AUTOMATIC TRANSMISSION (if
so equipped)
WARNING
cDo not depress the accelerator pedal
while shifting from P (Park) or N
(Neutral) to R (Reverse), D (Drive), 2
or 1. Always depress the brake pedal
until shifting is completed. Failure to
do so could cause you to lose con-
trol and have an accident.
cCold engine idle speed is high, so
use caution when shifting into a for-
ward or reverse gear before the en-
gine has warmed up.
cNever shift to P (Park) or R (Reverse)
while the vehicle is moving. This
could cause an accident.
CAUTION
cWhen stopping the vehicle on an
uphill grade, do not hold the vehicle
by depressing the accelerator pedal.
The foot brake should be used for
this purpose.
cOn slippery roads, do not downshift.
This may cause a loss of control.The automatic transmission in your vehicle
is electronically controlled by a transmission
control module to produce maximum power
and smooth operation.
The recommended operating procedures for
this transmission are shown on the following
pages. Follow these procedures for maximum
vehicle performance and driving enjoyment.
Starting the vehicle
cAfter starting the engine, fully depress
the foot brake pedal to ensure the ve-
hicle is at a complete stop before at-
tempting to shift the selector lever.
cKeep the foot brake pedal depressed
and shift the selector lever into a driving
gear.
cRelease the foot brake, then gradually
start the vehicle in motion.
This automatic transmission is designed
so the foot brake pedal MUST be de-
pressed before shifting from P (Park) to
any drive position while the ignition
switch is ON.
The selector lever cannot be moved out
of P (Park) and into any of the other gear
positions if the ignition key is turned toLOCK or if the key is removed.
The selector lever can be moved if the
ignition switch is in the ACC or OFF
position without depressing the foot
brake pedal. This allows the vehicle to be
moved if the battery is discharged.
DRIVING THE VEHICLE
Starting and driving5-9
ZX