2001 NISSAN FRONTIER remove seats
[x] Cancel search: remove seatsPage 14 of 290
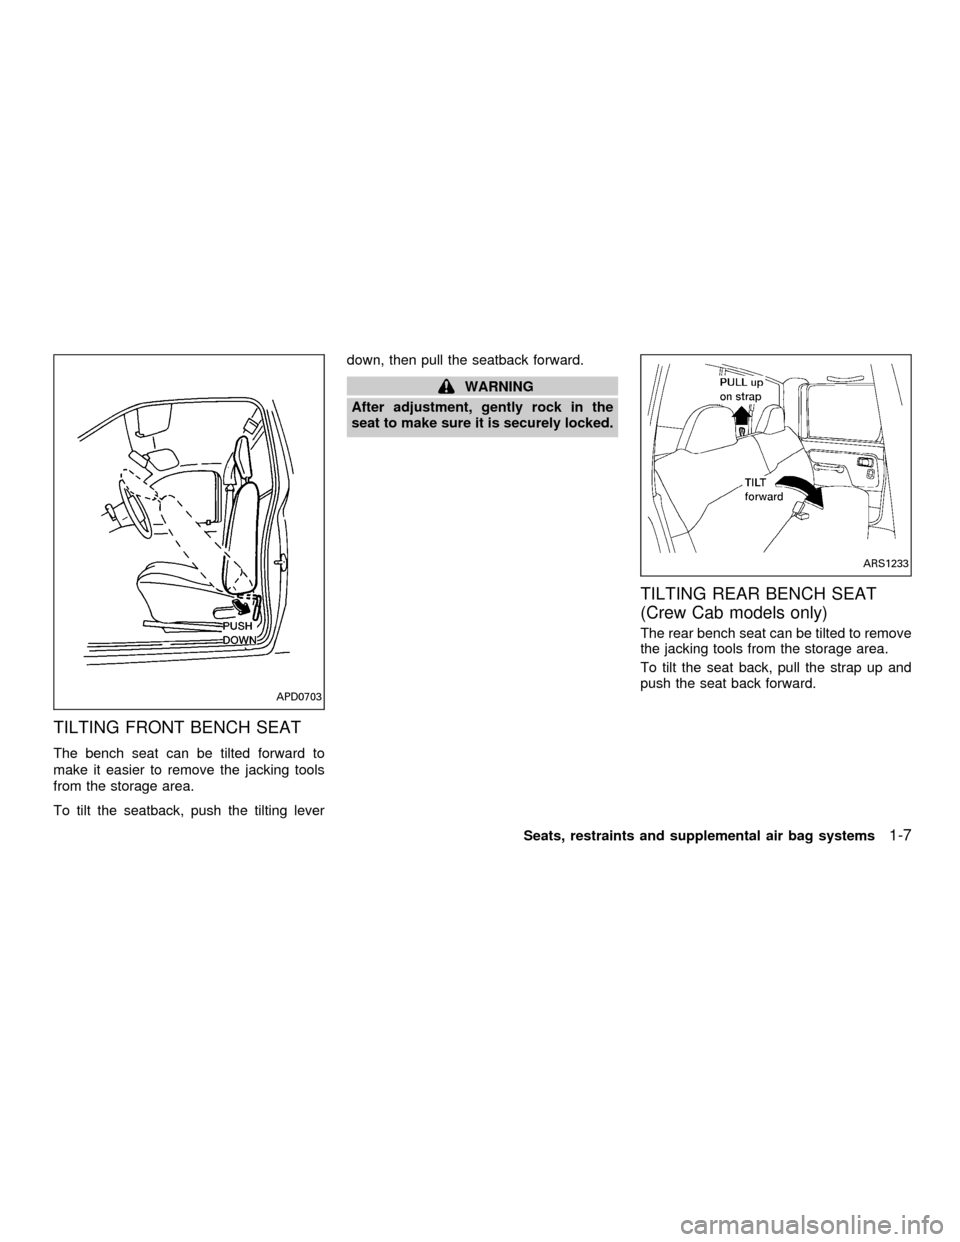
TILTING FRONT BENCH SEAT
The bench seat can be tilted forward to
make it easier to remove the jacking tools
from the storage area.
To tilt the seatback, push the tilting leverdown, then pull the seatback forward.
WARNING
After adjustment, gently rock in the
seat to make sure it is securely locked.
TILTING REAR BENCH SEAT
(Crew Cab models only)
The rear bench seat can be tilted to remove
the jacking tools from the storage area.
To tilt the seat back, pull the strap up and
push the seat back forward.
APD0703
ARS1233
Seats, restraints and supplemental air bag systems1-7
ZX
Page 16 of 290
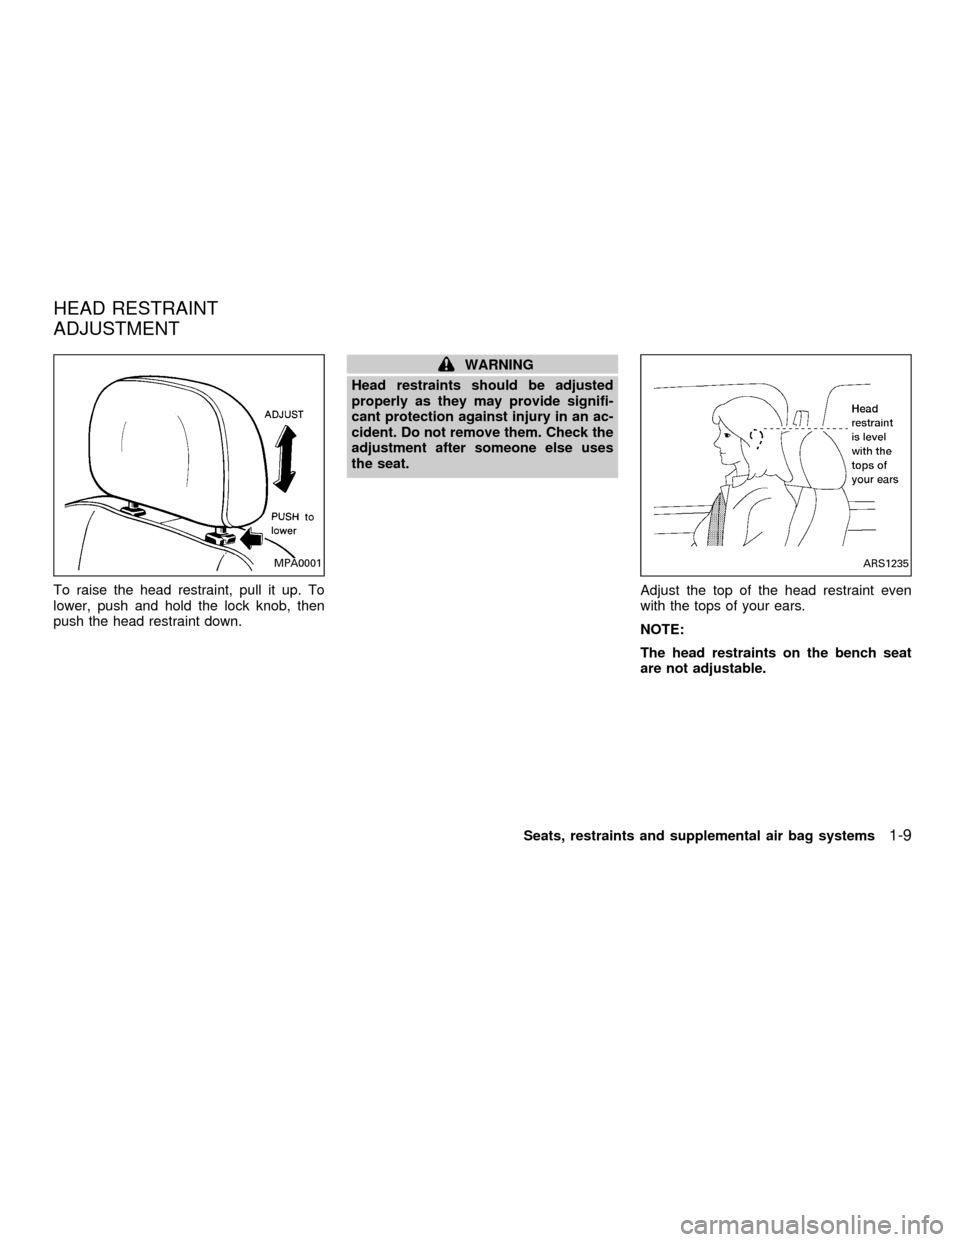
To raise the head restraint, pull it up. To
lower, push and hold the lock knob, then
push the head restraint down.
WARNING
Head restraints should be adjusted
properly as they may provide signifi-
cant protection against injury in an ac-
cident. Do not remove them. Check the
adjustment after someone else uses
the seat.
Adjust the top of the head restraint even
with the tops of your ears.
NOTE:
The head restraints on the bench seat
are not adjustable.
MPA0001ARS1235
HEAD RESTRAINT
ADJUSTMENT
Seats, restraints and supplemental air bag systems1-9
ZX
Page 25 of 290
turn the passenger supplemental air bag
OFF.
The ON/OFF switch should ONLY
be used
to turn the passenger supplemental air bag
OFF when the following government criteria
exists:
cInfants (less than 1 year old) in rear
facing child restraints MUST
be placed
in the front passenger seat.
cChildren ages 1-12 years MUST
be
placed in the front passenger seat.
c
The passenger has a medical condition
which, according to a physician, causes
the air bag to pose a special risk and
makes the potential harm from the air-
bag greater than the potential harm
from turning off the air bag.
Seat belts and child restraints should al-
ways be properly used. See ªPrecautions
on seat belt usageº and ªChild restraintsº
later in this section for details.
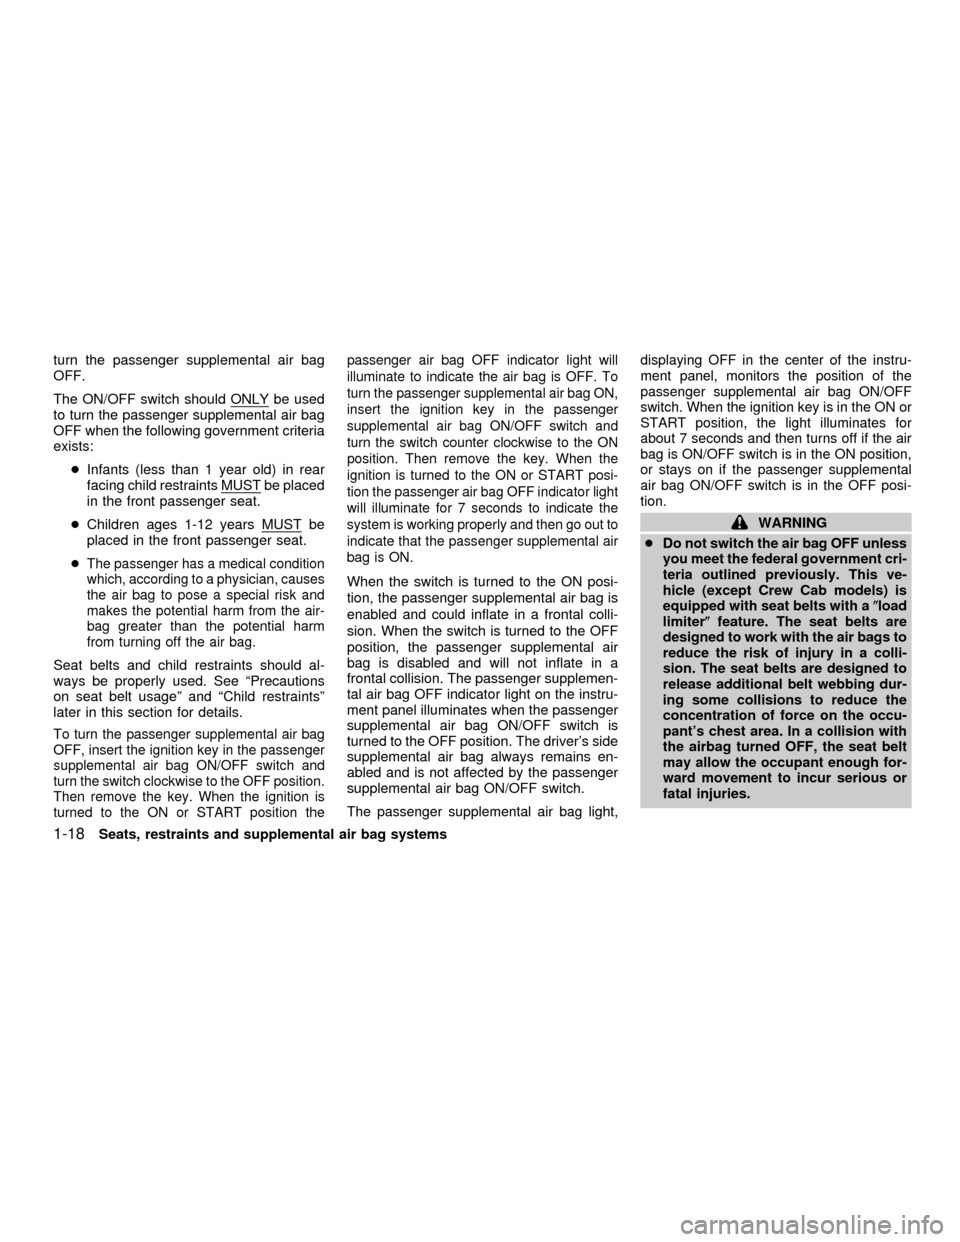
To turn the passenger supplemental air bag
OFF, insert the ignition key in the passenger
supplemental air bag ON/OFF switch and
turn the switch clockwise to the OFF position.
Then remove the key. When the ignition is
turned to the ON or START position thepassenger air bag OFF indicator light will
illuminate to indicate the air bag is OFF. To
turn the passenger supplemental air bag ON,
insert the ignition key in the passenger
supplemental air bag ON/OFF switch and
turn the switch counter clockwise to the ON
position. Then remove the key. When the
ignition is turned to the ON or START posi-
tion the passenger air bag OFF indicator light
will illuminate for 7 seconds to indicate the
system is working properly and then go out to
indicate that the passenger supplemental air
bag is ON.
When the switch is turned to the ON posi-
tion, the passenger supplemental air bag is
enabled and could inflate in a frontal colli-
sion. When the switch is turned to the OFF
position, the passenger supplemental air
bag is disabled and will not inflate in a
frontal collision. The passenger supplemen-
tal air bag OFF indicator light on the instru-
ment panel illuminates when the passenger
supplemental air bag ON/OFF switch is
turned to the OFF position. The driver's side
supplemental air bag always remains en-
abled and is not affected by the passenger
supplemental air bag ON/OFF switch.
The passenger supplemental air bag light,displaying OFF in the center of the instru-
ment panel, monitors the position of the
passenger supplemental air bag ON/OFF
switch. When the ignition key is in the ON or
START position, the light illuminates for
about 7 seconds and then turns off if the air
bag is ON/OFF switch is in the ON position,
or stays on if the passenger supplemental
air bag ON/OFF switch is in the OFF posi-
tion.
WARNING
cDo not switch the air bag OFF unless
you meet the federal government cri-
teria outlined previously. This ve-
hicle (except Crew Cab models) is
equipped with seat belts with a(load
limiter(feature. The seat belts are
designed to work with the air bags to
reduce the risk of injury in a colli-
sion. The seat belts are designed to
release additional belt webbing dur-
ing some collisions to reduce the
concentration of force on the occu-
pant's chest area. In a collision with
the airbag turned OFF, the seat belt
may allow the occupant enough for-
ward movement to incur serious or
fatal injuries.
1-18Seats, restraints and supplemental air bag systems
ZX
Page 41 of 290

INSTALLATION ON REAR
BENCH SEAT CENTER POSI-
TION (Crew Cab models only)
Front facing
When you install a child restraint in the rear
center seat, follow these steps:
1. Position the child restraint on the seat as
illustrated. Always follow the restraint
manufacturer's instructions.2. Route the seat belt tongue through the
child restraint and insert it into the buckle
until you hear and feel the latch engage.
Be sure to follow the child restraint manu-
facturer's instructions for belt routing.3. Remove all slack in the lap belt for a very
tight fit by pulling forcefully on the lap belt
adjustment.
ARS1247ARS1169ARS1170
1-34Seats, restraints and supplemental air bag systems
ZX
Page 43 of 290
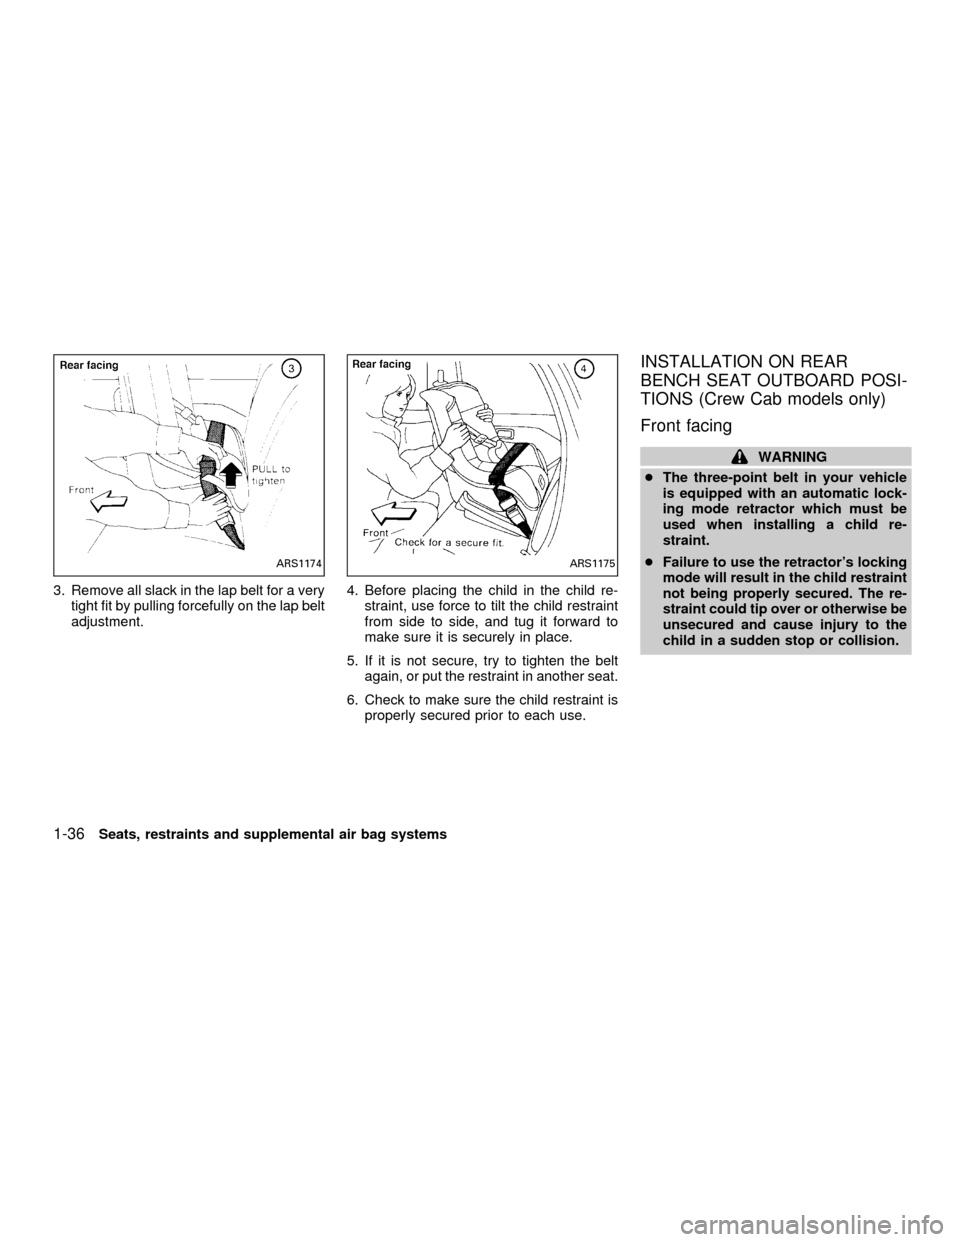
3. Remove all slack in the lap belt for a very
tight fit by pulling forcefully on the lap belt
adjustment.4. Before placing the child in the child re-
straint, use force to tilt the child restraint
from side to side, and tug it forward to
make sure it is securely in place.
5. If it is not secure, try to tighten the belt
again, or put the restraint in another seat.
6. Check to make sure the child restraint is
properly secured prior to each use.
INSTALLATION ON REAR
BENCH SEAT OUTBOARD POSI-
TIONS (Crew Cab models only)
Front facing
WARNING
cThe three-point belt in your vehicle
is equipped with an automatic lock-
ing mode retractor which must be
used when installing a child re-
straint.
cFailure to use the retractor's locking
mode will result in the child restraint
not being properly secured. The re-
straint could tip over or otherwise be
unsecured and cause injury to the
child in a sudden stop or collision.
ARS1174ARS1175
1-36Seats, restraints and supplemental air bag systems
ZX
Page 45 of 290
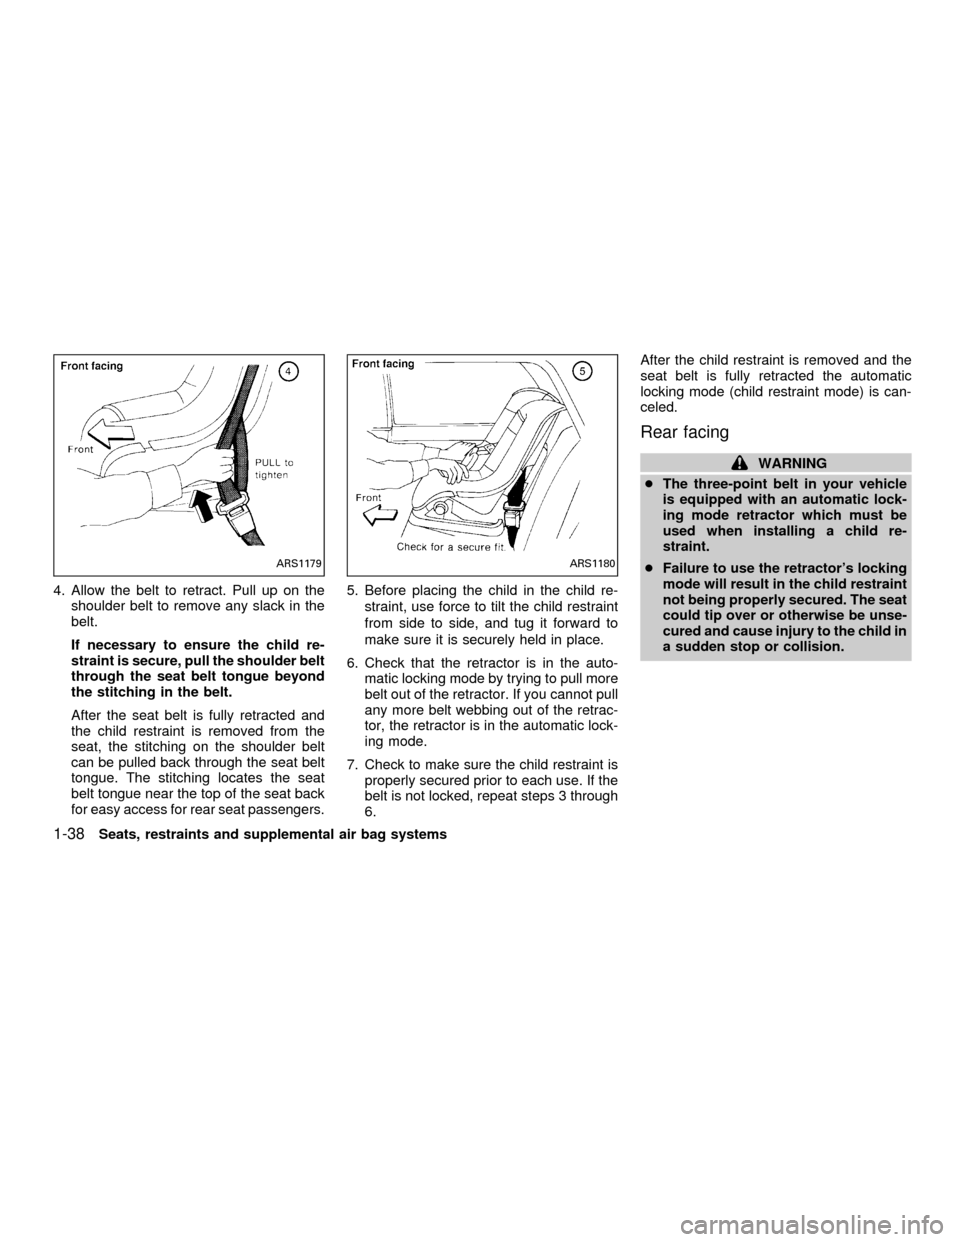
4. Allow the belt to retract. Pull up on the
shoulder belt to remove any slack in the
belt.
If necessary to ensure the child re-
straint is secure, pull the shoulder belt
through the seat belt tongue beyond
the stitching in the belt.
After the seat belt is fully retracted and
the child restraint is removed from the
seat, the stitching on the shoulder belt
can be pulled back through the seat belt
tongue. The stitching locates the seat
belt tongue near the top of the seat back
for easy access for rear seat passengers.5. Before placing the child in the child re-
straint, use force to tilt the child restraint
from side to side, and tug it forward to
make sure it is securely held in place.
6. Check that the retractor is in the auto-
matic locking mode by trying to pull more
belt out of the retractor. If you cannot pull
any more belt webbing out of the retrac-
tor, the retractor is in the automatic lock-
ing mode.
7. Check to make sure the child restraint is
properly secured prior to each use. If the
belt is not locked, repeat steps 3 through
6.After the child restraint is removed and the
seat belt is fully retracted the automatic
locking mode (child restraint mode) is can-
celed.
Rear facing
WARNING
cThe three-point belt in your vehicle
is equipped with an automatic lock-
ing mode retractor which must be
used when installing a child re-
straint.
cFailure to use the retractor's locking
mode will result in the child restraint
not being properly secured. The seat
could tip over or otherwise be unse-
cured and cause injury to the child in
a sudden stop or collision.
ARS1179ARS1180
1-38Seats, restraints and supplemental air bag systems
ZX
Page 47 of 290

4. Allow the belt to retract. Pull up on the
shoulder belt to remove any slack in the
belt.
If necessary to ensure the child re-
straint is secure, pull the shoulder belt
through the seat belt tongue beyond
the stitching in the belt.
After the seat belt is fully retracted and
the child restraint is removed from the
seat, the stitching on the shoulder belt
can be pulled back through the seat belt
tongue. This stitching locates the seat
belt tongue near the top of the seat back
for easy access for rear seat passengers.5. Before placing the child in the child re-
straint, use force to tilt the child restraint
from side to side, and tug it forward to
make sure it is securely held in place.
6. Check that the retractor is in the auto-
matic locking mode by trying to pull more
belt out of the retractor. If you cannot pull
any more belt webbing out of the retrac-
tor, the retractor is in the automatic lock-
ing mode.
7. Check to make sure the child restraint is
properly secured prior to each use. If the
belt is not locked, repeat steps 3 through
6.After the child restraint is removed and the
seat belt is fully retracted the automatic
locking mode (child restraint mode) is can-
celed.
ARS1184ARS1185
1-40Seats, restraints and supplemental air bag systems
ZX
Page 48 of 290
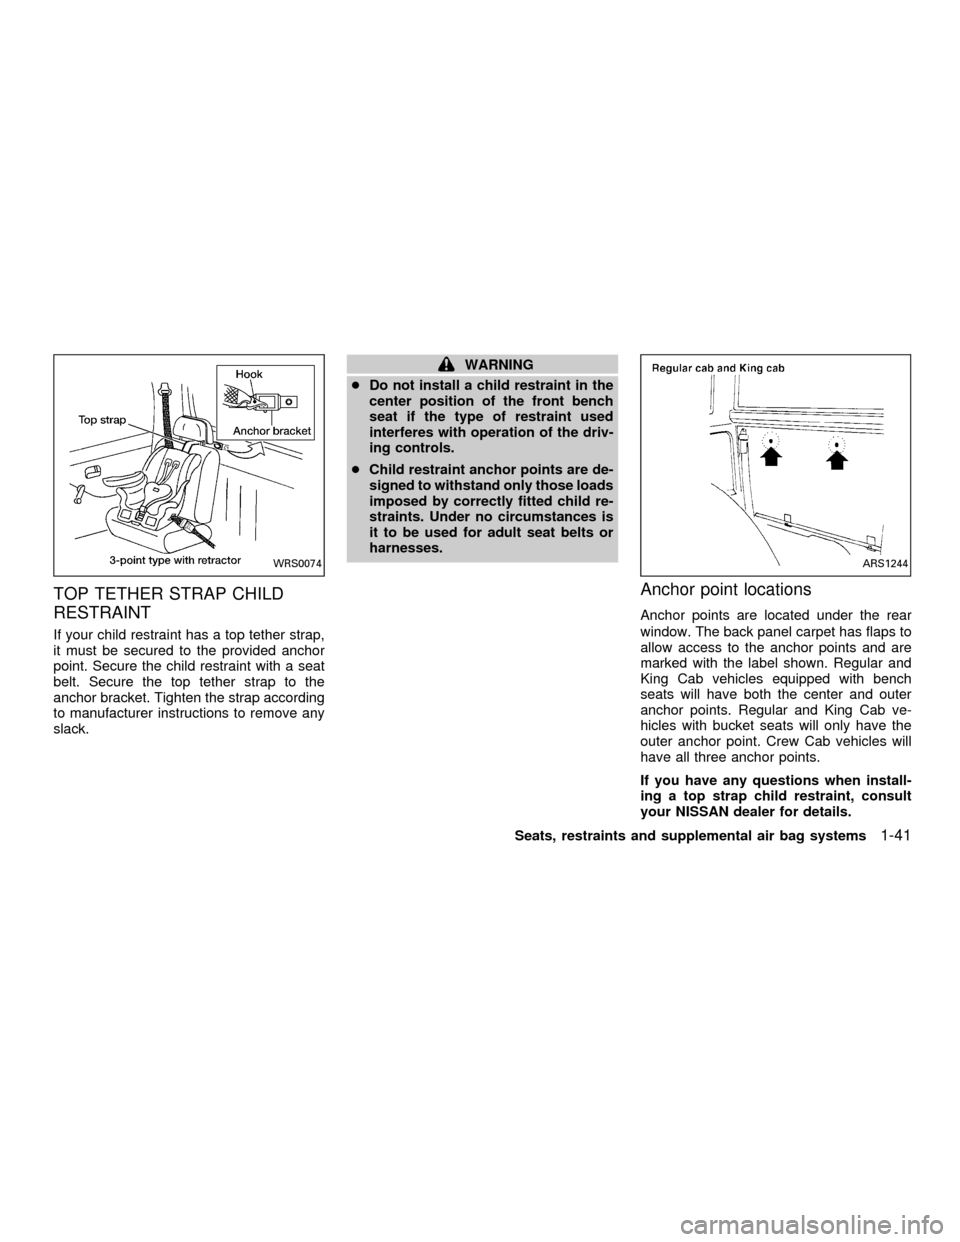
TOP TETHER STRAP CHILD
RESTRAINT
If your child restraint has a top tether strap,
it must be secured to the provided anchor
point. Secure the child restraint with a seat
belt. Secure the top tether strap to the
anchor bracket. Tighten the strap according
to manufacturer instructions to remove any
slack.
WARNING
cDo not install a child restraint in the
center position of the front bench
seat if the type of restraint used
interferes with operation of the driv-
ing controls.
cChild restraint anchor points are de-
signed to withstand only those loads
imposed by correctly fitted child re-
straints. Under no circumstances is
it to be used for adult seat belts or
harnesses.
Anchor point locations
Anchor points are located under the rear
window. The back panel carpet has flaps to
allow access to the anchor points and are
marked with the label shown. Regular and
King Cab vehicles equipped with bench
seats will have both the center and outer
anchor points. Regular and King Cab ve-
hicles with bucket seats will only have the
outer anchor point. Crew Cab vehicles will
have all three anchor points.
If you have any questions when install-
ing a top strap child restraint, consult
your NISSAN dealer for details.
WRS0074ARS1244
Seats, restraints and supplemental air bag systems1-41
ZX