2001 NISSAN FRONTIER tailgate
[x] Cancel search: tailgatePage 87 of 290

3 Pre-driving checks and adjustments
Key .........................................................................3-2
Doors ......................................................................3-2
Locking with key ................................................3-2
Locking with inside lock knob............................3-3
Locking with power door lock switch.................3-3
Child safety rear door lock
(Crew Cab models only)....................................3-4
Multi-remote control system (if so equipped).........3-4
How to use multi-remote control system...........3-4
Battery replacement ..........................................3-7
Hood .......................................................................3-8
Roof rack (if so equipped)......................................3-9
Step rail (if so equipped) ......................................3-11
Fuel filler lid ..........................................................3-11Fuel filler cap ...................................................3-11
Steering wheel .....................................................3-12
Tilt operation (if so equipped) .........................3-12
Sun visors.............................................................3-13
Vanity mirror (if so equipped) ..........................3-13
Mirrors ..................................................................3-13
Inside mirror.....................................................3-13
Outside mirrors ................................................3-13
Outside mirror remote control
(if so equipped)................................................3-14
Truck box..............................................................3-15
Tailgate ............................................................3-15
Tie down hooks ...............................................3-17
ZX
Page 101 of 290

WARNING
Objects viewed in the outside mirror on
the passenger side are closer than they
appear. Be careful when moving to the
right. Using only this mirror could cause
an accident. Use the inside mirror or
glance over your shoulder to properly
judge distances to other objects.
TAILGATE
Opening the tailgate
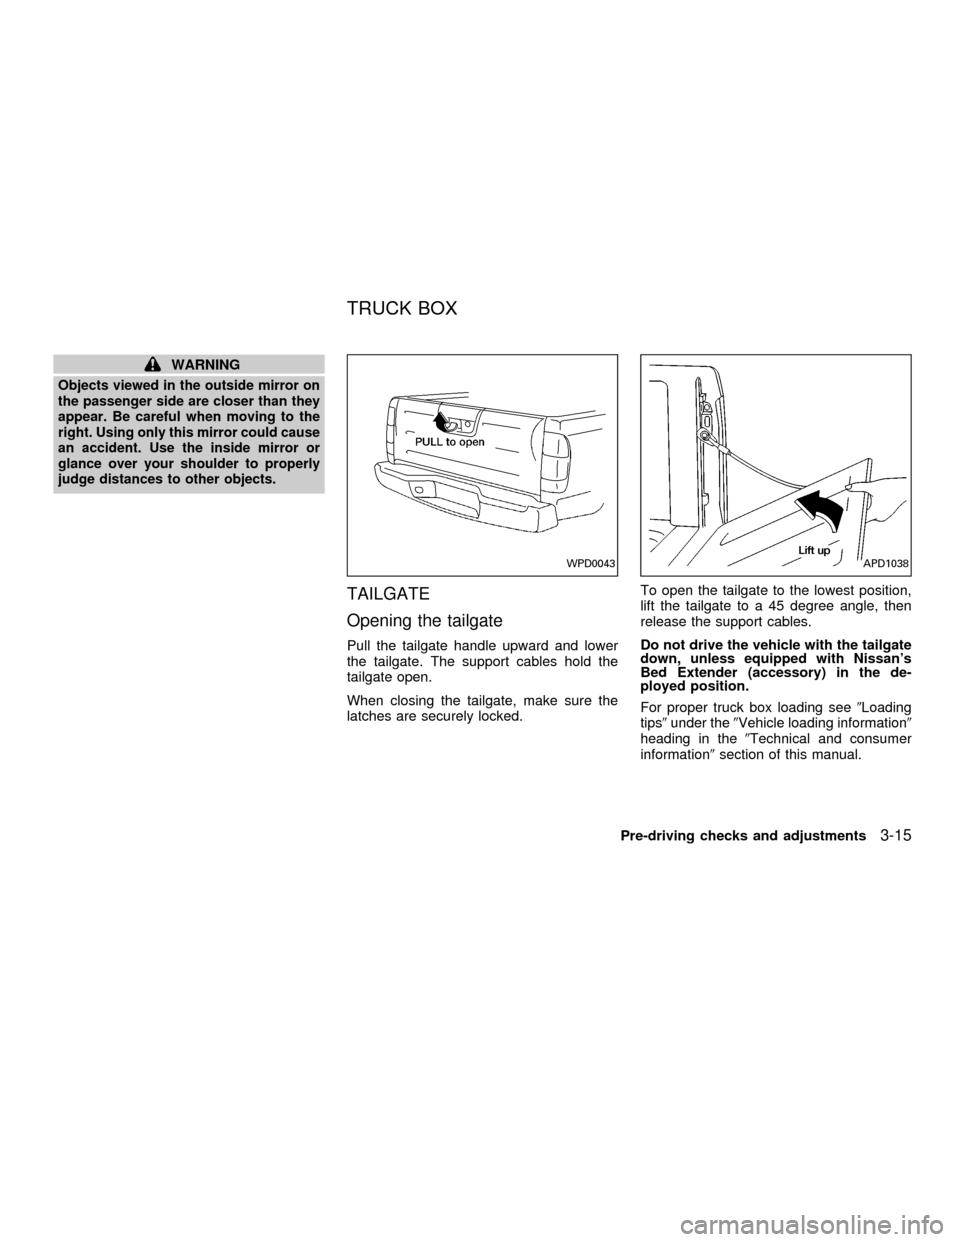
Pull the tailgate handle upward and lower
the tailgate. The support cables hold the
tailgate open.
When closing the tailgate, make sure the
latches are securely locked.To open the tailgate to the lowest position,
lift the tailgate to a 45 degree angle, then
release the support cables.
Do not drive the vehicle with the tailgate
down, unless equipped with Nissan's
Bed Extender (accessory) in the de-
ployed position.
For proper truck box loading see9Loading
tips9under the9Vehicle loading information9
heading in the9Technical and consumer
information9section of this manual.
WPD0043APD1038
TRUCK BOX
Pre-driving checks and adjustments3-15
ZX
Page 102 of 290

WARNING
cIt is extremely dangerous to ride in a
cargo area inside a vehicle. In a
collision, people riding in these ar-
eas are more likely to be seriously
injured or killed.
cDo not allow people to ride in any
area of your vehicle that is not
equipped with seats and seat belts.
cBe sure everyone in your vehicle is
in a seat and using a seat belt
properly.
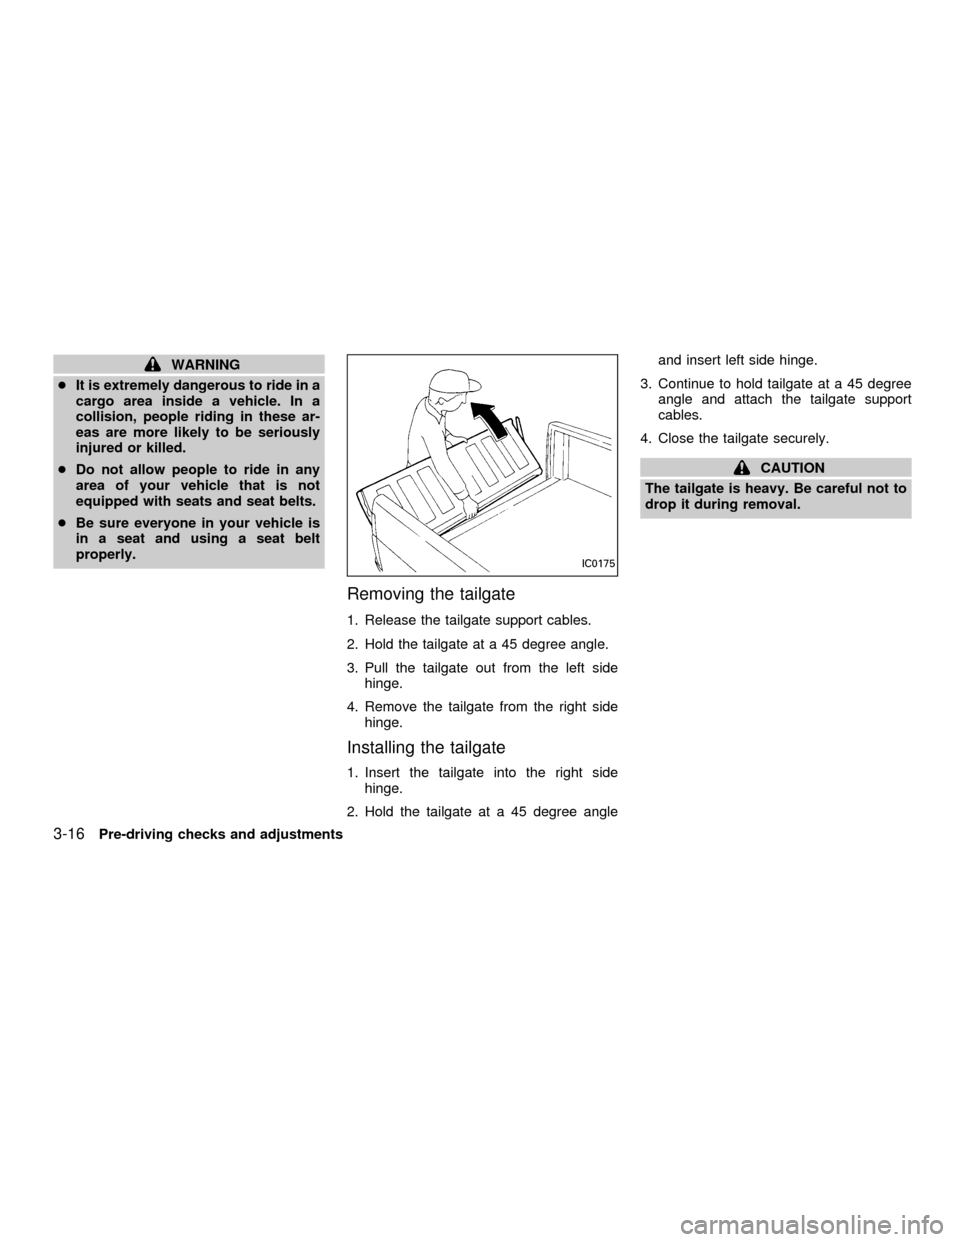
Removing the tailgate
1. Release the tailgate support cables.
2. Hold the tailgate at a 45 degree angle.
3. Pull the tailgate out from the left side
hinge.
4. Remove the tailgate from the right side
hinge.
Installing the tailgate
1. Insert the tailgate into the right side
hinge.
2. Hold the tailgate at a 45 degree angleand insert left side hinge.
3. Continue to hold tailgate at a 45 degree
angle and attach the tailgate support
cables.
4. Close the tailgate securely.
CAUTION
The tailgate is heavy. Be careful not to
drop it during removal.
IC0175
3-16Pre-driving checks and adjustments
ZX
Page 103 of 290

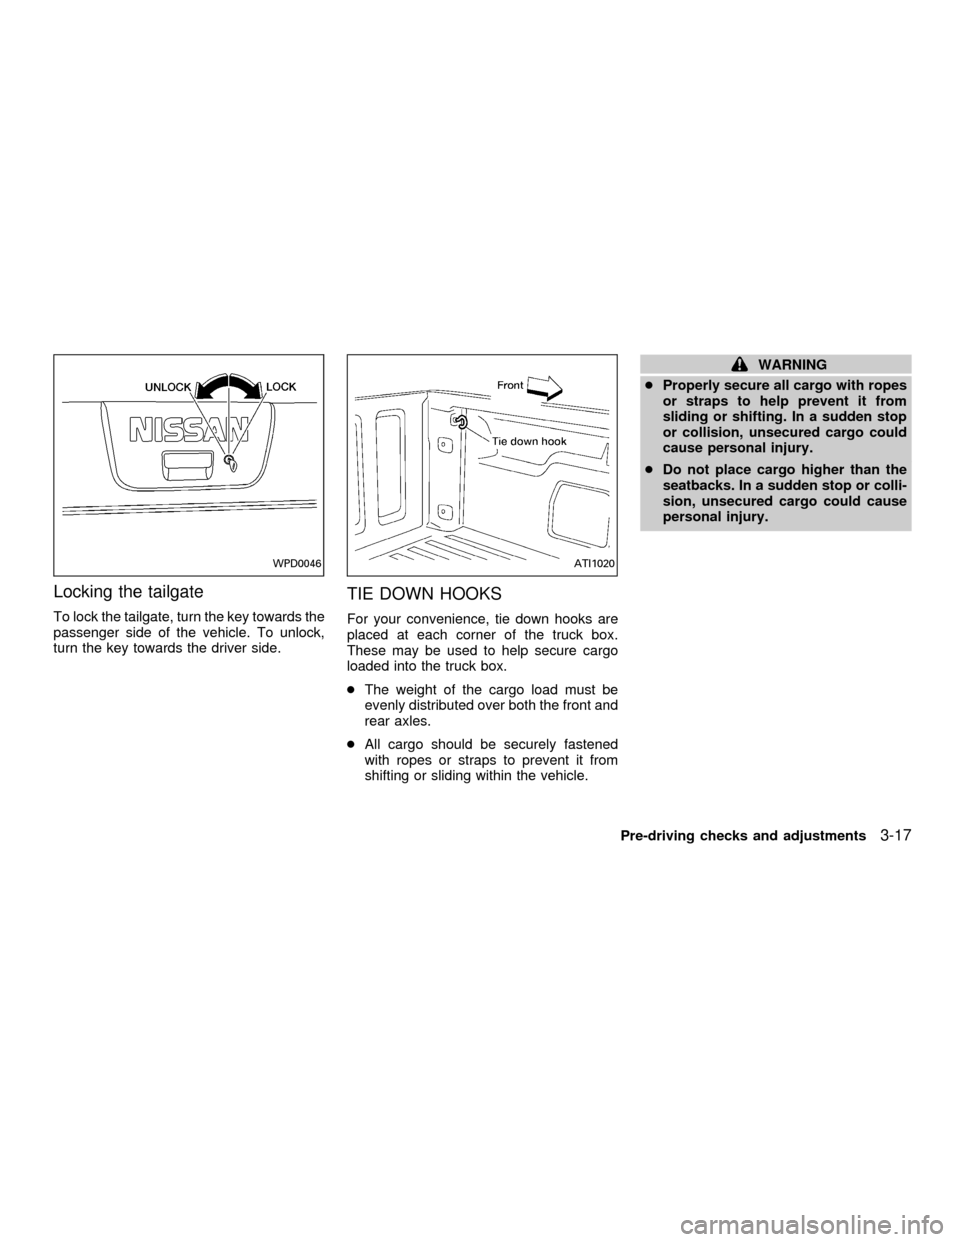
Locking the tailgate
To lock the tailgate, turn the key towards the
passenger side of the vehicle. To unlock,
turn the key towards the driver side.
TIE DOWN HOOKS
For your convenience, tie down hooks are
placed at each corner of the truck box.
These may be used to help secure cargo
loaded into the truck box.
cThe weight of the cargo load must be
evenly distributed over both the front and
rear axles.
cAll cargo should be securely fastened
with ropes or straps to prevent it from
shifting or sliding within the vehicle.
WARNING
cProperly secure all cargo with ropes
or straps to help prevent it from
sliding or shifting. In a sudden stop
or collision, unsecured cargo could
cause personal injury.
cDo not place cargo higher than the
seatbacks. In a sudden stop or colli-
sion, unsecured cargo could cause
personal injury.
WPD0046ATI1020
Pre-driving checks and adjustments3-17
ZX
Page 177 of 290

Getting the spare tire and tools
1.For Standard Cab models:
a. Move the bench seatback fully for-
ward.
b. Remove the jack, jack rod, and wheel
nut wrench located behind the driver's
side of the bench seat.For King Cab models:
a. Move the driver's seatback fully forward.
b. Remove the jack and wheel nut wrench
from the tool case located behind the
driver's seat and below the jump seat.
c. Remove the jack rod located behind the
driver's seat.For Crew Cab models:
a. Tilt the rear bench seat forward
b. Remove the jack, jack rod, and tool case
located behind the rear bench seat.
2. Fit the square end of the jack rod into the
square hole of the wheel nut wrench to
form a handle.
3. Find the oval-shaped opening under the
middle of the tailgate. Pass the T-shaped
end of the jack rod through the opening
and direct it towards the spare tire winch,
located directly above the spare tire.
ACE1010ACE1017ACE1039
In case of emergency6-3
ZX
Page 193 of 290

SEAT BELTS
The seat belts can be cleaned by wiping
them with a sponge dampened in a mild
soap solution. Allow the belts to dry com-
pletely in the shade before using them. See
ªSeat belt maintenanceº in the ªSeats, re-
straints and supplemental air bag systemsº
section of this owner's manual.
WARNING
Do not allow wet seat belts to roll up in
the retractor. NEVER use bleach, dye or
chemical solvents to clean the seat
belts, since these materials may se-
verely weaken the seat belt webbing.
MOST COMMON FACTORS
CONTRIBUTING TO VEHICLE
CORROSION
1. The accumulation of moisture-retaining
dirt and debris in body panel sections,
cavities, and other areas.
2. Damage to paint and other protective
coatings caused by gravel and stone
chips or minor traffic accidents.
ENVIRONMENTAL FACTORS
INFLUENCE THE RATE OF
CORROSION
Moisture
The accumulation of sand, dirt and water on
the underside of the body accelerates corro-
sion. Floor sections which have snow and ice
trapped under the floor matting will not dry.
Relative humidity
Corrosion will be accelerated:
cin areas of high relative humidity.
cin areas where the temperatures stay
above freezing.
cwhere atmospheric pollution exists.cwhere road salt is used.
Temperature
A temperature increase accelerates the rate
of corrosion to those parts which are not
well ventilated.
Air pollution
Industrial pollution, the presence of salt in
the air in coastal areas, or heavy road salt
use will accelerate the corrosion process.
Road salt will also accelerate the disintegra-
tion of paint surfaces.
TO PROTECT YOUR VEHICLE
FROM CORROSION
cwash and wax your vehicle often to keep
the vehicle clean.
calways check for minor damage to the
paint and repair it as soon as possible.
ckeep drain holes at the bottom of the
doors and tailgate open to avoid water
accumulation.
ccheck the underbody and inside the
pick-up box. If any sand, dirt or salt is
accumulated, wash it off with water as
soon as possible.
CORROSION PROTECTION
Appearance and care7-5
ZX
Page 241 of 290

cluding the spare, and adjust to the speci-
fied pressure if necessary. Check carefully
for damage, cuts or excessive wear.
Wheel nuts*When checking the tires, make
sure no wheel nuts are missing, and check for
any loose wheel nuts. Tighten if necessary.
Tire rotation*Tires should be rotated every
7,500 miles (12,000 km).
Wheel alignment and balanceIf the ve-
hicle should pull to either side while driving
on a straight and level road, or if you detect
uneven or abnormal tire wear, there may be
a need for wheel alignment.
If the steering wheel or seat vibrates at
normal highway speeds, wheel balancing
may be needed.
Windshield wiper blades*Check for
cracks or wear if they do not wipe properly.
Doors, hood and tailgateCheck that the
doors, hood and tailgate operate properly.
Also ensure that all latches lock securely.
Lubricate hinges, latches, latch pins, rollers
and links as necessary. Make sure that the
secondary latch keeps the hood from open-
ing when the primary latch is released.
When driving in areas using road salt orother corrosive materials, check lubrication
frequently.
Lights*Make sure that the headlights, stop
lights, tail lights, turn signal lights, and other
lights are all operating properly and installed
securely. Also check headlight aim.INTERIOR MAINTENANCE
The maintenance items listed here should
be checked on a regular basis, such as
when performing periodic maintenance,
cleaning the vehicle, etc.
Additional information on the following
items with an ``*'' is found in the ``Do-it-
yourself'' section of this manual.
Warning lights and chimesMake sure all
warning lights and chimes are operating
properly.
Windshield wiper and washer*Check that
the wipers and washer operate properly and
that the wipers do not streak.
Windshield defrosterCheck that the air
comes out of the defroster outlets properly
and in sufficient quantity when operating the
heater or air conditioner.
Steering wheelCheck for changes in thesteering conditions, such as excessive free-
play, hard steering or strange noises.
SeatsCheck seat position controls such as
seat adjusters, seatback recliner, etc. to
ensure they operate smoothly and all
latches lock securely in every position.
Check that the head restraints move up and
down smoothly and the locks (if so
equipped) hold securely in all latched posi-
tions.
Seat beltsCheck that all parts of the seat
belt system (e.g., buckles, anchors, adjust-
ers and retractors) operate properly and
smoothly, and are installed securely. Check
the belt webbing for cuts, fraying, wear or
damage.
Accelerator pedalCheck the pedal for
smooth operation and make sure the pedal
does not catch or require uneven effort.
Keep the floor mat away from the pedal.
Clutch pedal*Make sure the pedal oper-
ates smoothly and check that it has the
proper free travel.
BrakesCheck that the brakes do not pull
the vehicle to one side when applied.
Brake pedal and booster*Check the pedal
Maintenance
9-3
ZX
Page 287 of 290

Headlight and turn signal switch .......... 2-17
Overdrive switch.......................... 5-13, 5-14
Passenger supplemental air bag ON/OFF
switch and light ..................................... 1-17
Rear window defogger switch .............. 2-16
Windshield wiper and washer switch ... 2-15
T
Tachometer .................................................. 2-5
Tailgate latch ............................................. 3-15
Three-way catalyst....................................... 5-2
Tie down hooks ......................................... 3-17
Tilting steering wheel ................................. 3-12
Tire
Flat tire.................................................... 6-2
Spare tire .............................................. 8-40
Tire chains ............................................ 8-37
Tire placard......................................... 10-14
Tire pressure ........................................ 8-36
Tire rotation .......................................... 8-38
Tires of 4-wheel drive ........................... 8-39
Types of tires ........................................ 8-36
Uniform tire quality grading ................ 10-27
Wheels and tires................................... 8-36
Wheel/tire size .................................... 10-10
Towing
2-wheel drive models ........................... 6-11
4-wheel drive models ........................... 6-12
Tow truck towing .................................. 6-11
Towing load/specification chart .......... 10-24Trailer towing ...................................... 10-22
Transfer case ............................................. 5-21
Transmission
Automatic transmission fluid (ATF) ...... 8-14
Driving with automatic transmission ....... 5-9
Driving with manual transmission ......... 5-15
Selector lever lock release ................... 5-12
Travel (See registering your vehicle in
another country)....................................... 10-12
Truck - camper loading............................ 10-17
Turn signal switch (See headlight and turn
signal switch) ............................................. 2-17
U
Uniform tire quality grading ..................... 10-27
V
Vanity mirror .............................................. 3-13
Vehicle dimensions and weights ............. 10-11
Vehicle identification number (VIN)
(chassis number) ..................................... 10-12
Vehicle identification number (VIN)
plate ......................................................... 10-12
Vehicle loading information ..................... 10-15
Vehicle recovery ........................................ 6-13
Vehicle security system ............................. 2-12
Ventilators .................................................... 4-2W
Warning
Air bag warning light............................. 1-20
Hazard warning flasher switch ............. 2-19
Vehicle security system ........................ 2-12
Warning labels (for SRS) ..................... 1-20
Warning/indicator lights and chimes ...... 2-7
Weights (See dimensions and weights) .. 10-11
Wheels and tires ........................................ 8-36
Wheel/tire size ......................................... 10-10
When traveling or registering your vehicle
in another country .................................... 10-12
Window washer fluid.................................. 8-16
Windows
Manual windows ................................... 2-25
Power windows..................................... 2-23
Rear sliding window ............................. 2-25
Windshield wiper and washer switch ........ 2-15
Wiper
Windshield wiper and washer switch ... 2-15
Wiper blades......................................... 8-23
11-5
ZX