2001 NISSAN FRONTIER interior lights
[x] Cancel search: interior lightsPage 56 of 290

2 Instruments and controls
Meters and gauges ................................................2-2
Speedometer and odometer .............................2-3............................................2-3
Tachometer........................................................2-5
Engine coolant temperature gauge ...................2-5
Fuel gauge ........................................................2-6
Warning/indicator lights and chimes ......................2-7
Checking bulbs ..................................................2-7
Warning lights ....................................................2-8
Indicator lights .................................................2-10
Chimes.............................................................2-12
Security system ..................................................2-12
Vehicle security system (if so equipped) ........2-12
Windshield wiper and washer switch ...................2-15
Switch operation ..............................................2-16
Rear window defogger switch (Crew Cab
models only) .........................................................2-16
Headlight and turn signal switch ..........................2-17
Headlight switch ..............................................2-17
Turn signal switch............................................2-18
Front fog light switch (if so equipped)..................2-18
Hazard warning flasher switch .............................2-19Horn ......................................................................2-19
Power point (if so equipped) ................................2-20
Cigarette lighter (accessory) and ash tray ...........2-20
Storage .................................................................2-21
Storage compartment (Crew Cab
models only) ....................................................2-21
Cup holders (if so equipped) ...........................2-21
Glove box ........................................................2-22
Grocery hooks (King Cab only) .......................2-23
Windows ...............................................................2-23
Power windows (if so equipped) .....................2-23
Manual windows ..............................................2-25
Rear sliding window (if so equipped) ..............2-25
Sunroof (if so equipped).......................................2-25
Tilting the sunroof ............................................2-25
Removing/installing..........................................2-26
Interior lights .........................................................2-28
Map lights (if so equipped)...................................2-29
Illuminated entry system ......................................2-29
Battery saver ...................................................2-29
ZX
Page 84 of 290

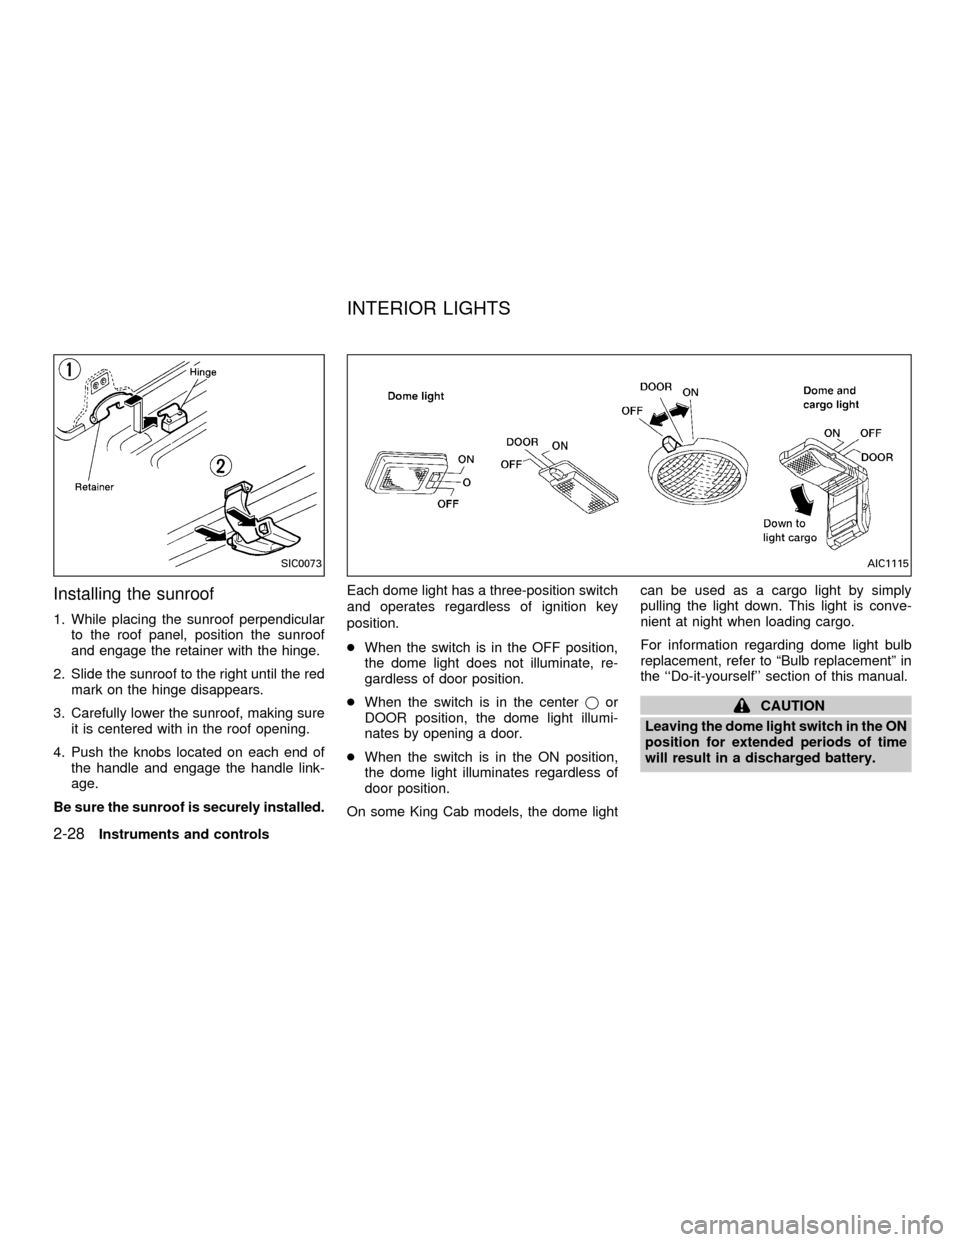
Installing the sunroof
1. While placing the sunroof perpendicular
to the roof panel, position the sunroof
and engage the retainer with the hinge.
2. Slide the sunroof to the right until the red
mark on the hinge disappears.
3. Carefully lower the sunroof, making sure
it is centered with in the roof opening.
4. Push the knobs located on each end of
the handle and engage the handle link-
age.
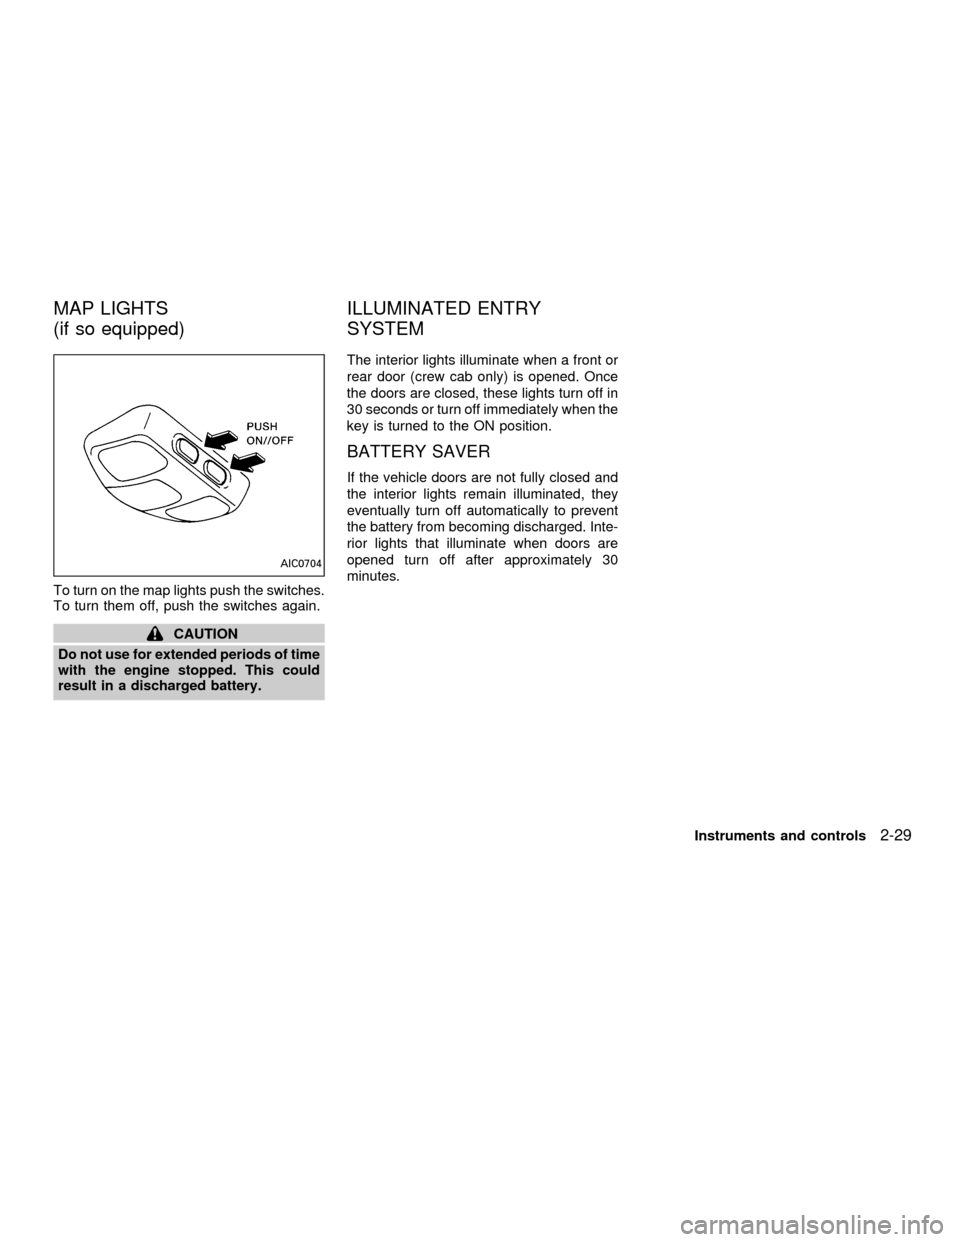
Be sure the sunroof is securely installed.Each dome light has a three-position switch
and operates regardless of ignition key
position.
cWhen the switch is in the OFF position,
the dome light does not illuminate, re-
gardless of door position.
cWhen the switch is in the centerjor
DOOR position, the dome light illumi-
nates by opening a door.
cWhen the switch is in the ON position,
the dome light illuminates regardless of
door position.
On some King Cab models, the dome lightcan be used as a cargo light by simply
pulling the light down. This light is conve-
nient at night when loading cargo.
For information regarding dome light bulb
replacement, refer to ªBulb replacementº in
the ``Do-it-yourself'' section of this manual.
CAUTION
Leaving the dome light switch in the ON
position for extended periods of time
will result in a discharged battery.
SIC0073AIC1115
INTERIOR LIGHTS
2-28Instruments and controls
ZX
Page 85 of 290

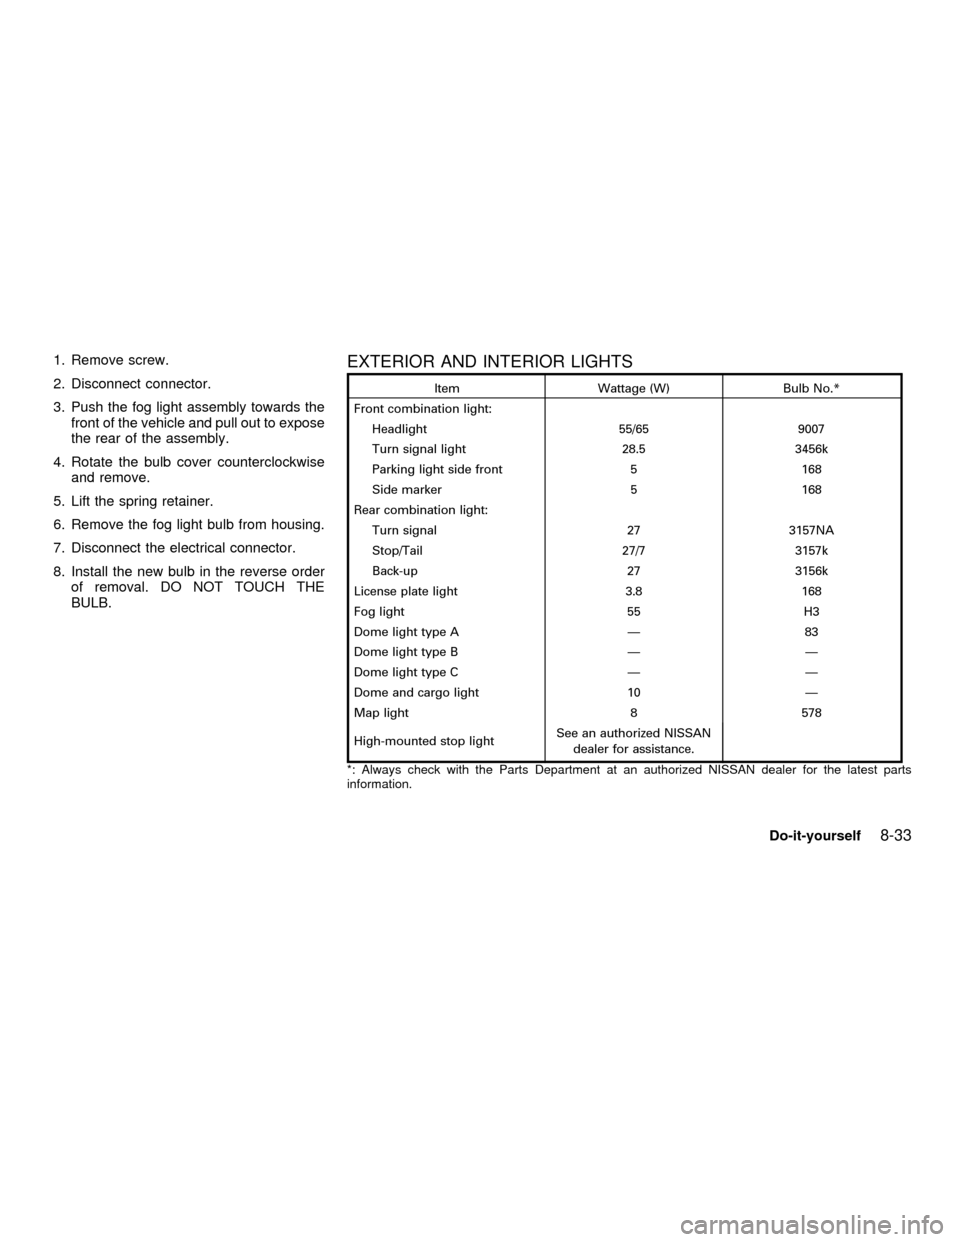
To turn on the map lights push the switches.
To turn them off, push the switches again.
CAUTION
Do not use for extended periods of time
with the engine stopped. This could
result in a discharged battery.The interior lights illuminate when a front or
rear door (crew cab only) is opened. Once
the doors are closed, these lights turn off in
30 seconds or turn off immediately when the
key is turned to the ON position.
BATTERY SAVER
If the vehicle doors are not fully closed and
the interior lights remain illuminated, they
eventually turn off automatically to prevent
the battery from becoming discharged. Inte-
rior lights that illuminate when doors are
opened turn off after approximately 30
minutes.
AIC0704
MAP LIGHTS
(if so equipped)ILLUMINATED ENTRY
SYSTEM
Instruments and controls2-29
ZX
Page 91 of 290

Unlocking doors
1. Push the UNLOCK button on the multi-
remote controller. Only the driver's side
door unlocks.
2. Push the UNLOCK button on the multi-remote controller again within five sec-
onds. All doors unlock.
3. The interior light illuminates for 30 sec-
onds when the light switch is in the O or
DOOR position.The interior light can be turned off without
waiting 30 seconds by inserting the key into
the ignition and turning to the ON or START
position, locking the doors with the multi-
remote controller or pushing the interior light
switch to the OFF position.
Auto Relock
All doors will lock automatically within 5
minutes unless one of the following opera-
tions is performed:
cany door is opened
ca key is inserted into the ignition switch
and the key is turned from OFF to ON.
Using the panic alarm
If you are near your vehicle and feel threat-
ened, you may activate the panic alarm to
call attention as follows:
1. Push the PANIC button on the remote
controller forlonger than 0.5 seconds.
2. The theft warning alarm and headlights
will stay on for 30 seconds.
3. The panic alarm stops when:
cit has run for 30 seconds, or
cthe LOCK or UNLOCK button is pressed,
on the multi-remote controller.
WPD0038
Pre-driving checks and adjustments3-5
ZX
Page 196 of 290

8 Do-it-yourself
Maintenance precautions .......................................8-2
Engine compartment check locations ....................8-3
Engine cooling system ...........................................8-6
Checking engine coolant level ..........................8-6
Changing engine coolant ..................................8-7
Engine oil .............................................................8-10
Checking engine oil level ................................8-10
Changing engine oil ........................................8-11
Changing engine oil filter.................................8-13
Automatic transmission fluid ................................8-14
Temperature conditions for checking ..............8-14
Power steering fluid..............................................8-15
Brake and clutch fluid...........................................8-16
Window washer fluid ............................................8-16
Window washer fluid reservoir ........................8-16
Battery ..................................................................8-17
Jump starting ...................................................8-18
Drive belts ............................................................8-19
Spark plugs ..........................................................8-20
Replacing spark plugs
(except supercharger) .....................................8-20Replacing spark plugs
(with supercharger)..........................................8-21
Air cleaner ............................................................8-21
Windshield wiper blades ......................................8-23
Cleaning ..........................................................8-23
Replacing .........................................................8-23
Parking brake and brake pedal ............................8-24
Checking parking brake...................................8-24
Checking brake pedal .....................................8-24
Brake booster ..................................................8-25
Clutch pedal .........................................................8-26
Checking clutch pedal .....................................8-26
Fuses ....................................................................8-27
Passenger compartment .................................8-27
Multi-remote controller battery replacement ........8-28
Lights ....................................................................8-29
Headlights ........................................................8-29
Fog lights (if so equipped)...............................8-32
Exterior and interior lights ...............................8-33
Wheels and tires ..................................................8-36
Tire pressure ...................................................8-36
ZX
Page 229 of 290

1. Remove screw.
2. Disconnect connector.
3. Push the fog light assembly towards the
front of the vehicle and pull out to expose
the rear of the assembly.
4. Rotate the bulb cover counterclockwise
and remove.
5. Lift the spring retainer.
6. Remove the fog light bulb from housing.
7. Disconnect the electrical connector.
8. Install the new bulb in the reverse order
of removal. DO NOT TOUCH THE
BULB.EXTERIOR AND INTERIOR LIGHTS
Item Wattage (W) Bulb No.*
Front combination light:
Headlight 55/65 9007
Turn signal light 28.5 3456k
Parking light side front 5 168
Side marker 5 168
Rear combination light:
Turn signal 27 3157NA
Stop/Tail 27/7 3157k
Back-up 27 3156k
License plate light 3.8 168
Fog light 55 H3
Dome light type A Ð 83
Dome light type B Ð Ð
Dome light type C Ð Ð
Dome and cargo light 10 Ð
Map light 8 578
High-mounted stop lightSee an authorized NISSAN
dealer for assistance.
*: Always check with the Parts Department at an authorized NISSAN dealer for the latest parts
information.
Do-it-yourself8-33
ZX
Page 241 of 290

cluding the spare, and adjust to the speci-
fied pressure if necessary. Check carefully
for damage, cuts or excessive wear.
Wheel nuts*When checking the tires, make
sure no wheel nuts are missing, and check for
any loose wheel nuts. Tighten if necessary.
Tire rotation*Tires should be rotated every
7,500 miles (12,000 km).
Wheel alignment and balanceIf the ve-
hicle should pull to either side while driving
on a straight and level road, or if you detect
uneven or abnormal tire wear, there may be
a need for wheel alignment.
If the steering wheel or seat vibrates at
normal highway speeds, wheel balancing
may be needed.
Windshield wiper blades*Check for
cracks or wear if they do not wipe properly.
Doors, hood and tailgateCheck that the
doors, hood and tailgate operate properly.
Also ensure that all latches lock securely.
Lubricate hinges, latches, latch pins, rollers
and links as necessary. Make sure that the
secondary latch keeps the hood from open-
ing when the primary latch is released.
When driving in areas using road salt orother corrosive materials, check lubrication
frequently.
Lights*Make sure that the headlights, stop
lights, tail lights, turn signal lights, and other
lights are all operating properly and installed
securely. Also check headlight aim.INTERIOR MAINTENANCE
The maintenance items listed here should
be checked on a regular basis, such as
when performing periodic maintenance,
cleaning the vehicle, etc.
Additional information on the following
items with an ``*'' is found in the ``Do-it-
yourself'' section of this manual.
Warning lights and chimesMake sure all
warning lights and chimes are operating
properly.
Windshield wiper and washer*Check that
the wipers and washer operate properly and
that the wipers do not streak.
Windshield defrosterCheck that the air
comes out of the defroster outlets properly
and in sufficient quantity when operating the
heater or air conditioner.
Steering wheelCheck for changes in thesteering conditions, such as excessive free-
play, hard steering or strange noises.
SeatsCheck seat position controls such as
seat adjusters, seatback recliner, etc. to
ensure they operate smoothly and all
latches lock securely in every position.
Check that the head restraints move up and
down smoothly and the locks (if so
equipped) hold securely in all latched posi-
tions.
Seat beltsCheck that all parts of the seat
belt system (e.g., buckles, anchors, adjust-
ers and retractors) operate properly and
smoothly, and are installed securely. Check
the belt webbing for cuts, fraying, wear or
damage.
Accelerator pedalCheck the pedal for
smooth operation and make sure the pedal
does not catch or require uneven effort.
Keep the floor mat away from the pedal.
Clutch pedal*Make sure the pedal oper-
ates smoothly and check that it has the
proper free travel.
BrakesCheck that the brakes do not pull
the vehicle to one side when applied.
Brake pedal and booster*Check the pedal
Maintenance
9-3
ZX