2001 NISSAN FRONTIER headlights
[x] Cancel search: headlightsPage 70 of 290

begins to flash once every three seconds.
The system is now activated. If, during
this 30 second time period, a door is
unlocked by the key or the multi-remote
controller, or the ignition key is turned to
ACC or ON, the system will not activate.
cIf the key is turned slowly when lock-
ing the door, the system may not acti-
vate. Furthermore, if the key is turned
excessively to the unlock position, the
system may be deactivated when the
key is removed. If the indicator light
fails to glow for 30 seconds, unlock
the door once and lock it again.
cEven when the driver and/or passen-
gers are in the vehicle, the system will
activate with doors, and hood locked
and with the ignition key in the OFF
position. Turn the ignition key to ACC
or ON to turn the system off.
The vehicle security system is NOT acti-
vated if one of the following occurs:
cA door is unlocked or the ignition key is
turned to the ACC or ON position during
the 30 seconds in which the SECURITY
light stays on.
cThe SECURITY light blinks at a steady1/2 second on - 1/2 second off rate (a
door, or the hood is open and the key is
not in the ACC or ON position). When the
ignition key is turned to the ACC or ON
position, the SECURITY light turns off.
Vehicle security system operation
The vehicle security system emits the fol-
lowing alarm:
cThe headlights blink and the horn sounds
intermittently. In addition, the starter mo-
tor does not operate.
c
The alarm automatically turns off after 50
seconds. However, the alarm reactivates
if the vehicle is tampered with again. The
alarm can be shut off by unlocking a door
with the key or by pressing the UNLOCK
buttonon the multi-remote controller.
The alarm is activated by:
copening a door without using the key
(even if the door is unlocked by releasing
the inside lock knob).
copening the hood.
How to stop the alarm
The alarm stops only by unlocking a door
with the key or by pressing the UNLOCK
buttonon the multi-remote controller.
The alarm does not stop if the ignition
switch is turned to ACC or ON position.
2-14Instruments and controls
ZX
Page 73 of 290

HEADLIGHT SWITCH
Lighting
Turn the switch to theposition:
The front combination, rear combination,
license plate and instrument panel lights
come on.Turn the switch to the
position:
The headlights come on and all the other
lights remain on.
To select the high beam function, push the
lever forward. The high beam lights come
on and the
light illuminates. Pull it back
to select the low beam.
Instrument brightness control
The instrument brightness control operates
when the light switch is in the
or
position.
Turn the control to adjust the brightness of
the instrument panel lights.
Passing signal
Pulling and releasing the lever flashes the
headlight high beams on and off.
AIC1116
AIC1023
HEADLIGHT AND TURN
SIGNAL SWITCH
Instruments and controls2-17
ZX
Page 74 of 290

Daytime Running Light System
(Canada only)
The headlights automatically illuminate at a
reduced intensity when the engine is started
with the parking brake released. The day-
time running lights operate with the head-
light switch in the OFF position or in the
position. Turn the headlight switch
to the
position for full illumination
when driving at night. If the parking brake is
applied before the engine is started, the
daytime running lights do not illuminate. The
daytime running lights illuminate once the
parking brake is released. The daytime run-
ning lights will remain on until the ignition
switch is turned off.
WARNING
When the daytime running light system
is active, tail lights on your vehicle are
not on. It is necessary at dusk to turn
on your headlights. Failure to do so
could cause an accident injuring your-
self and others.
TURN SIGNAL SWITCH
Turn signal
Move the lever up or down to signal the
turning direction. When the turn is com-
pleted, the turn signal cancels automati-
cally.
Lane change signal
To indicate a lane change, move the lever
up or down to the point where the indicator
light begins to flash, but the lever does not
latch.
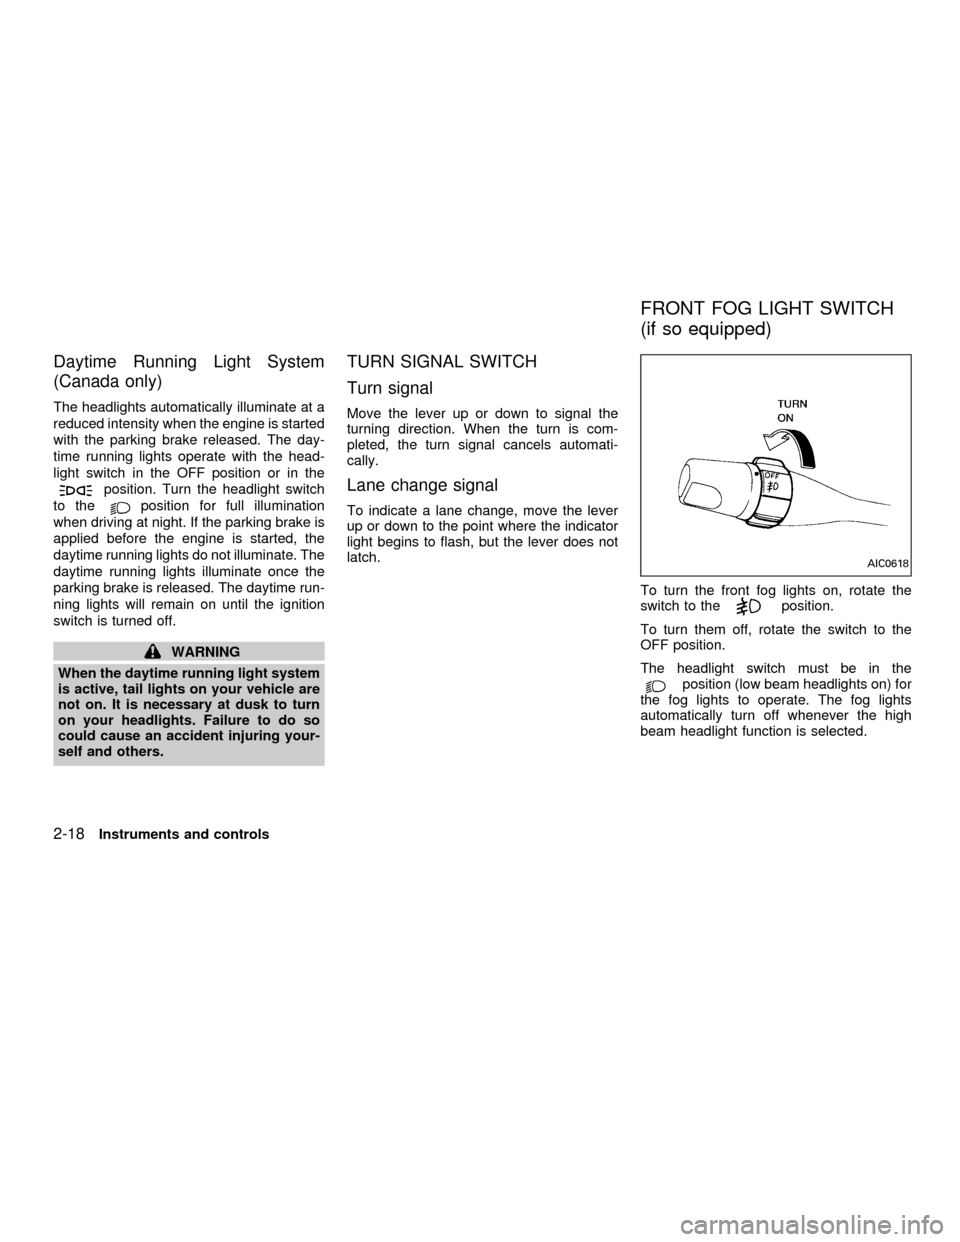
To turn the front fog lights on, rotate the
switch to the
position.
To turn them off, rotate the switch to the
OFF position.
The headlight switch must be in the
position (low beam headlights on) for
the fog lights to operate. The fog lights
automatically turn off whenever the high
beam headlight function is selected.
AIC0618
FRONT FOG LIGHT SWITCH
(if so equipped)
2-18Instruments and controls
ZX
Page 76 of 290

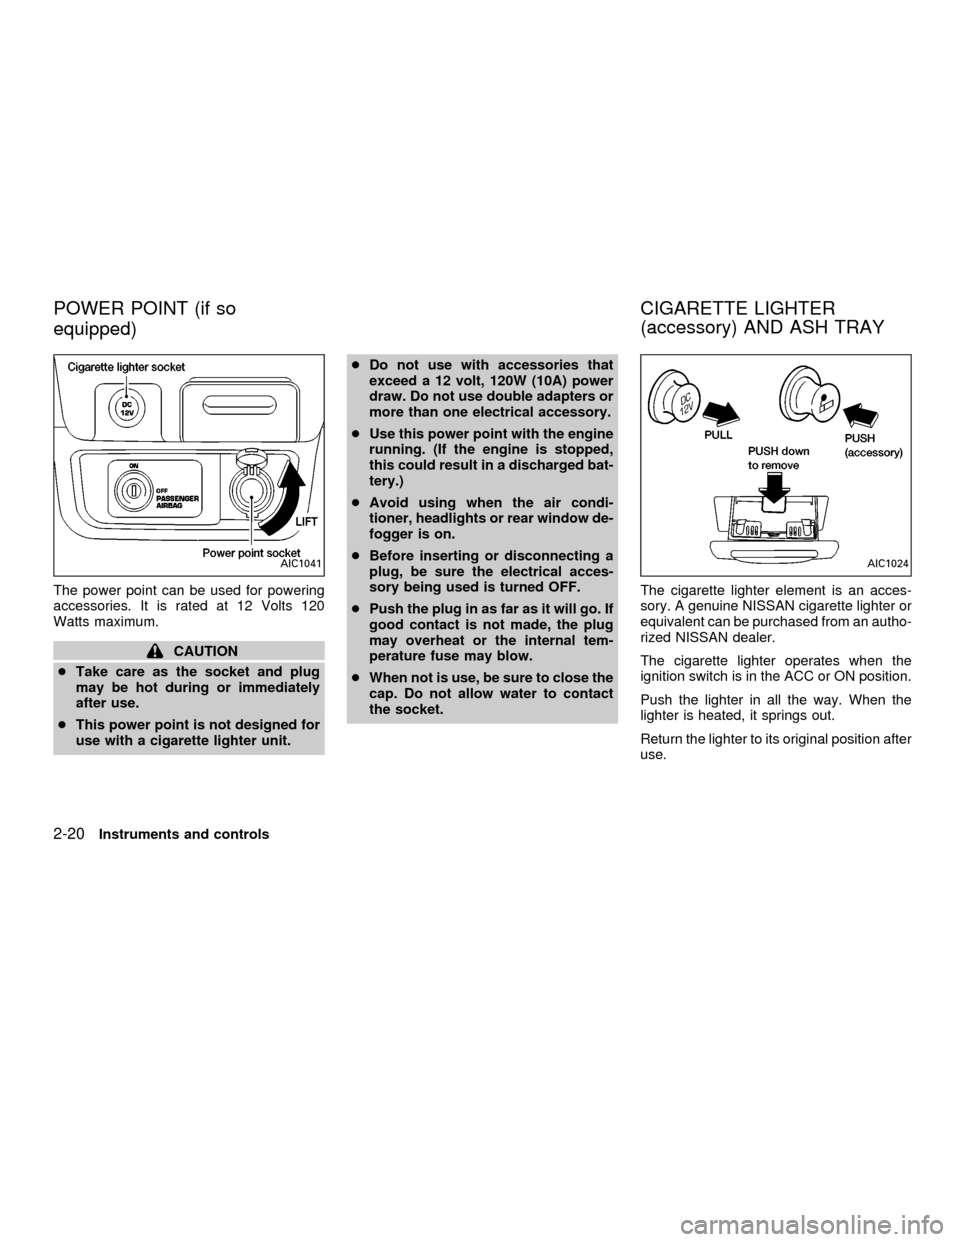
The power point can be used for powering
accessories. It is rated at 12 Volts 120
Watts maximum.
CAUTION
cTake care as the socket and plug
may be hot during or immediately
after use.
cThis power point is not designed for
use with a cigarette lighter unit.cDo not use with accessories that
exceed a 12 volt, 120W (10A) power
draw. Do not use double adapters or
more than one electrical accessory.
cUse this power point with the engine
running. (If the engine is stopped,
this could result in a discharged bat-
tery.)
cAvoid using when the air condi-
tioner, headlights or rear window de-
fogger is on.
cBefore inserting or disconnecting a
plug, be sure the electrical acces-
sory being used is turned OFF.
cPush the plug in as far as it will go. If
good contact is not made, the plug
may overheat or the internal tem-
perature fuse may blow.
cWhen not is use, be sure to close the
cap. Do not allow water to contact
the socket.The cigarette lighter element is an acces-
sory. A genuine NISSAN cigarette lighter or
equivalent can be purchased from an autho-
rized NISSAN dealer.
The cigarette lighter operates when the
ignition switch is in the ACC or ON position.
Push the lighter in all the way. When the
lighter is heated, it springs out.
Return the lighter to its original position after
use.
AIC1041AIC1024
POWER POINT (if so
equipped)CIGARETTE LIGHTER
(accessory) AND ASH TRAY
2-20Instruments and controls
ZX
Page 91 of 290

Unlocking doors
1. Push the UNLOCK button on the multi-
remote controller. Only the driver's side
door unlocks.
2. Push the UNLOCK button on the multi-remote controller again within five sec-
onds. All doors unlock.
3. The interior light illuminates for 30 sec-
onds when the light switch is in the O or
DOOR position.The interior light can be turned off without
waiting 30 seconds by inserting the key into
the ignition and turning to the ON or START
position, locking the doors with the multi-
remote controller or pushing the interior light
switch to the OFF position.
Auto Relock
All doors will lock automatically within 5
minutes unless one of the following opera-
tions is performed:
cany door is opened
ca key is inserted into the ignition switch
and the key is turned from OFF to ON.
Using the panic alarm
If you are near your vehicle and feel threat-
ened, you may activate the panic alarm to
call attention as follows:
1. Push the PANIC button on the remote
controller forlonger than 0.5 seconds.
2. The theft warning alarm and headlights
will stay on for 30 seconds.
3. The panic alarm stops when:
cit has run for 30 seconds, or
cthe LOCK or UNLOCK button is pressed,
on the multi-remote controller.
WPD0038
Pre-driving checks and adjustments3-5
ZX
Page 99 of 290

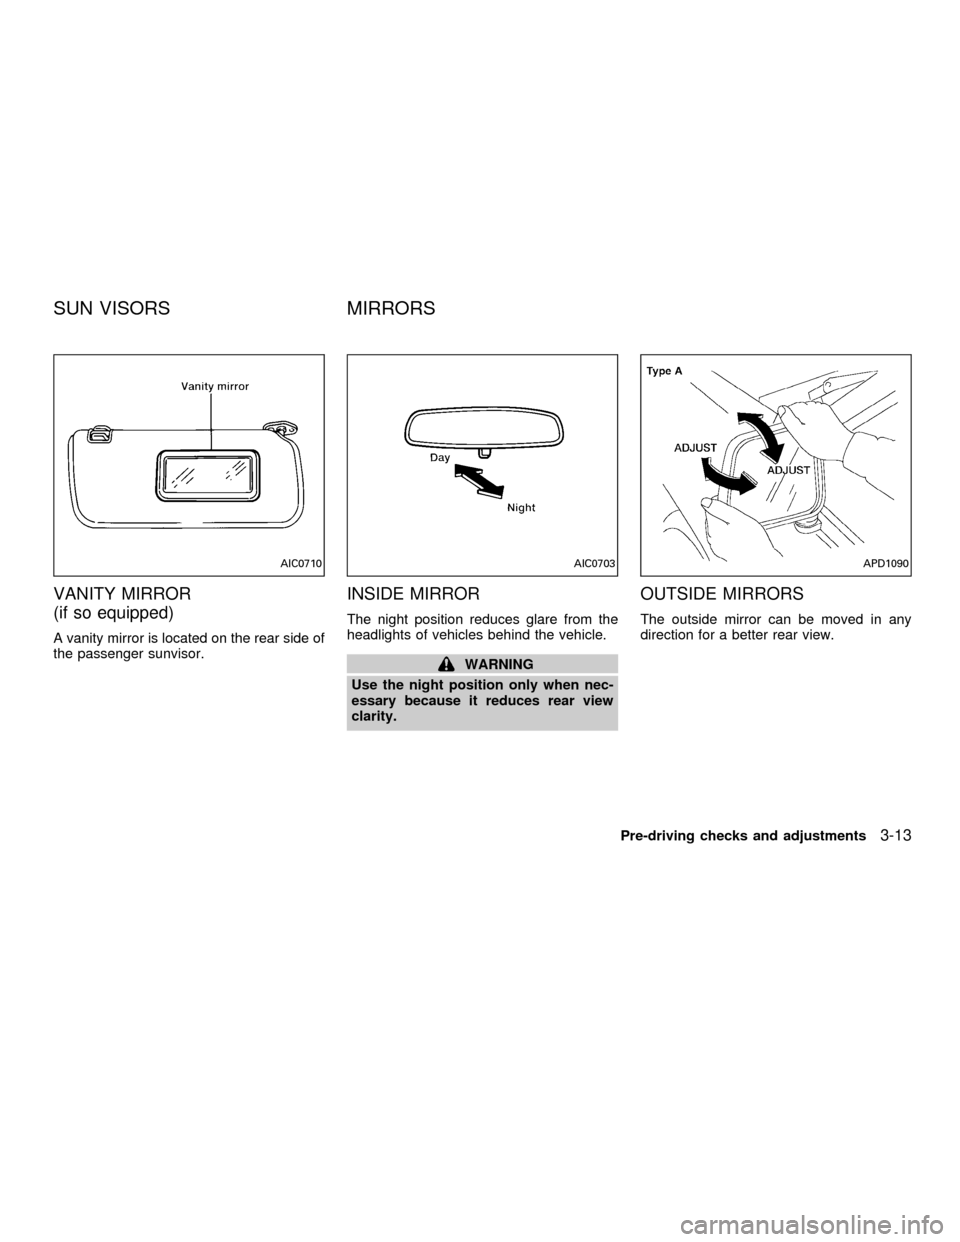
VANITY MIRROR
(if so equipped)
A vanity mirror is located on the rear side of
the passenger sunvisor.
INSIDE MIRROR
The night position reduces glare from the
headlights of vehicles behind the vehicle.
WARNING
Use the night position only when nec-
essary because it reduces rear view
clarity.
OUTSIDE MIRRORS
The outside mirror can be moved in any
direction for a better rear view.
AIC0710AIC0703APD1090
SUN VISORS MIRRORS
Pre-driving checks and adjustments3-13
ZX
Page 196 of 290

8 Do-it-yourself
Maintenance precautions .......................................8-2
Engine compartment check locations ....................8-3
Engine cooling system ...........................................8-6
Checking engine coolant level ..........................8-6
Changing engine coolant ..................................8-7
Engine oil .............................................................8-10
Checking engine oil level ................................8-10
Changing engine oil ........................................8-11
Changing engine oil filter.................................8-13
Automatic transmission fluid ................................8-14
Temperature conditions for checking ..............8-14
Power steering fluid..............................................8-15
Brake and clutch fluid...........................................8-16
Window washer fluid ............................................8-16
Window washer fluid reservoir ........................8-16
Battery ..................................................................8-17
Jump starting ...................................................8-18
Drive belts ............................................................8-19
Spark plugs ..........................................................8-20
Replacing spark plugs
(except supercharger) .....................................8-20Replacing spark plugs
(with supercharger)..........................................8-21
Air cleaner ............................................................8-21
Windshield wiper blades ......................................8-23
Cleaning ..........................................................8-23
Replacing .........................................................8-23
Parking brake and brake pedal ............................8-24
Checking parking brake...................................8-24
Checking brake pedal .....................................8-24
Brake booster ..................................................8-25
Clutch pedal .........................................................8-26
Checking clutch pedal .....................................8-26
Fuses ....................................................................8-27
Passenger compartment .................................8-27
Multi-remote controller battery replacement ........8-28
Lights ....................................................................8-29
Headlights ........................................................8-29
Fog lights (if so equipped)...............................8-32
Exterior and interior lights ...............................8-33
Wheels and tires ..................................................8-36
Tire pressure ...................................................8-36
ZX
Page 225 of 290

FCC Notice:
Changes or modification not expressly
approved by the manufacturer for com-
pliance could void the user's authority to
operate the equipment.
This device complies with part 15 of the
FCC Rules and RSS-210 of Industry
Canada.
Operation is subject to the following two
conditions: (1) This device may not
cause harmful interference, and (2) this
device must accept any interference re-
ceived including interference that may
cause undesired operation of the device.HEADLIGHTS
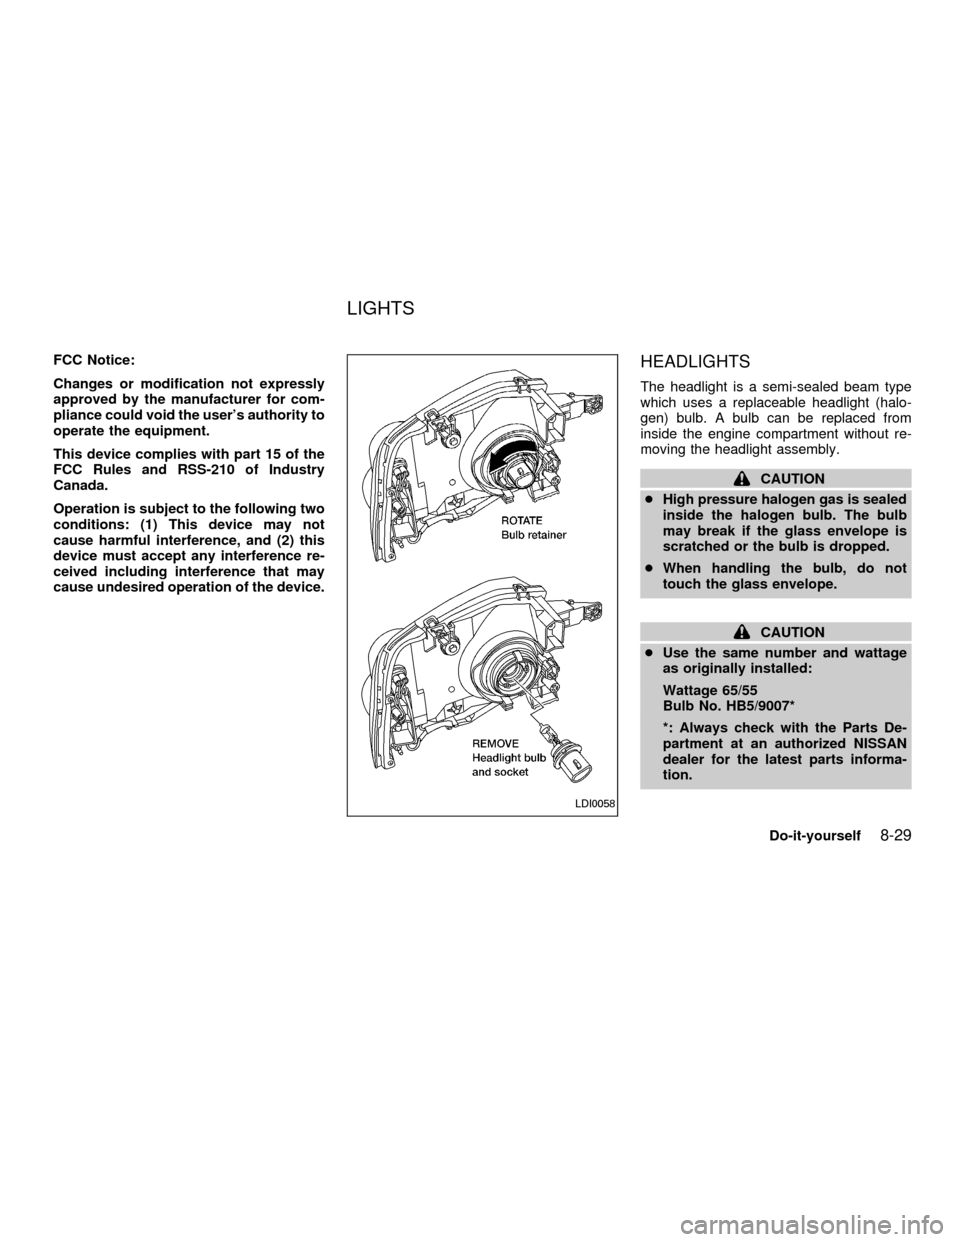
The headlight is a semi-sealed beam type
which uses a replaceable headlight (halo-
gen) bulb. A bulb can be replaced from
inside the engine compartment without re-
moving the headlight assembly.
CAUTION
cHigh pressure halogen gas is sealed
inside the halogen bulb. The bulb
may break if the glass envelope is
scratched or the bulb is dropped.
cWhen handling the bulb, do not
touch the glass envelope.
CAUTION
cUse the same number and wattage
as originally installed:
Wattage 65/55
Bulb No. HB5/9007*
*: Always check with the Parts De-
partment at an authorized NISSAN
dealer for the latest parts informa-
tion.
LDI0058
LIGHTS
Do-it-yourself8-29
ZX