2001 NISSAN FRONTIER flat tire
[x] Cancel search: flat tirePage 152 of 290
cMake sure the area around the vehicle is
clear.
cCheck fluid levels such as engine oil,
coolant, brake and clutch fluid, and win-
dow washer fluid as frequently as pos-
sible, at least whenever you refuel.
cCheck that all windows and lights are
clean.
cVisually inspect tires for their appearance
and condition. Also check tires for proper
inflation.
cLock all doors.
cPosition seat and adjust head restraints.
cAdjust inside and outside mirrors.
cFasten seat belts and ask all passengers
to do likewise.
cCheck the operation of warning lights
when key is turned to the ON (3) position.
See9Warning/Indicator lights and
chimes9in the9Instruments and controls9
section.1. Apply the parking brake.
2.Automatic transmission:
Move the selector lever to P (Park) or N
(Neutral). P (Park) is preferred.
The selector lever cannot be moved
out of P (Park) and into any of the
other gear positions if the ignition key
is turned to OFF or if the key is re-
moved from the ignition switch.
The starter is designed not to operate
if the selector lever is in one of the
driving positions.
Manual transmission:
Move the shift lever to N (Neutral), and
fully depress the clutch pedal to the floor
while starting the engine.
The starter is designed not to operate
unless the clutch pedal is fully de-
pressed.
3.With your foot off the accelerator
pedal,turn the ignition key to START.
Release the key when the engine starts.
If the engine starts, but fails to run, repeat
the above procedure.cIf the engine is very hard to start in
extremely cold or hot weather, depress
the accelerator pedal fully and hold it
to help start the engine.
cIn the summer, when restarting the
engine within 30 minutes after it has
been stopped, keep the accelerator
pedal fully depressed while starting.
CAUTION
Do not operate the starter for more than
15 seconds at a time. If the engine does
not start, turn the key off and wait 10
seconds before cranking again, other-
wise the starter could be damaged.
4.Warm-up
Always allow the engine to idle for at
least 30 seconds after starting. Drive at a
moderate speed for a short distance first,
especially in cold weather.
BEFORE STARTING THE
ENGINESTARTING THE ENGINE
5-8Starting and driving
ZX
Page 164 of 290

cAccelerate slowly and smoothly. Maintain
cruising speeds with a constant accelera-
tor position.
cDrive at moderate speeds on the high-
way. Driving at high speeds lowers fuel
economy.
cAvoid unnecessary stopping and brak-
ing. Maintain a safe distance behind
other vehicles.
cUse a proper gear range which suits road
conditions. On level roads, shift into high
gear as soon as possible.
cAvoid unnecessary engine idling.cKeep your engine tuned up.
cFollow the recommended periodic main-
tenance schedule.
cKeep the tires inflated to the correct
pressure. Low tire pressure increases
tire wear and wastes fuel.
cKeep the front wheels in correct align-
ment. Improper alignment increases tire
wear and lowers fuel economy.
cAir conditioner operation lowers fuel
economy. Use the air conditioner only
when necessary.
cWhen cruising at highway speeds, it is
more economical to use the air condi-
tioner and leave the windows closed to
reduce drag.
c
Use 4H or 4L position only when neces-
sary. Four-wheel drive operation lowers
fuel economy.
SD0001
ASD1022
INCREASING FUEL
ECONOMYUSING FOUR-WHEEL DRIVE
5-20Starting and driving
ZX
Page 172 of 290
radiator and on the engine block. Refill
before operating the vehicle. For details,
see ``Changing engine coolant'' in the ``Do-
it-yourself'' section of this manual.
TIRE EQUIPMENT
1. SUMMER tires have a tread designed to
provide superior performance on dry
pavement. However, the performance of
these tires will be substantially reduced
in snowy and icy conditions. If you oper-
ate your vehicle on snowy or icy roads,
NISSAN recommends the use on all four
wheels of MUD & SNOW or ALL SEA-
SON tires. Please consult your NISSAN
dealer for the tire type, size, speed rating
and availability information.
2. For additional traction on icy roads, stud-
ded tires may be used. However, some
U.S. states and Canadian provinces pro-
hibit their use. Check local, state and
provincial laws before installing studded
tires.
Skid and traction capabilities of studded
snow tires on wet or dry surfaces may be
poorer than that of non-studded snow
tires.
3. Tire chains may be used. Use of tirechains may be prohibited according to
location. Check the local laws before
installing tire chains. When installing tire
chains, make sure they are of proper size
for the tires on your vehicle and are
installed according to the chain manufac-
turer's suggestions.Use only SAE
Class ``S'' chains.Other types may
damage your vehicle. Use chain tension-
ers when recommended by the tire chain
manufacturer to ensure a tight fit. Loose
end links of the tire chain must be se-
cured or removed to prevent the possi-
bility of whipping action damage to the
fenders or undercarriage. If possible,
avoid fully loading your vehicle when
using tire chains. In addition, drive at a
reduced speed, otherwise, your vehicle
may be damaged and/or vehicle handling
and performance may be adversely af-
fected. Never install tire chains on a
TEMPORARY USE ONLY spare tire. Do
not use tire chains on dry roads.
SPECIAL WINTER EQUIPMENT
It is recommended that the following items
be carried in the vehicle during winter:
1. A scraper and stiff-bristled brush to re-move ice and snow from the windows
and wiper blades.
2. A sturdy, flat board to be placed under
the jack to give it firm support.
3. A shovel to dig the vehicle out of snow-
drifts.
4. Extra window washer fluid to refill the
reservoir tank.
DRIVING ON SNOW OR ICE
WARNING
cWet ice (32ÉF, 0ÉC and freezing rain),
very cold snow, or ice can be slick
and very hard to drive on. The ve-
hicle will have much less traction or
``grip'' under these conditions. Try to
avoid driving on wet ice until the
road is salted or sanded.
cWhatever the condition, drive with
caution. Accelerate and slow down
with care. If accelerating or down-
shifting too fast, the drive wheels
will lose even more traction.
c
Allow more stopping distance under
these conditions. Braking should be
started sooner than on dry pavement.
5-28Starting and driving
ZX
Page 175 of 290

6 In case of emergency
Flat tire ...................................................................6-2
Changing a flat tire ............................................6-2
Jump starting ..........................................................6-8
Push starting ..........................................................6-9
If your vehicle overheats ......................................6-10Towing your vehicle .............................................6-11
Towing recommended by Nissan ....................6-11
Vehicle recovery (freeing a stuck
vehicle) ............................................................6-13
ZX
Page 176 of 290
CHANGING A FLAT TIRE
If you have a flat tire, follow the instructions
below:
Stopping the vehicle
1. Safely move the vehicle off the road and
away from traffic.
2. Turn on the hazard warning flashers.
3. Park on a level surface and apply the
parking brake. Shift the manual transmis-
sion into R (Reverse), or the automatic
transmission into P (Park).
WARNING
c
The transfer control lever
must be in the 2H, 4H or 4L position.
c
Do not leave the transfer control le-
ver in the N (Neutral) position. Other-
wise, the vehicle could roll unexpect-
edly even if the manual transmission
is in any gear or the automatic trans-
mission is in the P (Park) position.
This could result in serious personal
injury or property damage.
4. Turn off the engine.5. Raise the hood to warn other traffic and
to signal professional road assistance
personnel that you require assistance.
6. Have all passengers get out of the ve-
hicle and stand in a safe place away from
traffic and clear of the vehicle.
WARNING
cMake sure the parking brake is se-
curely applied and the manual trans-
mission is shifted into R (Reverse),
or the automatic transmission into P
(Park).
cNever change tires when the vehicle
is on a slope, ice or slippery areas.
This is hazardous.
cNever change tires if oncoming traf-
fic is close to your vehicle. Wait for
professional road assistance.
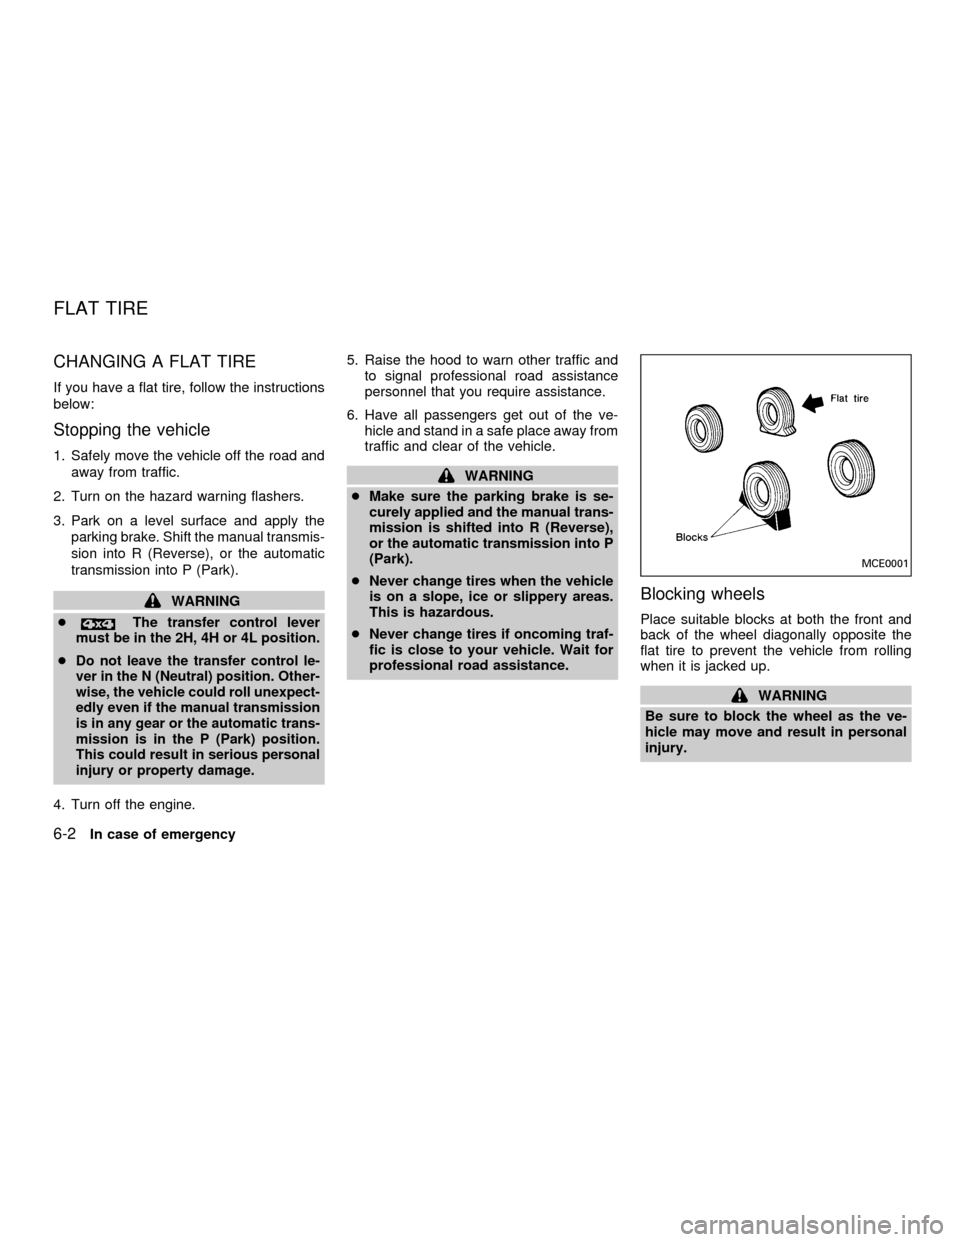
Blocking wheels
Place suitable blocks at both the front and
back of the wheel diagonally opposite the
flat tire to prevent the vehicle from rolling
when it is jacked up.
WARNING
Be sure to block the wheel as the ve-
hicle may move and result in personal
injury.
MCE0001
FLAT TIRE
6-2In case of emergency
ZX
Page 181 of 290
it-yourself'' section of this owner's
manual.
1. Clean any mud or dirt from the surface
between the wheel and hub.
2. Carefully put the spare tire on and tighten
the wheel nuts finger tight.
3. With the wheel nut wrench, tighten the
wheel nuts alternately and evenly until
they are tight.
4. Lower the vehicle slowly until the tire
touches the ground. Then, with the wheel
nut wrench, tighten the wheel nuts se-
curely in the sequence as illustrated.
Lower the vehicle completely.
As soon as possible, tighten the wheel
nuts to the specified torque with a torque
wrench.
Wheel nut tightening torque:
87 to 108 ft-lb (118 to 147 Nzm)
The wheel nuts must be kept tightened to
specification at all times. It is recom-
mended that wheel nuts be tightened to
specification at each lubrication interval.
Adjust tire pressure to the COLD pres-
sure.COLD pressure:
After vehicle has been parked for three
hours or more or driven less than 1 mile
(1.6 km).
COLD tire pressures are shown on the
tire placard affixed to the inside of the
glove box lid.
cRetighten the wheel nuts when the
vehicle has been driven for 600 miles
(1,000 km) (also in cases of a flat tire,
etc.).
5. Securely store the flat tire and jacking
equipment in the vehicle.
WARNING
cAlways make sure that the spare tire
and jacking equipment are properly
secured after use. Such items can
become dangerous projectiles in an
accident or sudden stop.
cThe spare tire is designed for emer-
gency use. See specific instructions
under the heading ``Wheels and
tires'' in the ``Do-it-yourself'' section
of this manual.
CAUTION
cBe sure to center the spare tire sus-
pending plate on the wheel and then
lift the spare tire.
In case of emergency
6-7
ZX
Page 226 of 290
cAiming is not necessary after replac-
ing the bulb. When aiming adjust-
ment is necessary, contact an autho-
rized NISSAN dealer.
cDo not leave the bulb out of the
headlight reflector for a long period
of time as dust, moisture, and smoke
may enter the headlight body and
affect the performance of the head-
light.
Replacing the headlight bulb
1. Open the hood.
2. Disconnect the negative (2) battery
cable.
3 Disconnect the electrical connector from
the rear end of the bulb.
4. Turn the bulb retaining ring counterclock-
wise until it is free from the headlamp
reflector and then remove it.
5. Carefully remove the headlight bulb. Do
not shake or rotate the bulb when remov-
ing it.
DO NOT TOUCH THE BULB.6. Install the new bulb in the reverse order
of removal.
cBe sure the lip of the bulb socket
contacts the headlight body.
Adjusting the headlight aim
Before performing aiming adjustment, make
sure of the following:
a. Use an aiming wall screen.
b. Keep all of the tires inflated to the correct
pressure.
c. Place the vehicle and screen on level
ground.
d. See that the vehicle is unloaded (except
for full levels of coolant, engine oil and
fuel, and that the spare tire, jack, and
tools are stored). Have the driver or an
equivalent weight placed in the driver's
seat.
1. Open the hood. Turn headlamp low
beam on.
2. Adjust the vertical aim by turning the
adjustment screw.
cCover the opposite lamp and ensure the
fog lamps (if so equipped) are turned off.cAdjust beam pattern until cutoff line is
positioned at the same height off ground
as bulb center (on H-line).
8-30Do-it-yourself
ZX
Page 232 of 290
If you have a flat tire, see the ``In case of
emergency'' section of this manual.
TIRE PRESSURE
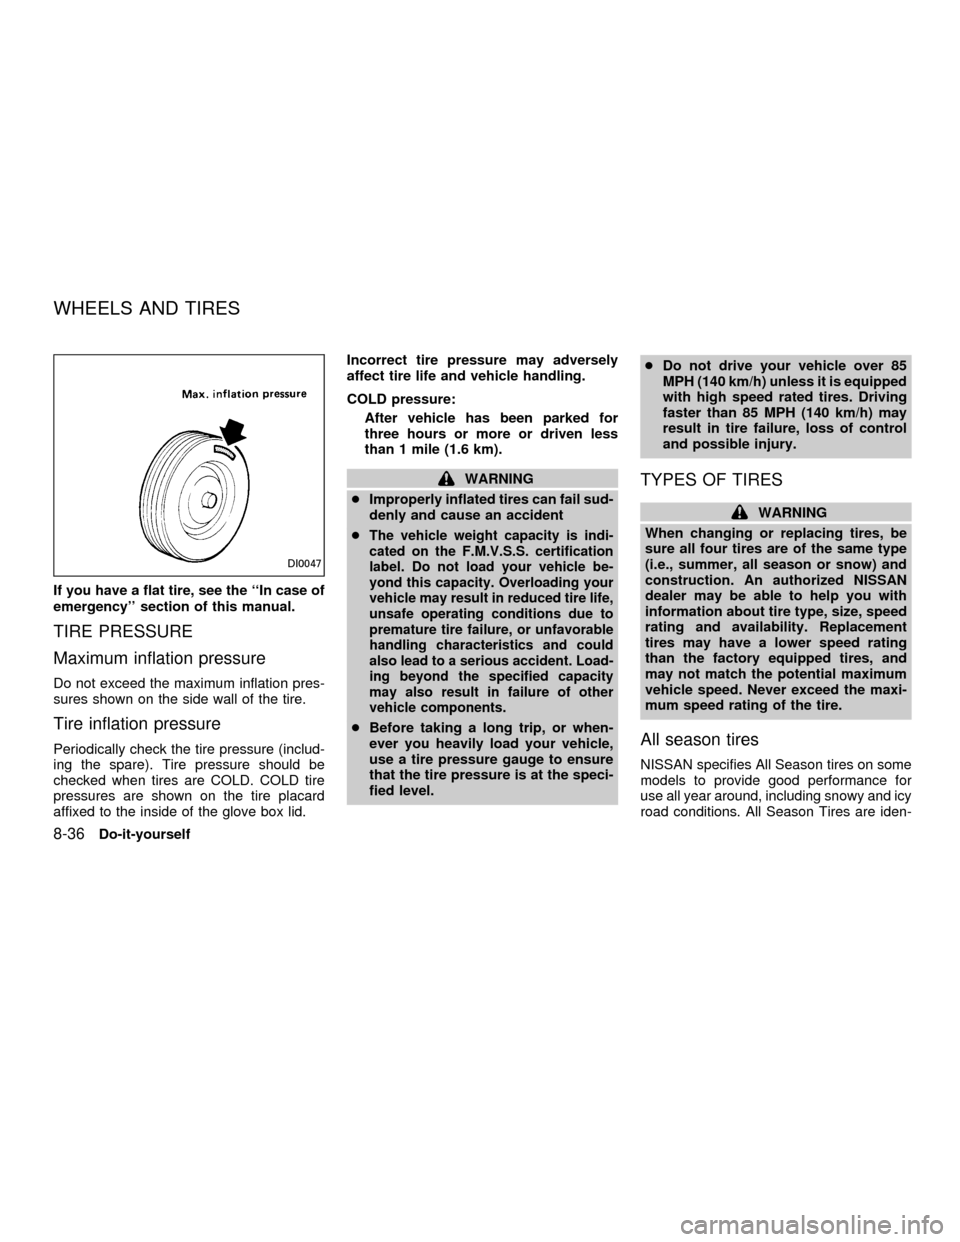
Maximum inflation pressure
Do not exceed the maximum inflation pres-
sures shown on the side wall of the tire.
Tire inflation pressure
Periodically check the tire pressure (includ-
ing the spare). Tire pressure should be
checked when tires are COLD. COLD tire
pressures are shown on the tire placard
affixed to the inside of the glove box lid.Incorrect tire pressure may adversely
affect tire life and vehicle handling.
COLD pressure:
After vehicle has been parked for
three hours or more or driven less
than 1 mile (1.6 km).
WARNING
cImproperly inflated tires can fail sud-
denly and cause an accident
c
The vehicle weight capacity is indi-
cated on the F.M.V.S.S. certification
label. Do not load your vehicle be-
yond this capacity. Overloading your
vehicle may result in reduced tire life,
unsafe operating conditions due to
premature tire failure, or unfavorable
handling characteristics and could
also lead to a serious accident. Load-
ing beyond the specified capacity
may also result in failure of other
vehicle components.
cBefore taking a long trip, or when-
ever you heavily load your vehicle,
use a tire pressure gauge to ensure
that the tire pressure is at the speci-
fied level.cDo not drive your vehicle over 85
MPH (140 km/h) unless it is equipped
with high speed rated tires. Driving
faster than 85 MPH (140 km/h) may
result in tire failure, loss of control
and possible injury.
TYPES OF TIRES
WARNING
When changing or replacing tires, be
sure all four tires are of the same type
(i.e., summer, all season or snow) and
construction. An authorized NISSAN
dealer may be able to help you with
information about tire type, size, speed
rating and availability. Replacement
tires may have a lower speed rating
than the factory equipped tires, and
may not match the potential maximum
vehicle speed. Never exceed the maxi-
mum speed rating of the tire.
All season tires
NISSAN specifies All Season tires on some
models to provide good performance for
use all year around, including snowy and icy
road conditions. All Season Tires are iden-
DI0047
WHEELS AND TIRES
8-36Do-it-yourself
ZX