Page 38 of 345

35 Central locking system
Te ch n ica l
data Instruments
and controlsOperationDrivingInstrument
cluster displayPractical hints Car care Index If the vehicle has previously been locked from the
outside, opening a door from the inside will trigger the
alarm. When opening a door while the central locking
system is in the:
•selective unlocking mode, only that individual door
is unlocked. The remaining doors, the tailgate and
fuel filler flap remain locked.
•global unlocking mode, all doors, the tailgate and
fuel filler flap are unlocked.
Notes:
In case of a malfunction in the central locking system
the doors can be locked and unlocked individually.
To lock, push down lock buttons and turn m echanical
key in driver’s door lock to position 3. In addition lock
the tailgate.To unlock, pull inside door handles or turn mechanical
key in driver’s door lock to position 2.
Rear doors can only be opened from inside by first
pulling up on the door lock button.
When unlocking the driver’s door with the mechanical
key, the exterior lamps will flash and the alarm will
sound.
To cancel the alarm, insert the electronic key in the
steering lock or press buttonŒ or‹ on the
electronic main key.
Page 39 of 345

36 Central locking system
Te ch n ica l
data Instruments
and controlsOperationDrivingInstrument
cluster displayPractical hints Car care Index
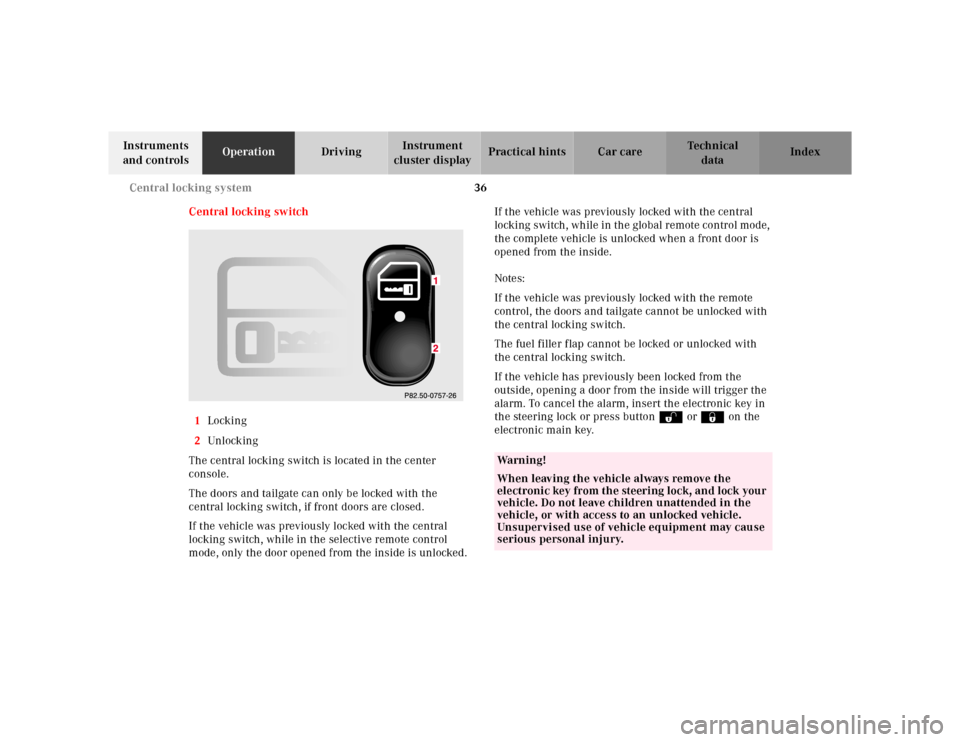
Central locking switch
1Locking
2Unl ock ing
The central locking switch is located in the center
console.
The doors and tailgate can only be locked with the
central locking switch, if front doors are closed.
If the vehicle was previously locked with the central
locking switch, while in the selective remote control
mode, only the door opened from the inside is unlocked.If the vehicle was previously locked with the central
locking switch, while in the global remote control mode,
the complete vehicle is unlocked when a front door is
opened from the inside.
Notes:
If the vehicle was previously locked with the remote
control, the doors and tailgate cannot be unlocked with
the central locking switch.
The fuel filler flap cannot be locked or unlocked with
the central locking switch.
If the vehicle has previously been locked from the
outside, opening a door from the inside will trigger the
alarm. To cancel the alarm, insert the electronic key in
the steering lock or press buttonŒ or‹ on the
electronic main key.
Wa r n i n g !
When leaving the vehicle always remove the
electronic key from the steering lock, and lock your
vehicle. Do not leave children unattended in the
vehicle, or with access to an unlocked vehicle.
Unsupervised use of vehicle equipment may cause
serious personal injury.
Page 40 of 345

37 Central locking system
Te ch n ica l
data Instruments
and controlsOperationDrivingInstrument
cluster displayPractical hints Car care Index Automatic central locking
The central locking switch also operates the automatic
central locking.
With the automatic central locking system activated, the
doors and trunk are locked at vehicle speeds of
approximately 9 mph (15 km / h) or more. The fuel filler
flap remains unlocked.
To a ctiva te:
With electronic key in steering lock position 2 hold
upper portion of switch (1) for a minimum of 5 seconds.
To deactivate:
With electronic key in steering lock position 2 hold
lower portion of switch (2) for a minimum of 5 seconds.
Notes:
If doors are unlocked with the central locking switch
after activating the automatic central locking, and
neither door is opened, then the doors remain unlocked
even at vehicle speeds of approximately 9 mph
(15 km / h) or more.If a door is opened from the inside at speeds of
approximately 9 mph (15 km / h) or less with the
automatic central locking activated, the door will again
be automatically locked at speeds of approximately
9mph (15km/h) or more.
Important!
When towing the vehicle, or with the vehicle on a
dynamometer test stand, please, note the following:
With the automatic central locking activated and the
electronic key in steering lock position 2, the vehicle
doors will lock if the left front wheel as well as the right
rear wheel spin at vehicle speeds of approximately
9mph (15km/h) or more.
To prevent the vehicle door locks from locking,
deactivate the automatic central locking.
Emergency unlocking in case of accident
The doors unlock automatically a short time after a
strong deceleration is detected, such as in a collision
(this is intended to aid rescue and exit).
Driving on rough roads may cause the vehicle to unlock.
If necessary, the vehicle can be locked again with the
central locking switch, see page 36.
Page 43 of 345

40 Central locking system
Te ch n ica l
data Instruments
and controlsOperationDrivingInstrument
cluster displayPractical hints Car care Index
Important!
In case of danger, the closed tailgate can be opened with
the inside or outside handle.
Only drive with the tailgate closed as otherwise exhaust
fumes may enter the vehicle interior.Notes:
In case of a malfunction in the central locking system
the tailgate can be locked and unlocked individually.
To unlock, turn mechanical key in lock to position 1, or
push lock button to position 1.
To lock, turn mechanical key in lock to position 2, or
push lock button to position 2.
The rear compartment lamp will be switched off by the
contact switch only if the tailgate is fully closed.
When opening the tailgate completely, always make sure
that there is sufficient overhead clearance.
When unlocking the tailgate with the mechanical key,
the exterior lamps will flash and the alarm will sound.
To cancel the alarm, insert the electronic key in the
steering lock or press buttonŒ or‹ on the
electronic main key.
If the fuel filler flap cannot be opened, see page 302.
Wa r n i n g !
To prevent possible personal injury, always keep
hands and fingers away from the tailgate opening
when closing the tailgate. Be especially careful
when small children are around.To prevent personal injury, never activate the
closing assist mechanism by tampering with the
tailgate latch.In case the closing procedure causes potential
danger, the closing procedure can be immediately
halted by pulling the outside recessed handle.
Page 90 of 345
87 Instrument cluster
Te ch n ica l
data Instruments
and controlsOperationDrivingInstrument
cluster displayPractical hints Car care Index 1Push buttons for intensity of instrument lamps,
see page 89
2Push button for resetting trip odometer, see page 91,
or to acknowledge a malfunction or warning
message, see page 108
3Coolant temperature gauge, see page 90
4Fuel gauge with reserve and fuel cap placement
warning lamp, see page 244
5Outside temperature indicator, see page 90
6Left turn signal indicator lamp, see combination
switch on page 122
7ESP (Electronic stability program) warning lamp,
see page 2458Speedometer
9Trip odometer, see page 91 and 96
10Main odometer, see page 96
11Multifunction display, see page 92 and 247
12Right turn signal indicator lamp, see combination
switch on page 122
13Tachometer, see page 91
14Gear range indicator display, see page 204
15Clock
To set the time, see page 110
Page 91 of 345

88 Instrument cluster
Te ch n ica l
data Instruments
and controlsOperationDrivingInstrument
cluster displayPractical hints Car care Index
Indicator lamps in the instrument cluster
High beam
ABS malfunction, see page 245
Brake fluid low (except Canada).
Parking brake engaged, see page 243
Brake fluid low (Canada only).
Parking brake engaged, see page 243
BAS malfunction, see page 245
ESP malfunction, see page 245
Fasten seat belts, see page 246
ESP. Adjust driving to road condition,
see page 245Engine malfunction indicator lamp. If the
“CHECK ENGINE” malfunction indicator
lamp comes on when the engine is running,
it indicates a malfunction of the fuel
management system, emission control
system, systems which impact emissions, or
the fuel cap is not closed tight. In all cases,
we recommend that you have the
malfunction checked as soon as possible,
see page 242
SRS malfunction, see page 244
Function indicator lamp on the center console
Front passenger airbag automatically
switched off, see page 246
ABSBRAKE
CHECK
ENGINESRS
Page 94 of 345
91 Instrument cluster
Te ch n ica l
data Instruments
and controlsOperationDrivingInstrument
cluster displayPractical hints Car care Index Trip odometer (9)
To reset to “0” miles / km:
Activate the instrument cluster if it is not already
activated, see page 89.
Press button è or ÿ on the multifunction
steering wheel repeatedly until the trip odometer
appears if it is not displayed, see page 96.
Press buttonJ(2) on the instrument cluster.Tachometer (13)
The red marking on tachometer denotes excessive
engine speed.
Avoid this engine speed, as it may result in serious
engine damage that is not covered by the
Mercedes-Benz Limited Warranty.
To help protect the engine, the fuel supply is interrupted
if the engine is operated within the red marking.
Page 96 of 345

93 Multifunction steering wheel, multifunction display
Te ch n ica l
data Instruments
and controlsOperationDrivingInstrument
cluster displayPractical hints Car care Index Depending on your vehicle’s equipment, you may use
the buttons on the multifunction steering wheel to call
up, control and set the following systems in the
multifunction display:
1Trip odometer and main odometer, see page 96
Vehicle speed, see page 96
Flexible service system (FSS), see page 114
Engine oil level indicator, see page 117
2Audio systems, see page 97
Radio, see page 97
CD player (optional), see page 98
Cassette player, see page 99
3Navigation system (optional), see page 105
4Malfunction message memory, see page 108
5Individual settings, see page 110
6Trip computer, see page 106
After start
After reset
Fuel tank content
7Telephone (if so equipped), see page 100Press the è or ÿ button repeatedly until the
required system is displayed.
Pressing the è button advances the display to the
next system.
Pressing the ÿ button returns the display to the
previous system.
You may call up additional displays within some of these
categories by pressing the j or k button.
Wa r n i n g !
A driver’s attention to the road must always be his /
her primary focus when driving. For your safety and the safety of others, selecting
features through the multifunction steering wheel
should only be done by the driver when traffic and
road conditions permit it to be done safely.
Programming individual settings in the system can
only be made while the vehicle is at standstill.