Page 181 of 424
178 Interior equipment
Te ch n ica l
data Instruments
and controlsOperationDrivingInstrument
cluster displayPractical hints Car care Index
Power w indows
The control panel is located on the driver’s door.
Switches for:
1left, front
2right, front
3left, rear
4right, rear
5Switch for rear door window overrideControl panel on rear center console.
Turn electronic key in starter switch to position 1 or 2.
Opening the side windows:
Pressk on the switch to resistance point.
Closing the side windows:
Pressj on the switch to resistance point.
Release switch when window is in desired position.
3
3
3
3
Page 182 of 424
179 Interior equipment
Te ch n ica l
data Instruments
and controlsOperationDrivingInstrument
cluster displayPractical hints Car care Index Express opening and closing of windows
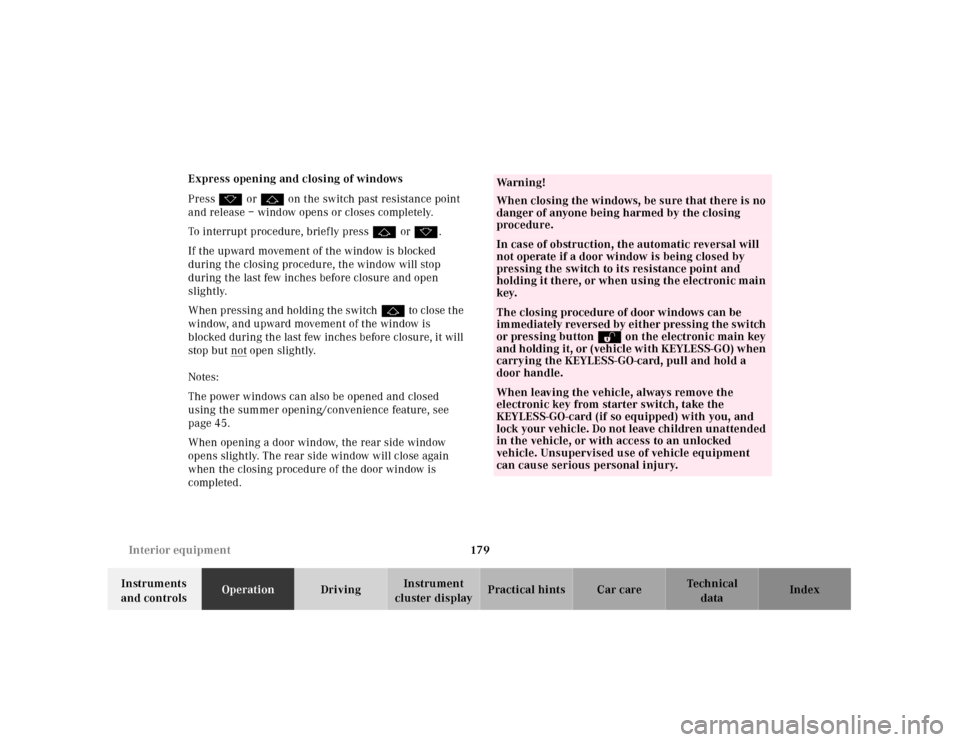
Pressk orj on the switch past resistance point
and release – window opens or closes completely.
To interrupt procedure, briefly pressj ork.
If the upward movement of the window is blocked
during the closing procedure, the window will stop
during the last few inches before closure and open
slightly.
When pressing and holding the switchj to close the
w ind ow, a nd u pward movement of t he window is
blocked during the last few inches before closure, it will
stop but not
open slightly.
Notes:
The power windows can also be opened and closed
using the summer opening/convenience feature, see
page 45.
When opening a door window, the rear side window
opens slightly. The rear side window will close again
when the closing procedure of the door window is
completed.
Wa r n i n g !
When closing the windows, be sure that there is no
danger of anyone being harmed by the closing
procedure.In case of obstruction, the automatic reversal will
not operate if a door window is being closed by
pressing the switch to its resistance point and
holding it there, or when using the electronic main
key.The closing procedure of door windows can be
immediately reversed by either pressing the switch
or pressing buttonΠon the electronic main key
and holding it, or (vehicle with KEYLESS-GO) when
carrying the KEYLESS-GO-card, pull and hold a
door handle.When leaving the vehicle, always remove the
electronic key from starter switch, take the
KEYLESS-GO-card (if so equipped) with you, and
lock your vehicle. Do not leave children unattended
in the vehicle, or with access to an unlocked
vehicle. Unsupervised use of vehicle equipment
can cause serious personal injury.
Page 183 of 424
180 Interior equipment
Te ch n ica l
data Instruments
and controlsOperationDrivingInstrument
cluster displayPractical hints Car care Index
Blocking of rear side window operation
If no operation of the rear side windows by switch (for
instance by children) is desired, slide override
switch (5) to the right; the Nsymbol becomes
visible.
Operation of the rear side windows with the switches
located in the driver’s door is still possible.Synchronizing power windows
If the power supply was interrupted, (battery
disconnected or low), the windows cannot be opened or
closed by the express feature.
To resynchronize the express feature, pressj s i d e o f
power window switch until the window is completely
closed and hold down for approximately 1 second.
Repeat procedure for each window.
The automatic full opening and closing procedure of the
windows should now be restored.
Page 185 of 424
182 Interior equipment
Te ch n ica l
data Instruments
and controlsOperationDrivingInstrument
cluster displayPractical hints Car care Index
Express opening and closing of sliding/pop-up roof
To select a sunroof opening position, press the switch to
resistance point and release it when the sunroof has
reached the required position.
The sliding/pop-up roof now opens to the position set if
the switch is pressed past resistance point in the “open”
direction.
If you wish to change the opening position of the
sunroof, move the switch to resistance point in the
direction you require.
Stopping the sliding/pop-up roof:
Move the switch in any direction.
If the movement of the sliding/pop-up roof is blocked
during the closing procedure, the sunroof will stop and
reopen slightly.
Note:
Opening the sliding/pop-up roof automatically almost
fully (less approximately 1 inch [3 cm]), the sunroof
must have been opened first by pressing the switch to
resistance point and releasing it when the sunroof has
reached an almost fully open position.
Wa r n i n g !
When closing the sliding/pop-up roof, be sure that
there is no danger of anyone being harmed by the
closing procedure.In case of obstruction, the automatic reversal will
not operate if the sliding/pop-up roof is being
closed by moving the switch to its resistance point
and holding it there, or when using the electronic
main key or the lock button at each door handle
(vehicles with KEYLESS-GO).The closing procedure of the sliding/pop-up roof
can be immediately reversed by either moving the
switch in any direction, or pressing buttonΠon
the electronic main key and holding it; or (vehicles
with KEYLESS-GO ) when carrying the KEYLESS-
GO-card, pull and hold a door handle.When leaving the vehicle, always remove the
electronic key from starter switch and take the
KEYLESS-GO-card (if so equipped) with you, and
lock your vehicle. Do not leave children unattended
in the vehicle, or with access to an unlocked
vehicle. Unsupervised use of vehicle equipment
can cause serious personal injury.
Page 187 of 424
184 Interior equipment
Te ch n ica l
data Instruments
and controlsOperationDrivingInstrument
cluster displayPractical hints Car care Index
Interior lighting
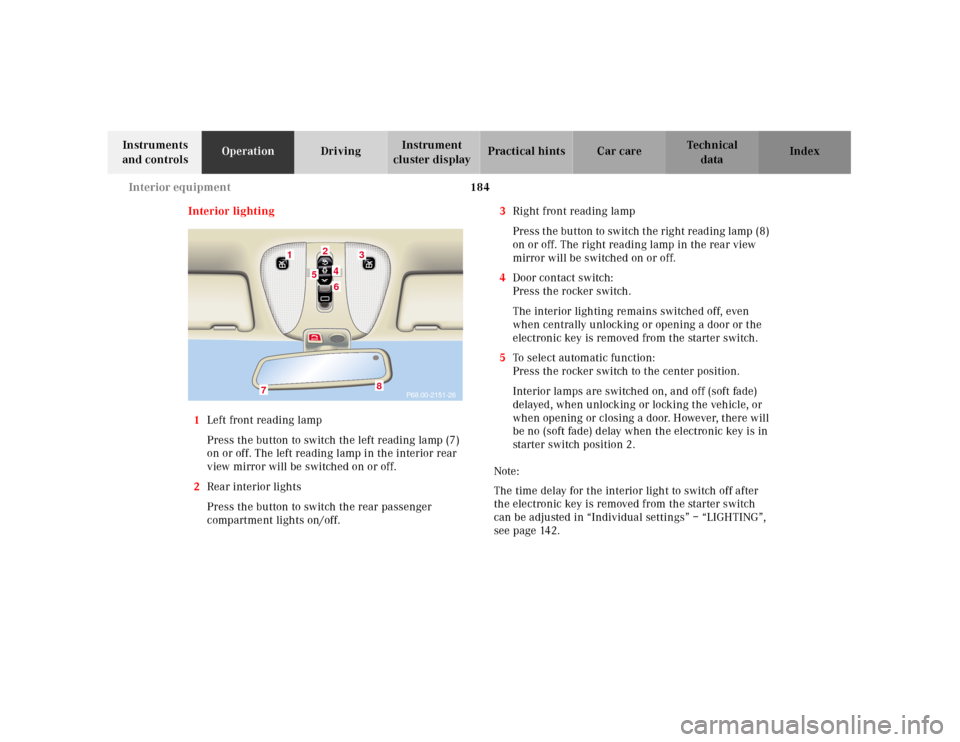
1Left front reading lamp
Press the button to switch the left reading lamp (7)
on or off. The left reading lamp in the interior rear
view mirror will be switched on or off.
2Rear interior lights
Press the button to switch the rear passenger
compartment lights on/off.3Right front reading lamp
Press t he bu tton to sw itch t he rig ht read ing l amp (8)
on or off. The right reading lamp in the rear view
mirror will be switched on or off.
4Door contact switch:
Press the rocker switch.
The interior lighting remains switched off, even
when centrally unlocking or opening a door or the
electronic key is removed from the starter switch.
5To select automatic function:
Press the rocker switch to the center position.
Interior lamps are switched on, and off (soft fade)
delayed, when unlocking or locking the vehicle, or
when opening or closing a door. However, there will
be no (soft fade) delay when the electronic key is in
starter switch position 2.
Note:
The time delay for the interior light to switch off after
the electronic key is removed from the starter switch
can be adjusted in “Individual settings” – “LIGHTING”,
seepage142.
P68.00-2151-26
1
3
24
5
6
7
8
Page 188 of 424
185 Interior equipment
Te ch n ica l
data Instruments
and controlsOperationDrivingInstrument
cluster displayPractical hints Car care Index To prevent the vehicle battery from being discharged
with doors open, all interior lamps switch off after
approximately 5 minutes.
6 Interior lamps, front:
Press rocker switch in to switch front interior and
reading lamps on. The front interior lighting stays
on while the rocker switch is pressed in.
Switching off the front interior lighting:
Press rocker switch to position (4) or (5).
Courtesy lighting
The interior of your vehicle is equipped with various
different lighting installations to help you to orient
yourself better in the dark.
Entrance lamps, exit lamps
With exterior lamps on or electronic key in starter
switch position 1, the lamps in the door trays illuminate.
The lights will remain on for approximately 5 minutes if
the electronic key is in starter switch position 0 and
exterior lamps are switched off.Footwell lighting
With exterior lamps on, the driver and front passenger
footwell is illuminated.
Center console lighting
Turn the electronic key in the starter switch to
position 1. The center console is illuminated from the
rear-view mirror.
Door entry lamps
The appropriate entry lamp switches on if a door is
opened in darkness and if the interior lighting is
switched to automatic function.
The entry lamp switches off automatically when the
door is closed.
Page 205 of 424
202 Garage door opener
Te ch n ica l
data Instruments
and controlsOperationDrivingInstrument
cluster displayPractical hints Car care Index
Garage door opener
1Signal transmitter keys
2Indicator lamp
3Portable remote control transmitterThe built-in remote control is capable of operating up to
three separately controlled objects.
Note:
Certain types of garage door openers are incompatible
with the integrated opener. If you should experience
difficulties with programming the transmitter, contact
your authorized Mercedes-Benz Center, or call
Mercedes-Benz Client Assistance Center (in the USA
only) at 1-800-FOR-MERCedes, or Customer Service (in
Canada) at 1-800-387-0100.
3
Wa r n i n g !
When programming a garage door opener, the door
moves up or down.When programming or operating the remote
control make sure there is no possibility of anyone
being harmed by the moving door.
Page 206 of 424
203 Garage door opener
Te ch n ica l
data Instruments
and controlsOperationDrivingInstrument
cluster displayPractical hints Car care Index For operation in the USA only: This device complies
with Part 15, Subpart C, Section 209 of the FCC Rules.
Operation is subject to the following two conditions:
(1) This device may not cause harmful interference, and
(2) this device must accept any interference received,
including interference that may cause undesired
operation.
WARNING: Changes or modification not expressly
a p pr ove d by pa rt y r e s po n si b l e f or c o mpl ia n c e c o u l d vo i d
the user’s authority to operate the equipment.
Programming or reprogramming the integrated
remote control:
1. Turn electronic key in starter switch to position 1
or 2.
2. Hold the end of the hand-held transmitter of the
d evice you w ish to train approxim ately 2 to 5 inch es
(5 cm to 12 cm) away from the surface of the
integrated remote control located on the inside rear
view mirror, keeping the indicator lamp in view.3. Using both hands, simultaneously push the hand-
held transmitter button and the desired integrated
remote control button. Do not release the buttons
until completing step 4.
4. The indicator lamp on the integrated remote control
will flash, first slowly and then rapidly. When the
indicator lamp f lashes rapidly, both buttons may be
released (the rapid flashing lamp indicates
successful programming of the new frequency
signal). To program the remaining two buttons,
follow ste ps 1 through 4.
Note:
If, after repeated attempts, you do not successfully
program the integrated remote control device to learn
the signal of the hand-held transmitter, the garage door
opener could be equipped with the “rolling code
feature”.