2001 LINCOLN CONTINENTAL window
[x] Cancel search: windowPage 4 of 224

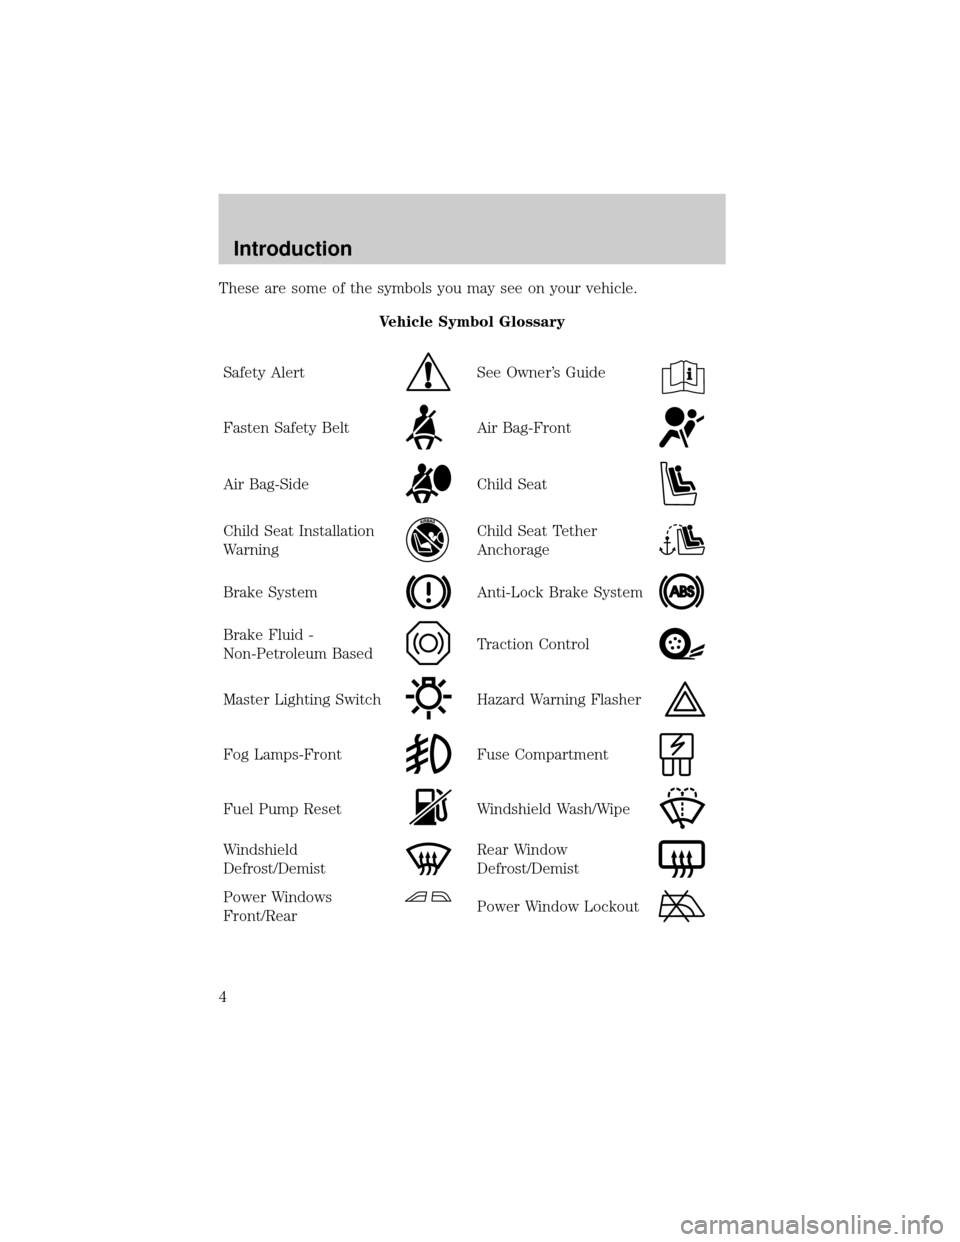
These are some of the symbols you may see on your vehicle.
Vehicle Symbol Glossary
Safety Alert
See Owner's Guide
Fasten Safety BeltAir Bag-Front
Air Bag-SideChild Seat
Child Seat Installation
WarningChild Seat Tether
Anchorage
Brake SystemAnti-Lock Brake System
Brake Fluid -
Non-Petroleum BasedTraction Control
Master Lighting SwitchHazard Warning Flasher
Fog Lamps-FrontFuse Compartment
Fuel Pump ResetWindshield Wash/Wipe
Windshield
Defrost/DemistRear Window
Defrost/Demist
Power Windows
Front/RearPower Window Lockout
Introduction
4
Page 21 of 224

DRIVER ID (if equipped)
Press this control and use SELECT
to choose DRIVER 1 or DRIVER 2
when choosing operator selectable
features. Seat and mirror positions
and nine operator selectable features, found under the MENU and
VEHICLE HANDLING controls, will be saved to DRIVER 1 or DRIVER 2.
These will be automatically recalled when the drivers identify themselves
to the system with the remote entry transmitter (refer toBasic
Operation of Memory Profile Systemin this section) or selecting
DRIVER 1 or DRIVER 2 in the message center. When a vehicle setting is
changed, the message center will display ªSAVED TO DRIVER 1 or
DRIVER 2º for 5 seconds to confirm the change has been made. Press
the SELECT to choose ªOFFº for temporary position/setting changes
which will not be stored.
MENU
Press this control to change various
convenience settings throughout the
vehicle. Each press of the MENU
control will display the following:
²Traction control (returns to ªONº everytime vehicle is started).
²Express window (completely goes down with one touch on the power
switch).
²Auto lock (locks the doors when the vehicle reaches 5 km/h [3 mph]).
²Horn chirp (sounds horn one time whenever the doors are locked
using the remote transmitter).
²Seat access (moves seat back to aid entry/exit from the vehicle).
²Reverse mirrors (tilts the exterior mirrors downward to assist parking
using reverse).
²English/metric (changes the odometer and display readouts)
Press the SELECT control to change the settings to ON or OFF.
These settings will be saved to the vehicle not individualized settings.
Vehicles equipped with the DRIVER ID control, the settings will be saved
to DRIVER 1 or DRIVER 2.
DRIVER ID
MENU
Instrumentation
21
Page 27 of 224

²To turn autolamps on, push the control up toward the MAX position.
As you press this switch, the autolamp system's status will be
displayed in the message center. The system can be set to provide
light for up to three minutes after you turn the ignition OFF.
²To turn autolamps off, push the control down toward OFF.
CLIMATE CONTROL SYSTEM
Electronic Automatic Temperature Control (EATC) system
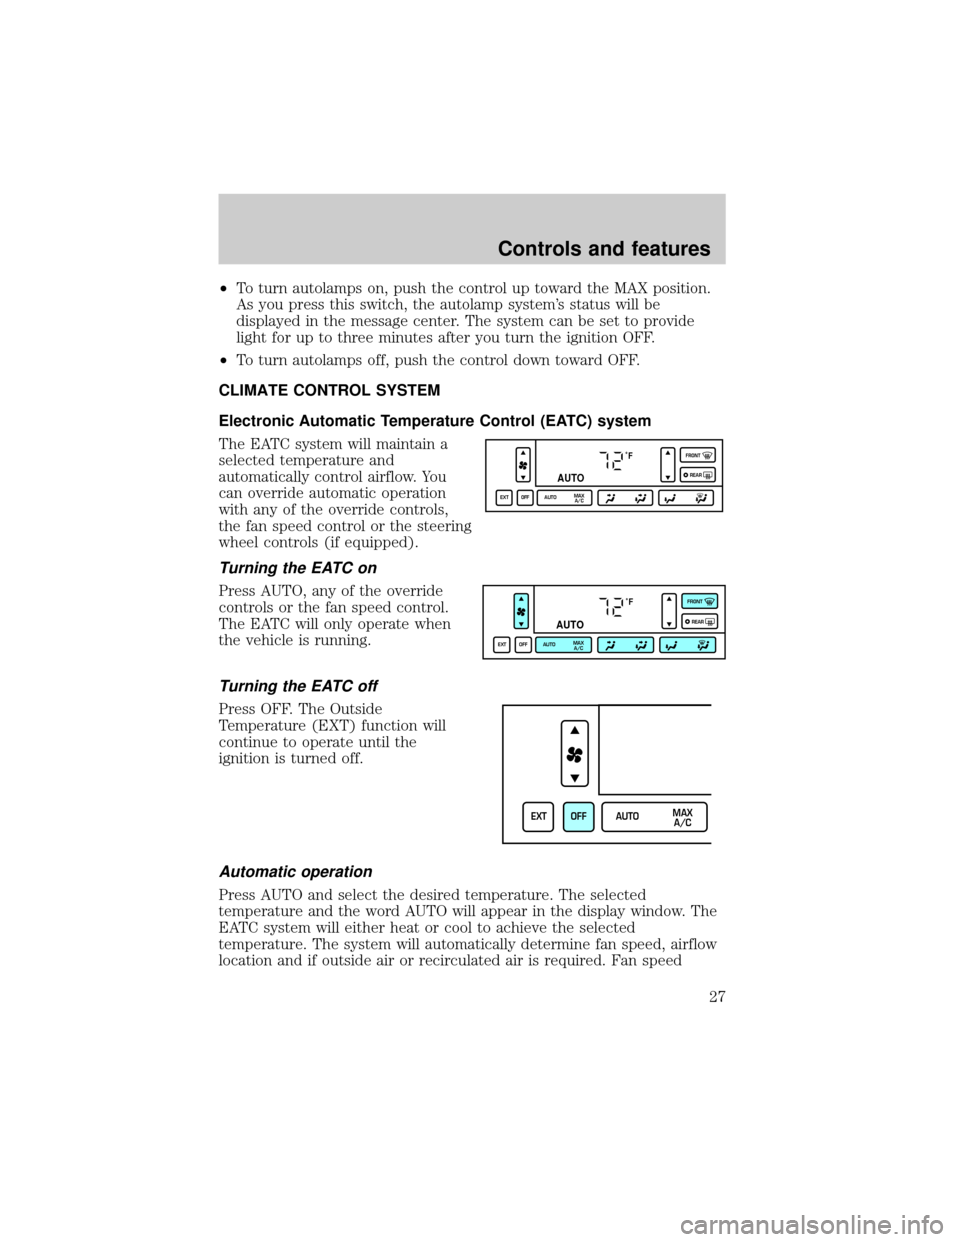
The EATC system will maintain a
selected temperature and
automatically control airflow. You
can override automatic operation
with any of the override controls,
the fan speed control or the steering
wheel controls (if equipped).
Turning the EATC on
Press AUTO, any of the override
controls or the fan speed control.
The EATC will only operate when
the vehicle is running.
Turning the EATC off
Press OFF. The Outside
Temperature (EXT) function will
continue to operate until the
ignition is turned off.
Automatic operation
Press AUTO and select the desired temperature. The selected
temperature and the word AUTO will appear in the display window. The
EATC system will either heat or cool to achieve the selected
temperature. The system will automatically determine fan speed, airflow
location and if outside air or recirculated air is required. Fan speed
˚F
AUTO
EXT OFF AUTOMAX
A/CFRONT
REAR
˚F
AUTO
EXT OFF AUTOMAX
A/CFRONT
REAR
EXT OFF AUTOMAX
A/C
Controls and features
27
Page 28 of 224

remains automatic unless the fan speed control is pressed or the steering
wheel controls (if equipped) are pressed.
When in AUTO and weather conditions require heat, air will be sent to
the floor. However, if the engine is not warm enough to provide heat, the
fan will not operate. In 3
1¤2minutes or less, the fan speed will start to
increase and the airflow location will change to the floor area.
If unusual conditions exist (i.e.-window fogging, etc.), the manual
override controls allow you to select airflow locations and the fan control
allows you to adjust fan speed as necessary.
Temperature selection
The display window indicates the
selected temperature, function
(AUTO or one of the override
controls) and manual control of fan
speed (
) if automatic fan speed
is not desired.
To control the temperature, select
any temperature between 18ÉC
(65ÉF) and 29ÉC (85ÉF) by pressing
the temperature control.
For continuous maximum cooling, push the temperature control until
16ÉC (60ÉF) is shown in the display window. The EATC will continue
maximum cooling (disregarding the displayed temperature) until a
warmer temperature is selected by pressing the temperature control.
For continuous maximum heating, push the temperature control until
32ÉC (90ÉF) is shown in the display window. The EATC will continue
maximum heating (disregarding the displayed temperature) until a
cooler temperature is selected by pressing the temperature control.
˚F
AUTO
FRONT
REAR
Controls and features
28
Page 31 of 224

Displaying outside temperature
Press EXT to display the outside air
temperature. It will be displayed
until EXT is pressed again.
If the selected temperature is changed while the outside temperature is
displayed, the new temperature will be displayed for four seconds after it
is changed, then the outside temperature will return to the window.
If a manual override function is selected while the outside temperature is
displayed, the new function will be displayed for four seconds after it is
changed, then the outside temperature will return to the window along
with the override selection.
The outside temperature reading is most accurate when the vehicle is
moving. Higher readings may be obtained when the vehicle is not
moving. The readings that you get may not agree with temperatures
given on the radio due to differences in vehicle and station locations.
Operating tips
²In humid weather conditions, place the climate control system in DEF
before driving. This will reduce fogging on your windshield. Once the
windshield has been cleared, operate the climate control system as
desired.
²To reduce humidity buildup inside the vehicle in cold weather
conditions, don't drive with the climate control system in the OFF or
MAX A/C position.
²To reduce humidity buildup inside the vehicle in warm weather
conditions, don't drive with the climate control system in the OFF
position.
²Under normal weather conditions, your vehicle's climate control
system should be left in any position other than MAX A/C or OFF
when the vehicle is parked. This allows the vehicle to ªbreatheº
through the outside air inlet duct.
EXT OFF AUTOMAX
A/C
Controls and features
31
Page 32 of 224

²Under snowy or dirty weather conditions, your vehicle's climate
control system should be left in the OFF position when the vehicle is
parked. This allows the climate control system to be free from
contamination of outside pollutants.
²If your vehicle has been parked with the windows closed during warm
weather conditions, the air conditioner will perform more efficiently in
cooling the vehicle if driven for two or three minutes with the
windows open. This will force most of the hot, stale air out of the
vehicle. Once the vehicle has been ªaired outº, operate the climate
control system as desired.
²Don't put objects under the front seat that will interfere with the
airflow to the back seats.
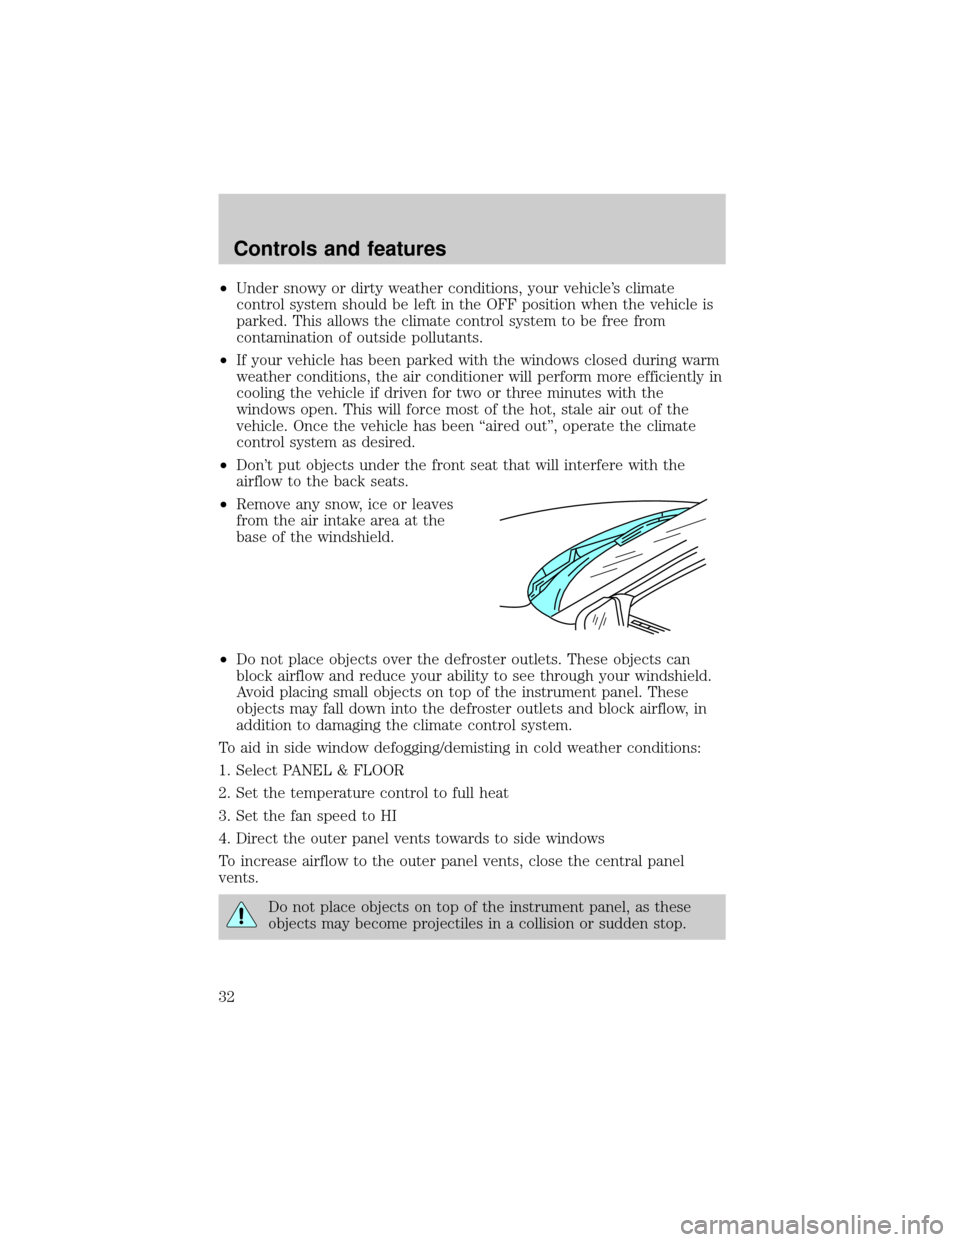
²Remove any snow, ice or leaves
from the air intake area at the
base of the windshield.
²Do not place objects over the defroster outlets. These objects can
block airflow and reduce your ability to see through your windshield.
Avoid placing small objects on top of the instrument panel. These
objects may fall down into the defroster outlets and block airflow, in
addition to damaging the climate control system.
To aid in side window defogging/demisting in cold weather conditions:
1. Select PANEL & FLOOR
2. Set the temperature control to full heat
3. Set the fan speed to HI
4. Direct the outer panel vents towards to side windows
To increase airflow to the outer panel vents, close the central panel
vents.
Do not place objects on top of the instrument panel, as these
objects may become projectiles in a collision or sudden stop.
Controls and features
32
Page 33 of 224

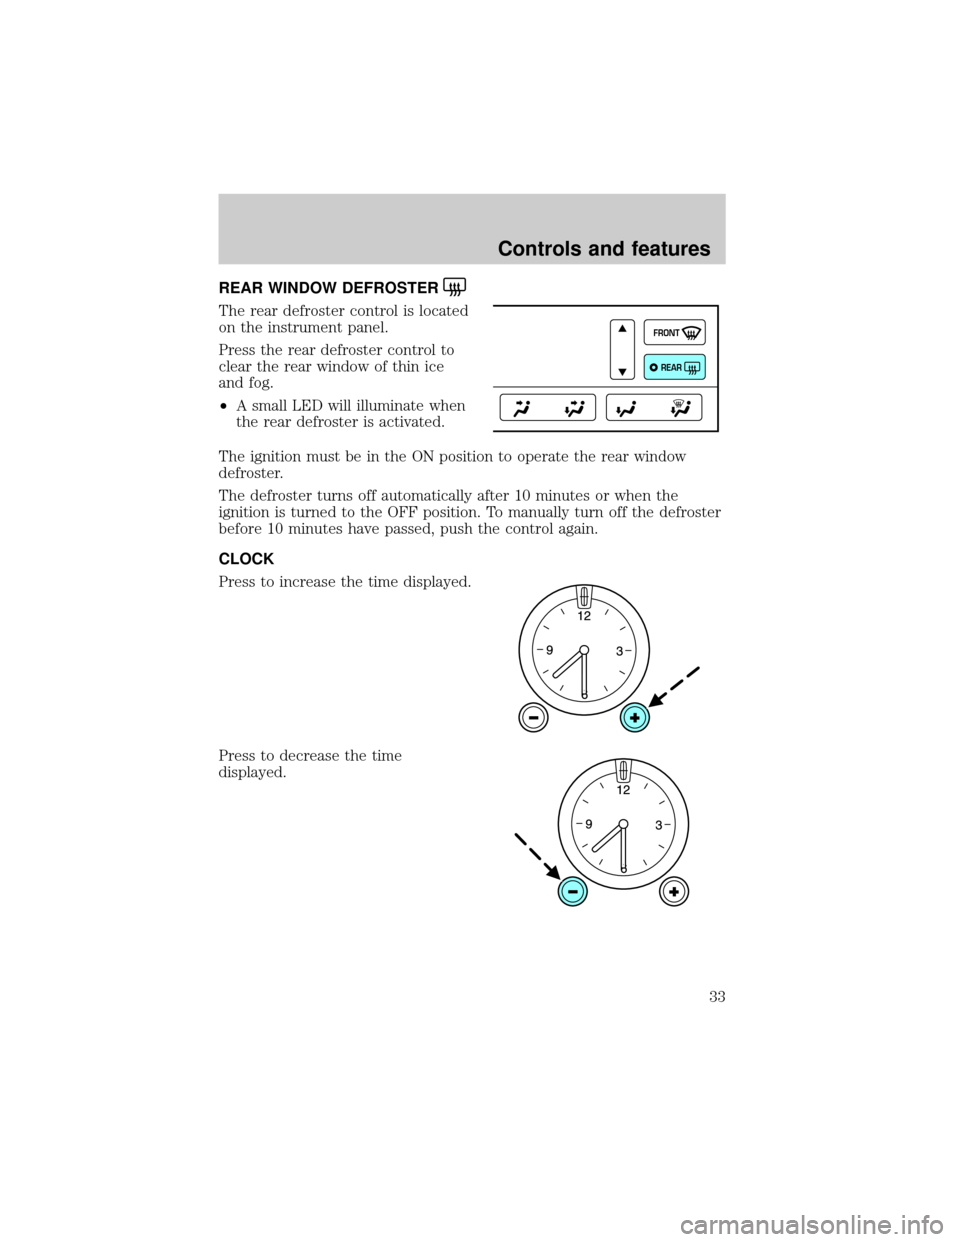
REAR WINDOW DEFROSTER
The rear defroster control is located
on the instrument panel.
Press the rear defroster control to
clear the rear window of thin ice
and fog.
²A small LED will illuminate when
the rear defroster is activated.
The ignition must be in the ON position to operate the rear window
defroster.
The defroster turns off automatically after 10 minutes or when the
ignition is turned to the OFF position. To manually turn off the defroster
before 10 minutes have passed, push the control again.
CLOCK
Press to increase the time displayed.
Press to decrease the time
displayed.
FRONT
REAR
Controls and features
33
Page 62 of 224

Without moon roof:
1. With the compass display turned
on, press and hold the COMP side of
the control until the zone selection
number appears in the mirror
display window.
2. Release the COMP side of the
control, then press it down again.
3. Continue to press until your zone number is shown in the mirror
display, then release.
4. The display will show all segments, then return to normal compass
mode within ten seconds.
With moon roof:
1. Press and hold the Auto-Dimming
control to toggle the Compass
display ON/OFF, then release.
2. Press and hold both map light
buttons, between 5 and 8 seconds,
until the ZONE number appears in
the display, then release. The
display should show the current
zone number.
3. Press either the right or left map
light button to change the zone
number. The display will show a compass direction after 5 seconds. The
zone is now updated.
Compass calibration adjustment
The compass may need calibration adjustment if:
²the compass ZONE is set correctly and the compass is not showing
the correct heading
²the letter ªCº is displayed in the compass window
Perform this adjustment in an open area free from steel structures and
high voltage lines.
COMP MIRROR
NW
Controls and features
62