Page 5 of 224
Vehicle Symbol Glossary
Child Safety Door
Lock/Unlock
Interior Luggage
Compartment Release
Symbol
Panic AlarmEngine Oil
Engine CoolantEngine Coolant
Temperature
Do Not Open When HotBattery
Avoid Smoking, Flames,
or SparksBattery Acid
Explosive GasFan Warning
Power Steering FluidMaintain Correct Fluid
LevelMAX
MIN
Emission SystemEngine Air Filter
Passenger Compartment
Air FilterJack
Check fuel cap
Introduction
5
Page 11 of 224

²the autolamps are off
²the autolamp sensor determines it is night time
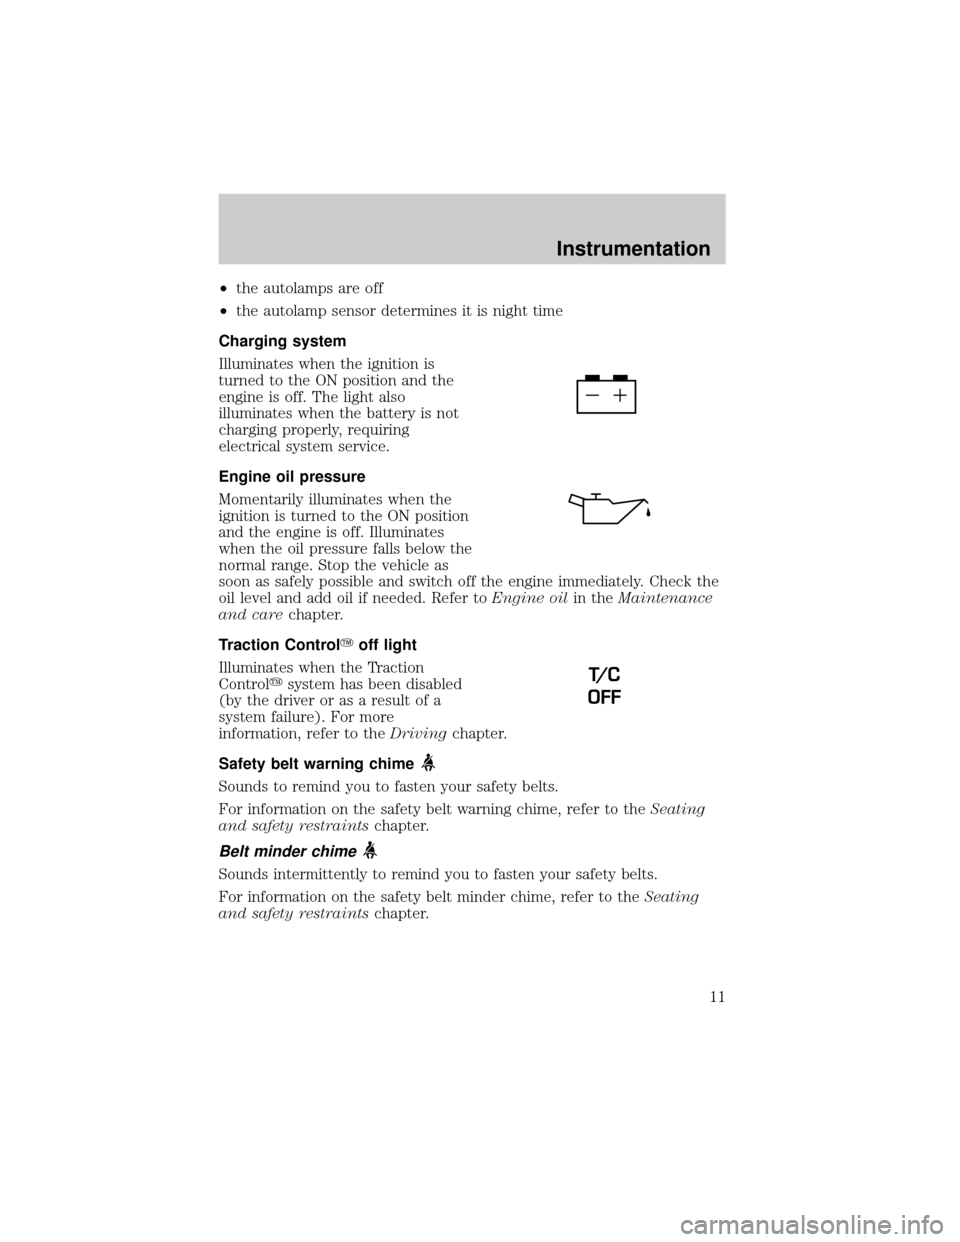
Charging system
Illuminates when the ignition is
turned to the ON position and the
engine is off. The light also
illuminates when the battery is not
charging properly, requiring
electrical system service.
Engine oil pressure
Momentarily illuminates when the
ignition is turned to the ON position
and the engine is off. Illuminates
when the oil pressure falls below the
normal range. Stop the vehicle as
soon as safely possible and switch off the engine immediately. Check the
oil level and add oil if needed. Refer toEngine oilin theMaintenance
and carechapter.
Traction ControlYoff light
Illuminates when the Traction
Controlysystem has been disabled
(by the driver or as a result of a
system failure). For more
information, refer to theDrivingchapter.
Safety belt warning chime
Sounds to remind you to fasten your safety belts.
For information on the safety belt warning chime, refer to theSeating
and safety restraintschapter.
Belt minder chime
Sounds intermittently to remind you to fasten your safety belts.
For information on the safety belt minder chime, refer to theSeating
and safety restraintschapter.
T/ C
OFF
Instrumentation
11
Page 23 of 224

DTE/ECON
²Press the DTE/ECON control
once to display approximately
how far you can drive before
running out of fuel, or the
distance to empty (DTE). To ensure accuracy, turn the ignition OFF
when you fill the tank.
²Press the DTE/ECON control a second time to display the average fuel
economy in liters/100 kilometers or miles/gallon, based on distance
traveled and rate of fuel used information.
²To reset this feature, press the
RESET control while average fuel
economy is displayed (while you
are driving).
The DTE function will flash for 5 seconds and sound a tone for 1 second
when you have approximately:
²40 km (25 miles)
²16 km (10 miles)
DTE is calculated using a running average fuel economy initialized by the
factory. This value is not the same as the average fuel economy display.
The running average fuel economy is based on more than 800 kilometers
(500 miles) of driving history, and is reinitialized if the battery is
disconnected.
If the FUEL LEVEL ERROR message is displayed, there is a problem
with the fuel indication system and you should contact your dealer for
service as soon as possible.
Checking your highway fuel economy using the electronic
message center display
The following procedure will allow you to accurately monitor your actual
highway fuel economy. Since this procedure requires the vehicle speed
control system to be set to highway speeds, it must be run only on
suitable roadways where long distance speed control can be safely
maintained.
You may notice gradual improvement in fuel economy over the course of
your vehicle's break-in period (approximately 1 600 kilometers [1 000
miles]).
DTE ECON
RESET
Instrumentation
23
Page 73 of 224
Opening the trunk
Press the control once to open the
trunk.
Ensure that the trunk is closed and
latched before driving your vehicle.
Failure to latch the trunk may cause
objects to fall out of the trunk or
block the rear view.
Sounding a panic alarm
Press this control to activate the
alarm.
To deactivate the alarm, press the
control again or turn the ignition to
ACC or ON.
Replacing the battery
The remote transmitter is powered by one coin type three-volt lithium
battery CR2032 or equivalent. Typical operating range will allow you to
be up to 10 meters (33 feet) away from your vehicle. A decrease in
operating range can be caused by:
²weather conditions
²nearby radio towers
²structures around the vehicle
²other vehicles parked next to the vehicle
Controls and features
73
Page 74 of 224

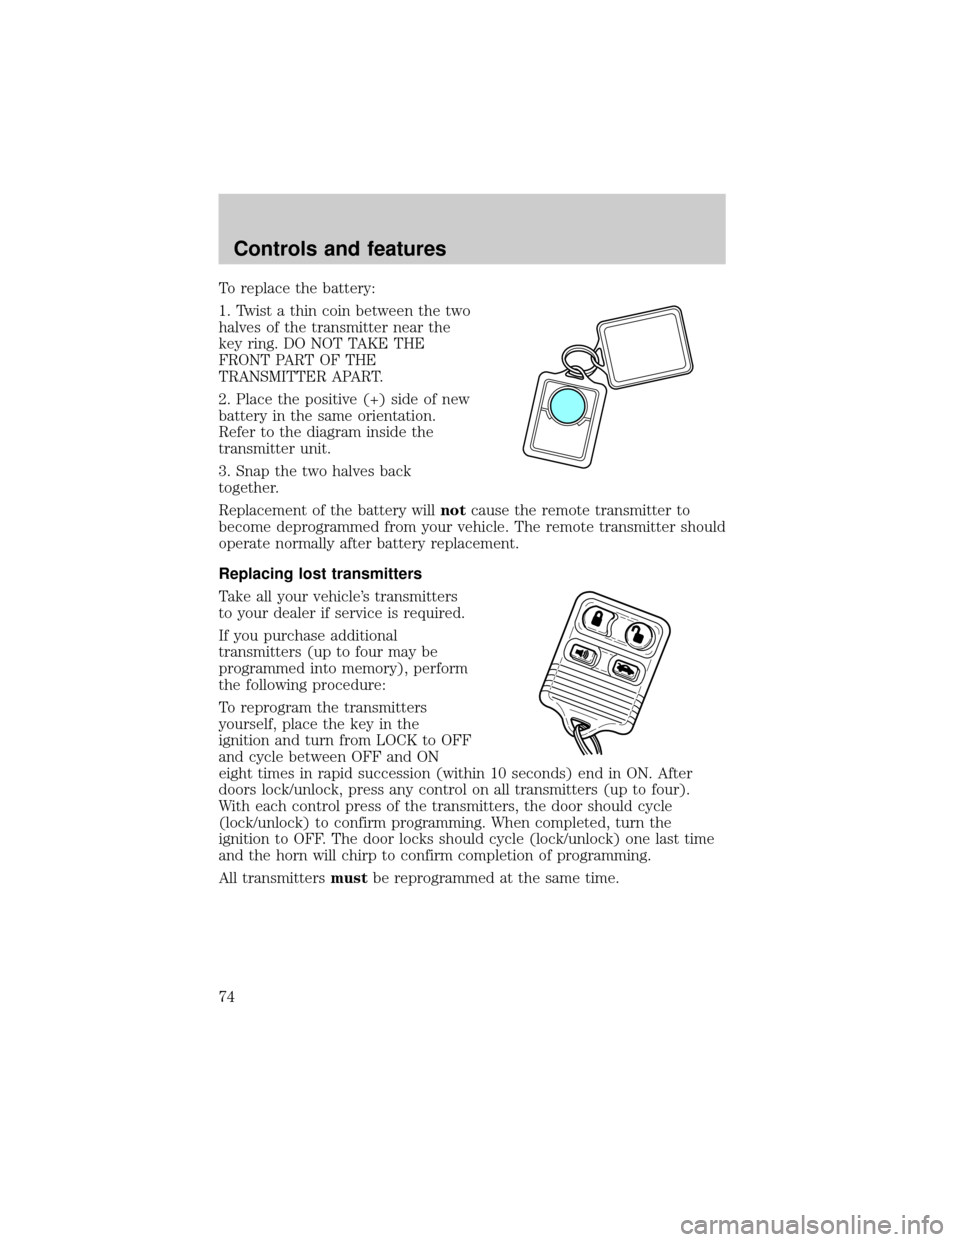
To replace the battery:
1. Twist a thin coin between the two
halves of the transmitter near the
key ring. DO NOT TAKE THE
FRONT PART OF THE
TRANSMITTER APART.
2. Place the positive (+) side of new
battery in the same orientation.
Refer to the diagram inside the
transmitter unit.
3. Snap the two halves back
together.
Replacement of the battery willnotcause the remote transmitter to
become deprogrammed from your vehicle. The remote transmitter should
operate normally after battery replacement.
Replacing lost transmitters
Take all your vehicle's transmitters
to your dealer if service is required.
If you purchase additional
transmitters (up to four may be
programmed into memory), perform
the following procedure:
To reprogram the transmitters
yourself, place the key in the
ignition and turn from LOCK to OFF
and cycle between OFF and ON
eight times in rapid succession (within 10 seconds) end in ON. After
doors lock/unlock, press any control on all transmitters (up to four).
With each control press of the transmitters, the door should cycle
(lock/unlock) to confirm programming. When completed, turn the
ignition to OFF. The door locks should cycle (lock/unlock) one last time
and the horn will chirp to confirm completion of programming.
All transmittersmustbe reprogrammed at the same time.
Controls and features
74
Page 75 of 224

Illuminated entry
The interior lamps illuminate when the remote entry system is used to
unlock the door(s) or sound the personal alarm.
The system automatically turns off after 25 seconds or when the ignition
is turned to the RUN or ACC position. The dome lamp control (if
equipped) mustnotbe set to the OFF position for the illuminated entry
system to operate.
The inside lights will not turn off if:
²they have been turned on with the dimmer control or
²any door is open.
The battery saver will shut off the interior lamps 30 minutes after the
ignition has been turned to the OFF position.
Memory seat/mirrors feature
The remote keyless entry system can also control the memory
seats/mirrors feature. With this feature, the first two programmed
transmitters will recall a different memory position.
Press the control once to unlock the
driver's door and move the memory
features to the corresponding
memory position, just as if you had
pressed the memory control in the
vehicle.
²transmitter #1 will recall memory
profile position #1.
²transmitter #2 will recall memory
profile position #2.
²If a third or fourth transmitter is added, it will not recall a memory
position.
Memory seat positions can be changed at any time. Transmitter #1 will
always move the memory features to position #1.
Controls and features
75
Page 139 of 224
Power distribution box
The power distribution box is located in the engine compartment. The
power distribution box contains high-current fuses that protect your
vehicle's main electrical systems from overloads.
Always disconnect the battery before servicing high current
fuses.
Always replace the cover to the Power Distribution Box before
reconnecting the battery or refilling fluid reservoirs.
If the battery has been disconnected and reconnected, refer to the
Batterysection of theMaintenance and carechapter.
The high-current fuses are coded as follows:
Fuse/Relay
LocationFuse Amp
RatingPower Distribution Box Description
1 Ð A/C Diode
2 Ð PCM Diode
1 30A* PCM
2 20A* ALT SENSE
3 30A* Right Rear Passenger Window
4 30A* Air Suspension
5 Ð Not Used
6 20A* Horns
MEGA
175A
PCM
PWR
RELAY
12 3 4
8
7
6 5
12
4 3
5
7
9
1110
12
14 136
8NOT USED
7BLOWER
MOTOR
RELAY6A/C
CLUTCH
RELAY4NOT
USED2
HORN
RELAY3HIGH
BEAM1STARTER
SOL
RELAY5
12
Roadside emergencies
139
Page 144 of 224

3. Turn the wrench in a counterclockwise direction to remove the lug
nut.
To install the anti-theft lug nut:
1. Insert the key over the locking lug nut.
2. Place the lug nut wrench over the lug nut key and apply pressure on
the key with the wrench.
3. Install the lug nut.
JUMP STARTING YOUR VEHICLE
The gases around the battery can explode if exposed to flames,
sparks, or lit cigarettes. An explosion could result in injury or
vehicle damage.
Do not push start your vehicle. You could damage the catalytic
converter.
Batteries contain sulfuric acid which can burn skin, eyes, and
clothing, if contacted.
Do not attempt to push start your vehicle. Automatic
transmissions do not have push-start capability.
Preparing your vehicle
When the battery is disconnected or a new battery is installed, the
transmission must relearn its adaptive strategy. As a result of this, the
transmission may shift firmly. This operation is considered normal and
will not effect function or durability of the transmission. Over time, the
adaptive learning process will fully update transmission operation to its
optimum shift feel.
1.Use only a 12±volt supply to start your vehicle.
2. Do not disconnect the battery of the disabled vehicle as this could
damage the vehicle's electrical system.
3. Park the booster vehicle close to the hood of the disabled vehicle
making sure the two vehiclesdo nottouch. Set the parking brake on
both vehicles and stay clear of the engine cooling fan and other moving
parts.
Roadside emergencies
144