2001 HONDA ODYSSEY parking brake
[x] Cancel search: parking brakePage 58 of 363

This section gives inf ormation about
the controls and displays that
contribute to the daily operation of
your Honda. All the essential
controls are within easy reach............................
Control Locations . 60
...............................
Indicator Lights . 61
.............................................
Gauges . 66
Controls Near the Steering
.......................................
Wheel . 69
...................................
Headlights . 70
Automatic Lighting Off
.....................................
Feature . 71
............
Daytime Running Lights . 71
....
Instrument Panel Brightness . 71
................................
Turn Signals . 72
.....................
Windshield Wipers . 72
..................
Windshield Washers . 74 Rear Window Wiper and
.....................................
Washer . 74
..........................
Hazard Warning . 75
.............
Rear Window Def ogger . 75
......
Steering Wheel Adjustment . 76
...............
Steering Wheel Controls . 77
.............................
Cruise Control . 77
.............
Remote Audio Controls . 80
...............................
Keys and Locks . 80
..............................................
Keys . 80
....................
Immobilizer System . 81
............................
Ignition Switch . 82
......................
Power Door Locks . 83
...................
Remote Transmitter . 85
..............
Childproof Door Locks . 89
........................................
Tailgate . 89
....................................
Glove Box . 91
.....................
Manual Sliding Doors . 92
.......................
Power Sliding Doors . 93
HomeLink Universal
.................................
Transmitter . 99
...............................................
Seats . 104
....................
Passenger Seating . 104
......................
Seat Adjustments . 105
Driver’s Seat Manual Height
............................
Adjustment . 107 Driver’s Seat Power
..........................
Adjustments . 108
....................................
Armrests . 109
........................
Head Restraints . 110
.....................
Third Seat Access . 111
Moving the Second Row
...........................
Bucket Seat . 112
Removing the Bucket Seats ................
in the Second Row . 114
.............
Folding the Third Seat . 115
............................
Power Windows . 118
...........................................
Mirrors . 121
...............................
Parking Brake . 122
..................................
Digital Clock . 123
..................................
Center Table . 123
...........................
Beverage Holder . 124
........................
Sunglasses Holder . 126
........................................
Sun Visor . 127
................................
Vanity Mirror . 127
.......................
Rear Compartment . 128
...............................
Center Pocket . 128
...................................
Coin Holder . 128
...................................
Storage Box . 129
......................................
Coat Hook . 129
............
Accessory Power Sockets . 130
...............................
Interior Lights . 131
Instruments and Controls
Inst rument s and Cont rols 59
Page 61 of 363

This light has two f unctions:This indicator comes on when you
turn the ignition switch ON (II). It
is a reminder to check the parking
brake. Driving with the parking
brake not f ully released can
damage the brakes and tires.
This indicator lights when you turn
the ignition switch ON (II). If it
comes on at any other time, it
indicates a problem in the
supplemental restraint system. For
complete inf ormation, see page .
If this light comes on when the
engine is running, the battery is not
being charged. For complete
inf ormation, see page .
The engine can be severely damaged
if this light f lashes or stays on when
the engine is running. For complete
inf ormation, see page .
See page .
The instrument panel has many
indicators to give you important
inf ormation about your vehicle.
This indicator lights when you turn
the ignition switch ON (II). It is a
reminder to you and your passengers
to protect yourselves by f astening
the seat belts. A beeper also sounds
if you have not fastened your seat
belt.
If you do not f asten your seat belt,
the beeper will stop af ter a f ew
seconds but the light stays on until
you do. Both the light and the beeper
stay of f if you f asten your seat belt
bef ore turning on the ignition. If the indicator remains lit af ter
you have fully released the
parking brake while the engine is
running, or if it comes on while
driving, it can indicate a problem
in the brake system. For complete
information, see page .
1. 2.
320
318
319
54 322
Indicator L ights
Inst rument s and Cont rols Parking Brake
and Brake
System
Indicator
Supplemental Restraint
System Indicator
Charging System
Indicator
L ow Oil Pressure
Indicator
Malf unction Indicator
Lamp
Seat Belt Reminder L ight
62 U.S. Canada
Page 64 of 363

Canadian models onlyCanadian models only
This indicator lights when you turn
the ignition switch to ON (II) with
the headlight switch of f and the
parking brake set. It should go of f if
youturnontheheadlightsorrelease
the parking brake. If it comes on at
any other time, it means there is a
problem with the DRL. There may
also be a problem with the high
beam headlights.This light comes on with the high
beam headlights. See page for
inf ormation on the headlight
controls.
On Canadian models, this indicator
comes on with reduced brightness
when the Daytime Running Lights
(DRL) are on (see page ).
This lights when you set the cruise
control. See page f or inf ormation
on operating the cruise control. This light comes on as a reminder
that you must ref uel soon.This light comes on when the
washer f luid level is low. Add washer
f luid when you see this light come on
(see page ).
77 70
71 258
‘‘Daytime Running
Lights’’ Indicator
High Beam Indicator
Cruise Control Indicator Low Fuel IndicatorWasher Level Indicator
Indicator L ights
Inst rument s and Cont rols
65
Page 70 of 363
The Automatic Lighting Of f f eature
turns of f the headlights, parking
lights, taillights, side marker lights,
license plate lights and instrument
panel lights within 15 seconds of
removing the key from the ignition
switch and closing the driver’s door.The lights will turn on again when
you unlock or open the driver’s door.
If you unlock the door, but do not
open it within 15 seconds, the lights
will go off. With the driver’s door
open, you will hear a lights-on
reminder chime.
With the headlight switch off, the
high beam headlights come on with
reduced brightness when you turn
the ignition switch to ON (II) and
release the parking brake. They
remain on until you turn the ignition
of f , even if you set the parking brake.
The headlights revert to normal
operation when you turn them on
with the switch.
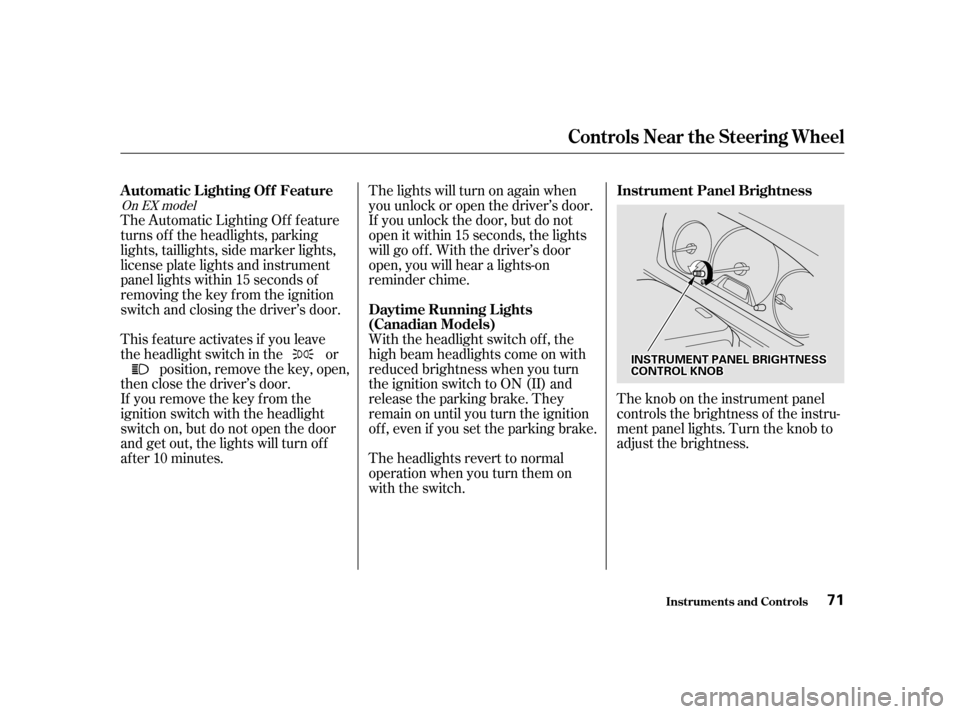
Theknobontheinstrumentpanel
controls the brightness of the instru-
ment panel lights. Turn the knob to
adjust the brightness.
This feature activates if you leave
the headlight switch in the or
position, remove the key, open,
then close the driver’s door.
If you remove the key f rom the
ignition switch with the headlight
switch on, but do not open the door
and get out, the lights will turn of f
af ter 10 minutes.
On EX model
Controls Near the Steering Wheel
Inst rument s and Cont rols
Automatic Lighting Of f Feature
Daytime Running L ights
(Canadian Models)Instrument Panel Brightness
71
IINNSSTTRRUUMMEENNTTPPAANNEELLBBRRIIGGHHTTNNEESSSSCCOONNTTRROOLLKKNNOOBB
Page 121 of 363
Canadian Models
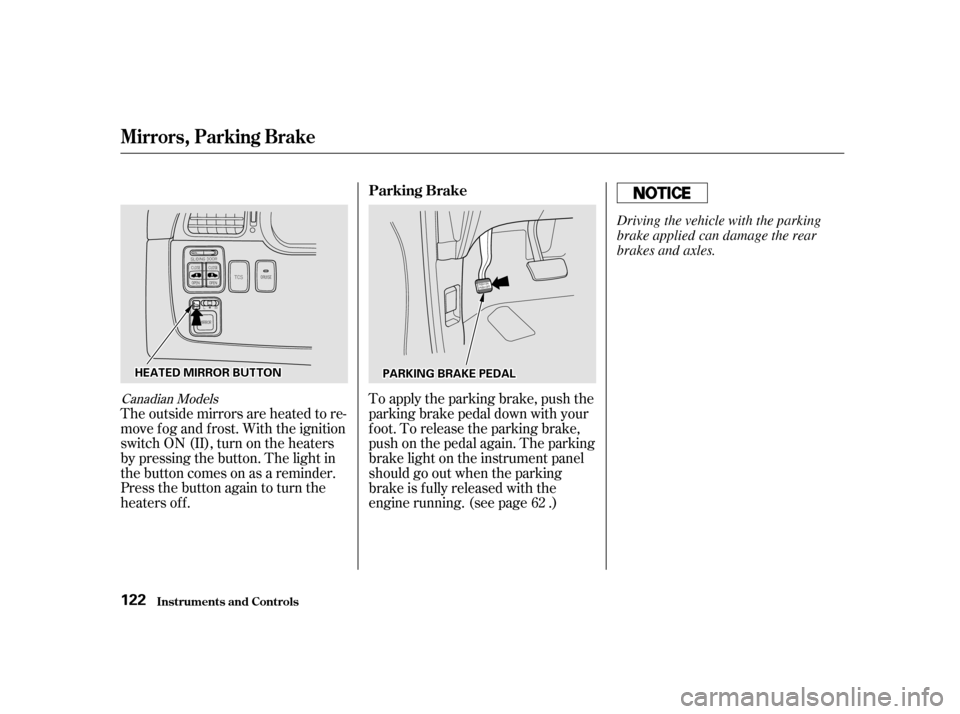
The outside mirrors are heated to re-
move fog and frost. With the ignition
switchON(II),turnontheheaters
by pressing the button. The light in
the button comes on as a reminder.
Press the button again to turn the
heaters off.To apply the parking brake, push the
parking brake pedal down with your
f oot. To release the parking brake,
push on the pedal again. The parking
brake light on the instrument panel
should go out when the parking
brake is f ully released with the
engine running. (see page .)
62
Mirrors, Parking Brake
Inst rument s and Cont rols Parking Brake
122
HHEEAATTEEDDMMIIRRRROORRBBUUTTTTOONNPPAARRKKIINNGGBBRRAAKKEEPPEEDDAALL Driving the vehicle with the parking
brake applied can damage the rear
brakes and axles.
Page 197 of 363
Remove the f uel f ill cap slowly.
You may hear a hissing sound as
pressure inside the tank escapes.
Place the cap in the holder on the
fuel fill door.
Stop f illing the tank af ter the f uel
nozzle automatically clicks of f . Do
not try to ‘‘top off’’ the tank, leave
some room f or the f uel to expand
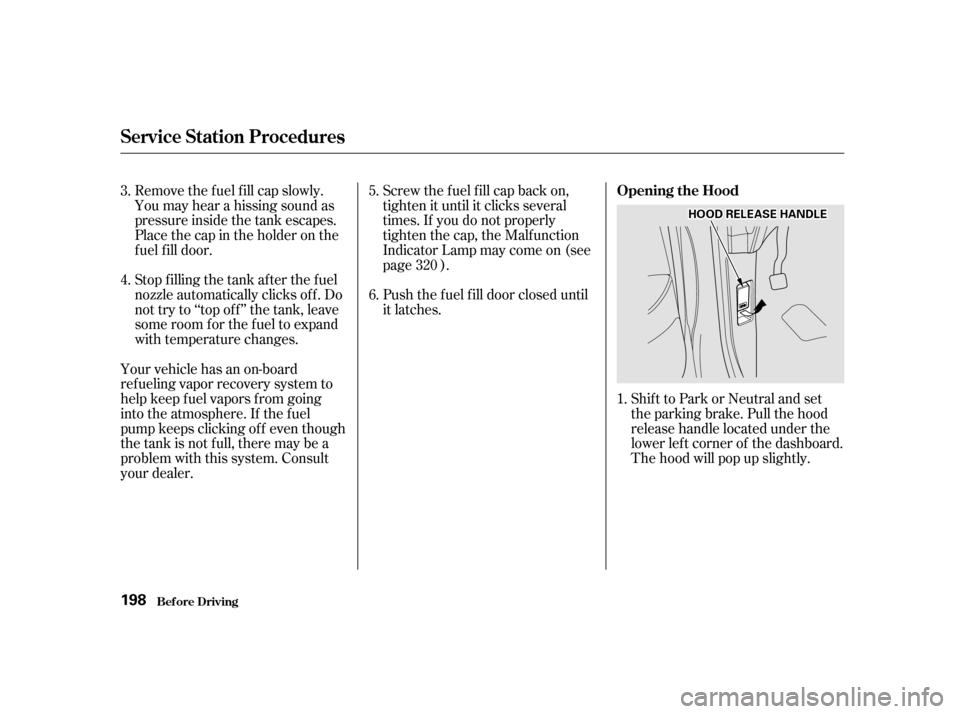
with temperature changes.Shift to Park or Neutral and set
the parking brake. Pull the hood
release handle located under the
lower lef t corner of the dashboard.
The hood will pop up slightly.
Screw the f uel f ill cap back on,
tighten it until it clicks several
times. If you do not properly
tighten the cap, the Malfunction
Indicator Lamp may come on (see
page ).
Push the f uel f ill door closed until
it latches.
Your vehicle has an on-board
ref ueling vapor recovery system to
help keep f uel vapors f rom going
into the atmosphere. If the fuel
pump keeps clicking of f even though
the tank is not full, there may be a
problem with this system. Consult
your dealer. 1.
3. 4.
5. 6.
320
Service Station Procedures
Bef ore Driving Opening the Hood
198
HHOOOODDRREELLEEAASSEEHHAANNDDLLEE
Page 208 of 363

This section gives you tips on
starting the engine under various
conditions, and how to operate the
automatic transmission. It also
includes important inf ormation on
parking your vehicle, the braking
system, the Traction Control System,
and f acts you need if you are
planning to tow a trailer.........................
Preparing to Drive . 210
.......................
Starting the Engine . 211
Starting in Cold Weather ....................
at High Altitude . 211
..............
Automatic Transmission . 212
.
Shif t Lever Position Indicator . 212
................
Shif t Lever Positions . 213
..............
Engine Speed Limiter . 215
....................
Shif t Lock Release . 215
...........................................
Parking . 217
.....................
The Braking System . 218
.............
Brake Wear Indicators . 218
...............
Brake System Design . 219
.......................
Anti-lock Brakes . 219
Important Saf ety .........................
Reminders . 220
........................
ABS Indicator . 220
..............
Traction Control System . 221
...............
TCS ON/OFF Switch . 222
............................
TCS Indicator . 223
...............
Driving in Bad Weather . 224
...........................
Towing a Trailer . 226
Driving
Driving 209
Page 210 of 363

Apply the parking brake.
In cold weather, turn of f all
electrical accessories to reduce
the drain on the battery.
Make sure the shif t lever is in
Park. Press on the brake pedal.
Without touching the accelerator
pedal, turn the ignition key to the
START (III) position. If the engine
does not start right away, do not
hold the key in START (III) f or
more than 15 seconds at a time.
Pause f or at least 10 seconds
bef ore trying again.
If the engine does not start within
15 seconds, or starts but stalls
right away, repeat step 4 with the
accelerator pedal pressed half-way
down. If the engine starts, release
pressure on the accelerator pedal
so the engine does not race.If the engine still does not start,
press the accelerator pedal all the
way down and hold it there while
starting in order to clear f looding.
As bef ore, keep the ignition key in
the START (III) position f or no
more than 15 seconds. Return to
step 5 if the engine does not start.
If it starts, lif t your f oot of f the
accelerator pedal so the engine
does not race.
An engine is harder to start in cold
weather. The thinner air f ound at
high altitude above 8,000 f eet (2,400
meters) adds to the problem.
Use the f ollowing procedure: Turn of f all electrical accessories
to reduce the drain on the battery. Push the accelerator pedal half-
way to the f loor and hold it there
while starting the engine. Do not
hold the ignition key in START
(III) f or more than 15 seconds.
When the engine starts, release
the accelerator pedal gradually as
the engine speeds up and smooths
out.
If the engine fails to start in step 2,
push the accelerator pedal to the
f loor and hold it there while you
try to start the engine for no more
than 15 seconds. If the engine
does not start, return to step 2.
1. 2. 3.
5. 6.
1. 2. 3. 4.
Starting the Engine
Driving
Starting in Cold Weather at High
A ltitude (A bove 8,000 f eet/
2,400 meters)
211