2001 HONDA ODYSSEY fuel
[x] Cancel search: fuelPage 64 of 363

Canadian models onlyCanadian models only
This indicator lights when you turn
the ignition switch to ON (II) with
the headlight switch of f and the
parking brake set. It should go of f if
youturnontheheadlightsorrelease
the parking brake. If it comes on at
any other time, it means there is a
problem with the DRL. There may
also be a problem with the high
beam headlights.This light comes on with the high
beam headlights. See page for
inf ormation on the headlight
controls.
On Canadian models, this indicator
comes on with reduced brightness
when the Daytime Running Lights
(DRL) are on (see page ).
This lights when you set the cruise
control. See page f or inf ormation
on operating the cruise control. This light comes on as a reminder
that you must ref uel soon.This light comes on when the
washer f luid level is low. Add washer
f luid when you see this light come on
(see page ).
77 70
71 258
‘‘Daytime Running
Lights’’ Indicator
High Beam Indicator
Cruise Control Indicator Low Fuel IndicatorWasher Level Indicator
Indicator L ights
Inst rument s and Cont rols
65
Page 66 of 363

This shows how much f uel you have.
It is most accurate when the vehicle
is on level ground. It may show
slightly more or less than the actual
amount when you are driving on
curvy or hilly roads.
This shows the temperature of the
engine’s coolant. During normal
operation, the pointer should rise
from the bottom white mark to about
the middle of the gauge. In severe
driving conditions, such as very hot
weather or a long period of uphill
driving, the pointer may rise to near
the upper white mark. If it reaches
the red (Hot) mark, pull safely to the
side of the road. Turn to page f or
instructions and precautions on
checking the engine’s cooling
system.
This meter shows the number of
miles (U.S.) or kilometers (Canada)
driven since you last reset it.
There are two trip meters: Trip A
and Trip B. Switch between these
displays by pressing the Select/
Reset button repeatedly. Each trip
meter works independently, so you
can keep track of two dif f erent
distances.
To reset a trip meter, display it, and
then press and hold the Select/Reset
button until the number resets to‘‘0.0’’.
The needle returns to the bottom
after you turn off the ignition. The
gauge shows the f uel level reading
immediately af ter you turn the
ignition switch back ON (II).
315
Gauges
Inst rument s and Cont rols
Trip Meter Temperature Gauge Fuel Gauge
67
Page 91 of 363

Your Honda is equipped with dual
sliding doors. Be sure all passengers
are clear of the sliding doors bef ore
closing them.
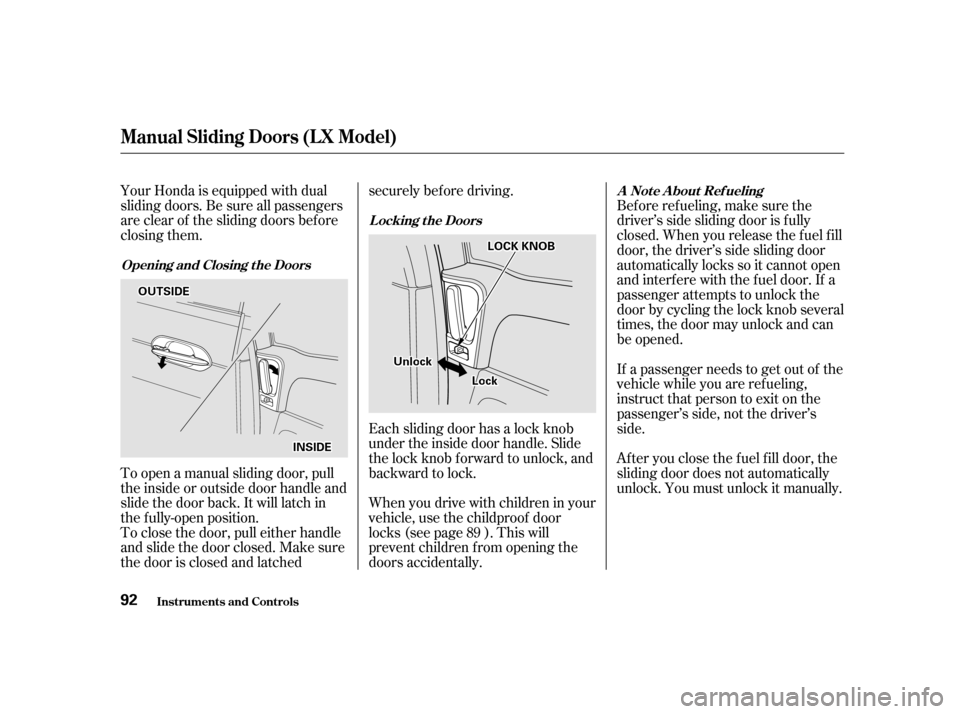
To open a manual sliding door, pull
the inside or outside door handle and
slide the door back. It will latch in
the f ully-open position.
To close the door, pull either handle
and slide the door closed. Make sure
the door is closed and latchedsecurely bef ore driving.
Each sliding door has a lock knob
under the inside door handle. Slide
the lock knob f orward to unlock, and
backward to lock.
Whenyoudrivewithchildreninyour
vehicle, use the childproof door
locks (see page ). This will
prevent children f rom opening the
doors accidentally.
Bef ore ref ueling, make sure the
driver’s side sliding door is f ully
closed. When you release the f uel f ill
door, the driver’s side sliding door
automatically locks so it cannot open
and interfere with the fuel door. If a
passenger attempts to unlock the
door by cycling the lock knob several
times, the door may unlock and can
be opened.
If a passenger needs to get out of the
vehicle while you are ref ueling,
instruct that person to exit on the
passenger’s side, not the driver’s
side.
Af ter you close the f uel f ill door, the
sliding door does not automatically
unlock. You must unlock it manually.
89
Manual Sliding Doors (L X Model)
Opening and Closing t he Doors L ocking t he Doors
A Not e A bout Ref ueling
Inst rument s and Cont rols
92
OOUUTTSSIIDDEE
IINNSSIIDDEE
UUnnlloocckk
LLoocckk
LLOOCCKKKKNNOOBB
Page 96 of 363

If a person or object is in the way
af ter the door begins to close, the
door handles cannot be used to stop
the door. To stop the door, use the
dashboard switches or the remote
transmitter.
If a passenger needs to get out of the
vehicle while you are ref ueling,
instruct that person to exit on the
passenger’s side, not the driver’s
side.Make sure the power sliding doors
are latched in the f ully-open
position, then hold the door open
while allowing your passengers to
enter or exit the vehicle. Do not
pull the inside or outside door
handle, or the latch will release
and the door will close.
Make sure the MAIN switch is in
the ON position. This allows the
power assist to keep the doors
f rom slamming shut.
If the MAIN switch is off, the door
can slam shut and possibly injure
someone.
If your vehicle’s battery is
disconnected or goes dead while a
sliding door is open, the power
sliding door system needs to be reset.
After reconnecting the battery:
Close each sliding door completely
by hand; or
Move the MAIN switch on the
dashboard to the ON position.
Push and hold the top of each door
switch until each sliding door
closes completely.
If the power sliding doors are closed,
the system will reset itself
automatically once the battery has
been reconnected.
If the power sliding doors do not
operate properly af ter resetting,
have your vehicle checked by a
Honda dealer.
When parking f acing downhill on a
steep grade, the power sliding doors
may not open or close as they do
normally.
Bef ore ref ueling, make sure the
driver’s side sliding door is f ully
closed. When you release the f uel f ill
door, the driver’s side sliding door
automatically locks so it cannot open
and interfere with the fuel door. If a
passenger attempts to unlock the
door by cycling the lock knob several
times, the door may unlock and can
be opened. Af ter you close the f uel f ill door, the
sliding door does not automatically
unlock. You must unlock it manually.
CONT INUED
Inst rument s and Cont rols
A Not e A bout Ref ueling
Parking Facing DownhillHow t o Reset t he Power Sliding
Doors
Power Sliding Doors (EX Model)
97
Page 194 of 363

Bef ore you begin driving your Honda,
youshouldknowwhatgasolineto
use, and how to check the levels of
important f luids. You also need to
know how to properly store luggage
or packages. The inf ormation in this
section will help you. If you plan to
add any accessories to your vehicle,
please read the inf ormation in this
section f irst..............................
Break-in Period . 196
.........................................
Gasoline . 196
.........
Service Station Procedures . 197
................
Filling the Fuel Tank . 197
....................
Opening the Hood . 198
...............................
Oil Check . 200
.........
Engine Coolant Check . 201
...............................
Fuel Economy . 202
.....................
Vehicle Condition . 202
...........................
Driving Habits . 202
...
Accessories and Modif ications . 203
.............................
Carrying Cargo . 205
Bef ore Driving
Bef ore Driving 195
Page 196 of 363

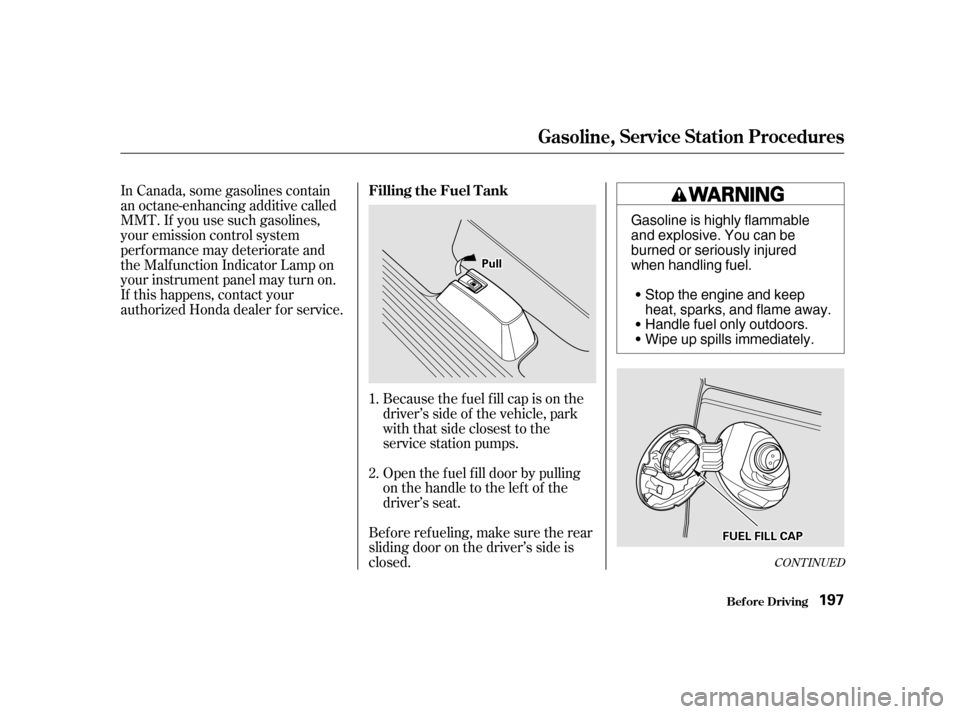
Because the f uel f ill cap is on the
driver’s side of the vehicle, park
with that side closest to the
service station pumps.
Open the f uel f ill door by pulling
onthehandletotheleftof the
driver’s seat.
In Canada, some gasolines contain
an octane-enhancing additive called
MMT. If you use such gasolines,
your emission control system
perf ormance may deteriorate and
the Malf unction Indicator Lamp on
your instrument panel may turn on.
If this happens, contact your
authorized Honda dealer f or service.
Bef ore ref ueling, make sure the rear
sliding door on the driver’s side is
closed.
1. 2.
CONT INUED
Bef ore Driving
Filling the Fuel Tank
Gasoline, Service Station Procedures
197
PPuullll
FFUUEELLFFIILLLLCCAAPP
Gasoline is highly flammable
and explosive. You can be
burned or seriously injured
when handling fuel.
Stop the engine and keep
heat, sparks, and flame away.
Handle fuel only outdoors.
Wipe up spills immediately.
Page 197 of 363

Remove the f uel f ill cap slowly.
You may hear a hissing sound as
pressure inside the tank escapes.
Place the cap in the holder on the
fuel fill door.
Stop f illing the tank af ter the f uel
nozzle automatically clicks of f . Do
not try to ‘‘top off’’ the tank, leave
some room f or the f uel to expand
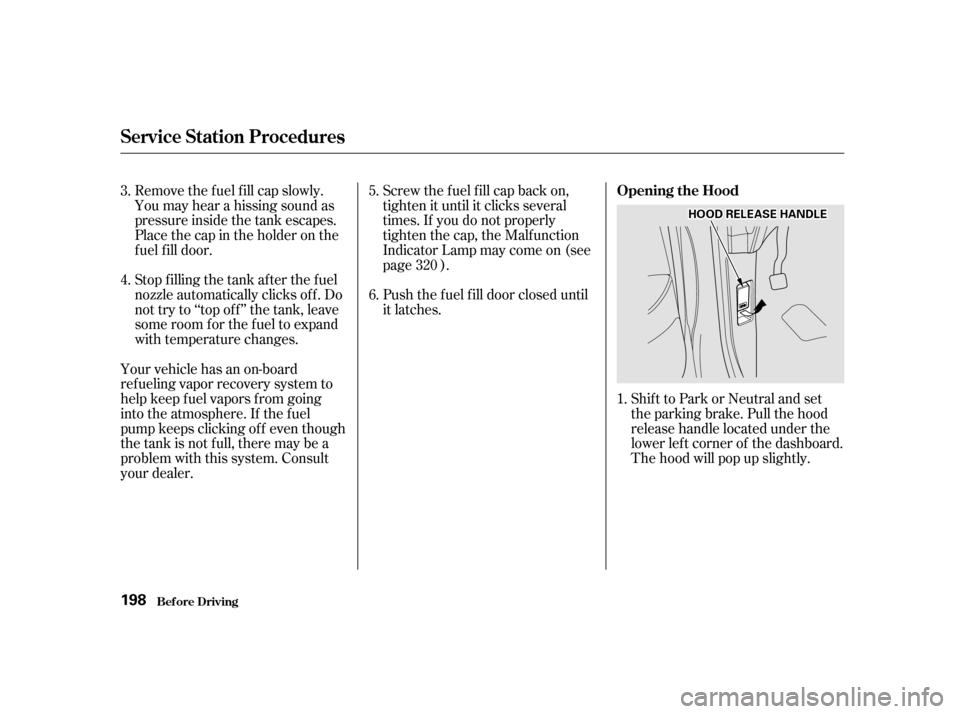
with temperature changes.Shift to Park or Neutral and set
the parking brake. Pull the hood
release handle located under the
lower lef t corner of the dashboard.
The hood will pop up slightly.
Screw the f uel f ill cap back on,
tighten it until it clicks several
times. If you do not properly
tighten the cap, the Malfunction
Indicator Lamp may come on (see
page ).
Push the f uel f ill door closed until
it latches.
Your vehicle has an on-board
ref ueling vapor recovery system to
help keep f uel vapors f rom going
into the atmosphere. If the fuel
pump keeps clicking of f even though
the tank is not full, there may be a
problem with this system. Consult
your dealer. 1.
3. 4.
5. 6.
320
Service Station Procedures
Bef ore Driving Opening the Hood
198
HHOOOODDRREELLEEAASSEEHHAANNDDLLEE
Page 201 of 363

The condition of your vehicle and
your driving habits are the two most
important things that affect the fuel
mileage you get.
Always maintain your vehicle accord-
ing to the maintenance schedule.
This will keep it in top operating
condition.A cold engine uses more f uel than a
warm engine. It is not necessary to
‘‘warm-up’’ a cold engine by letting it
idle f or a long time. You can drive
away in about a minute, no matter
how cold it is outside. The engine
will warm up f aster, and you get
better f uel economy. To cut down on
the number of ‘‘cold starts,’’ try to
combine several short trips into one.
You can improve f uel economy by
driving moderately. Rapid acceler-
ation, abrupt cornering, and hard
braking use more f uel.
Always drive in the highest gear that
allows the engine to run and acceler-
ate smoothly.
Depending on traf f ic conditions, try
to maintain a constant speed. Every
time you slow down and speed up,
your vehicle uses extra f uel. Use the
cruise control, when appropriate, to
increase f uel economy.
The air conditioning puts an extra
load on the engine which makes it
usemorefuel.Turnoff theA/Cto
cutdownonairconditioninguse.
Use the f low-through ventilation
when the outside air temperature is
moderate.
In winter, the build-up of snow on
your vehicle’s underside adds weight
and rolling resistance. Frequent
cleaning helps your f uel mileage and
reduces the chance of corrosion.
An important part of that mainte-
nance is the
(see page ). For
example, an underinf lated tire
causes more ‘‘rolling resistance,’’
which uses f uel. It also wears out
f aster, so check the tire pressure at
least monthly. 247
Vehicle Condition
Driving Habits
Owner Maintenance
Checks
Bef ore Driving
Fuel Economy
202