2001 FORD WINDSTAR towing
[x] Cancel search: towingPage 11 of 288
One of the following conditions may exist:
²low brake fluid level in the reservoir.
²Brake force distribution system failure. The ABS light will also
illuminate if this condition is present.
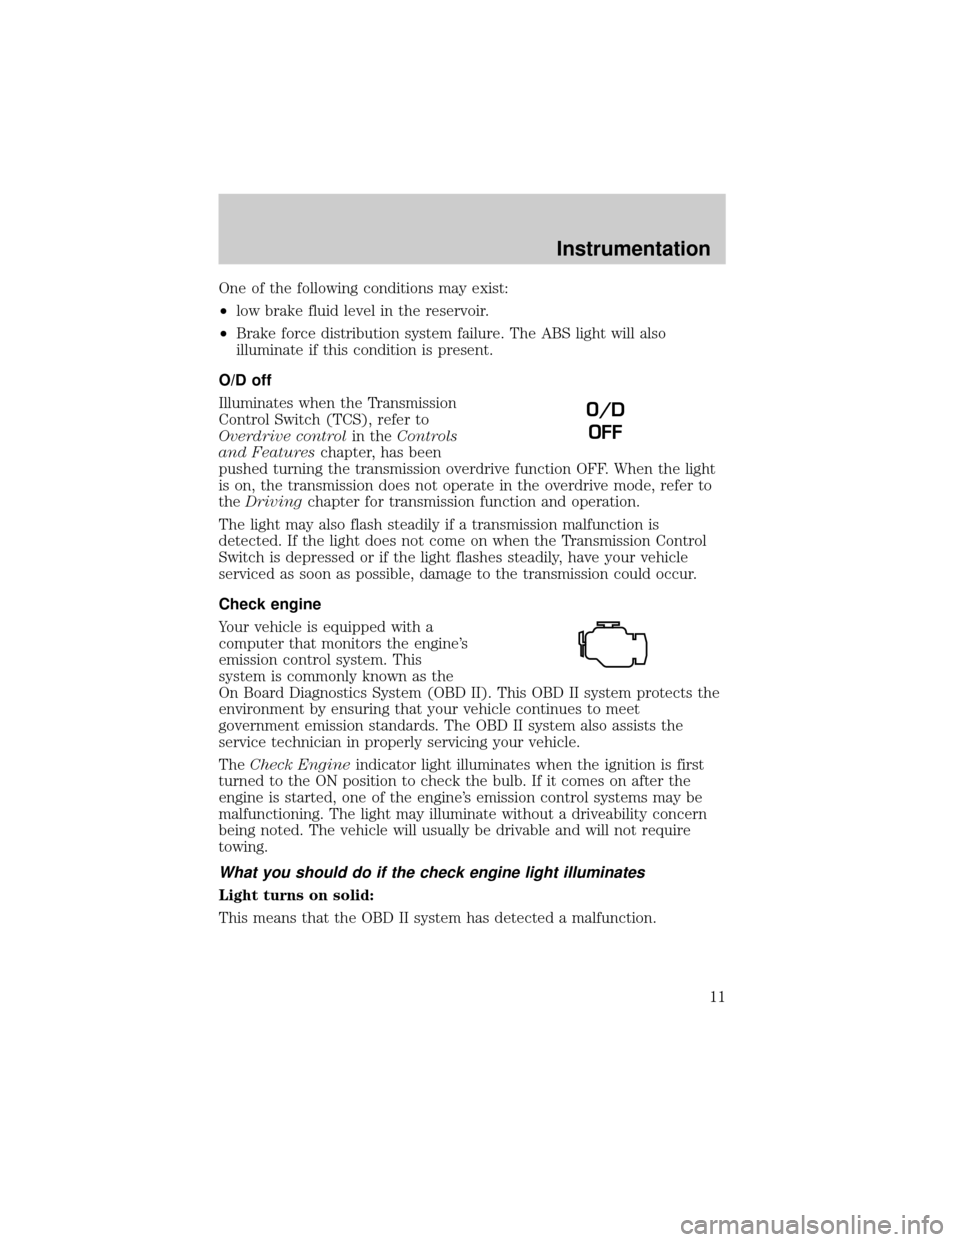
O/D off
Illuminates when the Transmission
Control Switch (TCS), refer to
Overdrive controlin theControls
and Featureschapter, has been
pushed turning the transmission overdrive function OFF. When the light
is on, the transmission does not operate in the overdrive mode, refer to
theDrivingchapter for transmission function and operation.
The light may also flash steadily if a transmission malfunction is
detected. If the light does not come on when the Transmission Control
Switch is depressed or if the light flashes steadily, have your vehicle
serviced as soon as possible, damage to the transmission could occur.
Check engine
Your vehicle is equipped with a
computer that monitors the engine's
emission control system. This
system is commonly known as the
On Board Diagnostics System (OBD II). This OBD II system protects the
environment by ensuring that your vehicle continues to meet
government emission standards. The OBD II system also assists the
service technician in properly servicing your vehicle.
TheCheck Engineindicator light illuminates when the ignition is first
turned to the ON position to check the bulb. If it comes on after the
engine is started, one of the engine's emission control systems may be
malfunctioning. The light may illuminate without a driveability concern
being noted. The vehicle will usually be drivable and will not require
towing.
What you should do if the check engine light illuminates
Light turns on solid:
This means that the OBD II system has detected a malfunction.
O/D
OFF
Instrumentation
11
Page 20 of 288
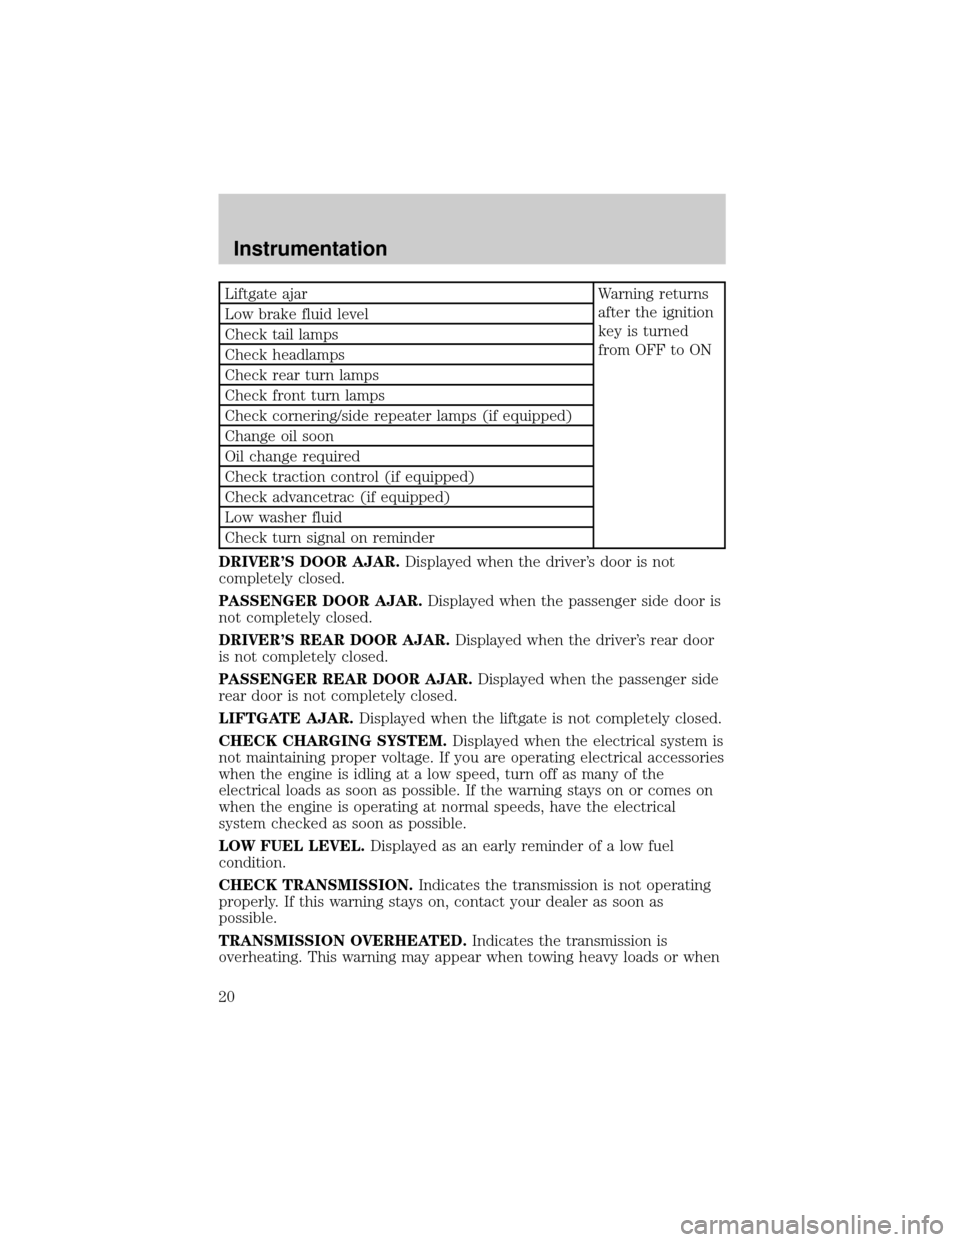
Liftgate ajar Warning returns
after the ignition
key is turned
from OFF to ON Low brake fluid level
Check tail lamps
Check headlamps
Check rear turn lamps
Check front turn lamps
Check cornering/side repeater lamps (if equipped)
Change oil soon
Oil change required
Check traction control (if equipped)
Check advancetrac (if equipped)
Low washer fluid
Check turn signal on reminder
DRIVER'S DOOR AJAR.Displayed when the driver's door is not
completely closed.
PASSENGER DOOR AJAR.Displayed when the passenger side door is
not completely closed.
DRIVER'S REAR DOOR AJAR.Displayed when the driver's rear door
is not completely closed.
PASSENGER REAR DOOR AJAR.Displayed when the passenger side
rear door is not completely closed.
LIFTGATE AJAR.Displayed when the liftgate is not completely closed.
CHECK CHARGING SYSTEM.Displayed when the electrical system is
not maintaining proper voltage. If you are operating electrical accessories
when the engine is idling at a low speed, turn off as many of the
electrical loads as soon as possible. If the warning stays on or comes on
when the engine is operating at normal speeds, have the electrical
system checked as soon as possible.
LOW FUEL LEVEL.Displayed as an early reminder of a low fuel
condition.
CHECK TRANSMISSION.Indicates the transmission is not operating
properly. If this warning stays on, contact your dealer as soon as
possible.
TRANSMISSION OVERHEATED.Indicates the transmission is
overheating. This warning may appear when towing heavy loads or when
Instrumentation
20
Page 179 of 288
²GAWR (Gross Axle Weight Rating):Carrying capacity for each axle
system. The GAWR is specific to each vehicle and is listed on the
Safety Certification Label on the driver's door pillar.
²GCW (Gross Combined Weight):The combined weight of the
towing vehicle (including passengers and cargo) and the trailer.
²GCWR (Gross Combined Weight Rating):Maximum combined
weight of towing vehicle (including passengers and cargo) and the
trailer. The GCWR indicates the maximum loaded weight that the
vehicle is designed to tow.
²Maximum Trailer Weight Rating:Maximum weight of a trailer the
vehicle is permitted to tow. The maximum trailer weight rating is
determined by subtracting the vehicle curb weight for any required
option weight for trailer towing and the weight of the driver from the
GCWR for the towing vehicle.
²Maximum Trailer Weight:Maximum weight of a trailer the loaded
vehicle (including passengers and cargo) is permitted to tow. It is
determined by subtracting the weight of the loaded trailer towing
vehicle from the GCWR for the towing vehicle.
²Trailer Weight Range:Specified weight range that the trailer must
fall within that ranges from zero to the maximum trailer weight rating.
Remember to figure in the tongue load of your loaded trailer when
figuring the total weight.
Do not exceed the GVWR or the GAWR specified on the
certification label.
Do not use replacement tires with lower load carrying capacities than the
originals because they may lower the vehicle's GVWR and GAWR
limitations. Replacement tires with a higher limit than the originals do
not increase the GVWR and GAWR limitations.
The Safety Certification Label, found on the driver's door pillar, lists
several important vehicle weight rating limitations. Before adding any
additional equipment, refer to these limitations. If you are adding weight
to the front of your vehicle, (potentially including weight added to the
cab), the weight added should not exceed the front axle reserve capacity
(FARC). Additional frontal weight may be added to the front axle reserve
capacity provided you limit your payload in other ways (i.e. restrict the
number of passengers or amount of cargo carried).
Driving
179
Page 180 of 288

Always ensure that the weight of passengers, cargo and equipment being
carried is within the weight limitations that have been established for
your vehicle including both gross vehicle weight and Front and rear
gross axle weight rating limits. Under no circumstance should these
limitations be exceeded. Exceeding any vehicle weight rating limitation
could result in serious damage to the vehicle and/or personal injury.
Calculating the load your vehicle can carry/tow
1. Use the appropriate maximum gross combined weight rating (GCWR)
chart to find the maximum GCWR for your vehicle type and whether it's
equipped with a trailer tow option.
2. Weigh your vehicle as you customarily operate the vehicle without
cargo. To obtain correct weights, try taking your vehicle to a shipping
company or an inspection station for trucks.
3. Subtract your loaded vehicle weight from the maximum GCWR on the
following charts. This is the maximum trailer weight your vehicle can tow
and must fall below the maximum shown under maximum trailer weight
on the chart.
TRAILER TOWING
Trailer towing with your vehicle requires the optional trailer tow
electrical package and may require the use of an additional medium duty
trailer tow option package.
Trailer towing puts additional loads on your vehicle's engine,
transmission, axle, brakes, tires, and suspension. For your safety and to
maximize vehicle performance, be sure to use the proper equipment
while towing.
Follow these guidelines to ensure safe towing procedure:
²Stay within your vehicle's load limits. If exceeded, cargo should be
removed from the trailer and/or the vehicle until all weights are within
specified limits.
²Thoroughly prepare your vehicle for towing. Refer toPreparing to
towin this chapter.
²Use extra caution when driving while trailer towing. Refer toDriving
while you towin this chapter.
²Service your vehicle more frequently if you tow a trailer. Refer to
Special Operating Conditions in the scheduled maintenance guide.
Driving
180
Page 181 of 288
²Do not tow a trailer until your vehicle has been driven at least 800 km
(500 miles).
²Refer to the instructions included with towing accessories for the
proper installation and adjustment specifications.
If your vehicle is equipped with the optional heavy duty trailer tow
wiring, it is pre-wired for trailer towing. An electrical connector is
provided under the instrument panel for installing a customer-supplied
electric brake controller. Another electrical connector is provided at the
hitch. This connector provides power to the trailer for taillamps, stop
and turn lamps, back up lamps, battery charge, electric brakes (when a
customer provided controller is installed) and ground. The kit included
with your vehicle provides you with adaptors to attach the brake
controller and convert the hitch connector for Class I trailer usage.
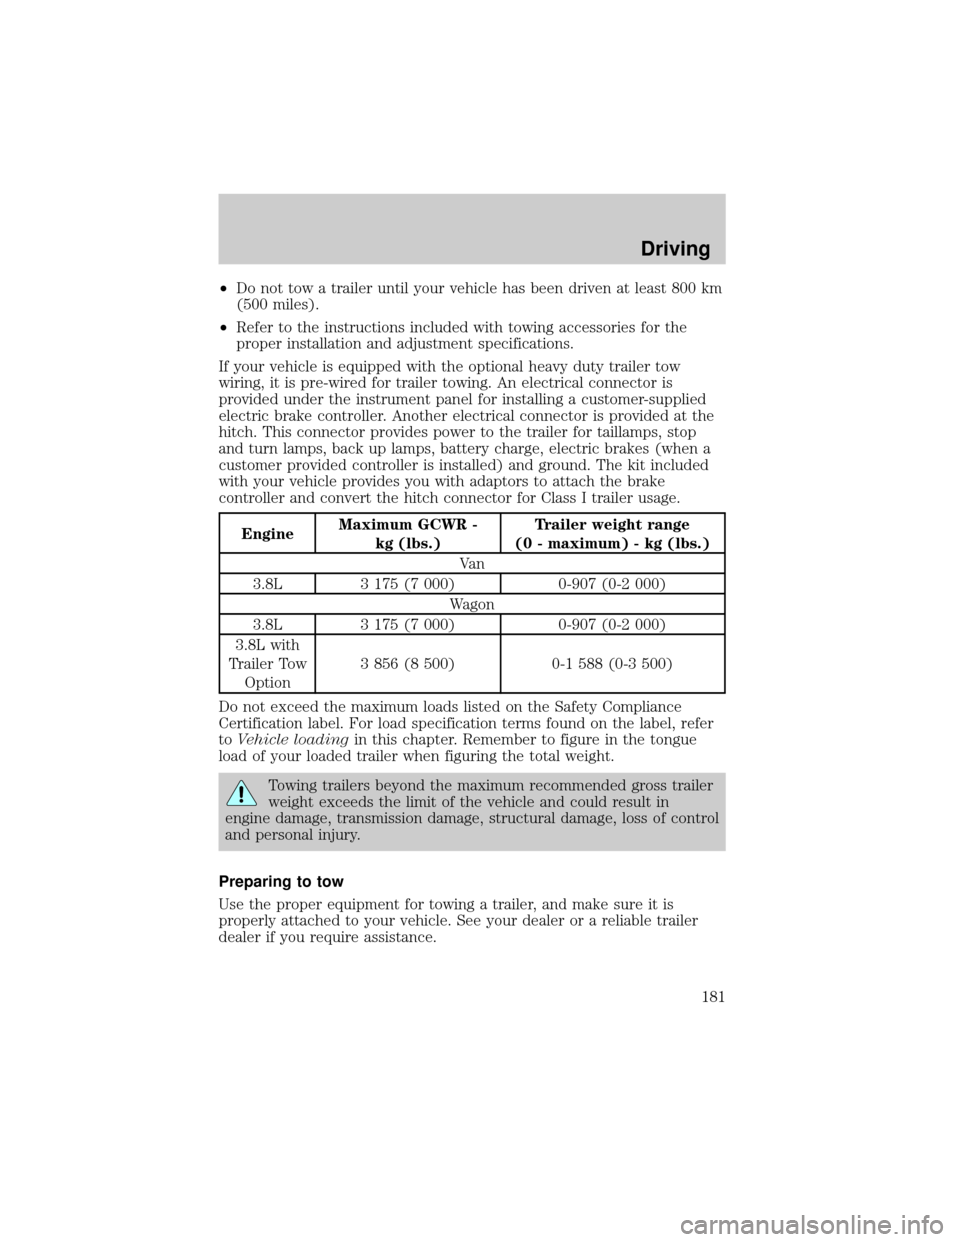
EngineMaximum GCWR -
kg (lbs.)Trailer weight range
(0 - maximum) - kg (lbs.)
Va n
3.8L 3 175 (7 000) 0-907 (0-2 000)
Wagon
3.8L 3 175 (7 000) 0-907 (0-2 000)
3.8L with
Trailer Tow
Option3 856 (8 500) 0-1 588 (0-3 500)
Do not exceed the maximum loads listed on the Safety Compliance
Certification label. For load specification terms found on the label, refer
toVehicle loadingin this chapter. Remember to figure in the tongue
load of your loaded trailer when figuring the total weight.
Towing trailers beyond the maximum recommended gross trailer
weight exceeds the limit of the vehicle and could result in
engine damage, transmission damage, structural damage, loss of control
and personal injury.
Preparing to tow
Use the proper equipment for towing a trailer, and make sure it is
properly attached to your vehicle. See your dealer or a reliable trailer
dealer if you require assistance.
Driving
181
Page 182 of 288
Hitches
Do not use hitches that clamp onto the vehicle bumper. Use a load
carrying hitch. You must distribute the load in your trailer so that 10% of
the total weight of the trailer is on the tongue.
Safety chains
Always connect the trailer's safety chains to the hook retainers on the
hitch. To connect the trailer's safety chains, cross the chains under the
trailer tongue and allow slack for turning corners.
If you use a rental trailer, follow the instructions that the rental agency
gives to you.
Do not attach safety chains to the bumper.
Trailer brakes
Electric brakes and manual, automatic or surge-type trailer brakes are safe
if installed properly and adjusted to the manufacturer's specifications. The
trailer brakes must meet local and Federal regulations.
Do not connect a trailer's hydraulic brake system directly to your
vehicle's brake system. Your vehicle may not have enough
braking power and your chances of having a collision greatly increase.
The braking system of the tow vehicle is rated for operation at the
GVWR not GCWR.
Trailer lamps
Trailer lamps are required on most towed vehicles. Ensure that your
trailer lamps conform to local and Federal Regulations.
Do not splice or modify the vehicle electrical wiring or lamps for
trailer towing.
Your vehicle uses an advanced electronic module with ground side
switching to control and monitor your vehicle lamps. Splicing into the
wiring or attaching wiring to the vehicle bulbs will DISABLE the rear
vehicle lamps from functioning. Your lamp outage feature will also be
disabled or provide incorrect information.
Your vehicle is ready to install a Trailer Tow module that will provide the
proper communication with the vehicle electrical system so your trailer
lamps will function properly. See your dealer or trailer rental agency for
proper instructions and equipment for hooking up trailer lamps.
Driving
182
Page 183 of 288

Driving while you tow
When towing a trailer:
²Ensure that you turn off your speed control. The speed control may
shut off automatically when you are towing on long, steep grades.
²Consult your local motor vehicle speed regulations for towing a trailer.
²Use a lower gear when towing up or down steep hills. This will
eliminate excessive downshifting and upshifting for optimum fuel
economy and transmission cooling.
²Anticipate stops and brake gradually.
Exceeding the GCWR rating may cause internal transmission
damage and void your warranty coverage.
Servicing after towing
If you tow a trailer for long distances, your vehicle will require more
frequent service intervals. Refer to your scheduled maintenance guide for
more information.
Trailer towing tips
²Practice turning, stopping and backing up before starting on a trip to
get the feel of the vehicle trailer combination. When turning, make
wider turns so the trailer wheels will clear curbs and other obstacles.
²Allow more distance for stopping with a trailer attached.
²The trailer tongue weight should be 10% of the loaded trailer weight.
²After you have traveled 80 km (50 miles), thoroughly check your
hitch, electrical connections and trailer wheel lug nuts.
²When stopped in traffic for long periods of time in hot weather, place
the gearshift in P (Park) and increase idle speed. This aids engine
cooling and air conditioner efficiency.
²Vehicles with trailers should not be parked on a grade. If you must
park on a grade, place wheel chocks under the trailer's wheels.
Recreational towing
Follow these guidelines for your specific powertrain combination to tow
your vehicle with all four wheels on the ground (such as behind a
recreational vehicle).
These guidelines are designed to ensure that your transmission is not
damaged due to insufficient lubrication.
Driving
183
Page 184 of 288
All Front Wheel Drive (FWD) vehicles
An example of recreational towing is towing your vehicle behind a
Motorhome. The following recreational towing guidelines are designed to
ensure that your transmission is not damaged. It is not recommended to
tow front wheel drive vehicles with the front drive wheels on the ground.
It is recommended to tow your vehicle with the drive wheels on a dolly
or two wheel car hauling trailer.
In case of a roadside emergency with a disabled vehicle (without access
to wheel dollies, car hauling trailer or flatbed transport vehicle) your
vehicle can be flat towed (all wheels on the ground) under the following
conditions:
²Place the transmission in N (Neutral).
²Maximum speed is 56 km/h (35 mph).
²Maximum distance is 80 km (50 miles).
LUGGAGE RACK (IF EQUIPPED)
Maximum load is 75 kg (165 lbs) on the roof rack structure, or 45 kg
(100 lbs) on the roof panel, evenly distributed. If it is not possible to
distribute the load, position it as far rearward as possible. Use the tie
down loops to secure the load.
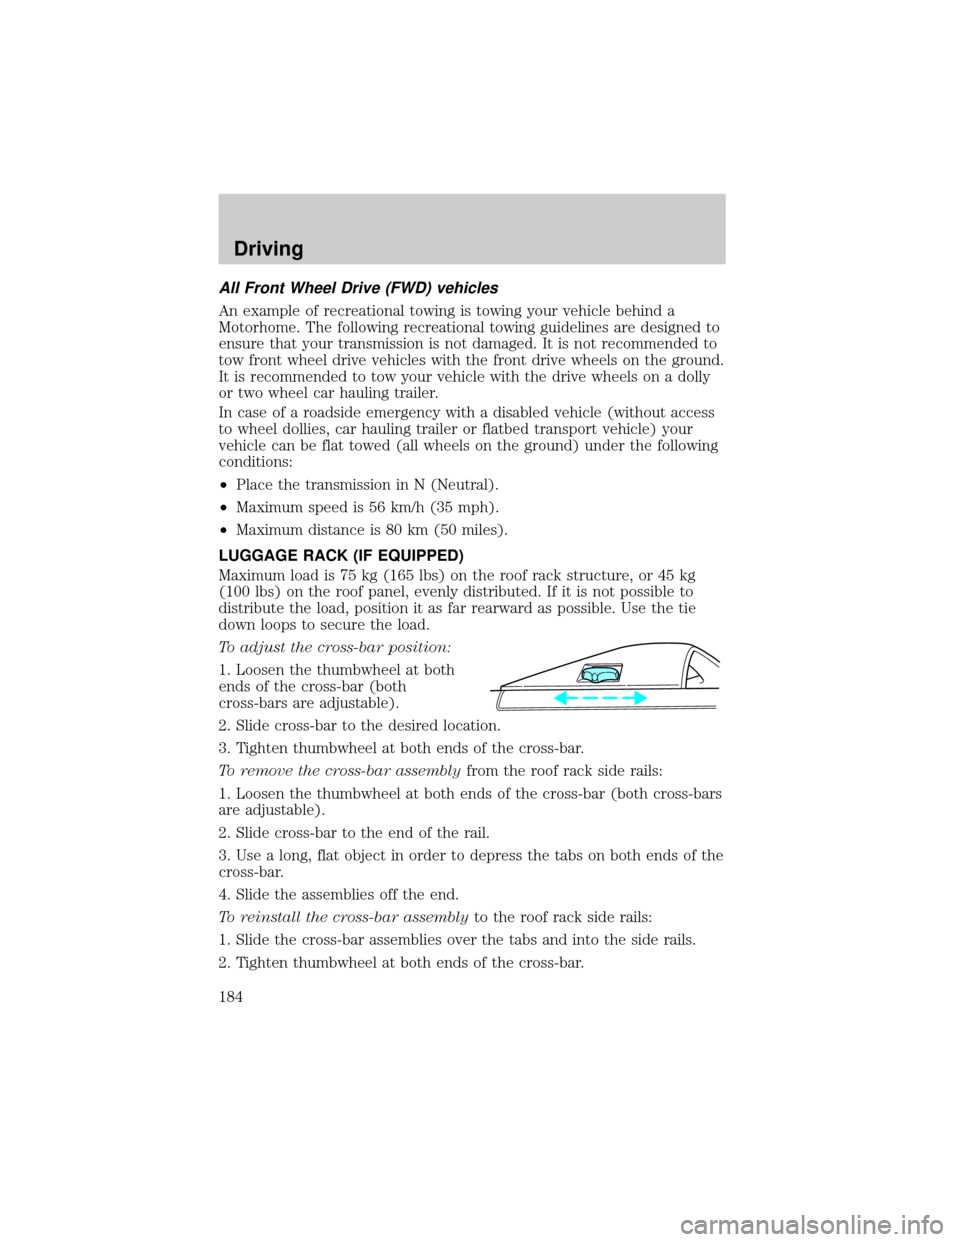
To adjust the cross-bar position:
1. Loosen the thumbwheel at both
ends of the cross-bar (both
cross-bars are adjustable).
2. Slide cross-bar to the desired location.
3. Tighten thumbwheel at both ends of the cross-bar.
To remove the cross-bar assemblyfrom the roof rack side rails:
1. Loosen the thumbwheel at both ends of the cross-bar (both cross-bars
are adjustable).
2. Slide cross-bar to the end of the rail.
3. Use a long, flat object in order to depress the tabs on both ends of the
cross-bar.
4. Slide the assemblies off the end.
To reinstall the cross-bar assemblyto the roof rack side rails:
1. Slide the cross-bar assemblies over the tabs and into the side rails.
2. Tighten thumbwheel at both ends of the cross-bar.
Driving
184