Page 29 of 288
AUTOLAMP CONTROL (IF EQUIPPED)
The autolamp system provides light
sensitive automatic on-off control of
the exterior lights normally
controlled by the headlamp control.
The autolamp system also keeps the
lights on for a fixed period of time
after the ignition switch is turned to
OFF.
²To turn autolamps on, rotate the
control counterclockwise.
²To turn autolamps off, rotate the control clockwise to OFF.
CLIMATE CONTROL SYSTEM
Manual heating system (if equipped)
Fan speed control
Controls the volume of air circulated
in the vehicle.
AUTO
Controls and features
29
Page 107 of 288

Illuminated entry
The interior lights will illuminate when the remote entry Unlock or Panic
control is pressed with the doors closed or when unlocking or opening a
power sliding door (if equipped).
The system automatically turns off after 25 seconds or when the ignition
is turned to the RUN position. The panel dimmer control mustnotbe
set to the OFF position for the illuminated entry to operate.
The inside lights will not turn off if:
²they have been turned on with the instrument panel dimmer control
or
²any door is open.
The battery saver will shut off the interior lamps 30 minutes after the
last door is closed even if the panel dimmer control is left on.
Illuminated exit
The interior lights will illuminate when the key is removed from the
ignition. When the headlamp control is on the ªsleeping baby modeº, only
the lower interior lights will illuminate.
The system automatically turns off after 25 seconds. The panel dimmer
control mustnotbe set to the OFF position for the illuminated entry to
operate.
Replacing the battery
The remote transmitter is powered by one coin type three-volt lithium
battery CR2032 or equivalent. Typical operating range will allow you to
be up to 10 meters (33 feet) away from your vehicle. A decrease in
operating range can be caused by:
²weather conditions
²nearby radio towers
²structures around the vehicle
²other vehicles parked next to the vehicle
Controls and features
107
Page 142 of 288

One time disable
Anytime the safety belt is buckled and then unbuckled during an ignition
ON cycle, Belt Minder will be disabled for that ignition cycle only.
Deactivating/activating the belt minder feature
Read steps1-9thoroughly before proceeding with the
deactivation/activation programming procedure.
The Belt Minder feature can be deactivated/activated by performing the
following procedure:
Before following the procedure, make sure that:
²the parking brake is set
²the gearshift is in P (Park) (automatic transmission).
²the ignition switch is in the OFF position
²all vehicle doors are closed
²the driver's safety belt is unbuckled
²the parklamps/headlamps are in OFF position (If vehicle is equipped
with Autolamps, this will not affect the procedure.)
To reduce the risk of injury, do not deactivate/activate the Belt
Minder feature while driving the vehicle.
1. Turn the ignition switch to the RUN (or ON) position. (DO NOT
START THE ENGINE)
2. Wait until the safety belt warning light turns off. (Approximately 1
minute)
²Steps 3±5 must be completed within 60 seconds or the procedure will
have to be repeated.
3. Buckle then unbuckle the safety belt three times, ending with the
safety belt unbuckled. This can be done before or during Belt Minder
warning activation.
4. Turn on the parklamps/headlamps, turn off the parklamps/headlamps.
5. Buckle then unbuckle the safety belt three times, ending with the
safety belt unbuckled.
²After step 5 the safety belt warning light will be turned on for three
seconds.
Seating and safety restraints
142
Page 164 of 288
2. Make sure the headlamps and vehicle accessories are off.
3. Make sure the gearshift is in P
(Park).
4. Make sure the parking brake is
set.
5. Turn the key to 4 (ON) without
turning the key to 5 (START).
If there is difficulty in turning the
key, firmly rotate the steering wheel
left and right until the key turns
freely. This condition may occur
when:
²front wheels are turned
²front wheel is against the curb
²steering wheel is turned when getting in or out of the vehicle
Make sure the corresponding lights illuminate or illuminate briefly. If a
light fails to illuminate, have the vehicle serviced.
1
2
34
5
40
4080
120
160
20020
12345
6
760
80100
120MPH RPMX1000 THEFT
TRAC
ACTIVE TRAC
OFFTEMP
H
FFUEL
E
km/h
BRAKE
mi
O/D
OFF
Starting
164
Page 194 of 288

Fuse/Relay
LocationFuse Amp
RatingPower Distribution Box Description
7 25A* Rear Wiper Motor, Rear Washer Pump, Rear
Wiper Relay (coil)
8 Ð Not Used
9 15A* Right Headlamp (Low and High Beam)
10 15A* Right Front Park Lamp, Right Front Turn
Lamp, Right Front Cornering Lamp, Right
Front Auxiliary Driving Lamp
11 15A* Left Front Park Lamp, Left Front Turn
Lamp, Left Front Cornering Lamp, Left
Front, Auxiliary Driving Lamp
12 15A* Left Headlamp (Low and High Beam)
13 10A* Alternator Field Sense
14 10A* Front Electronic Module (LH Door Lock
Motor)
15 20A* T/T park Lamps
16 20A* T/T Turn Lamps
17 Ð Not Used
18 Ð Not Used
19 15A* AX4S Transaxle, Vapor Management Valve,
A/C Clutch Relay Coil, EGR Control
Solenoid, Engine Fuel Control HO2S #11
Sensor, Engine Fuel Control HO2S #21
Sensor, Catalyst Monitor HO2S #12 Sensor,
Catalyst Monitor HO2S #22 Sensor,
Canister Vent Solenoid, Intake Manifold
Runner Control
20 15A* Ignition Coil, Intake Air Control Valve, Fuel
Injectors #1, #2, #3, #4, #5, #6, Mass Air
Flow Sensor, Fuel Pump Relay Coil, Intake
Manifold Runner Control, HI-Speed Cooling
Fan Relay Coil, LO-Speed Cooling Fan
Relay Coil, Powertrain Control Module,
Passive Anti-Theft Receiver
21 Ð Not Used
22 Ð Not Used
Roadside emergencies
194
Page 245 of 288

Readiness for Inspection/Maintenance (I/M) testing
In some localities, it may be a legal requirement to pass an I/M test of
the on-board diagnostics system. If your ªCheck Engine/Service Engine
Soonº light is on, refer to the description in theWarning Lights and
Chimessection of theInstrumentationchapter. Your vehicle may not
pass the I/M test with the ªCheck Engine/Service Engine Soonº light on.
If the vehicle's powertrain system or its battery has just been serviced,
the on-board diagnostics system is reset to a ªnot ready for I/M testº
condition. To ready the on-board diagnostics system for I/M testing, a
minimum of 30 minutes of city and highway driving is necessary as
described below:
²First, at least 10 minutes of driving on an expressway or highway.
²Next, at least 20 minutes driving in stop-and-go, city-type traffic with
at least four idle periods.
Allow the vehicle to sit for at least eight hours without starting the
engine. Then, start the engine and complete the above driving cycle. The
engine must warm up to its normal operating temperature. Once started,
do not turn off the engine until the above driving cycle is complete.
BULBS
Replacing exterior bulbs
It is a good idea to check the operation of the following lights frequently:
²Headlamps
²Turn signals
²Cornering lamps (if equipped)
²Auxiliary parking lamps (if equipped)
²High-mount brakelamp
²Tail lamps
²Brakelamps
²Backup lamps
²License plate lamps
Do not remove lamp bulbs unless they will be replaced immediately. If a
bulb is removed for an extended period of time, contaminants may enter
the lamp housings and affect performance.
Maintenance and care
245
Page 246 of 288
Replacing headlamp bulbs
To remove the headlamp bulb:
1. Make sure headlamp switch is in OFF position, then open the hood.
Note size and location of retainer
pins for installation.
2. At the back of the headlamp, pull
two retainer pins up to release the
headlamp assembly.
3. Pull headlamp assembly forward
disengaging the lamp from the rear
retainer to expose the back of the
bulb.
4. Disconnect the electrical
connector from the bulb by pulling
rearward.
5. Remove the bulb retaining ring by
rotating it counterclockwise (when
viewed from the rear) to free it
from the bulb socket, and slide the
ring off the plastic base. Keep the
ring to retain the new bulb.
6. Without turning, remove the old
bulb from its socket by gently
pulling it straight back out of the
lamp assembly.
Maintenance and care
246
Page 247 of 288

To install the new bulb:
Handle a halogen headlamp bulb carefully and keep out of
children's reach. Grasp the bulb only by its plastic base and do
not touch the glass. The oil from your hand could cause the bulb to
break the next time the headlamps are operated.
1. With the flat side of the new bulb's plastic base facing upward, insert
the glass end of the bulb into the lamp assembly. Turn the bulb left or
right to align the grooves in the plastic base with the tabs in the lamp
assembly. When the grooves are aligned, push the bulb into the lamp
assembly until the plastic base contacts the rear of the lamp assembly.
2. Install the bulb retaining ring over the plastic base until it contacts the
rear of the socket by rotating clockwise until you feel a ªstop.º
3. Connect the electrical connector into the rear of the plastic base until
it snaps, locking it into position.
4. Install the headlamp on vehicle by aligning the lamp with the rear
retainer, push rearward and secure with two retainer pins.
5. Turn the headlamps on and make sure they work properly. If the
headlamp was correctly aligned before you changed the bulb, you should
not need to align it again.
Replacing front parking/turn signal bulbs
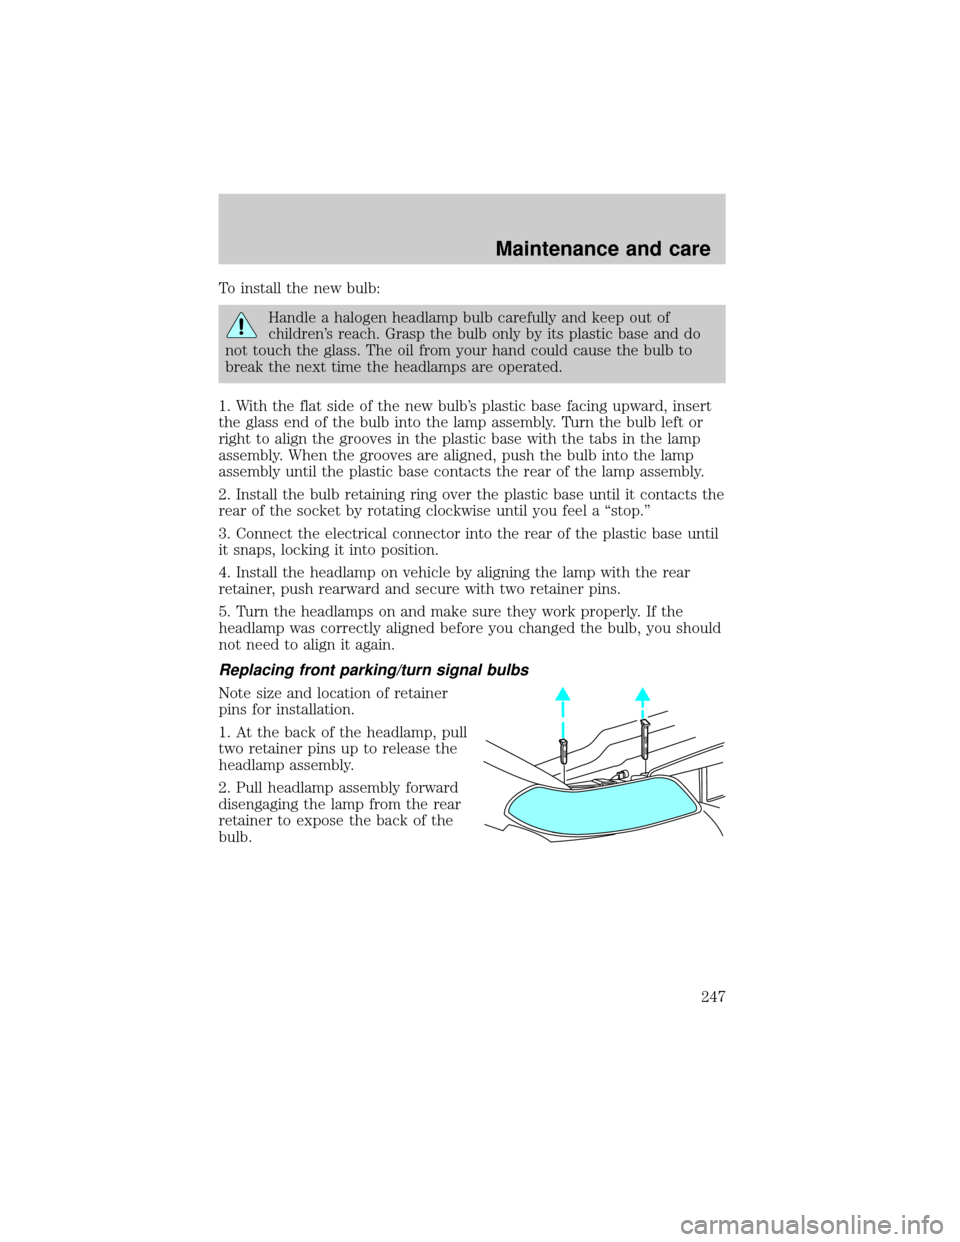
Note size and location of retainer
pins for installation.
1. At the back of the headlamp, pull
two retainer pins up to release the
headlamp assembly.
2. Pull headlamp assembly forward
disengaging the lamp from the rear
retainer to expose the back of the
bulb.
Maintenance and care
247