2001 FORD MUSTANG brakes
[x] Cancel search: brakesPage 12 of 240

O/D off (if equipped)
Illuminates when the
Transmission Control
Switch (TCS), refer to
Overdrive controlin
theControls and Featureschapter, has been
pushed turning the transmission overdrive function
OFF. When the light is on, the transmission does not
operate in the overdrive mode, refer to theDriving
chapter for transmission function and operation.
The light may also flash steadily if a transmission
malfunction is detected. If the light does not come
on when the Transmission Control Switch is
depressed or if the light flashes steadily, have your
vehicle serviced as soon as possible, damage to the
transmission could occur.
Traction ControlYactive
For more information,
refer to theDriver
controlschapter.
Momentarily illuminates when the ignition is turned
to ON. It also illuminates when the Traction
Controlysystem begins applying and releasing the
brakes and adjusting the engine characteristics to
limit a wheelspin condition. It will be lit for a
minimum of four seconds or for the duration of the
Traction Controlyevent.
For more information, refer to theDrivingchapter.
Anti-lock brake system (ABS)
Momentarily illuminates
when the ignition is
turned to the ON
position to indicate a
system check. If the light remains on, continues to
flash or fails to illuminate, have the system serviced
immediately. With the ABS light on, the anti-lock
brake system is disabled and normal braking is still
effective unless the brake warning light also remains
illuminated with the parking brake released.
O/D
OFF
ABS
Instrumentation
12
Page 54 of 240

If you drive up or down a steep hill, your vehicle
speed may vary momentarily slower or faster than
the set speed. This is normal.
Speed control cannot reduce the vehicle speed if it
increases above the set speed on a downhill. If your
vehicle speed is faster than the set speed while
driving on a downhill, you may want to shift to the
next lower gear or apply the brakes to reduce your
vehicle speed.
If your vehicle slows down more than 16 km/h (10
mph) below your set speed on an uphill, your speed
control will disengage. This is normal. Pressing
RESUME will re-engage it.
Do not use the speed control in heavy traffic
or on roads that are winding, slippery, or
unpaved.
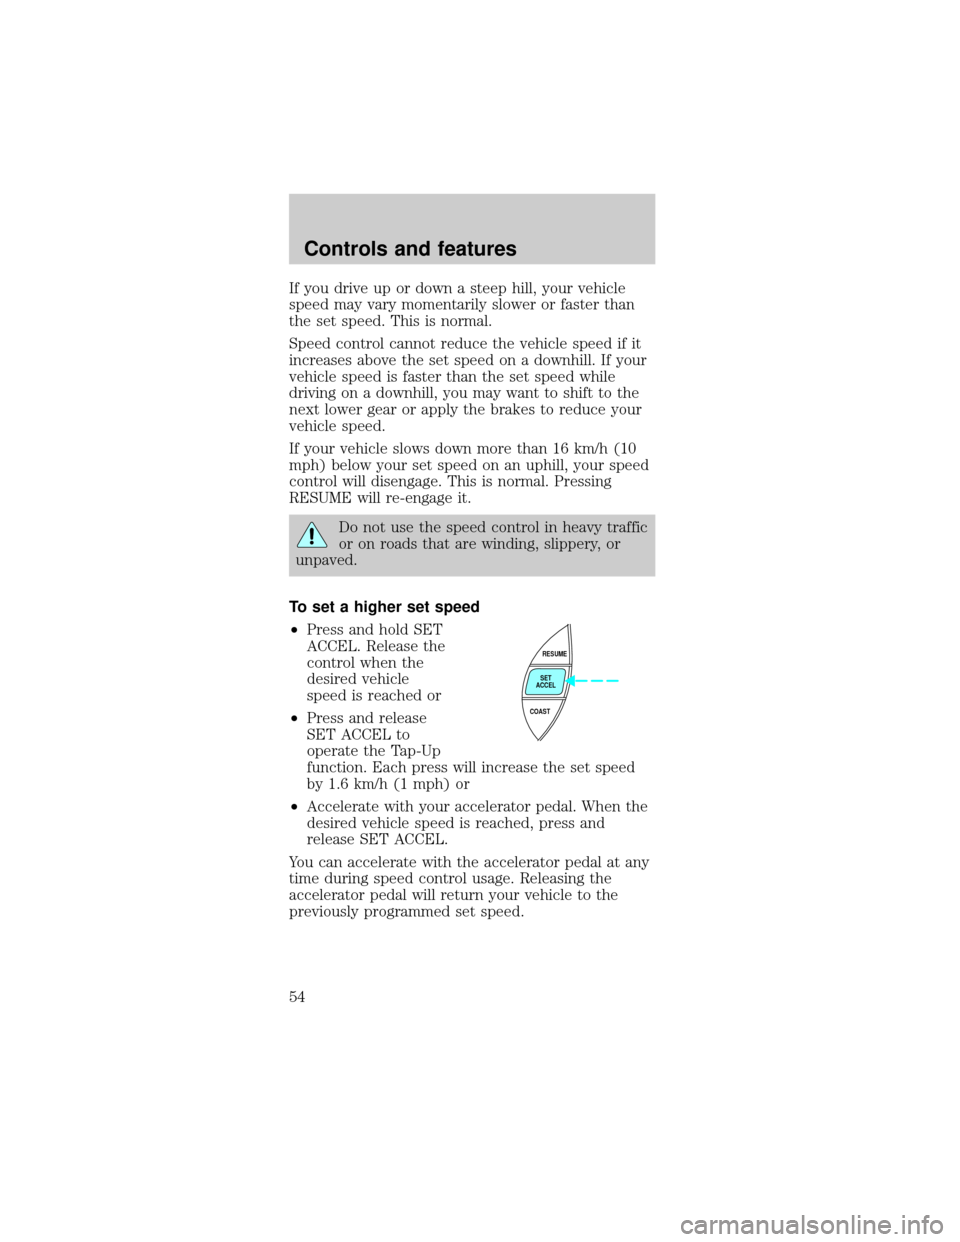
To set a higher set speed
²Press and hold SET
ACCEL. Release the
control when the
desired vehicle
speed is reached or
²Press and release
SET ACCEL to
operate the Tap-Up
function. Each press will increase the set speed
by 1.6 km/h (1 mph) or
²Accelerate with your accelerator pedal. When the
desired vehicle speed is reached, press and
release SET ACCEL.
You can accelerate with the accelerator pedal at any
time during speed control usage. Releasing the
accelerator pedal will return your vehicle to the
previously programmed set speed.
RESUME
SET
ACCEL
COAST
Controls and features
54
Page 79 of 240

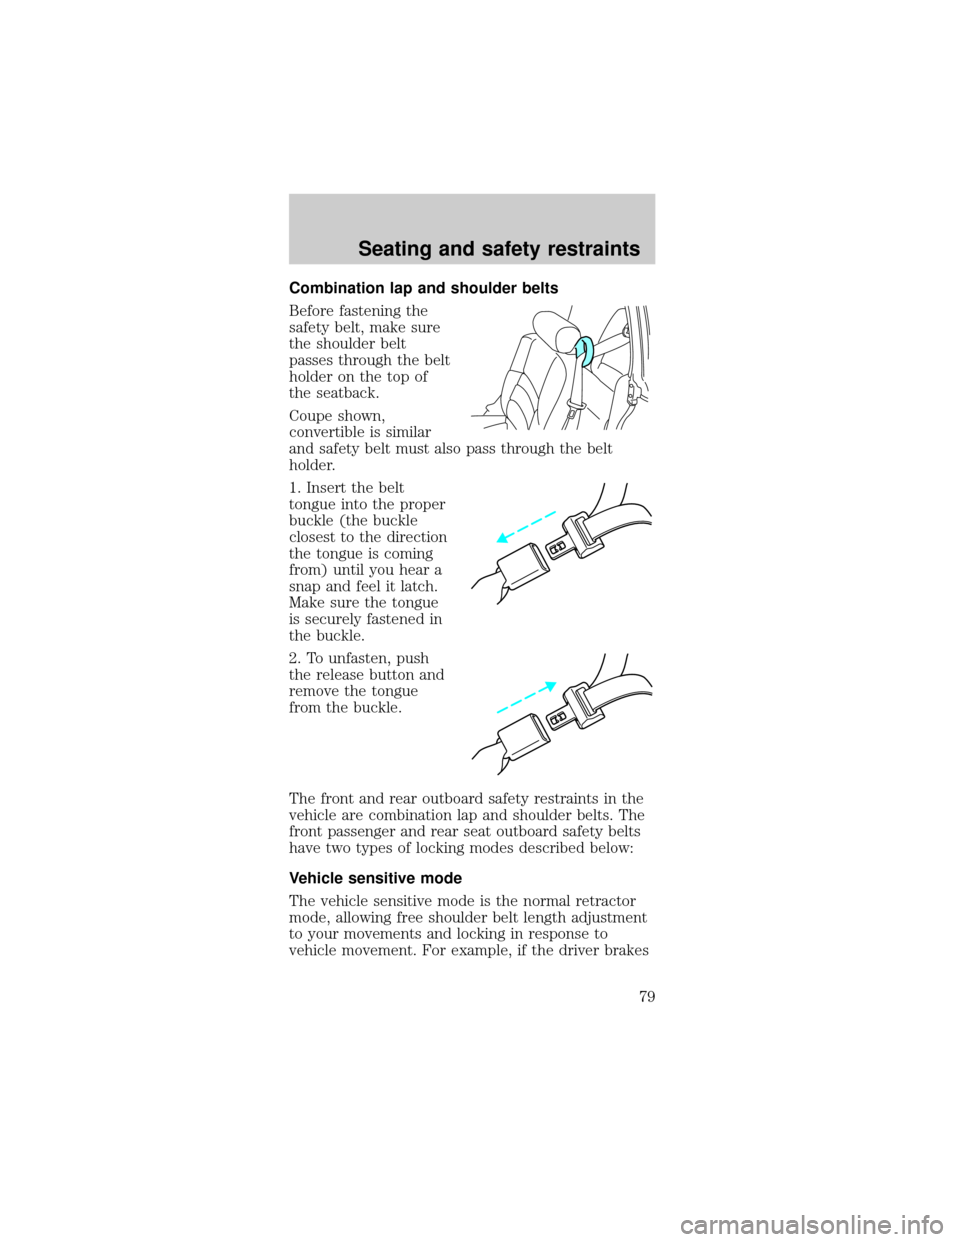
Combination lap and shoulder belts
Before fastening the
safety belt, make sure
the shoulder belt
passes through the belt
holder on the top of
the seatback.
Coupe shown,
convertible is similar
and safety belt must also pass through the belt
holder.
1. Insert the belt
tongue into the proper
buckle (the buckle
closest to the direction
the tongue is coming
from) until you hear a
snap and feel it latch.
Make sure the tongue
is securely fastened in
the buckle.
2. To unfasten, push
the release button and
remove the tongue
from the buckle.
The front and rear outboard safety restraints in the
vehicle are combination lap and shoulder belts. The
front passenger and rear seat outboard safety belts
have two types of locking modes described below:
Vehicle sensitive mode
The vehicle sensitive mode is the normal retractor
mode, allowing free shoulder belt length adjustment
to your movements and locking in response to
vehicle movement. For example, if the driver brakes
Seating and safety restraints
79
Page 108 of 240

BRAKES
Your service brakes are self-adjusting. Refer to the
scheduled maintenance guide for scheduled
maintenance.
Occasional brake noise is normal and often does not
indicate a performance concern with the vehicle's
brake system. In normal operation, automotive brake
systems may emit occasional or intermittent squeal
or groan noises when the brakes are applied. Such
noises are usually heard during the first few brake
applications in the morning; however, they may be
heard at any time while braking and can be
aggravated by environmental conditions such as
cold, heat, moisture, road dust, salt or mud. If a
ªmetal-to-metal,º ªcontinuous grindingº or
ªcontinuous squealº sound is present while braking,
the brake linings may be worn-out and should be
inspected by a qualified service technician.
Anti-lock brake system (ABS)
On vehicles equipped with an anti-lock braking
system (ABS), a noise from the hydraulic pump
motor and pulsation in the pedal may be observed
during ABS braking events. Pedal pulsation coupled
with noise while braking under panic conditions or
on loose gravel, bumps, wet or snowy roads is
normal and indicates proper functioning of the
vehicle's anti-lock brake system. The ABS performs a
self-check after you start the engine and begin to
drive away. A brief mechanical noise may be heard
during this test. This is normal. If a malfunction is
found, the ABS warning light will come on. If the
vehicle has continuous vibration or shudder in the
steering wheel while braking, the vehicle should be
inspected by a qualified service technician.
Driving
108
Page 109 of 240

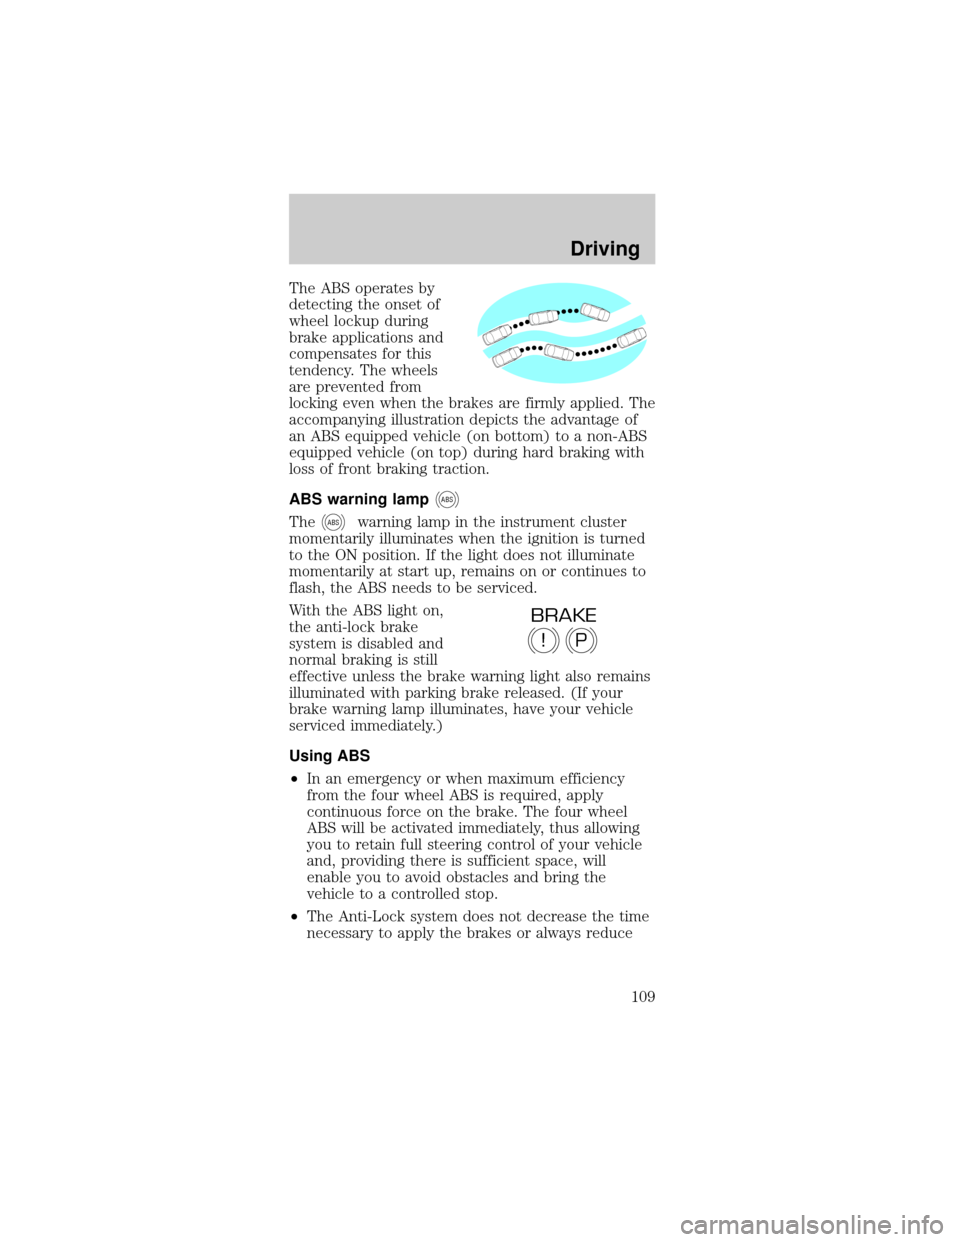
The ABS operates by
detecting the onset of
wheel lockup during
brake applications and
compensates for this
tendency. The wheels
are prevented from
locking even when the brakes are firmly applied. The
accompanying illustration depicts the advantage of
an ABS equipped vehicle (on bottom) to a non-ABS
equipped vehicle (on top) during hard braking with
loss of front braking traction.
ABS warning lamp
ABS
TheABSwarning lamp in the instrument cluster
momentarily illuminates when the ignition is turned
to the ON position. If the light does not illuminate
momentarily at start up, remains on or continues to
flash, the ABS needs to be serviced.
With the ABS light on,
the anti-lock brake
system is disabled and
normal braking is still
effective unless the brake warning light also remains
illuminated with parking brake released. (If your
brake warning lamp illuminates, have your vehicle
serviced immediately.)
Using ABS
²In an emergency or when maximum efficiency
from the four wheel ABS is required, apply
continuous force on the brake. The four wheel
ABS will be activated immediately, thus allowing
you to retain full steering control of your vehicle
and, providing there is sufficient space, will
enable you to avoid obstacles and bring the
vehicle to a controlled stop.
²The Anti-Lock system does not decrease the time
necessary to apply the brakes or always reduce
P!
BRAKE
Driving
109
Page 111 of 240

Always set the parking brake fully and make
sure that the gearshift is securely latched in
P (Park) (automatic transmission) or in 1 (First
Gear) (manual transmission).
The parking brake is not recommended to stop a
moving vehicle. However, if the normal brakes fail,
the parking brake can be used to stop your vehicle
in an emergency. Since the parking brake applies
only the rear brakes, the vehicle's stopping distance
will increase greatly and the handling of your vehicle
will be adversely affected.
To release the parking
brake, the brake
handle may need to be
pulled up slightly to
release pressure before
pushing in the button.
Push the button on the
end of the parking
brake handle and push the handle down as far as
possible. Driving with the parking brake applied will
cause the brakes to wear out quickly and reduce fuel
economy.
TRACTION CONTROLY
Your vehicle may be equipped with the optional
Traction Controlysystem. This system helps you
maintain the stability and steerability of your
vehicle. It is especially useful on slippery road
surfaces. The system operates by detecting and
controlling wheel spin. The system borrows many of
the electronic and mechanical elements already
present in the anti-lock braking system (ABS).
Wheel-speed sensors allow excess rear wheel spin to
be detected by the Traction Controlyportion of the
ABS computer. Any excessive wheel spin is
controlled by automatically applying and releasing
the rear brakes in conjunction with engine torque
Driving
111
Page 114 of 240

2. Insert the key and turn it to OFF. Apply the brake
pedal and shift to N (Neutral).
3. Start the vehicle.
If it is necessary to use the above procedure to
move the gearshift lever, it is possible that a fuse
has blown or the vehicle's brakelamps are not
operating properly. Refer toFuses and relaysin the
Roadside emergencieschapter.
Do not drive your vehicle until you verify
that the brakelamps are working.
If your vehicle gets stuck in mud or snow it may be
rocked out by shifting from forward and reverse
gears, stopping between shifts, in a steady pattern.
Press lightly on the accelerator in each gear.
Do not rock the vehicle if the engine is not at
normal operating temperature or damage to
the transmission may occur.
Do not rock the vehicle for more than a few
minutes or damage to the transmission and
tires may occur or the engine may overheat.
Always set the parking brake fully and make
sure the gearshift is latched in P (Park).
Turn off the ignition whenever you leave your
vehicle.
If the parking brake is fully released, but the
brake warning lamp remains illuminated, the
brakes may not be working properly. See your
dealer or a qualified service technician.
Driving
114
Page 125 of 240

tongue load of 45 kg (100 lbs.). Do not tow a trailer
until your vehicle has been driven at least 800 km
(500 miles).
Towing a trailer places an additional load on your
vehicle's engine, transaxle, brakes, tires and
suspension. Inspect these components carefully after
towing.
Do not exceed the GVWR or the GAWR
specified on the certification label.
Towing trailers beyond the maximum
recommended gross trailer weight exceeds
the limit of the vehicle and could result in engine
damage, transaxle damage, structural damage, loss
of control, and personal injury.
Preparing to tow
Use the proper equipment for towing a trailer, and
make sure it is properly attached to your vehicle.
See your dealer or a reliable trailer dealer if you
require assistance.
Safety chains
Always connect the trailer's safety chains to the
frame or hook retainers of the vehicle hitch. To
connect the trailer's safety chains, cross the chains
under the trailer tongue and allow slack for turning
corners.
If you use a rental trailer, follow the instructions that
the rental agency gives to you.
Do not attach safety chains to the bumper.
Trailer brakes
Electric brakes and manual, automatic or surge-type
trailer brakes are safe if installed properly and
adjusted to the manufacturer's specifications. The
trailer brakes must meet local and Federal
regulations.
Driving
125