2001 FORD F650 transmission fluid
[x] Cancel search: transmission fluidPage 102 of 240
STARTING PROCEDURES
Operating precautions
²
Always shift to a lower gear at high altitudes to prevent engine smoking.
²Avoid extended and unnecessary idling.
Do not operate a diesel engine where the vapors can be
combustible. These vapors can be sucked through the air intake
system and cause engine acceleration and overspeeding, which may
result in bodily injury and extensive property damage. The equipment
owner and operator are responsible for safe operation in a hostile
environment.
STARTING THE ENGINE
1. Ensure headlamps and all accessories are turned off and the parking
brake is applied.
2.Automatic transmissions,ensure gearshift is in N (Neutral).
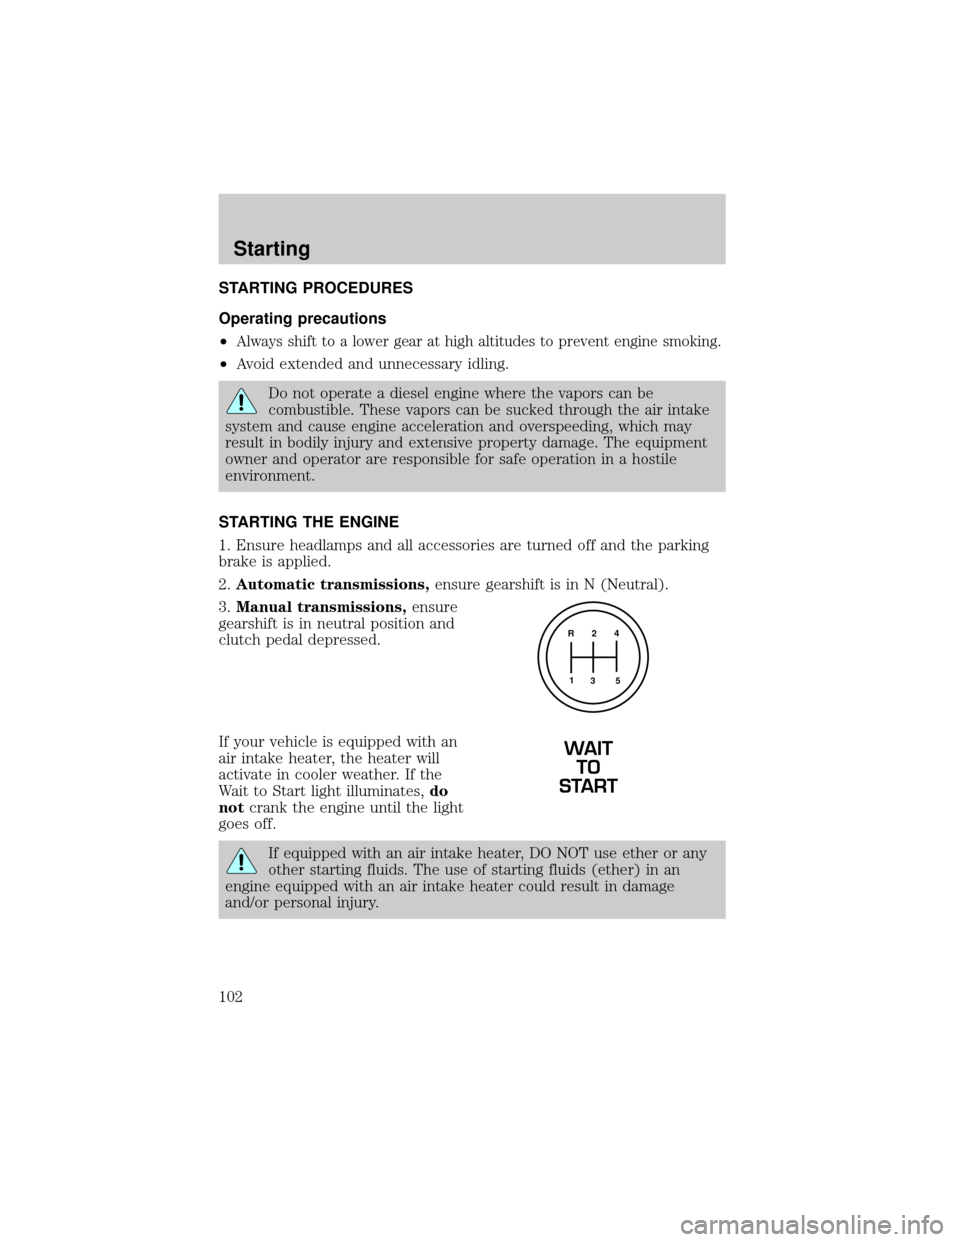
3.Manual transmissions,ensure
gearshift is in neutral position and
clutch pedal depressed.
If your vehicle is equipped with an
air intake heater, the heater will
activate in cooler weather. If the
Wait to Start light illuminates,do
notcrank the engine until the light
goes off.
If equipped with an air intake heater, DO NOT use ether or any
other starting fluids. The use of starting fluids (ether) in an
engine equipped with an air intake heater could result in damage
and/or personal injury.
R 2 4
3 5 1
WAIT
TO
START
Starting
102
Page 104 of 240
OPERATING THE ENGINE
Do not operate the engine at full throttle below peak torque engine
speed (RPM) for more than one minute at a time (peak torque RPM
varies from 1200-1500 RPM depending on engine rated speed).
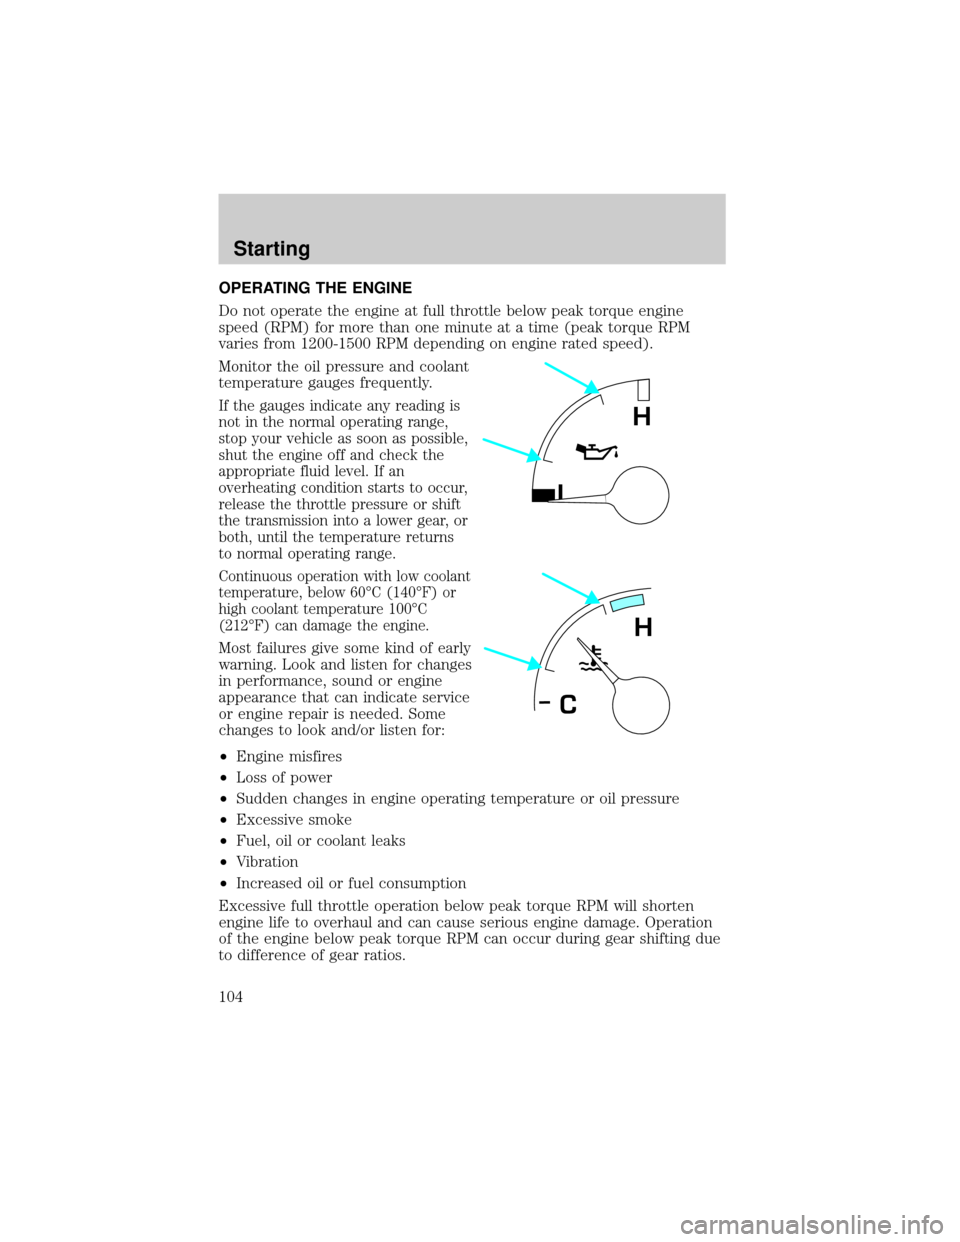
Monitor the oil pressure and coolant
temperature gauges frequently.
If the gauges indicate any reading is
not in the normal operating range,
stop your vehicle as soon as possible,
shut the engine off and check the
appropriate fluid level. If an
overheating condition starts to occur,
release the throttle pressure or shift
the transmission into a lower gear, or
both, until the temperature returns
to normal operating range.
Continuous operation with low coolant
temperature, below 60ÉC (140ÉF) or
high coolant temperature 100ÉC
(212ÉF) can damage the engine.
Most failures give some kind of early
warning. Look and listen for changes
in performance, sound or engine
appearance that can indicate service
or engine repair is needed. Some
changes to look and/or listen for:
²Engine misfires
²Loss of power
²Sudden changes in engine operating temperature or oil pressure
²Excessive smoke
²Fuel, oil or coolant leaks
²Vibration
²Increased oil or fuel consumption
Excessive full throttle operation below peak torque RPM will shorten
engine life to overhaul and can cause serious engine damage. Operation
of the engine below peak torque RPM can occur during gear shifting due
to difference of gear ratios.
L
H
H
C
Starting
104
Page 164 of 240
CLUTCH (IF EQUIPPED)ÐLINKAGE LUBRICATION
Lubricate the clutch linkage using the following procedure. Refer to the
Scheduled Maintenance Guide for the service interval schedules.
Use a grease which meets Ford specifications. Refer toCapacities and
specifications.
1. Set the parking brake, shift into 1 (First) and turn the engine off.
2. Remove the inspection cover from the clutch housing.
²Transmission and clutch
removed for clarity.
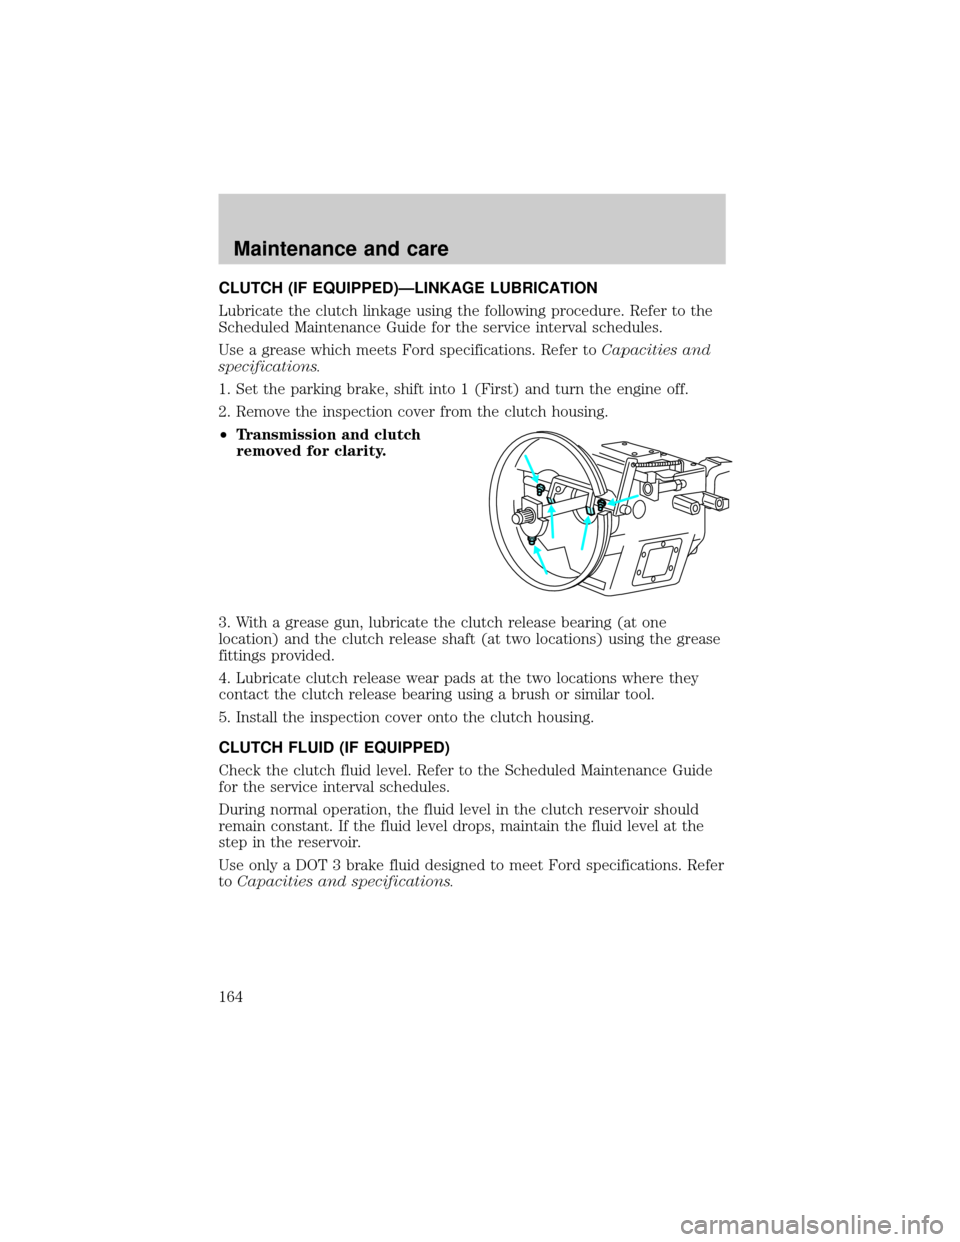
3. With a grease gun, lubricate the clutch release bearing (at one
location) and the clutch release shaft (at two locations) using the grease
fittings provided.
4. Lubricate clutch release wear pads at the two locations where they
contact the clutch release bearing using a brush or similar tool.
5. Install the inspection cover onto the clutch housing.
CLUTCH FLUID (IF EQUIPPED)
Check the clutch fluid level. Refer to the Scheduled Maintenance Guide
for the service interval schedules.
During normal operation, the fluid level in the clutch reservoir should
remain constant. If the fluid level drops, maintain the fluid level at the
step in the reservoir.
Use only a DOT 3 brake fluid designed to meet Ford specifications. Refer
toCapacities and specifications.
Maintenance and care
164
Page 168 of 240

Adding and replacing engine coolant-Caterpillar 3126 B engine
Refer to the engine operator's manual for additional engine cooling
system information.
FAN CLUTCHES
Your vehicle's cooling system is equipped with a viscous variable speed
fan clutch.
²The fan clutch helps control cooling, increase performance, improve
fuel economy and reduce noise.
²The fan clutch is controlled by bimetallic spring sensors. Do not
tamper with these sensors as this may change their calibration or keep
the fan clutch from operating at all.
Stay clear of the fan/fan area while the engine is running or
possible personal injury may occur.
CHECKING AND ADDING POWER STEERING FLUID
Checking power steering fluid level
Check the power steering fluid level using the following procedure. Refer
to the scheduled maintenance guide for the recommended service
intervals. If adding fluid is necessary, use only MERCONtAT F.
1. Set the parking brake, shift into N
(Neutral) (automatic transmission)
or 1 (First) (manual transmission)
and turn the engine off.
2. Open the hood.
3. Clean the top of the power
steering fluid reservoir.
4. Remove the dipstick from the
reservoir and wipe the dipstick clean.
Maintenance and care
168
Page 169 of 240
5. Reinstall the dipstick. Remove it again and check the fluid level.
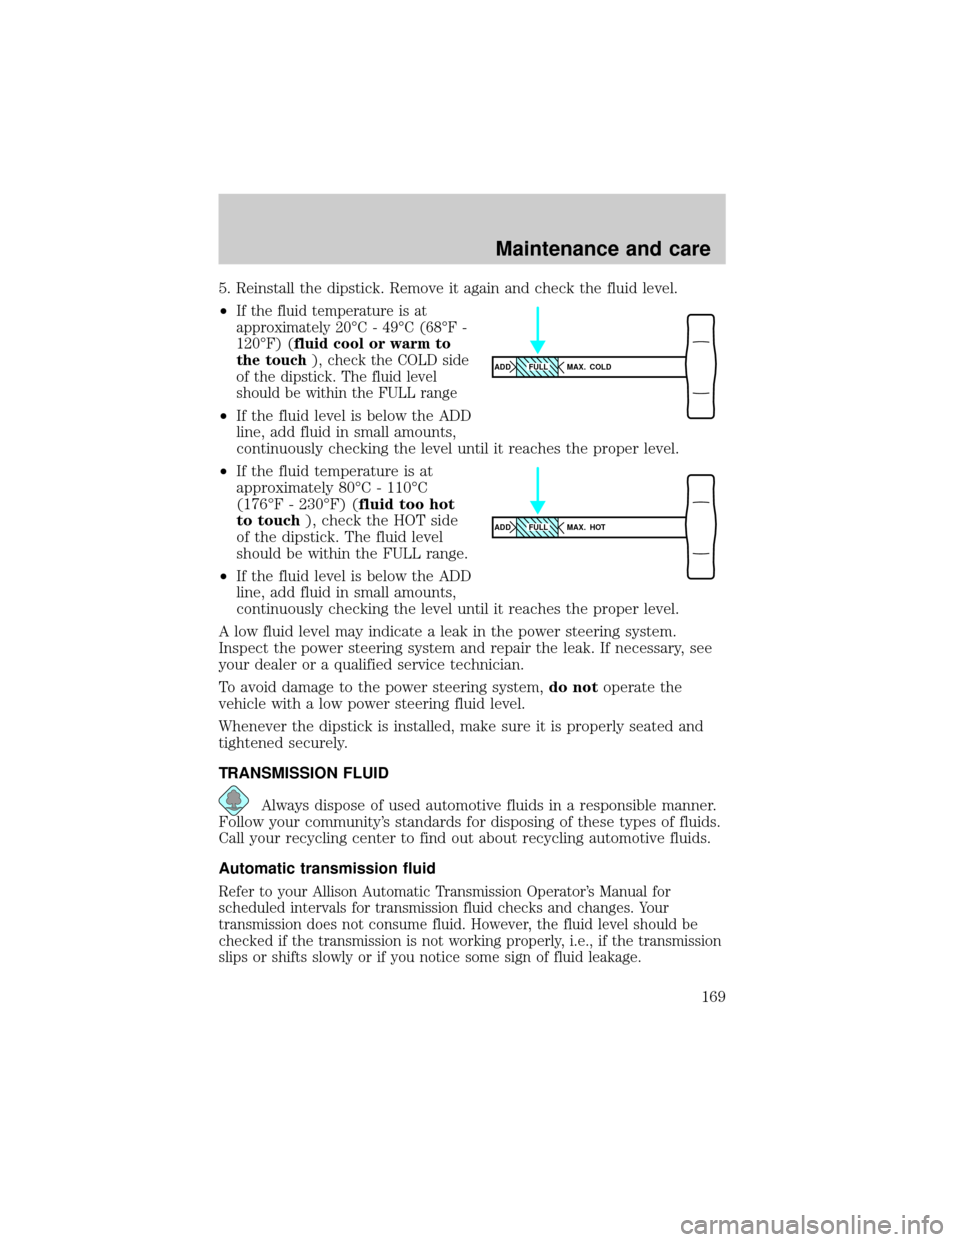
²
If the fluid temperature is at
approximately 20ÉC - 49ÉC (68ÉF -
120ÉF) (fluid cool or warm to
the touch), check the COLD side
of the dipstick. The fluid level
should be within the FULL range
²If the fluid level is below the ADD
line, add fluid in small amounts,
continuously checking the level until it reaches the proper level.
²If the fluid temperature is at
approximately 80ÉC - 110ÉC
(176ÉF - 230ÉF) (fluid too hot
to touch), check the HOT side
of the dipstick. The fluid level
should be within the FULL range.
²If the fluid level is below the ADD
line, add fluid in small amounts,
continuously checking the level until it reaches the proper level.
A low fluid level may indicate a leak in the power steering system.
Inspect the power steering system and repair the leak. If necessary, see
your dealer or a qualified service technician.
To avoid damage to the power steering system,do notoperate the
vehicle with a low power steering fluid level.
Whenever the dipstick is installed, make sure it is properly seated and
tightened securely.
TRANSMISSION FLUID
Always dispose of used automotive fluids in a responsible manner.
Follow your community's standards for disposing of these types of fluids.
Call your recycling center to find out about recycling automotive fluids.
Automatic transmission fluid
Refer to your Allison Automatic Transmission Operator's Manual for
scheduled intervals for transmission fluid checks and changes. Your
transmission does not consume fluid. However, the fluid level should be
checked if the transmission is not working properly, i.e., if the transmission
slips or shifts slowly or if you notice some sign of fluid leakage.
ADD MAX. COLDFULL
ADD MAX. HOTFULL
Maintenance and care
169
Page 170 of 240

Transmission fluid level should be checked by your dealer or a qualified
service technician.
If you must add transmission fluid, make sure the correct type of fluid is
being used. The type of fluid used is indicated in your Allison Automatic
Transmission Operator's Manual.
Use of a non-approved automatic transmission fluid may cause
internal transmission component damage.
Manual transmission fluid
Refer to your scheduled maintenance guide for transmission fluid level
checks and fluid change intervals.
Your manual transmission may be filled with an optional synthetic fluid
which allows the use of extended service intervals. A tag on the filler
plug will identify the use of the synthetic fluid.
Use only fluid that meets Ford specifications (refer toLubricant
specificationsin theCapacities and specificationchapter).
Use of a non-approved transmission fluid may cause internal
transmission component damage.
For location of the transmission filler plug, refer to your transmission
operator's manual orTransmission Refill Capacitiesin theCapacities
and specificationschapter.
Check your transmission fluid level using the following procedure:
1. Park the vehicle on level ground.
2. Set the parking brake and shift into 1 (First) and turn the engine off.
3. Clean any dirt from around the filler plug.
4. Remove the filler plug and inspect the fluid level.
5. The fluid level should be up to the bottom of the filler plug opening.
6. If necessary, add enough fluid through the filler plug opening so that
the fluid level is at the bottom of the opening.
7. Clean and install the filler plug securely.
Drain and refill your transmission fluid using the following procedure:
1. Drain the transmission while the fluid is warm.
2. Park the vehicle on level ground.
3. Set the parking brake and shift into 1 (First) and turn the engine off.
Maintenance and care
170
Page 171 of 240

4. Clean any dirt from around the filler and drain plugs.
5. Remove the filler and drain plugs and drain the fluid into a suitable
container. Dispose all used automotive fluids in a responsible manner
following your local authorized standards.
6. Clean and install the drain plug securely.
7. Add enough fluid through the filler plug opening so that the fluid level
is up to the bottom of the opening.
8. Clean and install the filler plug securely.
REAR AXLE LUBRICANT
Refer to your Scheduled Maintenance Guide for rear axle lubricant level
checks and lubricant change intervals.
Your rear axle may be filled with an optional synthetic lubricant which
allows the use of extended service intervals. A tag on the filler plug will
identify the use of the synthetic lubricant.
Use only a lubricant that meets Ford specifications (refer toLubricant
specificationsin theCapacities and specificationchapter).
Use of a non-approved rear axle lubricant may cause internal axle
component damage.
Check your rear axle lubricant level using the following procedure:
1. Park the vehicle on level ground.
2. Set the parking brake and shift into N (Neutral) (automatic
transmission) or 1 (First) (manual transmission) and turn the engine off.
3. Clean any dirt from around the rear axle filler plug.
4. Remove the filler plug and inspect the lubricant level.
5. The lubricant level should be up to the bottom of the filler plug
opening.
6. If necessary, add enough lubricant through the filler plug opening so
that the lubricant level is at the bottom of the opening.
7. Clean and install the filler plug securely.
Drain and refill your rear axle lubricant using the following procedure:
1. Drain the rear axle while the lubricant is warm.
2. Park the vehicle on level ground.
Maintenance and care
171
Page 172 of 240
3. Set the parking brake and shift into N (Neutral) (automatic
transmission) or 1 (First) (manual transmission) and turn the engine off.
4. Clean any dirt from around the rear axle filler and drain plugs.
5. Remove the filler and drain plugs and drain the lubricant into a
suitable container. Dispose all used automotive fluids in a responsible
manner following your local authorized standards.
6. Clean and install the drain plug securely.
7. Add enough lubricant through the filler plug opening so that the
lubricant level is up to the bottom of the opening.
8. Clean and install the filler plug securely.
BATTERY
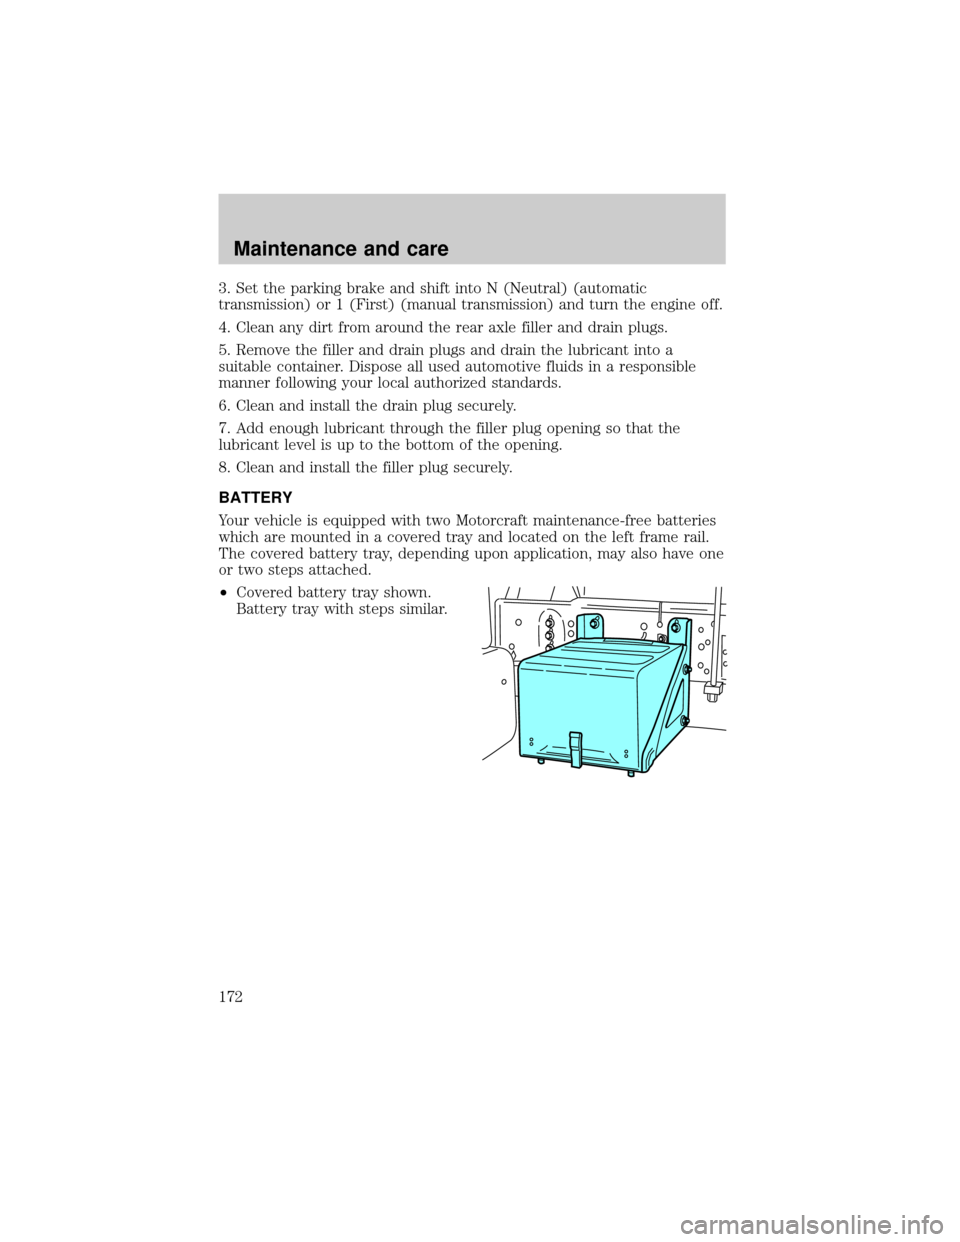
Your vehicle is equipped with two Motorcraft maintenance-free batteries
which are mounted in a covered tray and located on the left frame rail.
The covered battery tray, depending upon application, may also have one
or two steps attached.
²Covered battery tray shown.
Battery tray with steps similar.
Maintenance and care
172