Page 7 of 224
Vehicle Symbol Glossary
Child Safety Door
Lock/Unlock
Interior Luggage
Compartment Release
Symbol
Panic AlarmEngine Oil
Engine CoolantEngine Coolant
Temperature
Do Not Open When HotBattery
Avoid Smoking, Flames,
or SparksBattery Acid
Explosive GasFan Warning
Power Steering FluidMaintain Correct Fluid
LevelMAX
MIN
Emission SystemEngine Air Filter
Passenger Compartment
Air FilterJack
Check fuel cap
Introduction
7
ProCarManuals.com
Page 13 of 224

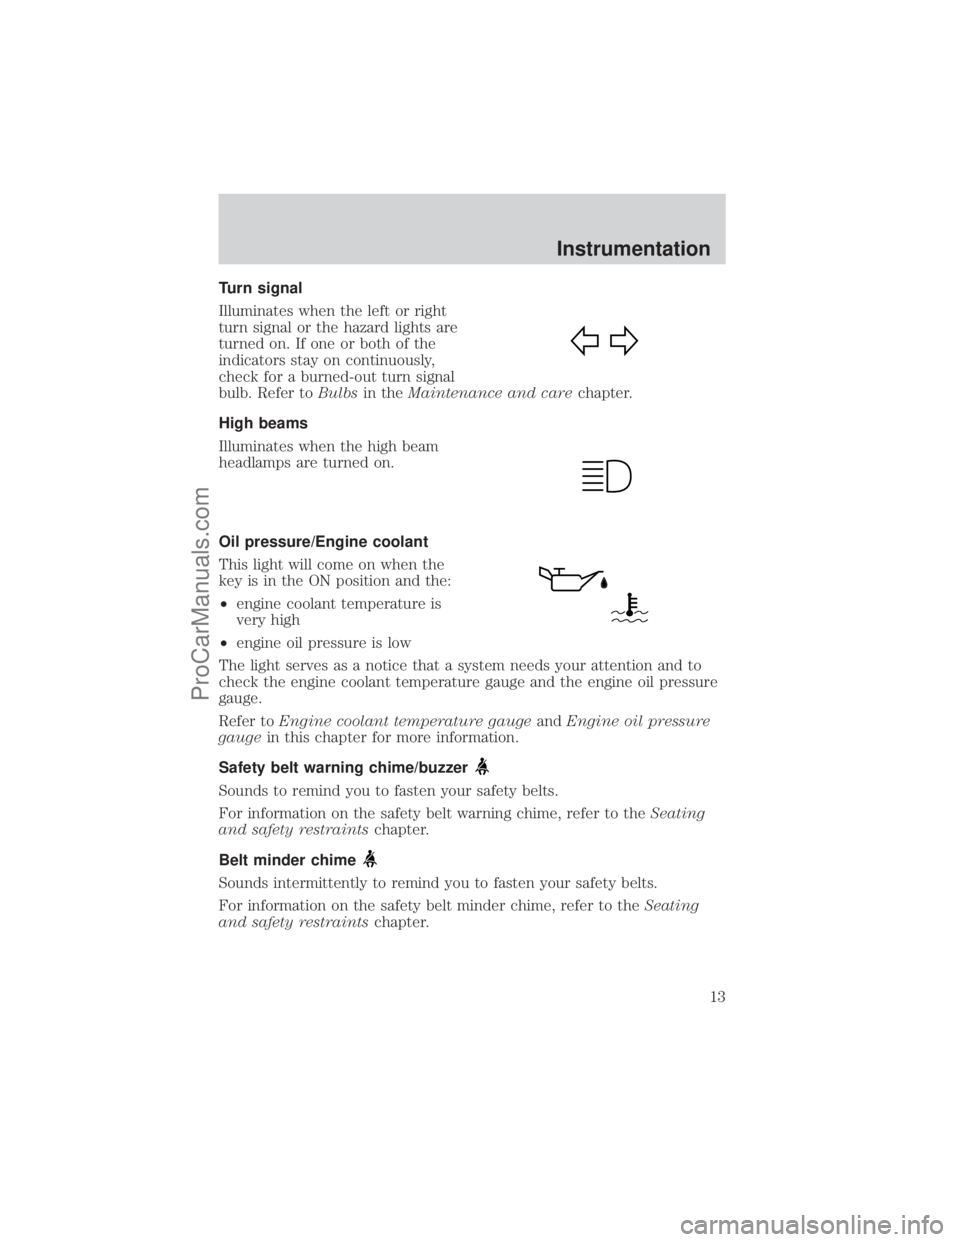
Turn signal
Illuminates when the left or right
turn signal or the hazard lights are
turned on. If one or both of the
indicators stay on continuously,
check for a burned-out turn signal
bulb. Refer toBulbsin theMaintenance and carechapter.
High beams
Illuminates when the high beam
headlamps are turned on.
Oil pressure/Engine coolant
This light will come on when the
key is in the ON position and the:
²engine coolant temperature is
very high
²engine oil pressure is low
The light serves as a notice that a system needs your attention and to
check the engine coolant temperature gauge and the engine oil pressure
gauge.
Refer toEngine coolant temperature gaugeandEngine oil pressure
gaugein this chapter for more information.
Safety belt warning chime/buzzer
Sounds to remind you to fasten your safety belts.
For information on the safety belt warning chime, refer to theSeating
and safety restraintschapter.
Belt minder chime
Sounds intermittently to remind you to fasten your safety belts.
For information on the safety belt minder chime, refer to theSeating
and safety restraintschapter.
Instrumentation
13
ProCarManuals.com
Page 15 of 224

Fuel gauge
Displays approximately how much
fuel is in the fuel tank (when the
key is in the ON position). The fuel
gauge may vary slightly when the
vehicle is in motion or after
refueling. The ignition should be in
the OFF position while the vehicle is
being refueled. When the gauge first indicates empty, there is a small
amount of reserve fuel in the tank. When refueling the vehicle from an
empty indication, the amount of fuel that can be added will be less than
the advertised capacity due to the reserve fuel.
Engine coolant temperature gauge
Indicates the temperature of the
engine coolant. At normal operating
temperature, the needle remains
within the normal area (the area
between the ªHº and ªCº). If it
enters the red section, the engine is
overheating. Stop the vehicle as
soon as safely possible, switch off
the engine immediately and let the
engine cool. Refer toEngine coolantin theMaintenance and care
chapter.
Never remove the coolant reservoir cap while the engine is
running or hot.
This gauge indicates the temperature of the engine coolant, not the
coolant level. If the coolant is not at its proper level the gauge indication
will not be accurate. If the gauge enters the red section, the oil
pressure/engine coolant andCheck Engine/Service Engine Soon
indicators illuminate, refer toWhat you should know about fail-safe
coolingin theMaintenance and care chapter.
F
E
H
C
Instrumentation
15
ProCarManuals.com
Page 16 of 224
Engine oil pressure gauge
This shows the engine oil pressure
in the system. Sufficient pressure
exists as long as the needle remains
in the normal range (the area
between the ªLº and ªHº).
If the gauge indicates low pressure,
stop the vehicle as soon as safely
possible and switch off the engine
immediately. Check the oil level. Add oil if needed (refer toEngine oil
in theMaintenance and carechapter). If the oil level is correct, have
your vehicle checked at your dealership or by a qualified technician.
Battery voltage gauge
This shows the battery voltage when
the ignition is in the ON position. If
the pointer moves and stays outside
the normal operating range (as
indicated by arrows), have the
vehicle's electrical system checked
as soon as possible.
Odometer
Registers the total kilometers
(miles) of the vehicle.
H
L
18
8
0 1020304050
60
70
80
90
10 0
20 km/h
406080
10 0
12 0
14 0
16 0
MPH
000000
0000
Instrumentation
16
ProCarManuals.com
Page 127 of 224

Fuse/Relay
LocationFuse Amp
RatingPassenger Compartment
Fuse Panel Description
6 10A Brake Shift Interlock, Speed Control,
DRL Module
7 10A Multi-Function Switch, Turn Signals
8 30A Radio Capacitor(s), Ignition Coil, PCM
Diode, PCM Power Relay, Fuel Heater
(Diesel Only), Glow Plug Relay (Diesel
Only)
9 30A Wiper Control Module, Windshield Wiper
Motor
10 20A Main Light Switch, Park Lamps, License
Lamp,(External Lamps) Multi-Function
Switch (Flash-to-pass)
11 15A Brake Pressure Switch, Multi-Function
Switch (Hazards), Brake Lamp Switch,
Brake Lamps
12 15A Transmission Range (TR) Sensor,
Backup Lamps, Auxiliary Battery Relay
13 15A Blend Door Actuator, A/C Heater,
Function Selector Switch
14 5A Instrument Cluster (Air Bag and Charge
Indicator)
15 5A Trailer Battery Charge Relay
16 30A Power Seats
17 Ð Not Used
18 Ð Not Used
19 10A Air Bag Diagnostic Monitor
20 5A Overdrive Cancel Switch
21 30A Power Windows*
22 15A Memory Power Radio, E Traveler Radio
23 20A Cigar Lighter, Data Link Connector
(DLC)
24 Ð Not Used
25 10A Left Headlamp (Low Beam)
26 20A Rear Power Point
Roadside emergencies
127
ProCarManuals.com
Page 137 of 224

²8-lug wheel
Never use wheels or lug
nuts different than the
original equipment as this could
damage the wheel or mounting
system. This damage could allow
the wheels to come off while the
vehicle is being driven.
9. Replace any wheel covers,
ornaments or hub caps. Make sure they are screwed or snapped in place.
10. Stow the jack, handle and lug wrench.
11. Unblock the wheels.
On vehicles equipped with dual rear wheels, retighten the wheel lug nuts
to the specified torque at 160 km (100 miles), and again at 800 km (500
miles) of new vehicle operation.
On vehicles equipped with single rear wheels, retighten the lug nuts to
the specified torque at 800 km (500 miles) of operation after any wheel
change or any time the lug nuts are loosened.
Model Bolt Size Wheel Lug nut Torque*
Nm Lb-ft
E-150 1/2-20 135 100
E-250, E-350 and
E-Super Duty9/16-18 190 140
* Torque specifications are for nut and bolt threads free of dirt and
rust. Do not use oil or grease on threads. Use only Ford recommended
replacement fasteners.
1
3 4
27 6
5 8
Roadside emergencies
137
ProCarManuals.com
Page 146 of 224
IDENTIFYING COMPONENTS IN THE ENGINE COMPARTMENT
Engine compartment component locations
Refer to the7.3 Liter Power Stroke Direct Injection Turbo Diesel
Owner's Guide Supplementfor diesel engine component locations.
1. Windshield washer fluid reservoir
2. Engine oil filler cap (except 4.2L V6 engine)
3. Automatic transmission fluid dipstick
4. Air filter assembly
5. Engine oil dipstick
6. Engine oil filler cap (4.2L V6 engine only)
7. Power steering fluid reservoir
8. Brake fluid reservoir
9. Engine coolant reservoir
10. Battery
ENGINE OIL
Checking the engine oil
Refer to the scheduled maintenance guide for the appropriate intervals
for checking the engine oil.
12345678
910
Maintenance and care
146
ProCarManuals.com
Page 147 of 224
1. Make sure the vehicle is on level ground.
2. Turn the engine off and wait a few minutes for the oil to drain into the
oil pan.
3. Set the parking brake and ensure the gearshift is securely latched in P
(Park).
4. Open the hood. Protect yourself from engine heat.
5. Locate and carefully remove the
engine oil level indicator (dipstick).
6. Wipe the indicator clean. Insert the indicator fully, then remove it
again.
²If the oil level isbetween the MIN and MAX marks,the oil level is
acceptable.DO NOT ADD OIL.
²If the oil level is below the MIN
mark, add enough oil to raise the
level within the MIN-MAX range.
MAX MIN
Maintenance and care
147
ProCarManuals.com