Page 2 of 351
Courtesy
Transportation
Every
2001 Malibu
under warranty is
backed with the
following
services:
Free lockout assistance
Free dead-battery assistance
Free out-of-fuel assistance
Free flat-tire change
Emergency towing
1-800-CHEV-USA
(For vehicles purchased in Canada,
call
1-800-268-6800)
that provides in an emergency:
1-800-CHEV-USA
(For vehicles purchased in Canada,
call
1-800-268-6800)
®
Page 6 of 351
iv
Table of Contents (cont'd)
Maintenance Schedule Service and Appearance Care
Section
7
Section
6
Scheduled Maintenance
Owner Checks and Services
Periodic Maintenance InspectionsRecommended Fluids and Lubricants
Maintenance Record Fuel
Checking Fluids and Lubricants
Engine Air Cleaner/Filter
Brakes
Bulb Replacement
Windshield Wiper Blade ReplacementTires and Wheels
Appearance Care
Electrical System/Fuses and Circuit Breakers
Capacities and Specifications
Normal Maintenance Replacement Parts
Page 7 of 351
v
Table of Contents (cont'd)
Customer Assistance Information
In the Index you will find an alphabetical listing of almost every subject in this manual.
You can use it to quickly find something you want to read.
Section
8Customer Satisfaction Procedures
Customer Assistance Offices
Roadside Assistance and Courtesy Transportation
Warranty Information (See Warranty Manual)
Reporting Safety Defects on page 8-10
Service Publications
Index
Section
9
Please refer to the last page of this manual for your Service Station Guide
Page 12 of 351
Fuel
Use unleaded only.
See Section 6
for octane ratings.
For
a More
Detailed Look at
What's Under the Hood
See Section 6
Tire Pressure
See Section 6
Service Station Guide
Oil Viscosity
Engine Oil
See Section 6
Engine Oil Dipstick
See Section 6
Cooling System
See Section 5
Hood Release
See Section 6
Windshield Washer
Fluid
See Section 6
Spare Tire Pressure
See Section 5
Battery
See Section 6
Page 37 of 351

1-25
How does an air bag restrain?
In moderate to severe frontal or near
-frontal collisions,
even belted occupants can contact the steering wheel or
the instrument panel. Air bags supplement the protection
provided by safety belts. Air bags distribute the force of
the impact more evenly over the occupant's upper body,
stopping the occupant more gradually. But air bags would
not help you in many types of collisions, including
rollovers, rear impacts and side impacts, primarily because
an occupant's motion is not toward those air bags. Air
bags should never be regarded as anything more than a
supplement to safety belts, and then only in moderate to
severe frontal or near
-frontal collisions.
What will you see after an air bag inflates?
After an air bag inflates, it quickly deflates, so quickly
that some people may not even realize the air bag
inflated. Some components of the air bag module
-- the
steering wheel hub for the driver's air bag, or the
instrument panel for the right front passenger's
bag
-- will be hot for a short time. The parts of the bag
that come into contact with you may be warm, but not
too hot to touch. There will be some smoke and dust
coming from vents in the deflated air bags. Air bag
inflation doesn't prevent the driver from seeing or from
being able to steer the vehicle, nor does it stop people
from leaving the vehicle.
CAUTION:
When an air bag inflates, there is dust in the air.
This dust could cause breathing problems for
people with a history of asthma or other
breathing trouble. To avoid this, everyone in the
vehicle should get out as soon as it is safe to do so.
If you have breathing problems but can't get out
of the vehicle after an air bag inflates, then get
fresh air by opening a window or door.
In many crashes severe enough to inflate an air bag,
windshields are broken by vehicle deformation.
Additional windshield breakage may also occur from the
right front passenger air bag.
�Air bags are designed to inflate only once. After they
inflate, you'll need some new parts for your air bag
system. If you don't get them, the air bag system
won't be there to help protect you in another crash.
A new system will include air bag modules and
possibly other parts. The service manual for your
vehicle covers the need to replace other parts.
Page 38 of 351

1-26
�Your vehicle is equipped with a crash sensing and
diagnostic module, which records information about
the air bag system. The module records information
about the readiness of the system, when the system
commands air bag inflation and driver's safety belt
usage at deployment.
�Let only qualified technicians work on your air bag
system. Improper service can mean that your air
bag system won't work properly. See your dealer
for service.
NOTICE:
If you damage the covering for the driver's or the
right front passenger's air bag, the bag may not
work properly. You may have to replace the air
bag module in the steering wheel or both the air
bag module and the instrument panel for the
right front passenger's air bag. Do not open or
break the air bag coverings.
Servicing Your Air Bag-Equipped Vehicle
Air bags affect how your vehicle should be serviced.
There are parts of the air bag system in several places
around your vehicle. You don't want the system to
inflate while someone is working on your vehicle. Your
dealer and the service manual have information about
servicing your vehicle and the air bag system. To
purchase a service manual, see ªService and Owner
Publicationsº in the Index.
CAUTION:
For up to 10 minutes after the ignition key is
turned off and the battery is disconnected, an air
bag can still inflate during improper service. You
can be injured if you are close to an air bag when
it inflates. Avoid yellow connectors. They are
probably part of the air bag system. Be sure to
follow proper service procedures, and make sure
the person performing work for you is qualified
to do so.
The air bag system does not need regular maintenance.
Page 76 of 351

2-11
Changes or modifications to this system by other than
an authorized service facility could void authorization
to use this equipment.
At times you may notice a decrease in range. This is
normal for any remote keyless entry system. If the
transmitter does not work or if you have to stand closer
to your vehicle for the transmitter to work, try this:
�Check the distance. You may be too far from your
vehicle. You may need to stand closer during rainy
or snowy weather.
�Check the location. Other vehicles or objects may
be blocking the signal. Take a few steps to the left
or right, hold the transmitter higher, and try again.
�Check to determine if battery replacement or
resynchronization is necessary. See the instructions
that follow.
�If you're still having trouble, see your dealer or a
qualified technician for service.Operation
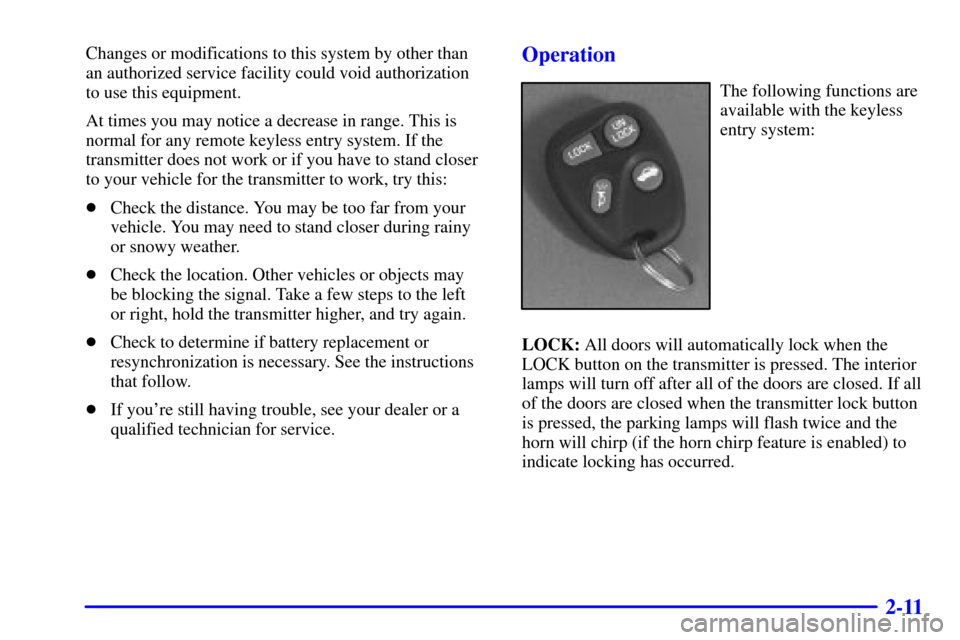
The following functions are
available with the keyless
entry system:
LOCK: All doors will automatically lock when the
LOCK button on the transmitter is pressed. The interior
lamps will turn off after all of the doors are closed. If all
of the doors are closed when the transmitter lock button
is pressed, the parking lamps will flash twice and the
horn will chirp (if the horn chirp feature is enabled) to
indicate locking has occurred.
Page 79 of 351

2-14
To replace the battery in the keyless entry system, do
the following:
1. Use a coin or similar object to separate the bottom
half from the top half of the transmitter.
2. Remove the battery and replace it with the new one.
Make sure the positive (+) side of the battery faces
down. Use one three
-volt, CR2032, or equivalent,
type battery.
3. Put the two halves back together. Make sure the
cover is on tightly, so water won't get in.
4. Check the operation of the transmitter with your
vehicle. If the transmitter does not work, try
resynchronizing the transmitter with the receiver.
Resynchronization
Your keyless entry system is equipped with a security
system that prevents anyone from recording and playing
back your signal. The transmitter does not send the same
signal twice to the receiver. The receiver will not respond
to a signal that has been sent to it more than once.
To synchronize your transmitter and receiver, follow
these directions:
1. Stand close to your vehicle.
2. Press and hold the LOCK and UNLOCK buttons on
the transmitter at the same time.
3. Hold the buttons for five seconds. In this time, the
doors should lock and unlock once. This confirms
the resynchronization. If the doors do not lock and
unlock, see your dealer for service.
Trunk
To unlock the trunk from the outside, insert the key and
turn the trunk lock cylinder.
When closing the trunk, close from the center to ensure
it fully latches.