Page 139 of 383

2-77
The main components of your instrument panel are the following:
A. Instrument Panel Brightness Control
B. Head
-Up Display Controls (Option)
C. Turn Signal/Multifunction Lever
D. Driver Information Center (DIC)
(Located in the Instrument Cluster)
E. Instrument Panel Cluster
F. Windshield Wiper/Washer Lever
G. Driver Information Center (DIC) Buttons
H. Hazard Warning Flasher Button
I. Center Air Vents
J. Audio System
K. Comfort Controls
L. Fog Lamp Button (If Equipped)
M. Remote Hatch Release Button (Coupe) or
Remote Trunk Release Button (Convertible/Hardtop)
N. Ignition SwitchO. Shift Lever (Automatic Shown)
P. Traction Control System (TCS) Switch/Active
Handling Switch
Q. Accessory Power Outlet
(Located in the Center Console)
R. Selective Real Time Damping (SRTD) (Option)
S. Air Bag Off Light
T. Instrument Panel Cupholder
U. Remote Fuel Door Release Button
(Located in the Center Console)
V. Ashtray and Cigarette Lighter
W. Parking Brake
X. Glove Box
Y. Instrument Panel Fuse Block
(Located behind the Toe
-Board)
Z. Air Bag Off Switch (Located in Glove Box)
Page 146 of 383
2-84
Brake System Warning Light
Your vehicle's hydraulic brake system is divided into
two parts. If one part isn't working, the other part can
still work and stop you. For good braking, though, you
need both parts working well.
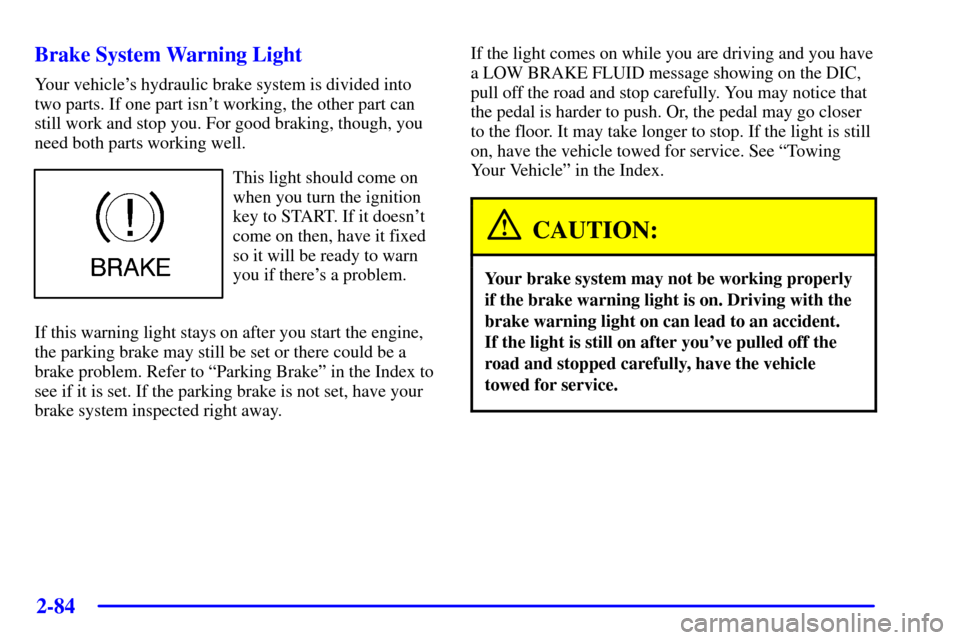
This light should come on
when you turn the ignition
key to START. If it doesn't
come on then, have it fixed
so it will be ready to warn
you if there's a problem.
If this warning light stays on after you start the engine,
the parking brake may still be set or there could be a
brake problem. Refer to ªParking Brakeº in the Index to
see if it is set. If the parking brake is not set, have your
brake system inspected right away.If the light comes on while you are driving and you have
a LOW BRAKE FLUID message showing on the DIC,
pull off the road and stop carefully. You may notice that
the pedal is harder to push. Or, the pedal may go closer
to the floor. It may take longer to stop. If the light is still
on, have the vehicle towed for service. See ªTowing
Your Vehicleº in the Index.
CAUTION:
Your brake system may not be working properly
if the brake warning light is on. Driving with the
brake warning light on can lead to an accident.
If the light is still on after you've pulled off the
road and stopped carefully, have the vehicle
towed for service.
Page 222 of 383

4-12 Competitive Driving Mode
The driver can select the optional handling mode by
pressing the ACTIVE HANDLING button on the
console for more than five seconds. Competitive
Driving mode allows the driver to have full control of
the rear wheels while the Active Handling System helps
steer the vehicle by selective brake application. The
instrument cluster light will not be on. The Traction
Control System will not be operating. Adjust your
driving accordingly.
When you press the ACTIVE HANDLING button
again, or turn the ignition to ACC, the Active Handling
and Traction Control Systems will be on. The
TRAC/ACT HNDLG
-ON message will be displayed
temporarily in the DIC and a chime will be heard.
Steering
Power Steering
If you lose power steering assist because the engine
stops or the system is not functioning, you can steer but
it will take much more effort.
Magnetic Speed Variable Assist Steering
Your vehicle is equipped with a steering system that
continuously adjusts the effort you feel when steering at
all vehicle speeds. It provides ease when parking yet a
firm, solid feel at highway speeds.
Steering Tips
Driving on Curves
It's important to take curves at a reasonable speed.
A lot of the ªdriver lost controlº accidents mentioned on
the news happen on curves. Here's why:
Experienced driver or beginner, each of us is subject to
the same laws of physics when driving on curves. The
traction of the tires against the road surface makes it
possible for the vehicle to change its path when you turn
the front wheels. If there's no traction, inertia will keep
the vehicle going in the same direction. If you've ever
tried to steer a vehicle on wet ice, you'll understand this.
The traction you can get in a curve depends on the
condition of your tires and the road surface, the angle at
which the curve is banked, and your speed. While you're
in a curve, speed is the one factor you can control.
Page 247 of 383
5-4
2. Get the vehicles close enough so that the jumper
cables can reach, but be sure the vehicles aren't
touching each other. If they are, it could cause a
ground connection you don't want. You wouldn't be
able to start your vehicle, and the bad grounding
could damage the electrical systems.
To avoid the possibility of the vehicles rolling, set
the parking brake firmly on both vehicles involved in
the jump start procedure. Put an automatic
transmission in PARK (P) or a manual transmission
in NEUTRAL before setting the parking brake.
3. Turn off the ignition on both vehicles. Unplug
unnecessary accessories plugged into the cigarette
lighter or accessory plug. Turn off all lamps that
aren't needed as well as radios. This will avoid
sparks and help save both batteries. In addition, it
could save your radio.
NOTICE:
If you leave your radio on, it could be badly
damaged. The repairs wouldn't be covered by
your warranty.
4. Open the hoods and locate the batteries. Find the
positive (+) and negative (
-) terminals on each.
CAUTION:
An electric fan can start up even when the engine
is not running and can injure you. Keep hands,
clothing and tools away from any underhood
electric fan.
Page 262 of 383
5-19
Z06 models do not have Extended Mobility Tires. If a
Z06 model tire goes flat, avoid further tire and wheel
damage by driving slowly to a level place and stopping.
Then do this:
1. Turn on the hazard warning flashers.
2. Set the parking brake firmly.
3. Put the shift lever (manual transmission)
in REVERSE (R).
4. Turn off the engine.
5. Inspect the flat tire.
If the tire has been separated from the wheel or has
damaged sidewalls or large tears that allow rapid air
loss, call a tire repair facility. See ªRoadside Assistanceº
in the Index.
If the flat tire is due to a slow leak caused by a nail or
other similar road hazard, the Tire Inflator Kit may be
used to repair the damaged tire temporarily. The kit uses
a liquid tire sealant to seal small punctures in the tread
area of the tire. The flat tire is then inflated to at least
26 psi (179 kPa) and driven to evenly distribute the tiresealant. The tire pressure is checked after driving for a
maximum of 10 minutes to see if the slow leak has been
stopped. If the tire pressure is 19 psi (131 kPa) or more,
inflate the tire up to the standard operating pressure as
shown on the Tire Pressure Label found on the rear edge
of the driver's door. See ªTires, Pressureº in the Index.
You should have the damaged tire repaired as soon as
possible. The tire sealant is a temporary repair only.
For more information regarding the tire inflator kit see
ªTire Inflator Kitº following this section.
NOTICE:
If the tire pressure has dropped below 19 psi
(131 kPa), the vehicle should not be driven
further. Damage to the tire may be severe and
the sealant will not be effective. Contact Roadside
Assistance, see ªRoadside Assistanceº in
the Index.
Page 265 of 383

5-22
NOTICE:
The car engine must be running to avoid draining
the battery while running the air compressor.
Follow the proper steps to be sure your vehicle won't
move. See ªParking Your Vehicle, Manual
Transmissionº in the Index.
CAUTION:
It can be dangerous to get out of your vehicle
with the engine running, if the shift lever is not in
NEUTRAL (N) with the parking brake firmly set
(manual transmission). Your vehicle can roll or
move suddenly even when on fairly level ground.
To be sure your vehicle won't move, always
set your parking brake and move the shift lever
to NEUTRAL (N) when you start or idle
your engine.
CAUTION:
Idling the engine in a closed-in place or with the
climate control system off can cause deadly
carbon monoxide (CO). See ªEngine Exhaustº in
the Index.
CAUTION:
Inflating something too much can make it
explode, and you or others could be injured. Be
sure to read the inflator instructions, and inflate
the tire to its recommended pressure. Do not
exceed 36 psi (248 kPa).
Page 322 of 383
6-53 Tire Chains
NOTICE:
Don't use tire chains. They can damage your
vehicle because there's not enough clearance.
Use another type of traction device only if its
manufacturer recommends it for use on your
vehicle and tire size combination and road
conditions. Follow that manufacturer's
instructions. To help avoid damage to your
vehicle, drive slowly, readjust or remove the
device if it's contacting your vehicle, and don't
spin your wheels.
If you do find traction devices that will fit, install
them on the rear tires.
Lifting Your Corvette
CAUTION:
Lifting a vehicle can cause an injury. The vehicle
can slip off the jack and roll over you or other
people. You and they could be badly injured.
Find a level place to lift your vehicle. To help
prevent the vehicle from moving:
1. Set the parking brake firmly.
2. Put an automatic transmission shift lever in
PARK (P), or shift a manual transmission to
FIRST (1) or REVERSE (R).
3. Turn off the engine.
To be even more certain the vehicle won't
move, you can put blocks in front of and behind
the wheels.
Page 361 of 383
7-15
Starter Switch Check
CAUTION:
When you are doing this check, the vehicle could
move suddenly. If it does, you or others could be
injured. Follow the steps below.
1. Before you start, be sure you have enough room
around the vehicle.
2. Firmly apply both the parking brake and the regular
brake. See ªParking Brakeº in the Index if necessary.
NOTE: Do not use the accelerator pedal, and be
ready to turn off the engine immediately if it starts.
3. On automatic transmission vehicles, try to start the
engine in each gear. The starter should work only in
PARK (P) or NEUTRAL (N). If the starter works in
any other position, your vehicle needs service.
On manual transmission vehicles, put the shift lever
in NEUTRAL (N), push the clutch down halfway
and try to start the engine. The starter should work
only when the clutch is pushed down all the way to
the floor. If the starter works when the clutch isn't
pushed all the way down, your vehicle needs service.Automatic Transmission Shift Lock Control
System Check
CAUTION:
When you are doing this check, the vehicle could
move suddenly. If it does, you or others could be
injured. Follow the steps below.
1. Before you start, be sure you have enough
room around the vehicle. It should be parked
on a level surface.
2. Firmly apply the parking brake. See ªParking Brakeº
in the Index if necessary.
NOTE: Be ready to apply the regular brake
immediately if the vehicle begins to move.
3. With the engine off, turn the key to the ON position,
but don't start the engine. Without applying the
regular brake, try to move the shift lever out of
PARK (P) with normal effort. If the shift lever
moves out of PARK (P), your vehicle needs service.