Page 178 of 383

2-116
If the sun comes out or it becomes cloudy, you may need
to adjust the HUD brightness again using the dimmer
control. Polarized sunglasses could make the HUD
image harder to see.
To change from English to metric units, push the
E/M button located to the right of the steering wheel.
Clean the inside of the windshield as needed to remove
any dirt or film that reduces the sharpness or clarity of
the HUD image.
To clean the HUD, spray household glass cleaner on a
soft, clean cloth. Wipe the HUD lens gently, then dry it.
Do not spray cleaner directly on the lens because the
cleaner could leak into the unit.If the ignition is on and you can't see the HUD image,
check to see if:
�Something is covering the HUD unit.
�The HUD dimmer control is adjusted properly.
�The HUD image is adjusted to the proper height.
�Ambient light (in the direction your vehicle is
facing) is low.
�A fuse is blown. See ªFuses and Circuit Breakersº in
the Index.
Keep in mind that your windshield is part of the HUD
system. If you ever have to have your windshield
replaced, be sure to get one that is designed for HUD or
your HUD image may look blurred and out of focus.
Page 272 of 383

6-3
CAUTION:
You can be injured and your vehicle could be
damaged if you try to do service work on a
vehicle without knowing enough about it.
�Be sure you have sufficient knowledge,
experience, the proper replacement parts
and tools before you attempt any vehicle
maintenance task.
�Be sure to use the proper nuts, bolts and
other fasteners. ªEnglishº and ªmetricº
fasteners can be easily confused. If you use
the wrong fasteners, parts can later break
or fall off. You could be hurt.
Adding Equipment to the Outside of
Your Vehicle
Things you might add to the outside of your vehicle can
affect the airflow around it. This may cause wind noise
and affect windshield washer performance. Check with
your dealer before adding equipment to the outside of
your vehicle.
Fuel
Use premium unleaded gasoline rated at 91 octane or
higher for best performance. You may use middle grade
or regular unleaded gasolines, but your vehicle's
acceleration may be slightly reduced.
It is recommended that the gasoline meet specifications
which were developed by the American Automobile
Manufacturers Association (AAMA) and endorsed by
the Canadian Motor Vehicle Manufacturers Association
for better vehicle performance and engine protection.
Gasolines meeting the AAMA specification could
provide improved driveability and emission control
system performance compared to other gasolines.
In Canada, look for the
ªAuto Makers' Choiceº
label on the fuel pump.
Canada Only
Page 338 of 383

6-69 Windshield Wipers
The windshield wiper motor is protected by a fuse and
an internal circuit breaker. If the motor overheats due
to heavy snow, etc., the wiper will stop until the motor
cools. If the overload is caused by some electrical
problem and not snow, etc., be sure to get it fixed.
Power Windows and Other Power Options
Circuit breakers protect the power seats and other power
accessories. When the current load is too heavy, the
circuit breaker opens and closes, protecting the circuit
until the problem is fixed or goes away.
Fuses and Circuit Breakers
The wiring circuits in your vehicle are protected from
short circuits by a combination of maxi
-fuses,
mini
-fuses and circuit breakers. This greatly reduces
the chance of fires caused by electrical problems.
Look at the silver
-colored band inside the fuse. If the
band is broken or melted, replace the fuse. Be sure you
replace a bad fuse with a new one of the identical size
and rating.If you ever have a problem on the road and don't have
a spare fuse, you can borrow one that has the same
amperage. Just pick some feature of your vehicle that
you can get along without
-- like the radio or cigarette
lighter
-- and use its fuse, if it is the correct amperage.
Replace it as soon as you can.
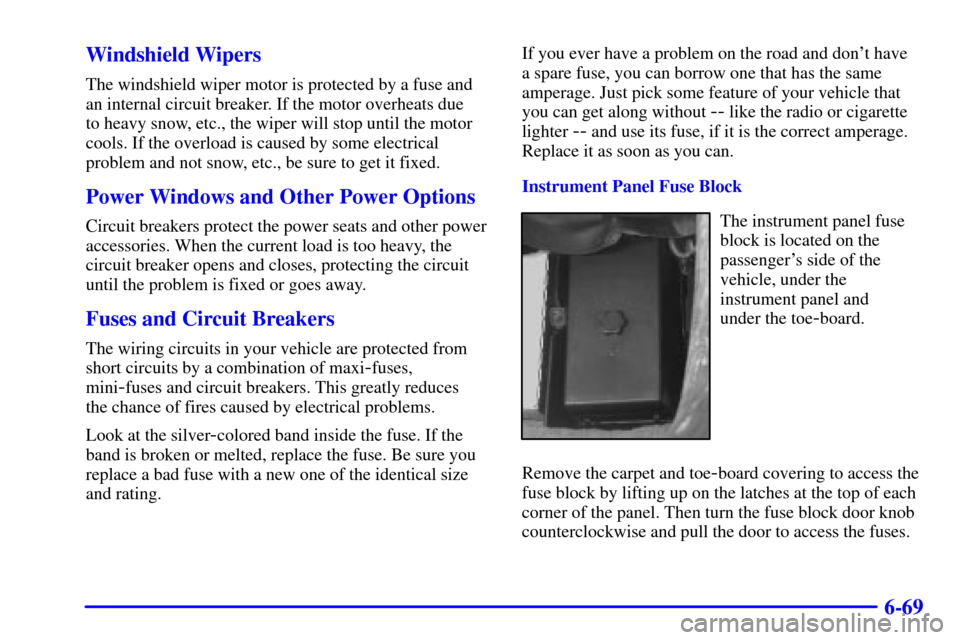
Instrument Panel Fuse Block
The instrument panel fuse
block is located on the
passenger's side of the
vehicle, under the
instrument panel and
under the toe
-board.
Remove the carpet and toe
-board covering to access the
fuse block by lifting up on the latches at the top of each
corner of the panel. Then turn the fuse block door knob
counterclockwise and pull the door to access the fuses.
Page 339 of 383
6-70
Minifuse Usage
1 Console Cigarette Lighter
2 Monitored (Inadvertent)
Load Control
3 Lumbar Seat
4 Driver Seat Control Module
5 Radio, Compact Disc Player
6 Parking Lamps, TaillampsMinifuse Usage
7 Cigarette Lighter
8 Stoplamp, Hazard Flashers
9 Body Control Module
10 Windshield Wiper/Washer
11 Accessory Power
12 Blank
13 Body Control Module
- Ignition 1
14 Crank
15 Hazard/Turn Signal
16 Air Bag
17 Tonneau Release
18 HVAC Controls
19 Instrument Panel Control
20 Cruise Control
21 Automatic Transmission Shift
Lock Control System and Inside
Rearview Mirror
22 Body Control Module
- Ignition 3
23 Body Control Module
- Ignition 2
24 Radio Antenna
Page 340 of 383
6-71
Minifuse Usage
25 Body Control Module
- Ignition 1,
Instrument Panel Control
26 Hatch/Trunk Release
27 HVAC Controls
28 Bose Speakers
29 Diagnostic
30 Right Door Control Module
31 Power Feed Door Right
32 Fuel Tank Door
33 Door Control Module Left
34 Power Feed Door Left
Circuit Breaker Usage
35 Driver Power Seat
36 Passenger Power Seat
Micro Relay Usage
37 Monitored (Inadvertent)
Load Control
38 Right Daytime Running Lamp
39 Hatch/Trunk Release
40 Left Daytime Running LampMicro Relay Usage
41 Tonneau Release
42 Courtesy Lamps
43 Automatic Lamp Control
Parking Lamps
44 Automatic Lamp
Control Headlamps
Mini Relay Usage
45 Bose Speakers
46 Rear Defogger
Maxifuse Usage
47 Ignition 1
48 Rear Defogger
49 Blank
50 Ignition 2
51 Blower Motor
52 Starter
53 Blank
Maxi Circuit
BreakerUsage
54 Headlamps
Page 341 of 383
6-72
Engine Compartment Fuse Block
There is one fuse block in the engine compartment
located on the passenger's side of the vehicle in front
of the battery.
To remove the fuse block cover, turn the
knob counterclockwise.Minifuse Usage
1 Rear Fog Lamp
2 Approach
3 Right Headlamp Motor
4 Left Headlamp Motor
5 Anti
-Lock Brakes, Selective Real
Time Damping (SRTD)
Page 342 of 383
6-73
Minifuse Usage
6 Fog Lamp
7 Selective Real Time Damping
(SRTD) Relay
8 Headlamp Low
-Beam Right
9 Headlamp High
-Beam Right
10 Headlamp Low
-Beam Left
11 Horn
12 Headlamp High
-Beam Left
13 Fuel Pump
14 Cooling Fan
- Ignition 3
15 Oxygen Sensor
16 Powertrain Control Module
17 Throttle Control
18 Injector 2
19 Engine Ignition
20 Blank
21 Blank
22 Injector 1
23 Powertrain Control ModuleMinifuse Usage
24 Air Conditioning
25 Blank
26 Blank
27 Spare
28 Spare
29 Spare
30 Spare
31 Spare
32 Spare
Micro Relay Usage
33 Air Pump
34 Air Conditioner and Clutch
35 Fuel Pump
36 Horn
37 Rear Fog Lamp
38 Back
-Up Lamps
39 Fog Lamp
40 Blank
41 Selective Real Time
Damping (SRTD)
Page 343 of 383
6-74
Mini Relay Usage
42 Ignition 1
43 Cooling Fan 2
44 Cooling Fan 3
45 Cooling Fan 1
Maxi
-Fuse Usage
46 Cooling Fan 2
47 Blank
48 Blank
49 Cooling Fan 1
50 Air Pump
51 Blank
52 Anti
-Lock Brakes
53 Selective Real Time Damping
(SRTD) Electronics
54 Fuse Puller
Replacement Bulbs
High-Beam Headlamp 9005. . . . . . . . . . . . . . . . . . . .
Low
-Beam Headlamp 9006. . . . . . . . . . . . . . . . . . . .
Back
-Up 2057. . . . . . . . . . . . . . . . . . . . . . . . . . . . . . .
Front/Rear Sidemarker 194. . . . . . . . . . . . . . . . . . . . .
Rear Stop/Tail and Turn Signal 3057. . . . . . . . . . . . .
For any bulb replacements or procedures not listed here,
please consult your dealer.