Page 125 of 448

2-57
Front Map Lamps (If Equipped)
If your vehicle has front map lamps, they are located
on the inside rearview mirror. They will automatically
come on for approximately 40 seconds when the
doors are unlocked with the keyless entry transmitter
(if equipped) or until the ignition key is turned to
RUN or ACCESSORY. The lamps will also stay on
for approximately 40 seconds after you exit the
vehicle unless you lock the doors with the keyless
entry transmitter.
You can also turn the lamps on and off by pressing the
switch near each lamp.
Dome Lamps
The dome lamps will come on when you open a door.
You can also turn the dome lamps on by turning the
thumbwheel, located next to the parking/headlamps
knob, all the way up to the top detent position. In this
position, the dome lamps will remain on until they are
turned off.You can use the DOME OVERRIDE button, located
below the parking/headlamp knob, to set the dome
lamps to come on automatically when a door is opened,
or to remain off. To turn the lamps off, press the button
into the ªinº position. With the button in this position,
the dome lamps will remain off when a door is open.
To return the lamps to automatic operation, press the
button again and return it to the ªoutº position.
With the button in this position, the dome lamps will
come on when you open a door. This will override the
illuminated entry feature, unless you use your keyless
entry transmitter (if equipped) to unlock the vehicle.
Battery Run-Down Protection
This feature shuts off the dome, courtesy, vanity,
reading, glove box and underhood lamps if they are left
on for more than 20 minutes when the ignition is off.
This will keep your battery from running down.
If the battery run
-down protection shuts off the interior
lamps, it may be necessary to do one of the following to
return to normal operation:
�Shut off all lamps and close all doors, or
�turn the ignition key to RUN.
Page 142 of 448
2-74
Ashtrays and Cigarette Lighter
Pull the front ashtray door down to open it.
NOTICE:
Don't put papers and other things that burn into
your ashtray. If you do, cigarettes or other smoking
materials could set them on fire, causing damage.
To remove the front ashtray, pull the bin upward.
To use the lighter, press it in all the way, and let go.
When it's ready, it will pop back out by itself.
NOTICE:
Don't hold a cigarette lighter in with your hand
while it is heating. If you do, it won't be able to
back away from the heating element when it's
ready. That can make it overload, damaging the
lighter and the heating element.
Sun Visors
To block out glare, you can pull the visor down.
You can also swing the visor from side
-to-side.
Visor Vanity Mirror
Pull the sun visor down and lift the cover to expose the
vanity mirror.
Illuminated Visor Vanity Mirror
(If Equipped)
Pull the sun visor down and lift the mirror cover to turn
on the lamps.
Page 146 of 448

2-78
The light will be red in the event of an OnStar system
malfunction. If this occurs press the OnStar button to
attempt to contact an advisor. If the connection is made,
the advisor will assist you with steps to take to make
sure that the system is functioning properly. If you
cannot contact the advisor, take your vehicle to your
dealership as soon as possible for assistance.
Safety and Security Services
�Automatic Notification of Air Bag
Deployment
-- If an air bag deploys, a priority
emergency signal is automatically sent to the center.
An advisor will locate your vehicle's position, try to
contact you and assist you in the situation. If the
center is unable to contact you, an emergency service
provider will be contacted.
�Stolen Vehicle Tracking
-- Call the center at
1
-888-4-ONSTAR (1-888-466-7827) to report your
vehicle stolen. The system can then locate and track
your vehicle and the advisor will be able to notify
the proper authorities.
�Roadside Assistance with Location
-- For vehicle
breakdowns, press the OnStar button. An advisor
will contact the appropriate help.�Remote Diagnostics
-- If an instrument panel light
comes on, the center can perform a check of the
engine on
-board computer. An advisor can then
recommend what action needs to be taken.
�OnStar MED
-NET -- Med-Net can store your
personal medical history and provide it to emergency
personnel if necessary.
�Accident Assist
-- An advisor can provide
step
-by-step guidance following an accident.
�Remote Door Unlock
-- To contact the center,
call 1
-888-4-ONSTAR. You will be required to
provide your security information. An advisor will
send a command to your vehicle to unlock itself.
The advisor can delay unlocking your vehicle.
Remote Door Unlock is disabled 48 hours after
the vehicle is parked to maintain the battery charge.
�Vehicle Locator Service
-- To contact the center,
call 1
-888-4-ONSTAR. You will be required to
provide your security information. An advisor will
send a command to your vehicle to sound the horn
and/or flash the lamps.
In order to provide you with excellent service, calls with
the OnStar Center may be monitored or recorded.
Page 259 of 448

4-43
4. With the engine running, shift the transfer case to
NEUTRAL. See ªFour
-Wheel Driveº in the Index
for the proper procedure to select the NEUTRAL
position for your vehicle.
CAUTION:
Shifting the transfer case into NEUTRAL can
cause your vehicle to roll even if the transmission
is in PARK (P), for an automatic transmission,
or if your vehicle is in gear, for a manual
transmission. You or others could be injured.
Make sure the parking brake is firmly set
before you shift the transfer case into NEUTRAL.
See ªFour
-Wheel Drive (Automatic Transfer Case)º
in the Index.
5. Release the parking brake only after the vehicle
being towed is firmly attached to the towing vehicle.
6. Turn the ignition to OFF. The OFF position unlocks
the steering column and reduces battery drain.
Unlocking the steering column will allow the proper
movement of the front wheels and tires during towing.
Loading Your Vehicle
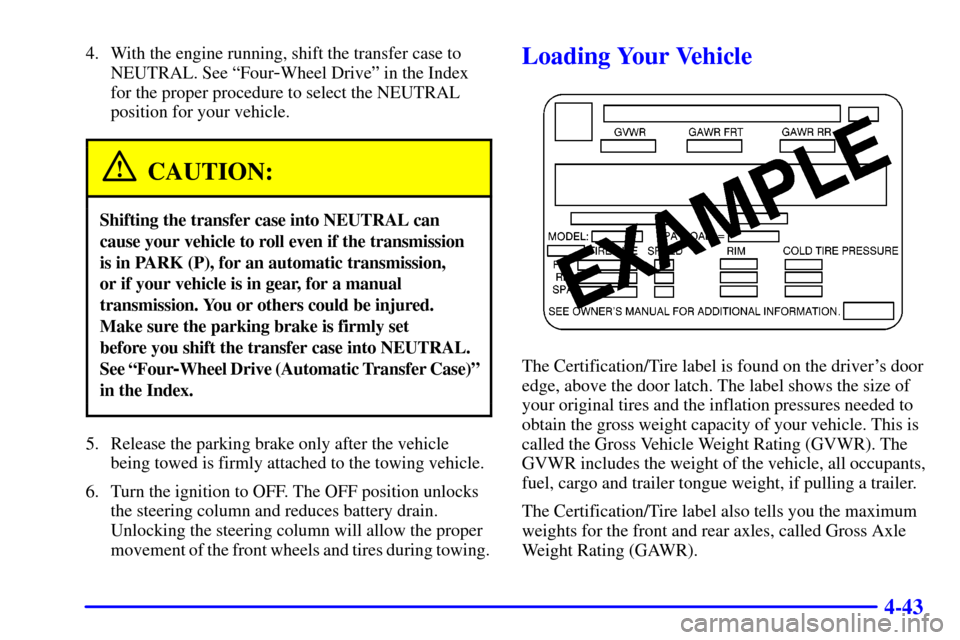
The Certification/Tire label is found on the driver's door
edge, above the door latch. The label shows the size of
your original tires and the inflation pressures needed to
obtain the gross weight capacity of your vehicle. This is
called the Gross Vehicle Weight Rating (GVWR). The
GVWR includes the weight of the vehicle, all occupants,
fuel, cargo and trailer tongue weight, if pulling a trailer.
The Certification/Tire label also tells you the maximum
weights for the front and rear axles, called Gross Axle
Weight Rating (GAWR).
Page 274 of 448

4-58 Trailer Wiring Harness
The light-duty trailer wiring is a six-wire harness
assembly. The optional heavy
-duty trailer wiring is an
eight
-wire harness assembly. The harnesses are stored
under the vehicle, along the passenger
-side frame
crossmember on two
-door vehicles or on the driver's
side corner frame rear crossmember on four
-door
vehicles. The heavy
-duty trailer wiring is fused in the
engine compartment fuse block. See ªFuses and Circuit
Breakersº in the Index. Both harnesses have no
connector and should be wired by a qualified
electrical technician. The technician can use the
following color code chart when connecting the
wiring harness to your trailer.�Dark Blue: Use for electric trailer brakes or auxiliary
wiring (eight
-wire harness only).
�Red: Use for battery charging; it connects to the
starter solenoid (eight
-wire harness only).
�Light Green: Back
-up lamps.
�Brown: Taillamps and parking lamps.
�Yellow: Left stoplamp and turn signal.
�Dark Green: Right stoplamp and turn signal.
�White: Ground wire.
�Light Blue: Auxiliary stoplamp.
Securely attach the harness to the trailer, then tape or
strap it to your vehicle's frame rail. Be sure you leave it
loose enough so the wiring doesn't bend or break,
but not so loose that it drags on the ground. Store the
harness in its original place. Wrap the harness together
and tie it neatly so it won't be damaged.
Page 297 of 448
5-23 Removing the Flat Tire and Installing the
Spare Tire
1. Using the wheel wrench, loosen all the wheel nuts.
Don't remove them yet.
2. Turn the jack handle clockwise to raise the jack lift head.
3. Fit the jack into the appropriate hole nearest the flat tire.
A. Front Frame Hole
B. Rear Frame Hole (2
-Door) or Spring Hanger
Hole (4
-Door)
Page 313 of 448
6-6
Filling Your Tank
CAUTION:
Gasoline vapor is highly flammable. It burns
violently, and that can cause very bad injuries.
Don't smoke if you're near gasoline or refueling
your vehicle. Keep sparks, flames and smoking
materials away from gasoline.
The fuel cap is behind a hinged door on driver's side of
your vehicle.
While refueling, hang the cap by the tether from the
hook on the filler door.
To remove the cap, turn it slowly to the
left (counterclockwise). The cap has a spring in it; if
you let go of the cap too soon, it will spring back to
the right.
Page 322 of 448

6-15
Remote Oil Filter (Four-Wheel Drive)
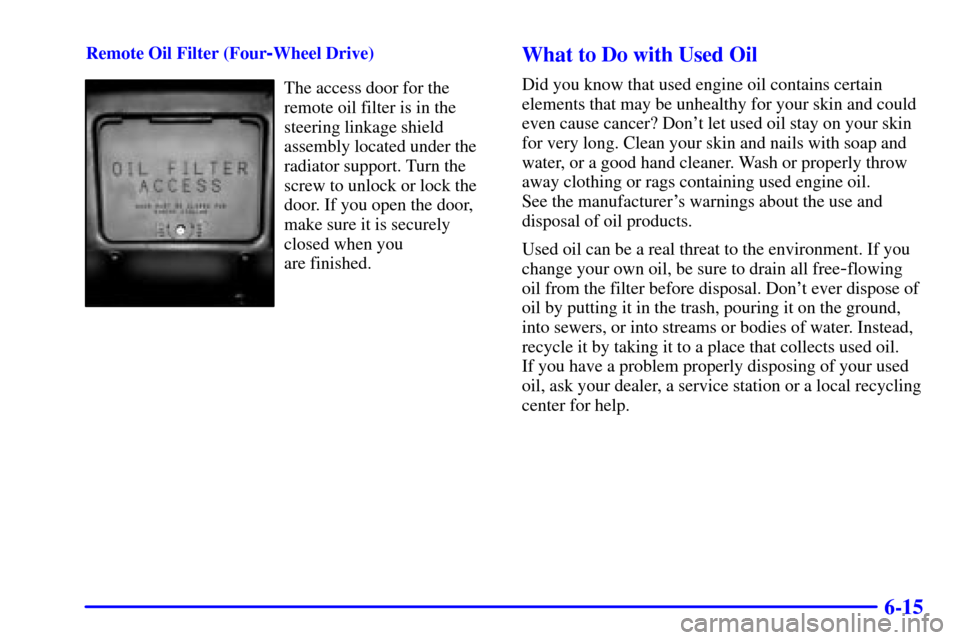
The access door for the
remote oil filter is in the
steering linkage shield
assembly located under the
radiator support. Turn the
screw to unlock or lock the
door. If you open the door,
make sure it is securely
closed when you
are finished.
What to Do with Used Oil
Did you know that used engine oil contains certain
elements that may be unhealthy for your skin and could
even cause cancer? Don't let used oil stay on your skin
for very long. Clean your skin and nails with soap and
water, or a good hand cleaner. Wash or properly throw
away clothing or rags containing used engine oil.
See the manufacturer's warnings about the use and
disposal of oil products.
Used oil can be a real threat to the environment. If you
change your own oil, be sure to drain all free
-flowing
oil from the filter before disposal. Don't ever dispose of
oil by putting it in the trash, pouring it on the ground,
into sewers, or into streams or bodies of water. Instead,
recycle it by taking it to a place that collects used oil.
If you have a problem properly disposing of your used
oil, ask your dealer, a service station or a local recycling
center for help.