Page 270 of 371

5-17
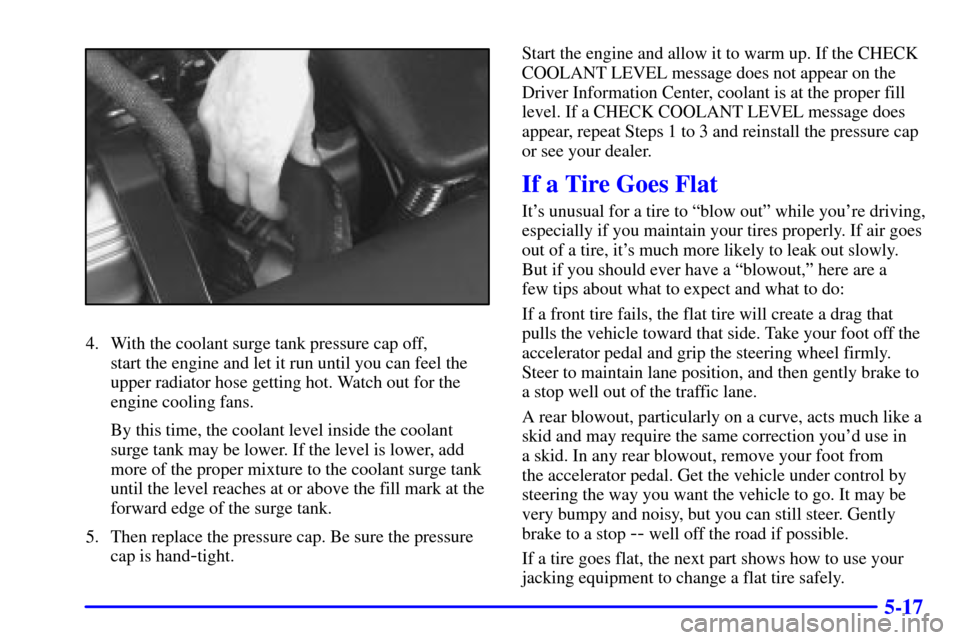
4. With the coolant surge tank pressure cap off,
start the engine and let it run until you can feel the
upper radiator hose getting hot. Watch out for the
engine cooling fans.
By this time, the coolant level inside the coolant
surge tank may be lower. If the level is lower, add
more of the proper mixture to the coolant surge tank
until the level reaches at or above the fill mark at the
forward edge of the surge tank.
5. Then replace the pressure cap. Be sure the pressure
cap is hand
-tight.Start the engine and allow it to warm up. If the CHECK
COOLANT LEVEL message does not appear on the
Driver Information Center, coolant is at the proper fill
level. If a CHECK COOLANT LEVEL message does
appear, repeat Steps 1 to 3 and reinstall the pressure cap
or see your dealer.
If a Tire Goes Flat
It's unusual for a tire to ªblow outº while you're driving,
especially if you maintain your tires properly. If air goes
out of a tire, it's much more likely to leak out slowly.
But if you should ever have a ªblowout,º here are a
few tips about what to expect and what to do:
If a front tire fails, the flat tire will create a drag that
pulls the vehicle toward that side. Take your foot off the
accelerator pedal and grip the steering wheel firmly.
Steer to maintain lane position, and then gently brake to
a stop well out of the traffic lane.
A rear blowout, particularly on a curve, acts much like a
skid and may require the same correction you'd use in
a skid. In any rear blowout, remove your foot from
the accelerator pedal. Get the vehicle under control by
steering the way you want the vehicle to go. It may be
very bumpy and noisy, but you can still steer. Gently
brake to a stop
-- well off the road if possible.
If a tire goes flat, the next part shows how to use your
jacking equipment to change a flat tire safely.
Page 271 of 371
5-18
Changing a Flat Tire
If a tire goes flat, avoid further tire and wheel damage
by driving slowly to a level place. Turn on your hazard
warning flashers.
CAUTION:
Changing a tire can cause an injury. The vehicle
can slip off the jack and roll over you or other
people. You and they could be badly injured.
Find a level place to change your tire. To help
prevent the vehicle from moving:
1. Put the shift lever in PARK (P).
2. Set the parking brake firmly.
3. Turn off the engine.
To be even more certain the vehicle won't move,
you can put blocks at the front and rear of the
tire farthest away from the one being changed.
That would be the tire on the other side of the
vehicle, at the opposite end.
The following steps will tell you how to use the jack and
change a tire.
Page 273 of 371
5-20
3. Remove the wheel wrench, jack and the spare tire
from the trunk. See ªCompact Spare Tireº later
in this section for more information about the
compact spare.
The tools you'll be using include the jack (A) and the
wheel wrench (B).
Removing the Wheel Cover
Wheel With Cover
If you have an aluminum wheel with a center cover, use
the flat end of the wheel wrench to gently pry the wheel
cover off. Be careful not to scratch the aluminum wheel
edge and don't try to remove it with your hands.
If you have an aluminum wheel without a center cover,
the wheel nuts and wheel nut covers are exposed.
Use the wheel wrench to remove the wheel nut covers.
Page 274 of 371
5-21 Removing the Flat Tire and Installing the
Spare Tire
Wheel Without Cover
1. Using the wheel wrench, loosen all the wheel nuts.
Don't remove them yet.
Page 276 of 371
5-23
3. Turn the jack handle counterclockwise to lower the
jack lift head until the jack fits under the car.
4. Raise the jack until the metal flange fits firmly into
the channel of the jack head.
5. Put the compact spare near you.
6. Raise the vehicle by turning the jack handle
clockwise. Raise the vehicle far enough off the
ground for the spare tire to fit under the vehicle.
7. Remove all wheel nuts and take off the flat tire.
8. Remove any rust or dirt
from the wheel bolts,
mounting surfaces and
spare wheel.
CAUTION:
Rust or dirt on the wheel, or on the parts to
which it is fastened, can make the wheel nuts
become loose after a time. The wheel could come
off and cause an accident. When you change a
wheel, remove any rust or dirt from the places
where the wheel attaches to the vehicle. In an
emergency, you can use a cloth or a paper towel
to do this; but be sure to use a scraper or wire
brush later, if you need to, to get all the rust or
dirt off.
Page 277 of 371
5-24
CAUTION:
Never use oil or grease on studs or nuts. If you
do, the nuts might come loose. Your wheel could
fall off, causing a serious accident.
9. Place the
spare on the
wheel
-mounting
surface.
10. Replace the wheel nuts
with the rounded end
of the nuts toward the
wheel. Tighten each nut
by hand until the wheel
is held against the hub.
11. Lower the vehicle by turning the jack handle
counterclockwise. Lower the jack completely.
Page 278 of 371
5-25
12. Tighten the wheel
nuts firmly in a
crisscross sequence
as shown.
On the STS, screw on the wheel nut covers with
your fingers, then tighten one
-quarter turn with the
wheel wrench.
CAUTION:
Incorrect wheel nuts or improperly tightened
wheel nuts can cause the wheel to become loose
and even come off. This could lead to an accident.
Be sure to use the correct wheel nuts. If you have
to replace them, be sure to get new GM original
equipment wheel nuts.
Stop somewhere as soon as you can and have
the nuts tightened with a torque wrench to
100 lb
-ft (140 N´m).
Page 279 of 371

5-26
NOTICE:
Improperly tightened wheel nuts can lead to
brake pulsation and rotor damage. To avoid
expensive brake repairs, evenly tighten the wheel
nuts in the proper sequence and to the proper
torque specification.
Don't try to put a wheel cover on your compact spare tire.
It won't fit. Store the wheel cover and lug nut caps in the
trunk until you have the flat tire repaired or replaced.
NOTICE:
Wheel covers won't fit on your compact spare.
If you try to put a wheel cover on your compact
spare, you could damage the cover or the spare.
Storing the Flat Tire and Tools
CAUTION:
Storing a jack, a tire or other equipment in the
passenger compartment of the vehicle could
cause injury. In a sudden stop or collision, loose
equipment could strike someone. Store all these
in the proper place.
After you've put the compact spare tire on your vehicle,
you'll need to store the flat tire in your trunk.
Store the flat tire as far forward in the trunk as possible.
Store the jack and wheel wrench in their compartment in
the trunk. For storage, the jack must be raised until the
screw end is flush with the edge of the jack.