Page 23 of 171
23n
IndexDataTechnologyRepairsCar careControlsOverview
Indicator and warning lamps
Green: for your information
Turn signal indicators
Flashes when the turn signal
indicators are in operation.
Rapid flashing indicates a system
malfunction.
For additional information, refer to
page 58.
Blue: for your information
High beams
Lights up when the high beams
are on or the headlamp flasher
is actuated.
For additional information, refer to
page 58.
ProCarManuals.com
Page 58 of 171

58n
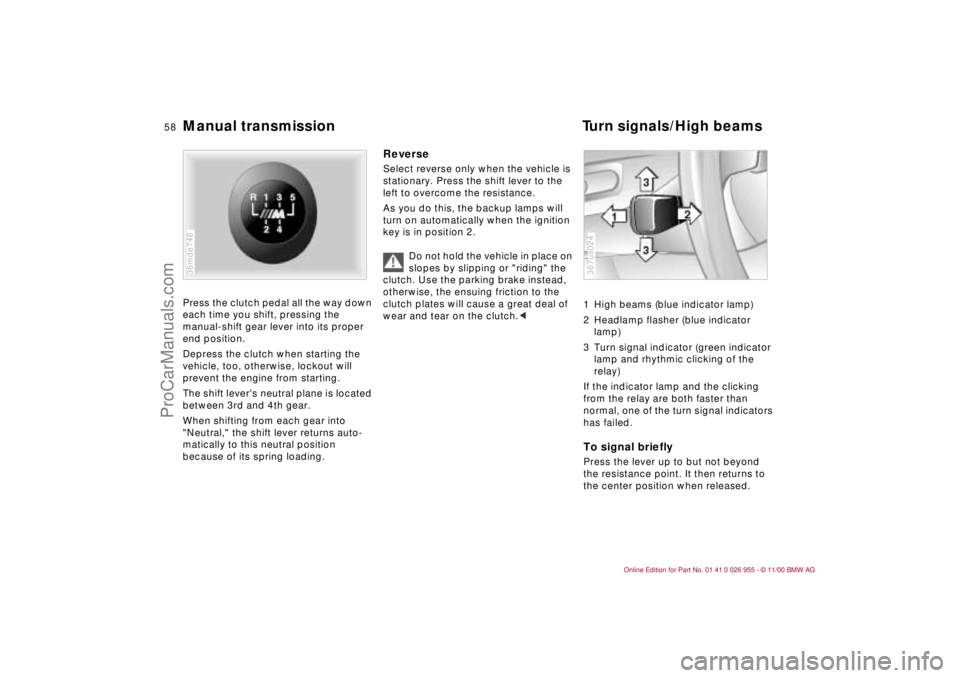
Manual transmission Turn signals/High beamsPress the clutch pedal all the way down
each time you shift, pressing the
manual-shift gear lever into its proper
end position.
Depress the clutch when starting the
vehicle, too, otherwise, lockout will
prevent the engine from starting.
The shift lever's neutral plane is located
between 3rd and 4th gear.
When shifting from each gear into
"Neutral," the shift lever returns auto-
matically to this neutral position
because of its spring loading.36mde746
ReverseSelect reverse only when the vehicle is
stationary. Press the shift lever to the
left to overcome the resistance.
As you do this, the backup lamps will
turn on automatically when the ignition
key is in position 2.
Do not hold the vehicle in place on
slopes by slipping or "riding" the
clutch. Use the parking brake instead,
otherwise, the ensuing friction to the
clutch plates will cause a great deal of
wear and tear on the clutch.<
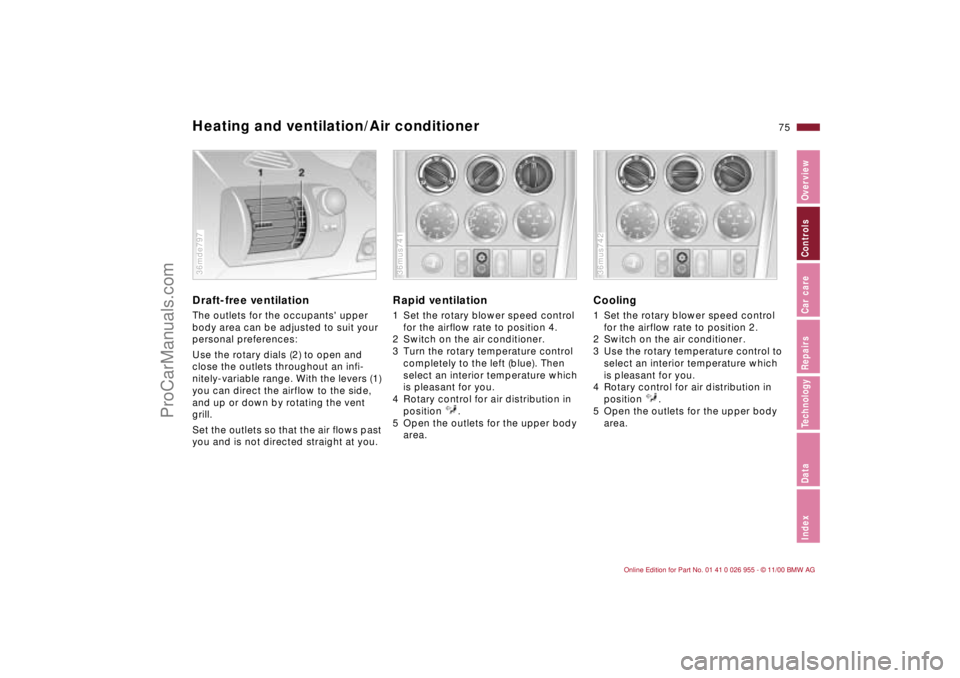
1 High beams (blue indicator lamp)
2 Headlamp flasher (blue indicator
lamp)
3 Turn signal indicator (green indicator
lamp and rhythmic clicking of the
relay)
If the indicator lamp and the clicking
from the relay are both faster than
normal, one of the turn signal indicators
has failed.To signal brieflyPress the lever up to but not beyond
the resistance point. It then returns to
the center position when released.367us024
ProCarManuals.com
Page 63 of 171
63n
IndexDataTechnologyRepairsCar careControlsOverview
Coolant temperature gauge Engine oil temperatureBlueThe engine is still cold. Drive at
moderate engine and vehicle speeds.RedWhen you switch on the ignition, the
warning lamp comes on briefly to
confirm that the system is operational.
Comes on while driving: the engine is
overheated. Switch off the engine
immediately and allow it to cool down.36mde752
Between the blue and red zonesNormal operating range. It is not
unusual for the needle to rise as far as
the edge of the red zone in response to
high outside temperatures or severe
operating conditions.
Checking coolant level: page 112.
During normal operation the engine oil
temperature is between 175 7 (80 6)
and 250 7 (120 6). During perfor-
mance-oriented driving, do not exceed
the maximum temperature of 265 7
(130 6).
Up to an oil temperature of 140 7
(60 6) an engine speed of 4,000 rpm
may not be exceeded.
36mus730
ProCarManuals.com
Page 75 of 171

75n
IndexDataTechnologyRepairsCar careControlsOverview
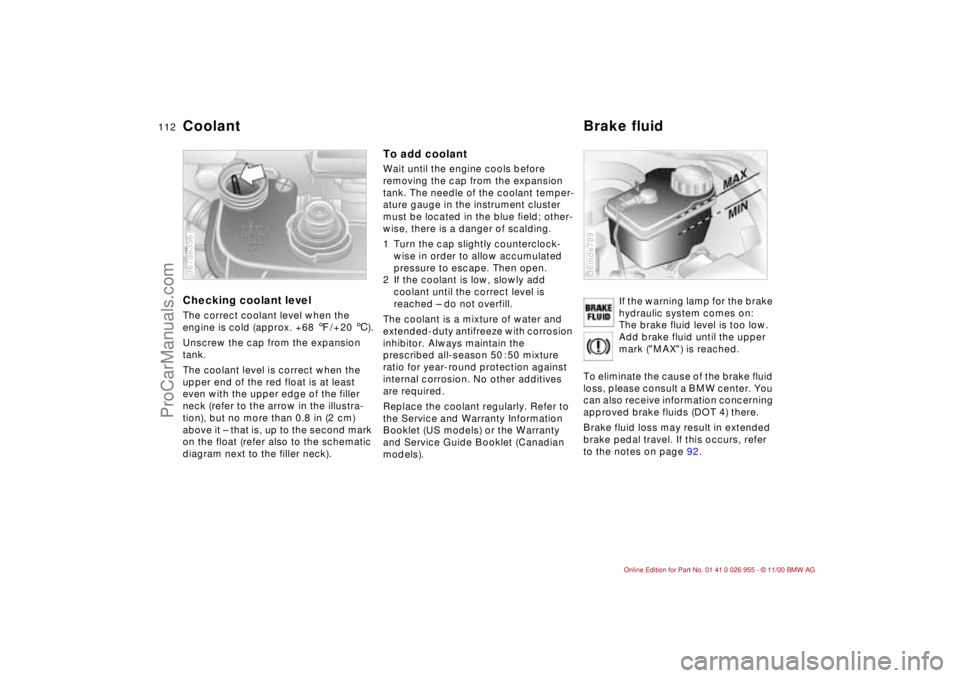
Heating and ventilation/Air conditionerDraft-free ventilationThe outlets for the occupants' upper
body area can be adjusted to suit your
personal preferences:
Use the rotary dials (2) to open and
close the outlets throughout an infi-
nitely-variable range. With the levers (1)
you can direct the airflow to the side,
and up or down by rotating the vent
grill.
Set the outlets so that the air flows past
you and is not directed straight at you.36mde797
Rapid ventilation1 Set the rotary blower speed control
for the airflow rate to position 4.
2 Switch on the air conditioner.
3 Turn the rotary temperature control
completely to the left (blue). Then
select an interior temperature which
is pleasant for you.
4 Rotary control for air distribution in
position .
5 Open the outlets for the upper body
area.36mus741
Cooling1 Set the rotary blower speed control
for the airflow rate to position 2.
2 Switch on the air conditioner.
3 Use the rotary temperature control to
select an interior temperature which
is pleasant for you.
4 Rotary control for air distribution in
position .
5 Open the outlets for the upper body
area.36mus742
ProCarManuals.com
Page 112 of 171

112n
Coolant Brake fluid Checking coolant levelThe correct coolant level when the
engine is cold (approx. +68 7/+20 6).
Unscrew the cap from the expansion
tank.
The coolant level is correct when the
upper end of the red float is at least
even with the upper edge of the filler
neck (refer to the arrow in the illustra-
tion), but no more than 0.8 in (2 cm)
above it – that is, up to the second mark
on the float (refer also to the schematic
diagram next to the filler neck).367de356
To add coolantWait until the engine cools before
removing the cap from the expansion
tank. The needle of the coolant temper-
ature gauge in the instrument cluster
must be located in the blue field; other-
wise, there is a danger of scalding.
1 Turn the cap slightly counterclock-
wise in order to allow accumulated
pressure to escape. Then open.
2 If the coolant is low, slowly add
coolant until the correct level is
reached – do not overfill.
The coolant is a mixture of water and
extended-duty antifreeze with corrosion
inhibitor. Always maintain the
prescribed all-season 50 : 50 mixture
ratio for year-round protection against
internal corrosion. No other additives
are required.
Replace the coolant regularly. Refer to
the Service and Warranty Information
Booklet (US models) or the Warranty
and Service Guide Booklet (Canadian
models).If the warning lamp for the brake
hydraulic system comes on:
The brake fluid level is too low.
Add brake fluid until the upper
mark ("MAX") is reached.
To eliminate the cause of the brake fluid
loss, please consult a BMW center. You
can also receive information concerning
approved brake fluids (DOT 4) there.
Brake fluid loss may result in extended
brake pedal travel. If this occurs, refer
to the notes on page 92.
36mde789
ProCarManuals.com