2001 BMW 540I SEDAN ECU
[x] Cancel search: ECUPage 175 of 238

Index
Data
Technology
Repairs
Car care
Controls
Overview
175nCaring for your car
Leather care
The leather* upholstery used by BMW
is a natural product of the highest qual-
ity, processed using state-of-the-art
methods to ensure that it will maintain
its high quality for years to come, pro-
vided that it is properly cared for.
Because this product is manufactured
using natural materials, you must make
allowance for its special characteristics
as well as for the peculiarities of its use
and care.
Regular periodic cleaning and care are
essential, as dust and road dirt act as
abrasives in the pores and creases of
the material. This leads to wear spots
and premature brittleness on the sur-
face of the leather. We therefore sug-
gest that you clean the leather with a
vacuum cleaner or dust cloth at fre-
quent intervals.
For cleaning, use BMW leather cleaning
foam.
Since dirt and grease gradually affect
the protective surface layer of the
leather, the cleaned surfaces should be
treated with a BMW leather care agent.
This also acts as an antistatic agent. For protection against dampness or
moisture, treat the leather with a BMW
impregnating agent.
We recommend that you perform this
procedure twice a year on leather ex-
posed to normal use.
Spills should be wiped up immediately.
Remove grease and oil stains without
rubbing, but rather by dabbing with
spot remover.
If the upholstery is to be exposed to in-
tense sunlight or if the vehicle is to be
stored for an extended period, cover all
leather surfaces (or, better yet, the win-
dows) to prevent fading.
Use cleaning and car-care
products that you can obtain
at your BMW center. <
Cleaning agents can contain sub-
stances that are dangerous or
pose health risks. Therefore, always
comply with the warnings and danger
notices on the package.
Open the doors or windows on your ve-
hicle before cleaning the interior. Never
clean your vehicle with cleaning agents
(or solvents) not specifically intended
for this purpose. <
Page 184 of 238
184nLamps and bulbs
Xenon lamps*
The operating life of these lamp units is
extremely long and the likelihood of fail-
ure very low, provided that they are not
switched on and off a very great num-
ber of times. If one of these bulbs
should nevertheless fail, it is possible to
continue driving with great caution us-
ing the fog lamps, provided traffic laws
in your area do not prohibit this.
Because of the extremely high
voltages involved, any work on the
lighting system should be carried out by
technically-qualified personnel only.
Otherwise, there is a risk of fatal in-
jury. <
Parking lamp
10 watt bulb
The bulb holder and reflector are a
single unit and are both changed
at the same time. <
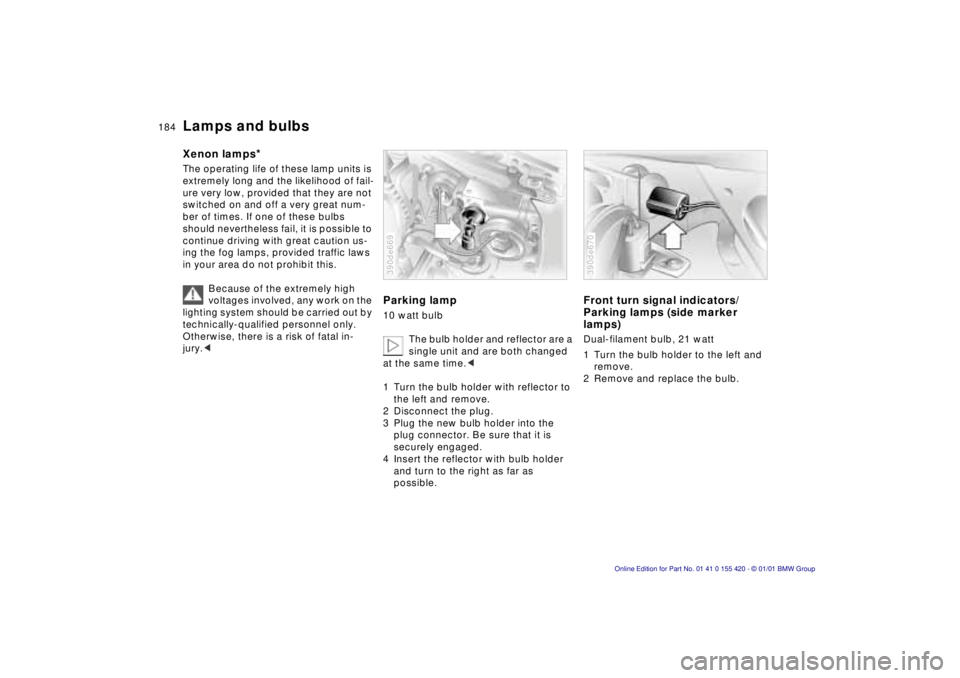
1 Turn the bulb holder with reflector to the left and remove.
2 Disconnect the plug.
3 Plug the new bulb holder into the plug connector. Be sure that it is
securely engaged.
4 Insert the reflector with bulb holder and turn to the right as far as
possible.
390de669
Front turn signal indicators/
Parking lamps (side marker
lamps)
Dual-filament bulb, 21 watt
1 Turn the bulb holder to the left and
remove.
2 Remove and replace the bulb.
390de670
Page 191 of 238
Index
Data
Technology
Repairs
Car care
Controls
Overview
191nChanging a wheel
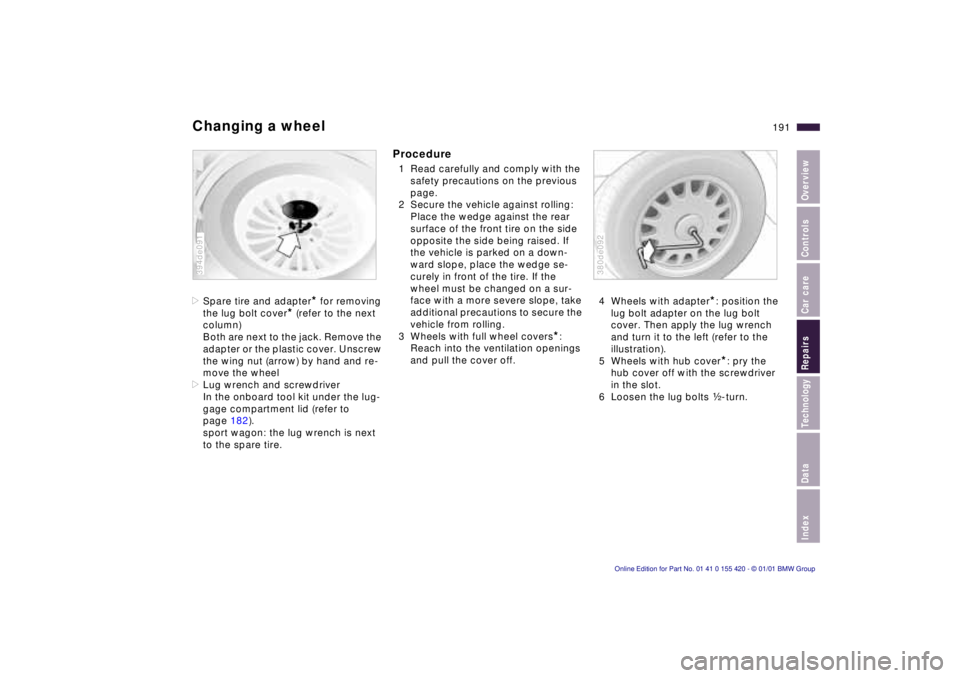
>Spare tire and adapter* for removing
the lug bolt cover
* (refer to the next
column)
Both are next to the jack. Remove the
adapter or the plastic cover. Unscrew
the wing nut (arrow) by hand and re-
move the wheel
> Lug wrench and screwdriver
In the onboard tool kit under the lug-
gage compartment lid (refer to
page 182).
sport wagon: the lug wrench is next
to the spare tire.
394de091
Procedure
1 Read carefully and comply with the safety precautions on the previous
page.
2 Secure the vehicle against rolling: Place the wedge against the rear
surface of the front tire on the side
opposite the side being raised. If
the vehicle is parked on a down-
ward slope, place the wedge se-
curely in front of the tire. If the
wheel must be changed on a sur-
face with a more severe slope, take
additional precautions to secure the
vehicle from rolling.
3 Wheels with full wheel covers
*:
Reach into the ventilation openings
and pull the cover off. 4 Wheels with adapter
*: position the
lug bolt adapter on the lug bolt
cover. Then apply the lug wrench
and turn it to the left (refer to the
illustration).
5 Wheels with hub cover
*: pry the
hub cover off with the screwdriver
in the slot.
6 Loosen the lug bolts g-turn.
380de092
Page 192 of 238
192nChanging a wheel
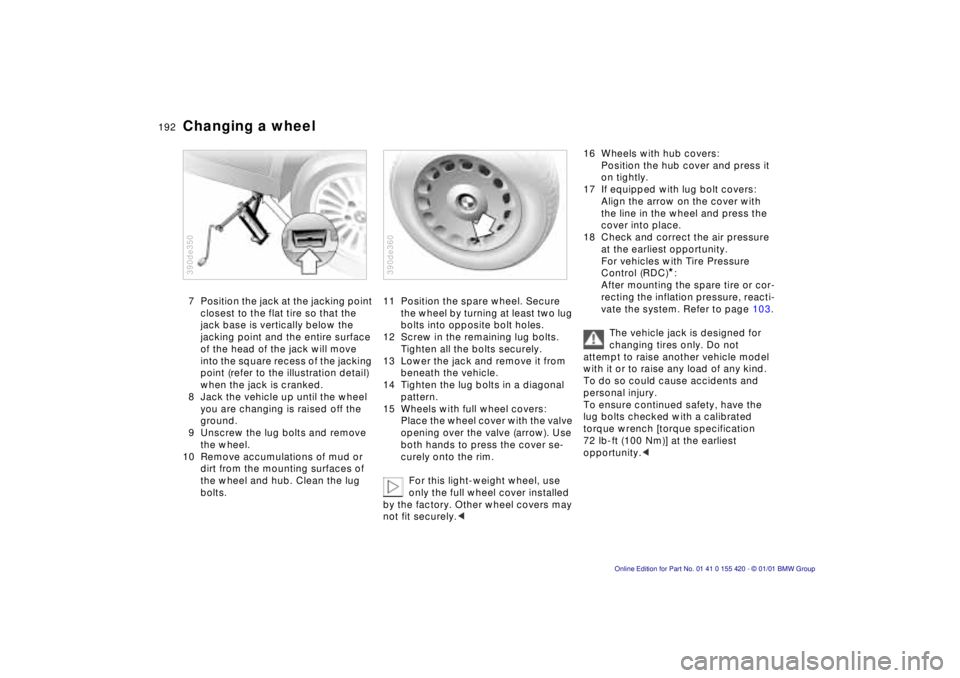
7 Position the jack at the jacking point
closest to the flat tire so that the
jack base is vertically below the
jacking point and the entire surface
of the head of the jack will move
into the square recess of the jacking
point (refer to the illustration detail)
when the jack is cranked.
8 Jack the vehicle up until the wheel you are changing is raised off the
ground.
9 Unscrew the lug bolts and remove the wheel.
10 Remove accumulations of mud or
dirt from the mounting surfaces of
the wheel and hub. Clean the lug
bolts.
390de350
11 Position the spare wheel. Secure the wheel by turning at least two lug
bolts into opposite bolt holes.
12 Screw in the remaining lug bolts. Tighten all the bolts securely.
13 Lower the jack and remove it from beneath the vehicle.
14 Tighten the lug bolts in a diagonal pattern.
15 Wheels with full wheel covers: Place the wheel cover with the valve
opening over the valve (arrow). Use
both hands to press the cover se-
curely onto the rim.
For this light-weight wheel, use
only the full wheel cover installed
by the factory. Other wheel covers may
not fit securely. <
390de360
16 Wheels with hub covers:
Position the hub cover and press it
on tightly.
17 If equipped with lug bolt covers: Align the arrow on the cover with
the line in the wheel and press the
cover into place.
18 Check and correct the air pressure at the earliest opportunity.
For vehicles with Tire Pressure
Control (RDC)
*:
After mounting the spare tire or cor-
recting the inflation pressure, reacti-
vate the system. Refer to page 103.
The vehicle jack is designed for
changing tires only. Do not
attempt to raise another vehicle model
with it or to raise any load of any kind.
To do so could cause accidents and
personal injury.
To ensure continued safety, have the
lug bolts checked with a calibrated
torque wrench [torque specification
72 lb-ft (100 Nm)] at the earliest
opportunity. <
Page 195 of 238
Index
Data
Technology
Repairs
Car care
Controls
Overview
195nBattery
Return used batteries to a
recycling point or your authorized
BMW center. Maintain the battery in
an upright position for transport and
storage. Secure the battery against
falling over in transit. <
Removal and installation
Do not disconnect the battery
when the engine is running. Dis-
connecting the battery cable when the
engine is running will cause a voltage
surge which will damage the vehicle's
onboard electronics.
Do not make any modifications in the
wires to the positive terminal. If you do
so, the protective function of the safety
battery terminal is no longer ensured.
Repairs and disposal may only be
performed by specially-trained person-
nel. <
390de611
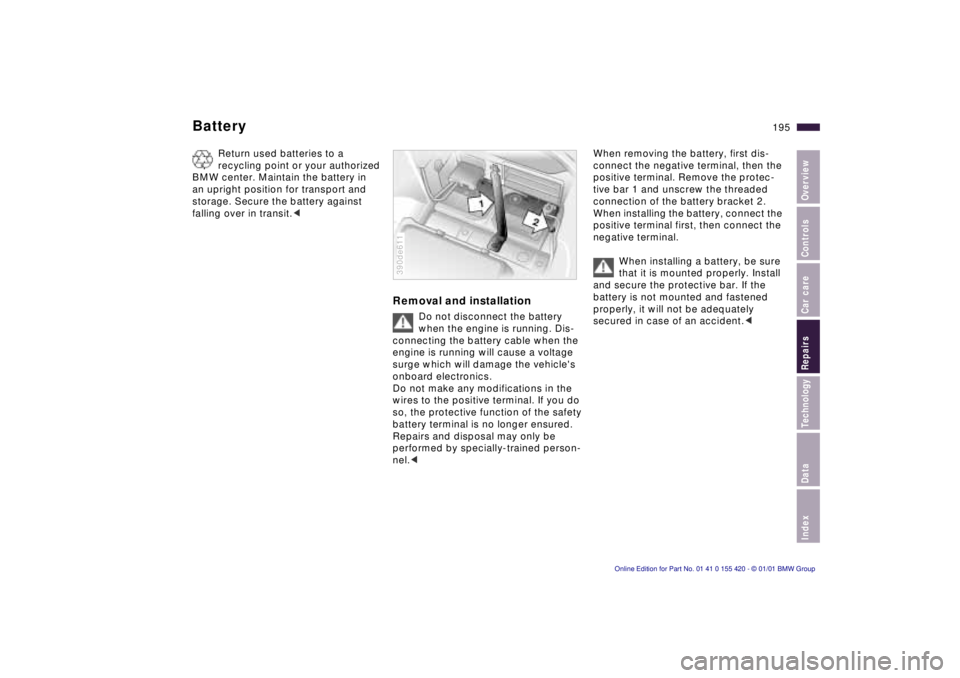
When removing the battery, first dis-
connect the negative terminal, then the
positive terminal. Remove the protec-
tive bar 1 and unscrew the threaded
connection of the battery bracket 2.
When installing the battery, connect the
positive terminal first, then connect the
negative terminal.
When installing a battery, be sure
that it is mounted properly. Install
and secure the protective bar. If the
battery is not mounted and fastened
properly, it will not be adequately
secured in case of an accident. <
Page 228 of 238
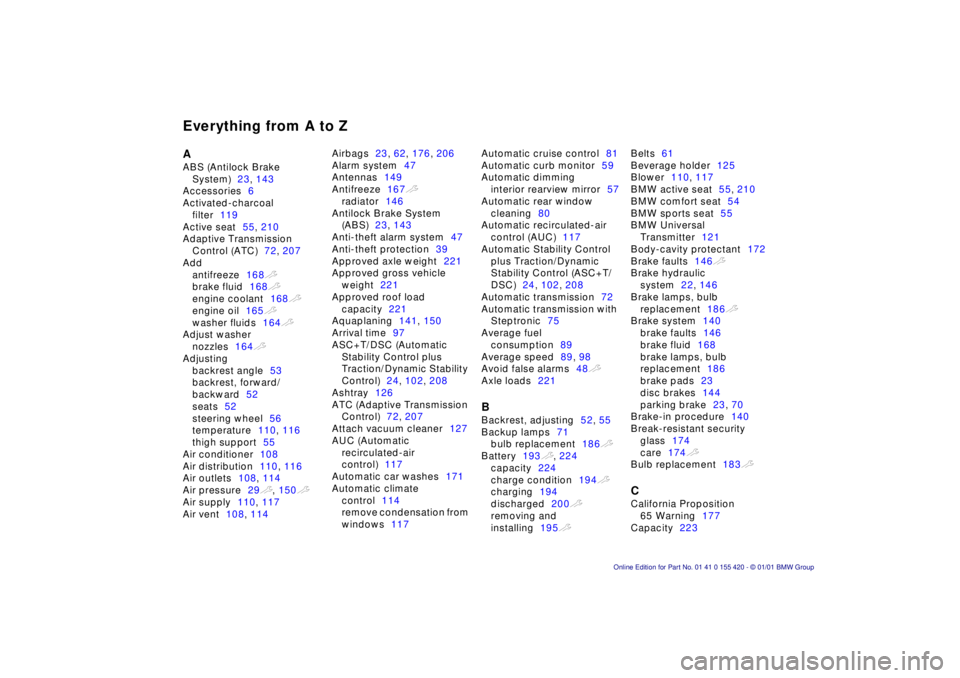
Everything from A to Z
A
ABS (Antilock Brake
System)23, 143
Accessories6
Activated-charcoal
filter119
Active seat55, 210
Adaptive Transmission
Control (ATC)72, 207
Add
antifreeze168
t
brake fluid168
t
engine coolant168
t
engine oil165
t
washer fluids164
t
Adjust washer
nozzles164
t
Adjusting
backrest angle53
backrest, forward/
backward52
seats52
steering wheel56
temperature110, 116
thigh support55
Air conditioner108
Air distribution110, 116
Air outlets108, 114
Air pressure29
t
, 150
t
Air supply110, 117
Air vent108, 114Airbags23, 62, 176, 206
Alarm system47
Antennas149
Antifreeze167
t
radiator146
Antilock Brake System
(ABS)23, 143
Anti-theft alarm system47
Anti-theft protection39
Approved axle weight221
Approved gross vehicle
weight221
Approved roof load
capacity221
Aquaplaning141, 150
Arrival time97
ASC+T/DSC (Automatic
Stability Control plus
Traction/Dynamic Stability
Control)24, 102, 208
Ashtray126
ATC (Adaptive Transmission
Control)72, 207
Attach vacuum cleaner127
AUC (Automatic
recirculated-air
control)117
Automatic car washes171
Automatic climate
control114
remove condensation from
windows117Automatic cruise control81
Automatic curb monitor59
Automatic dimming
interior rearview mirror57
Automatic rear window
cleaning80
Automatic recirculated-air
control (AUC)117
Automatic Stability Control
plus Traction/Dynamic
Stability Control (ASC+T/
DSC)24, 102, 208
Automatic transmission72
Automatic transmission with
Steptronic75
Average fuel
consumption89
Average speed89, 98
Avoid false alarms48
t
Axle loads221
B
Backrest, adjusting52, 55
Backup lamps71
bulb replacement186
t
Battery193
t
, 224
capacity224
charge condition194
t
charging194
discharged200
t
removing and
installing195
t
Belts61
Beverage holder125
Blower110, 117
BMW active seat55, 210
BMW comfort seat54
BMW sports seat55
BMW Universal
Transmitter121
Body-cavity protectant172
Brake faults146
t
Brake hydraulic
system22, 146
Brake lamps, bulb
replacement186
t
Brake system140
brake faults146
brake fluid168
brake lamps, bulb
replacement186
brake pads23
disc brakes144
parking brake23, 70
Brake-in procedure140
Break-resistant security
glass174
care174
t
Bulb replacement183
t
C
California Proposition
65 Warning177
Capacity223
Page 229 of 238

Everything from A to Z
229n
IndexDataTechnologyRepairsCar careControlsOverview
Car jack190
t
Car keys36
Car Memory60
Car phones, refer to the
seperate Owner's Manual
Car radio reception149
Car telephone125
Car wash171
Care
vehicle exterior172
vehicle interior174
Cargo loading136
Caring for the vehicle
finish173
Catalytic converter142
Cellular phone149
Center (high-mount) brake
lamp, bulb
replacement187
Central locking
system38, 42
Changing a tire190
t
Changing a wheel190
t
Charge indicator lamp22
Charging the battery194
t
Check air pressure30
Check button86
Check Control86
t
Check engine oil
level165
t
Check tire pressures29
t
Child restraint systems62
Child seat62, 66Child seat security67
Child-safety locks67
Cigarette lighter126
Cleaning headlamps79
Cleaning windshield78, 79
Clock92
Clock, refer also to the
onboard monitor
Cockpit16
Code98
activating98
de-activating98
selecting98
Cold start69
Combination switch78
Comfort seat54
Compartments124
Computer89, 95
average fuel
consumption89
average speed89
cruising range89
outside temperature89
remote control99
Computer, refer also to the
onboard monitor Owner's
Manual
Configure settings60
Consumption display84
Consumption, fuel97
Contamination on
paintwork172Convenience operation
sliding/tilt sunroof38
windows38
Convenience starting
feature69
Coolant146, 167
antifreeze146
temperature gauge85
Copyright notice4
Courtesy lamp, bulb
replacement189
t
Cover, sun blinds120
Cruise control81
Cruising range89, 97
Cup holder125
Curb weight221
D
Dashboard16
Data link connector for
Onboard Diagnostics178
Date
calling up92
changing92
Date, refer also to the
onboard monitor Owner's
Manual
Daytime-driving lamp105
DBC (Dynamic Brake
Control)23, 100, 145Deactivating99
interior motion
sensor40, 48
tilt sensor alarm
system40, 48
Deep water141
Defrost
rear window80
t
Defrost position113, 117
Defrost
windows113, 117
t
Difficult steering148
t
Digital clock92
Digital sound
processing211
Dimensions219
Dipstick, engine oil165
t
Disc brakes144
Disconnect the
battery195
t
Displacement218
Display lighting105
Displays18, 20
Distance96
Distance warning100
Diversity Antenna
system209
Divided rear-seat
backrest128
Door keys36
Page 231 of 238

Everything from A to Z
231n
IndexDataTechnologyRepairsCar careControlsOverview
Height219
Height adjustment
seats52
steering wheel56
Help with jump
starting200
t
HiFi system211
High beams24
bulb replacement183
t
High Performance Synthetic
Oils166
High-mount brake lamp187
Hood release159
t
Horn25
Hydraulic Brake Assistant,
refer to DBC23, 100, 145
I
Ice warning83
Identification number of the
vehicle169
Identification, tires153
Ignition key36
Ignition lock68
Imprint4
Independent
ventilation94, 120
Independent ventilation,
refer also to the onboard
monitor Owner's Manual
Indicator lamps22
t
Inflation
pressure29
t
, 30, 150
monitoring103, 213
INSPECTION85
Instrument cluster18, 20
Instrument lighting105
Instrument panel20
Instrument panel switch78
Instruments18
Integrated rear
suspension214
Intensive
cleaning78, 79, 164
Interaxle tire rotation152
Interference indicators86
Interference with
car phones149
Interior lamps106
bulb replacement188
t
remote control40
Interior mirror57
with automatic dimming
feature211
Interior motion sensor48
deactivation48
Interior rearview mirror
with automatic dimming
feature57
Interlock68
Intermittent mode78
J
Jack190
t
Jump starting200
t
KKey Memory60
Key, transmitter36
Keys36
Keys with remote control36
Kickdown73, 76LLashing eye136
Leather care175
Length219
Level control
system23, 214
inactive148t
License plate lamps, bulb
replacement188t
Light switch105
Light-alloy wheels156
Lighter126
Lights-on warning105
LIMIT95
Load-securing devices136
Locking and unlocking the
doors38
Louvers108, 114
Low beams105
bulb replacement183tLow-fuel warning lamp84
Lug bolts191
Lug wrench191t
Luggage compartment46
capacity221
hanger46
lamps106
Luggage compartment
lamps, bulb
replacement189t
Luggage compartment lid/
tailgate43
emergency actuation43
opening separately43
remote control41
secure separately43
unlock in case of electrical
fault43t
Luggage space46
Luggage straps46
Lumbar support54
MM+S tires154
Magic Eye194
Maintenance85t, 170t
Malfunction displays86t