2001 BMW 540I SEDAN ECU
[x] Cancel search: ECUPage 46 of 238
46n
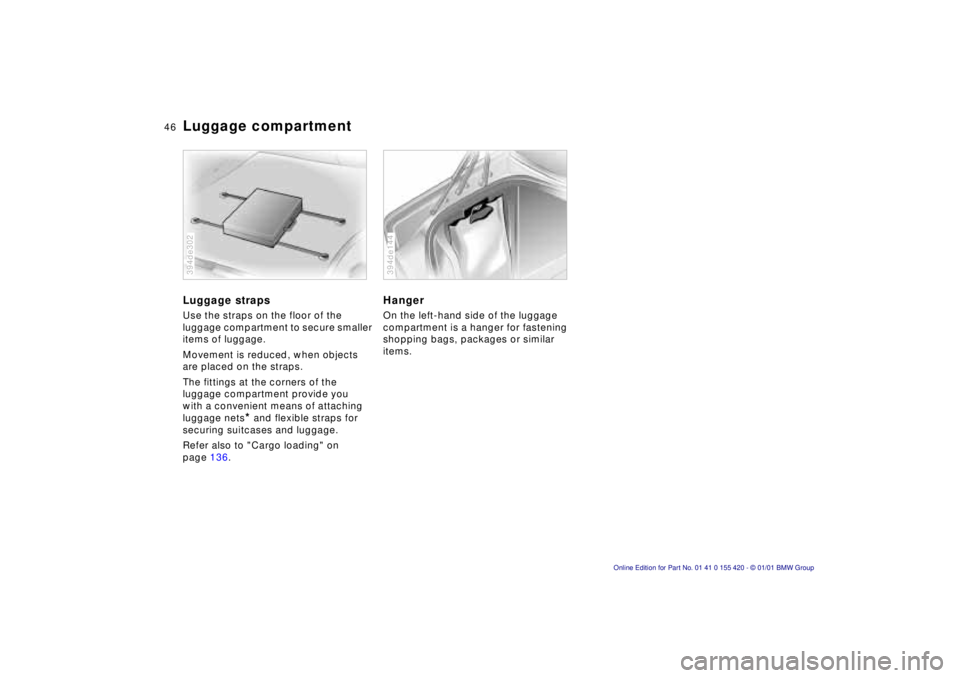
Luggage compartmentLuggage strapsUse the straps on the floor of the
luggage compartment to secure smaller
items of luggage.
Movement is reduced, when objects
are placed on the straps.
The fittings at the corners of the
luggage compartment provide you
with a convenient means of attaching
luggage nets
* and flexible straps for
securing suitcases and luggage.
Refer also to "Cargo loading" on
page 136.
394de302
HangerOn the left-hand side of the luggage
compartment is a hanger for fastening
shopping bags, packages or similar
items.394de144
Page 53 of 238
IndexDataTechnologyRepairsCar careControlsOverview
53n
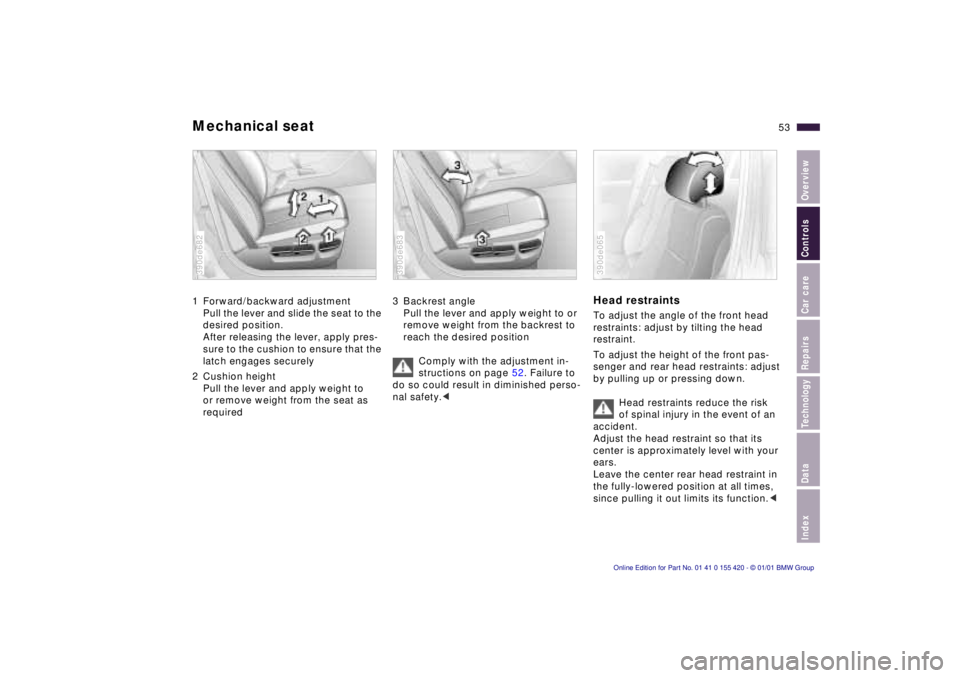
Mechanical seat1 Forward/backward adjustment
Pull the lever and slide the seat to the
desired position.
After releasing the lever, apply pres-
sure to the cushion to ensure that the
latch engages securely
2 Cushion height
Pull the lever and apply weight to
or remove weight from the seat as
required390de682
3 Backrest angle
Pull the lever and apply weight to or
remove weight from the backrest to
reach the desired position
Comply with the adjustment in-
structions on page 52. Failure to
do so could result in diminished perso-
nal safety.< 390de683
Head restraintsTo adjust the angle of the front head
restraints: adjust by tilting the head
restraint.
To adjust the height of the front pas-
senger and rear head restraints: adjust
by pulling up or pressing down.
Head restraints reduce the risk
of spinal injury in the event of an
accident.
Adjust the head restraint so that its
center is approximately level with your
ears.
Leave the center rear head restraint in
the fully-lowered position at all times,
since pulling it out limits its function.<390de065
Page 58 of 238
58n
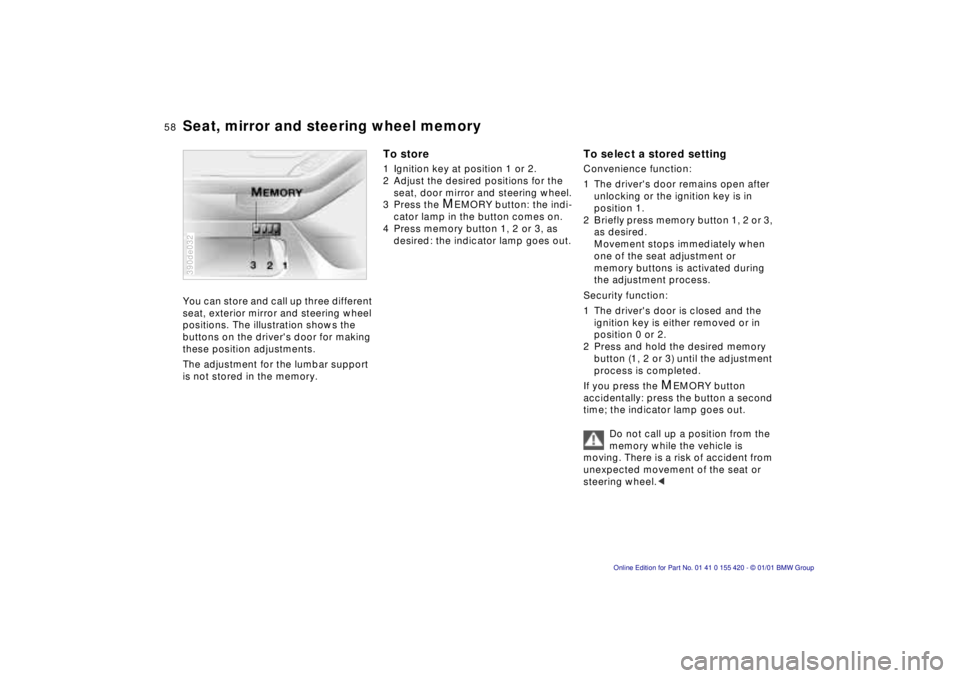
Seat, mirror and steering wheel memoryYou can store and call up three different
seat, exterior mirror and steering wheel
positions. The illustration shows the
buttons on the driver's door for making
these position adjustments.
The adjustment for the lumbar support
is not stored in the memory.390de032
To store1 Ignition key at position 1 or 2.
2 Adjust the desired positions for the
seat, door mirror and steering wheel.
3 Press the
M
EMORY button: the indi-
cator lamp in the button comes on.
4 Press memory button 1, 2 or 3, as
desired: the indicator lamp goes out.
To select a stored settingConvenience function:
1 The driver's door remains open after
unlocking or the ignition key is in
position 1.
2 Briefly press memory button 1, 2 or 3,
as desired.
Movement stops immediately when
one of the seat adjustment or
memory buttons is activated during
the adjustment process.
Security function:
1 The driver's door is closed and the
ignition key is either removed or in
position 0 or 2.
2 Press and hold the desired memory
button (1, 2 or 3) until the adjustment
process is completed.
If you press the
M
EMORY button
accidentally: press the button a second
time; the indicator lamp goes out.
Do not call up a position from the
memory while the vehicle is
moving. There is a risk of accident from
unexpected movement of the seat or
steering wheel.<
Page 62 of 238
62n
Airbags Child restraint systems
*
Never install a rear-facing child
restraint device on the front pas-
senger seat. Otherwise, injuries could
occur when the airbag is triggered in
the event of an accident.
Children should always ride in the rear
and the restraint systems should be
secured with the outer belts.
The centre seat belt should only be
used when it is necessary to secure
three child restraint systems.
Do not attempt to modify child restraint
systems. If you do this, the protection
provided by these systems could be
impaired.<
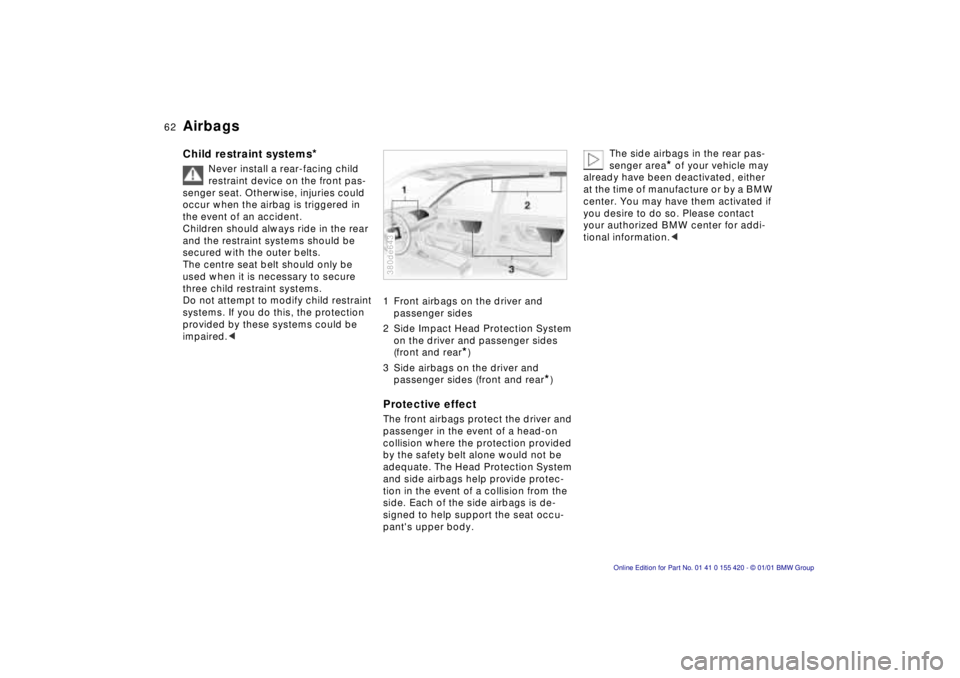
1 Front airbags on the driver and
passenger sides
2 Side Impact Head Protection System
on the driver and passenger sides
(front and rear
*)
3 Side airbags on the driver and
passenger sides (front and rear
*)
Protective effectThe front airbags protect the driver and
passenger in the event of a head-on
collision where the protection provided
by the safety belt alone would not be
adequate. The Head Protection System
and side airbags help provide protec-
tion in the event of a collision from the
side. Each of the side airbags is de-
signed to help support the seat occu-
pant's upper body.380de643
The side airbags in the rear pas-
senger area
* of your vehicle may
already have been deactivated, either
at the time of manufacture or by a BMW
center. You may have them activated if
you desire to do so. Please contact
your authorized BMW center for addi-
tional information.<
Page 66 of 238
66n
Transporting children safelyCommercially-available child restraint
systems are designed to be secured
with a lap belt or with the lap belt por-
tion of a combination lap/shoulder belt.
Improperly or inadequately installed re-
straint systems can increase the risk of
injury to children. Always read and fol-
low the instructions that come with the
system.380us123
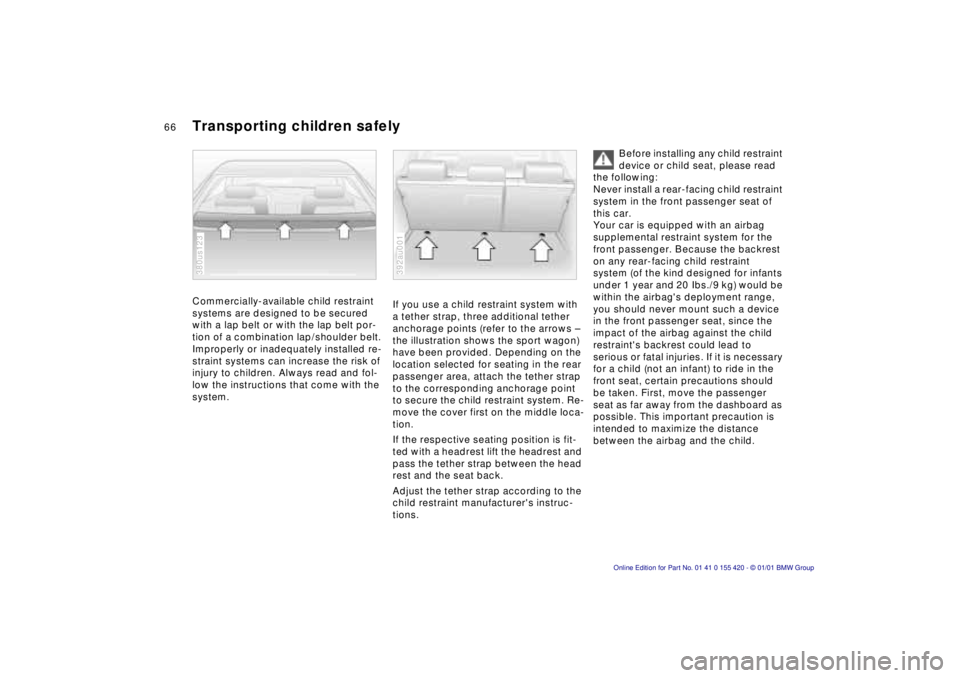
If you use a child restraint system with
a tether strap, three additional tether
anchorage points (refer to the arrows –
the illustration shows the sport wagon)
have been provided. Depending on the
location selected for seating in the rear
passenger area, attach the tether strap
to the corresponding anchorage point
to secure the child restraint system. Re-
move the cover first on the middle loca-
tion.
If the respective seating position is fit-
ted with a headrest lift the headrest and
pass the tether strap between the head
rest and the seat back.
Adjust the tether strap according to the
child restraint manufacturer's instruc-
tions.392au001
Before installing any child restraint
device or child seat, please read
the following:
Never install a rear-facing child restraint
system in the front passenger seat of
this car.
Your car is equipped with an airbag
supplemental restraint system for the
front passenger. Because the backrest
on any rear-facing child restraint
system (of the kind designed for infants
under 1 year and 20 Ibs./9 kg) would be
within the airbag's deployment range,
you should never mount such a device
in the front passenger seat, since the
impact of the airbag against the child
restraint's backrest could lead to
serious or fatal injuries. If it is necessary
for a child (not an infant) to ride in the
front seat, certain precautions should
be taken. First, move the passenger
seat as far away from the dashboard as
possible. This important precaution is
intended to maximize the distance
between the airbag and the child.
Page 67 of 238
IndexDataTechnologyRepairsCar careControlsOverview
67n
Transporting children safelyOlder children should be tightly secured
with a safety belt. Younger children
should be secured in an appropriate
forward-facing child restraint system
that has first been properly secured
with a safety belt. Never install a rear-
facing child restraint system in the front
passenger seat.
We strongly urge you to carefully read
and comply with the instructions for in-
stallation and use provided by the child
restraint's manufacturer whenever you
use such a device.
Be sure that all occupants (of all ages)
remain properly and securely restrained
at all times.<
All rear seating positions in your
vehicle meet the recommendations
of SAE J1819, an industry-recom-
mended practice for securing child
restraint systems in motor vehicles.
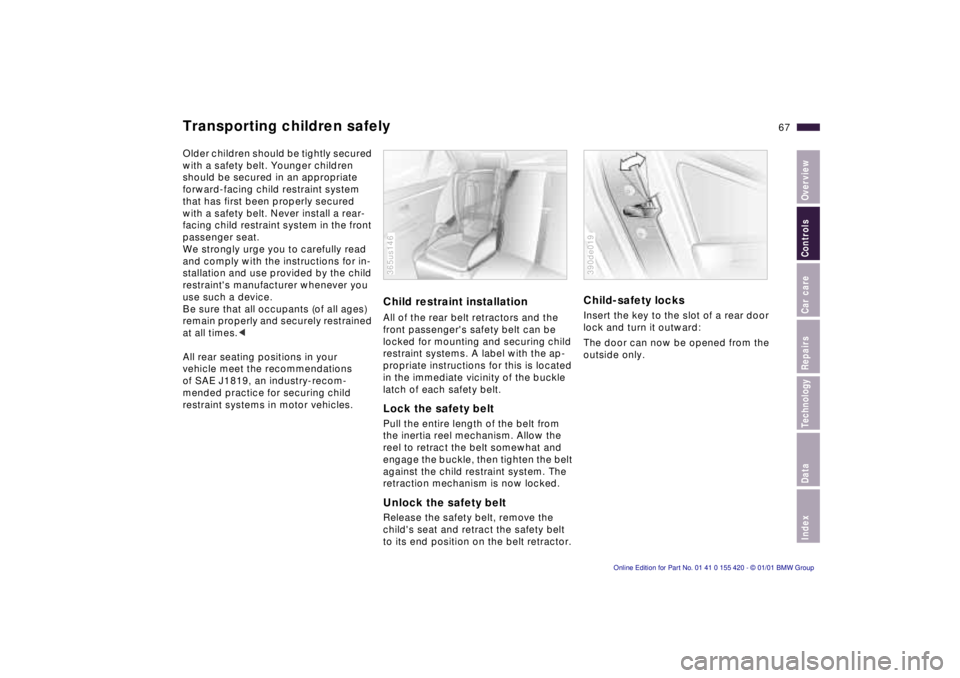
Child restraint installationAll of the rear belt retractors and the
front passenger's safety belt can be
locked for mounting and securing child
restraint systems. A label with the ap-
propriate instructions for this is located
in the immediate vicinity of the buckle
latch of each safety belt.Lock the safety beltPull the entire length of the belt from
the inertia reel mechanism. Allow the
reel to retract the belt somewhat and
engage the buckle, then tighten the belt
against the child restraint system. The
retraction mechanism is now locked.Unlock the safety beltRelease the safety belt, remove the
child's seat and retract the safety belt
to its end position on the belt retractor. 365us146
Child-safety locksInsert the key to the slot of a rear door
lock and turn it outward:
The door can now be opened from the
outside only.390de019
Page 77 of 238
IndexDataTechnologyRepairsCar careControlsOverview
77n
Automatic transmission with Steptronic
*
Upshifts or downshifts will be carried
out by the ATC only at appropriate
engine speeds and road speeds. For
instance, if engine speed is too high, a
downshift will not be executed. The
gear selected will appear briefly in the
instrument cluster followed by the
current gear.
If you are driving in the manual
mode and wish to accelerate
rapidly from low road speeds (when
passing, for instance), you must shift
down manually or with the "Kickdown"
function.<
You can only change from "M/S" to
selector lever positions "P," "R," and
"N" via the "D" position.
In the following situations, the Step-
tronic "thinks" for you in the manual
mode:
>In order to prevent engine over-
speeding, the transmission shifts
automatically to the next higher gear.
shortly before the RPM cutoff point
>At low speeds, the transmission
shifts down automatically – you do
not have to act.
>In the "Kickdown" mode, the trans-
mission shifts down to the lowest
gear which is possible, depending on
the engine speed.
>According to the situation, for
instance in wintry conditions, the
vehicle can be started in 2nd or
3rd gear.Electronic transmission control
module
If the indicator lamp comes on
or the message "TRANS.FAIL-
SAFE PROG" appears in the
Check Control
*, there is a fault in the
transmission system.
Bring the vehicle to a stop. Move the
transmission selector lever to "P." Set
the parking brake and turn the engine
off (ignition key to position 0).
Wait a few seconds, then start the
engine.
If the indicator lamp goes out after a
few seconds, normal transmission
performance has been restored. You
may continue to drive as usual. If the
indicator lamp does not go out, you can
place the selector lever in all positions.
However, the vehicle will now only drive
forward with limited gear selection.
If this happens, avoid extreme engine
loads and consult the nearest BMW
center.
Do not work in the engine com-
partment when a drive gear (for-
ward or reverse) is engaged. If you do
this, the vehicle could move.<
For jump-starting, towing and tow-
starting, refer to pages 200 and 201.
Page 86 of 238
86n
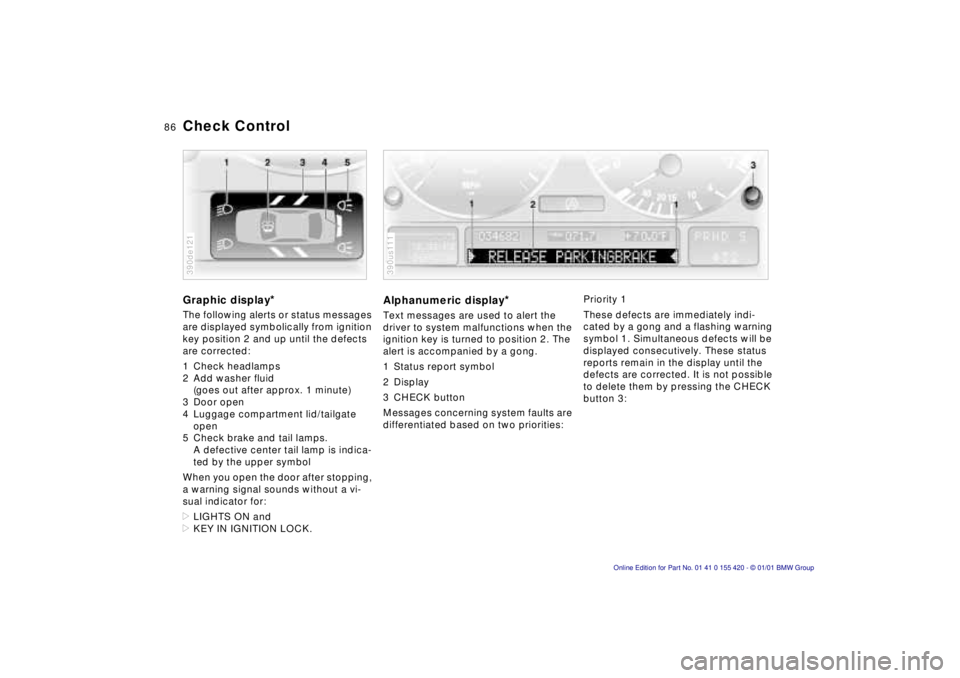
Check ControlGraphic display
*
The following alerts or status messages
are displayed symbolically from ignition
key position 2 and up until the defects
are corrected:
1 Check headlamps
2 Add washer fluid
(goes out after approx. 1 minute)
3 Door open
4 Luggage compartment lid/tailgate
open
5 Check brake and tail lamps.
A defective center tail lamp is indica-
ted by the upper symbol
When you open the door after stopping,
a warning signal sounds without a vi-
sual indicator for:
>LIGHTS ON and
>KEY IN IGNITION LOCK.390de121
Alphanumeric display
*
Text messages are used to alert the
driver to system malfunctions when the
ignition key is turned to position 2. The
alert is accompanied by a gong.
1 Status report symbol
2 Display
3 CHECK button
Messages concerning system faults are
differentiated based on two priorities:390us111
Priority 1
These defects are immediately indi-
cated by a gong and a flashing warning
symbol 1. Simultaneous defects will be
displayed consecutively. These status
reports remain in the display until the
defects are corrected. It is not possible
to delete them by pressing the CHECK
button 3: