Page 49 of 203

49n
IndexDataTechnologyRepairsCar careControlsOverview
Power seat
*
Seat and mirror memory
*
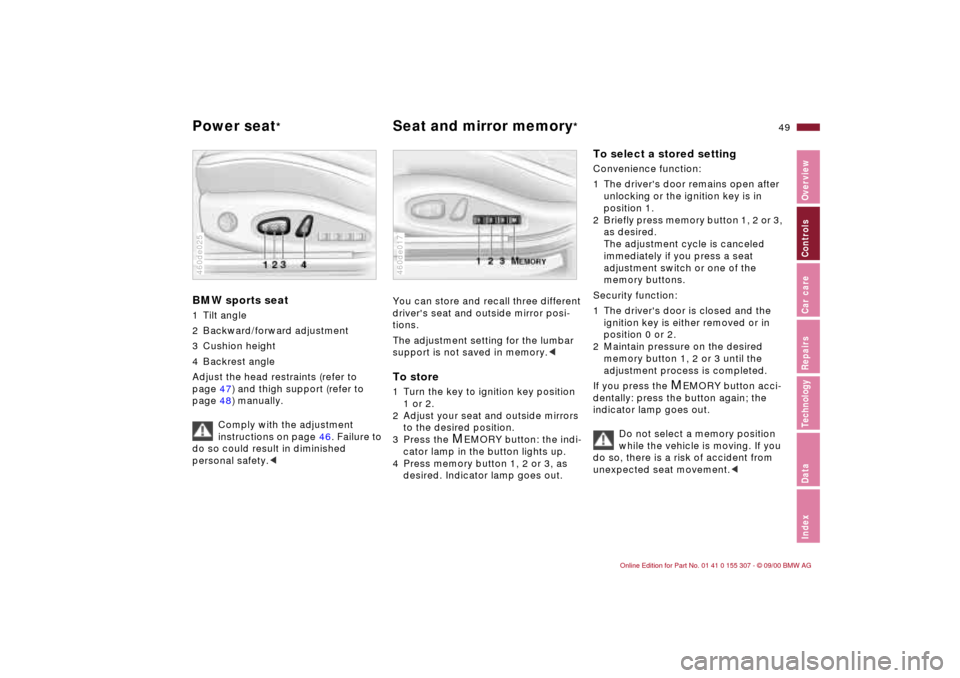
BMW sports seat1 Tilt angle
2 Backward/forward adjustment
3 Cushion height
4 Backrest angle
Adjust the head restraints (refer to
page 47) and thigh support (refer to
page 48) manually.
Comply with the adjustment
instructions on page 46. Failure to
do so could result in diminished
personal safety.<460de025
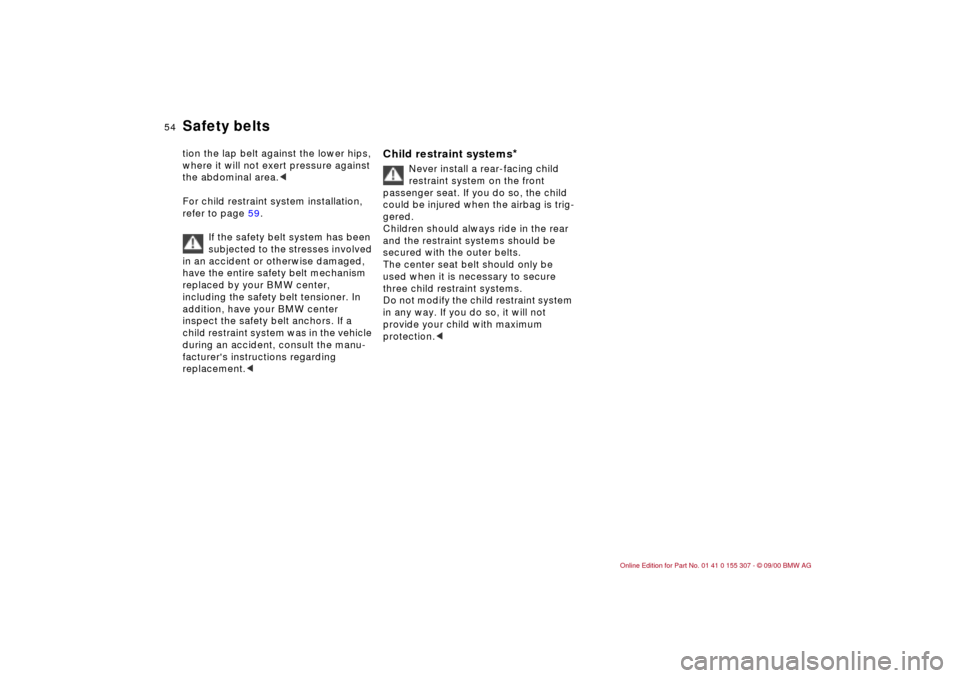
You can store and recall three different
driver's seat and outside mirror posi-
tions.
The adjustment setting for the lumbar
support is not saved in memory.
1 or 2.
2 Adjust your seat and outside mirrors
to the desired position.
3 Press the
M
EMORY button: the indi-
cator lamp in the button lights up.
4 Press memory button 1, 2 or 3, as
desired. Indicator lamp goes out.
460de017
To select a stored settingConvenience function:
1 The driver's door remains open after
unlocking or the ignition key is in
position 1.
2 Briefly press memory button 1, 2 or 3,
as desired.
The adjustment cycle is canceled
immediately if you press a seat
adjustment switch or one of the
memory buttons.
Security function:
1 The driver's door is closed and the
ignition key is either removed or in
position 0 or 2.
2 Maintain pressure on the desired
memory button 1, 2 or 3 until the
adjustment process is completed.
If you press the
M
EMORY button acci-
dentally: press the button again; the
indicator lamp goes out.
Do not select a memory position
while the vehicle is moving. If you
do so, there is a risk of accident from
unexpected seat movement.<
Page 54 of 203

54n
Safety beltstion the lap belt against the lower hips,
where it will not exert pressure against
the abdominal area.<
For child restraint system installation,
refer to page 59.
If the safety belt system has been
subjected to the stresses involved
in an accident or otherwise damaged,
have the entire safety belt mechanism
replaced by your BMW center,
including the safety belt tensioner. In
addition, have your BMW center
inspect the safety belt anchors. If a
child restraint system was in the vehicle
during an accident, consult the manu-
facturer's instructions regarding
replacement.<
Child restraint systems
*
Never install a rear-facing child
restraint system on the front
passenger seat. If you do so, the child
could be injured when the airbag is trig-
gered.
Children should always ride in the rear
and the restraint systems should be
secured with the outer belts.
The center seat belt should only be
used when it is necessary to secure
three child restraint systems.
Do not modify the child restraint system
in any way. If you do so, it will not
provide your child with maximum
protection.<
Page 59 of 203

59n
IndexDataTechnologyRepairsCar careControlsOverview
Transporting children safelyCommercially available child seats
complying with the legal standard are
designed to be secured with a lap belt
or with the lap belt portion of a combi-
nation lap/shoulder belt.
Improperly or inadequately installed
restraint systems can increase the risk
of injury to children. Always read and
follow the instructions that come with
the system.
If you use a child restraint system with a
tether strap, three additional tether
anchorage points (refer to the arrows in
the illustration) have been provided.
Depending on the location selected for
seating in the rear passenger area,
attach the tether strap to the corre-
sponding anchorage point to secure the
child restraint system. Remove the
cover first on the middle location.392au001
If the respective seating position is
fitted with a headrest, lift the headrest
and pass the tether strap between the
headrest and the seat back.
Adjust the tether strap according to the
child restraint manufacturer's instruc-
tions.
Before installing any child restraint
device or child seat, please read
the following:
Never install a rear-facing child restraint
system in the front passenger seat of
this vehicle.
Your vehicle is equipped with an airbag
supplemental restraint system for the
front passenger. Because the backrest
on any rear-facing child restraint system
(of the kind designed for infants under
1 year and 20 lbs./9 kg) would be within
the airbag's deployment range, you
should never mount such a device in
the front passenger seat, since the
impact of the airbag against the child
restraint's backrest could lead to
serious or fatal injuries.
If it is necessary for a child (not an
infant) to ride in the front seat, certain
precautions should be taken. First,
move the passenger seat as far away
from the dashboard as possible. This
important precaution is intended to
maximize the distance between the
airbag and the child. Older children
should be tightly secured with the
safety belt. Younger children should be
secured in an appropriate forward-
facing child restraint system that has
first been properly secured with a safety
belt.
Never install a rear-facing child restraint
system in the front passenger seat.
We strongly urge you to carefully read
and comply with the instructions for
installation and use provided by the
child restraint's manufacturer when-
ever you use such a device.
Be sure that all occupants (of all ages)
remain properly and securely restrained
at all times.c
All rear seating positions in your vehicle
meet the recommendations of SAE
J1819, an industry recommended prac-
tice for securing child restraint systems
in motor vehicles.
Page 60 of 203
60n
Transporting children safelyChild seat securityAll of the rear belt retractors and the
front passenger's safety belt can be
locked for mounting and securing child
restraint systems.
Information pertaining to this is located
in the immediate vicinity of the buckle
latch of each safety belt.462us014
Lock the safety beltExtract the entire length of the belt from
the inertia reel mechanism. Allow the
reel to retract the belt somewhat and
engage the buckle, then tighten the belt
against the child restraint system. The
retraction mechanism is now locked.
The belt cannot be extracted farther.
Always comply with the installation
instructions provided by the manufac-
turer of the child restraint system.
Unlock the safety beltRelease the safety belt, remove the
child's seat and retract the safety belt
to its end position on the belt retractor.
Page 66 of 203

66n
Automatic transmission with Steptronic
*
D Drive (automatic shift program)This position is designed for driving
under all normal operating conditions.
All forward gears are available and the
ATC is fully operational."Kickdown"You will get maximum vehicle perfor-
mance in the "kickdown" mode.
To activate this mode, depress the
accelerator pedal beyond the full-
throttle position, at which a resistance
point must be overcome.
M/S Manual mode and Sport
ProgramShifting from D into M/S activates the
Sport Program. This is indicated by
"SD" in the gear selection display. This
position is recommended for a perfor-
mance-oriented driving style.
With the first brief touch, the automatic
transmission shifts from the Sport
Program to the manual mode.
Whenever you tap the selector lever
forward in the "+" direction, the trans-
mission shifts up. Whenever the lever is
moved back in the "Ð" direction, the
transmission shifts down. M1 to M5
appear in the gear indicator.463de062
Upshifts or downshifts will only be
carried out by the ATC at appropriate
engine speeds and road speeds. If the
engine speed is too high, for instance,
a downshift will not be executed. The
gear selected will appear briefly in the
instrument cluster followed by the
current gear.
To accelerate quickly in the
manual mode (to pass another
vehicle), shift down manually or employ
the "kickdown" mode.<
Shifting from M/S to the selector lever
positions P, R and N is possible only by
going through D.
Page 106 of 203

106n
Ski bag
*
The ski bag allows the safe and clean
transport of up to four pairs of standard
skis or up to two snowboards.
The length of the ski bag and the addi-
tional space provided in the luggage
compartment make it possible to carry
skis up to 6.8 feet long (2.1 0 meters).
Because of the tapered shape of the
bag, the ski bag can only accommodate
two pairs of skis that are 6.8 feet
(2.1 0 meters) long.
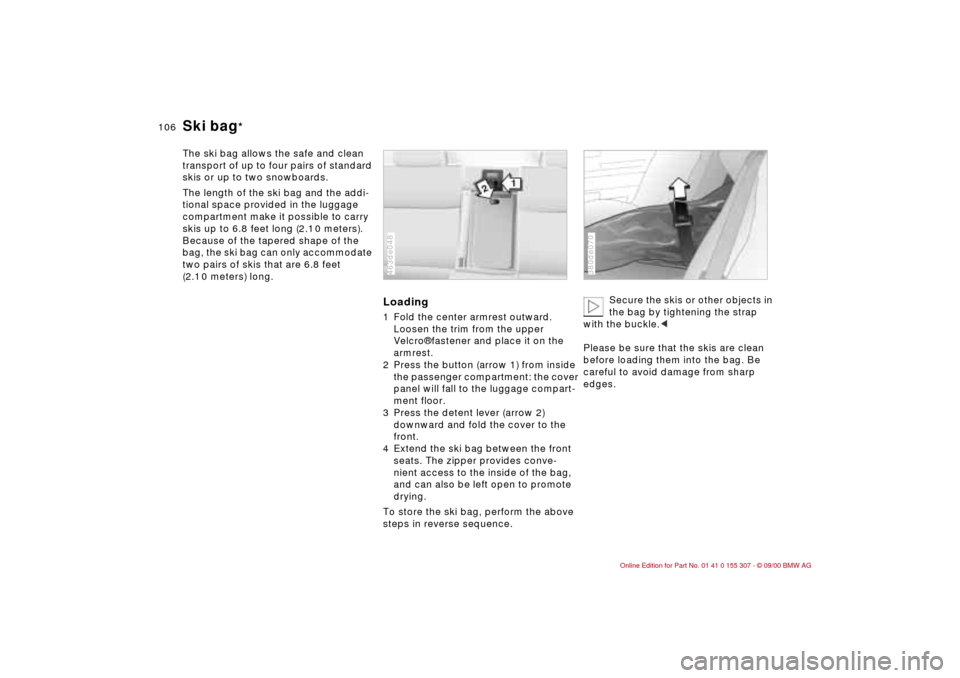
Loading1 Fold the center armrest outward.
Loosen the trim from the upper
Velcro¨ fastener and place it on the
armrest.
2 Press the button (arrow 1) from inside
the passenger compartment: the cover
panel will fall to the luggage compart-
ment floor.
3 Press the detent lever (arrow 2)
downward and fold the cover to the
front.
4 Extend the ski bag between the front
seats. The zipper provides conve-
nient access to the inside of the bag,
and can also be left open to promote
drying.
To store the ski bag, perform the above
steps in reverse sequence.463de048
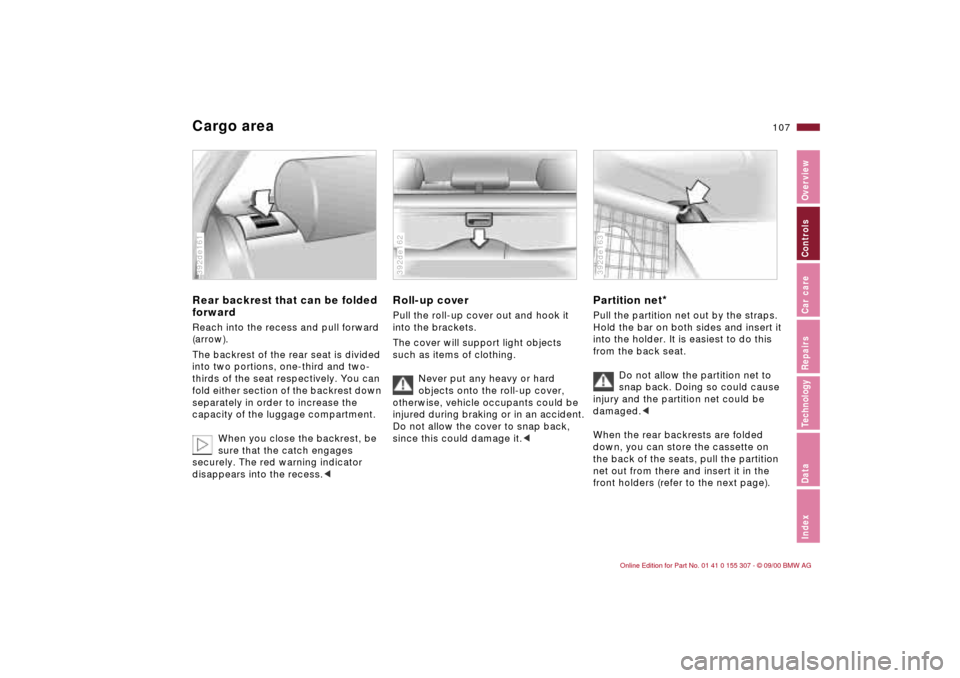
Secure the skis or other objects in
the bag by tightening the strap
with the buckle.<
Please be sure that the skis are clean
before loading them into the bag. Be
careful to avoid damage from sharp
edges.
380de070
Page 107 of 203

107n
IndexDataTechnologyRepairsCar careControlsOverview
Cargo areaRear backrest that can be folded
forwardReach into the recess and pull forward
(arrow).
The backrest of the rear seat is divided
into two portions, one-third and two-
thirds of the seat respectively. You can
fold either section of the backrest down
separately in order to increase the
capacity of the luggage compartment.
When you close the backrest, be
sure that the catch engages
securely. The red warning indicator
disappears into the recess.<392de161
Roll-up coverPull the roll-up cover out and hook it
into the brackets.
The cover will support light objects
such as items of clothing.
Never put any heavy or hard
objects onto the roll-up cover,
otherwise, vehicle occupants could be
injured during braking or in an accident.
Do not allow the cover to snap back,
since this could damage it.<392de162
Partition net
*
Pull the partition net out by the straps.
Hold the bar on both sides and insert it
into the holder. It is easiest to do this
from the back seat.
Do not allow the partition net to
snap back. Doing so could cause
injury and the partition net could be
damaged.<
When the rear backrests are folded
down, you can store the cassette on
the back of the seats, pull the partition
net out from there and insert it in the
front holders (refer to the next page).392de163
Page 109 of 203
109n
IndexDataTechnologyRepairsCar careControlsOverview
Cargo areaFloor panelTo raise and secure the floor panel, lift
it by the ring and hook it into the rubber
seal of the run-off gutter with the
hanger (arrow).463de008
Side coversOpen the side covers by pressing the
button.463de038