Page 12 of 203
Contents
Owner service procedures
Advanced technology
Technical data
Replacement procedures:
Onboard tool kit152
Windshield wiper blades152
Lamps and bulbs153
Changing a wheel159
Battery162
Fuses164
Microfilter/Activated-charcoal
filter165
In case of electrical
malfunction:
Fuel filler door166
Sliding/Tilt sunroof166
Tailgate166
Assistance, giving and
receiving:
Jump-starting167
Towing the vehicle168Airbags172
Adaptive Transmission Control
(ATC)173
Automatic Stability Control plus
Traction (ASC+T)/Dynamic
Stability Control (DSC)173
Radio reception174
Four-wheel drive175
Safety belt tensioner175
Interior rearview mirror with
automatic dimmer176
Rain sensor177
Tire Pressure Control (RDC)178
Self-diagnostics179
Xenon lamps180Engine data184
Dimensions185
Weights186
Capacities187
Electrical system188
Drive belts188
Page 151 of 203
Overview
Controls and features
Operation, care
and maintenance
Owner service procedures
Technical data
Index Advanced technology
151n
IndexDataTechnologyRepairsCar careControlsOverview
Replacement procedures:
Onboard tool kit152
Windshield wiper blades152
Lamps and bulbs153
Changing a wheel159
Battery162
Fuses164
Microfilter/Activated-charcoal
filter165
In case of electrical
malfunction:
Fuel filler door166
Sliding/Tilt sunroof166
Tailgate166
Assistance, giving and
receiving:
Jump-starting167
Towing the vehicle168
Repairs
Page 153 of 203

153n
IndexDataTechnologyRepairsCar careControlsOverview
Lamps and bulbs The lamps and bulbs are essential
factors contributing to the safety of your
vehicle. Therefore, comply fully with the
following instructions during bulb
replacement. If you are not familiar with
any of the procedures, consult your
BMW center.
Do not touch the glass portion of
a new bulb with your bare hands
since even small amounts of impurities
burn into the surface and reduce the
service life of the bulb. Use a clean
cloth, paper napkin, or a similar mate-
rial, or hold the bulb by its metallic
base.<
A replacement bulb set is available from
your BMW center.
Whenever working on the
electrical system, switch off the
electrical accessory you are working on
or disconnect the cable from the nega-
tive terminal of the battery. Failure to do
this could result in short circuits.
To prevent injuries and damage,
comply with any instructions provided
by the bulb manufacturer.<
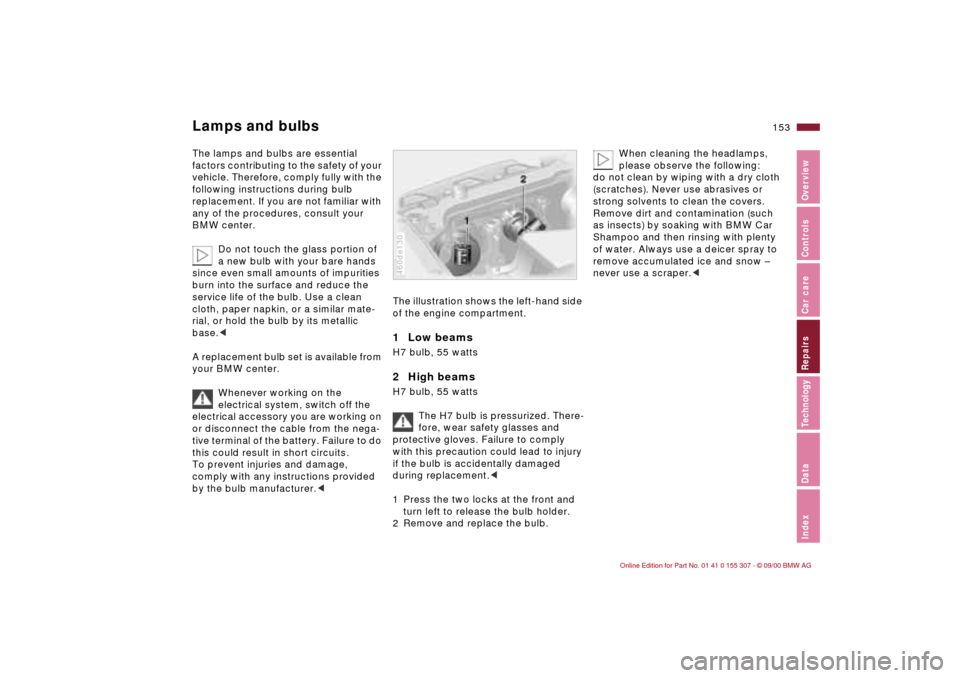
The illustration shows the left-hand side
of the engine compartment.1 Low beams H7 bulb, 55 watts2 High beamsH7 bulb, 55 watts
The H7 bulb is pressurized. There-
fore, wear safety glasses and
protective gloves. Failure to comply
with this precaution could lead to injury
if the bulb is accidentally damaged
during replacement.<
1 Press the two locks at the front and
turn left to release the bulb holder.
2 Remove and replace the bulb.460de130
When cleaning the headlamps,
please observe the following:
do not clean by wiping with a dry cloth
(scratches). Never use abrasives or
strong solvents to clean the covers.
Remove dirt and contamination (such
as insects) by soaking with BMW Car
Shampoo and then rinsing with plenty
of water. Always use a deicer spray to
remove accumulated ice and snow Ð
never use a scraper.<
Page 154 of 203

154n
Lamps and bulbsXenon lamps
*
The service life of these bulbs is very
long and the probability of a failure is
very low, provided that they are not
switched on and off an unusual number
of times. If one of these bulbs should
nevertheless fail, it is possible to con-
tinue driving with great caution using
the fog lamps, provided traffic laws in
your area do not prohibit this.
Because of the extremely high
voltages involved, any work on
the xenon lighting system and bulb
replacement should be performed only
by technicians with the appropriate
qualifications. Failure to comply with
this creates a risk of fatal injury.<
The illustration shows the left-hand side
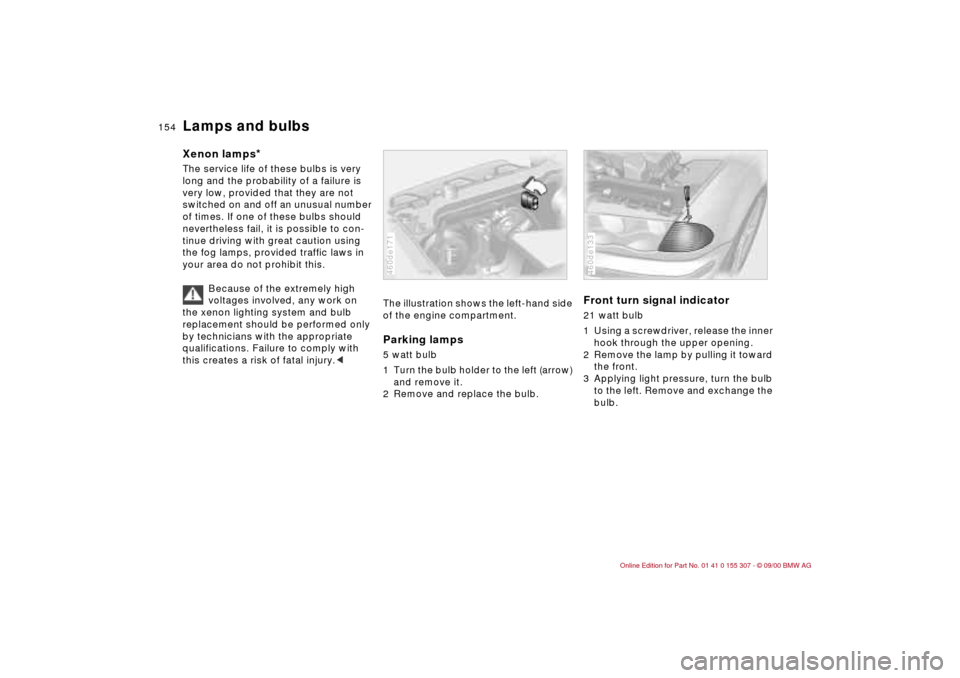
of the engine compartment.Parking lamps5 watt bulb
1 Turn the bulb holder to the left (arrow)
and remove it.
2 Remove and replace the bulb.460de171
Front turn signal indicator 21 watt bulb
1 Using a screwdriver, release the inner
hook through the upper opening.
2 Remove the lamp by pulling it toward
the front.
3 Applying light pressure, turn the bulb
to the left. Remove and exchange the
bulb.460de133
Page 155 of 203
155n
IndexDataTechnologyRepairsCar careControlsOverview
Lamps and bulbs4 Insert the 2 pins on the lamp into the
guides on the vehicle.
5 Push the lamp in. Carefully apply
pressure until you hear it engage.460de134
Side turn signal indicator5 watt bulb
1 Use finger pressure against the rear
end of the lens (arrow) to press it
forward for removal.
2 Apply gentle pressure to the bulb
while turning it to the left to remove.460de135
Front fog lamps
*
HB4 bulb, 55 watts
The bulb is pressurized. There-
fore, wear safety glasses and
protective gloves. Failure to comply
with this precaution could lead to injury
if the bulb is accidentally damaged
during replacement.<
1 Using a screwdriver, carefully remove
the lamp.
2 Applying light pressure, turn the bulb
to the left. Remove and exchange the
bulb.460de132
Page 156 of 203
156n
Lamps and bulbsTail lamps Tail lamp 4: bulbs 21/4 watts
Remaining bulbs: 21 watts
1 Turn signal indicators yellow
2 Backup lamps white
3 Tail lamps red
4 Tail lamps/brake lamps red463us004
The illustration shows the right-hand
luggage compartment section.
Bulbs in the fender:
All of the bulbs are integrated in a cen-
tral bulb holder.
1 Release and remove the flap from the
respective luggage compartment
side facing.
2 Release the bulb holder (arrow) and
remove.
3 Pull the power supply receptacle off
and set the bulb holder aside (e.g. on
the luggage compartment floor).
4 Applying light pressure, turn the bulb
to the left. Remove and exchange the
bulb.
5 Plug in the power supply receptacle.
6 Press the bulb holder into position
until you hear it engage.463de055
Lamps in the tailgate:
1 Place a screwdriver in the slot and
press downward (arrow) to release.463de53
Page 157 of 203
157n
IndexDataTechnologyRepairsCar careControlsOverview
Lamps and bulbs2 Rotate the trim downward. Release
the bulb holder and remove it.
3 Applying light pressure, turn the bulb
to the left. Remove and exchange the
bulb.
4 Press the bulb holder into position
until you hear it engage.
5 Press the trim into position until you
hear it engage.Center (high-mount) brake lamp
LED strip on the rear window.
Please contact a BMW center in the
event of a malfunction.463de054
License plate lamps 5 watt bulb
1 Place a screwdriver in the slot and
press toward the left (arrow) to
release the lens.
2 Replace the bulb.460de047
Tailgate lamp 5 watt bulb
1 Remove lamp socket (arrow).
2 Replace the bulb.463de052
Page 158 of 203
158n
Lamps and bulbsInterior lamps The illustration provides an example of
the interior lamps when equipped with
reading lamps.
Interior lamps (2 x 5 watt bulbs)
1 Using a screwdriver, press the lamp
out toward the front.
2 Remove the lens and pull the bulb
out of the contact studs.
Interior lamps (6 watt bulb) with reading
lamps
* (2 x 6 watt bulbs)
1 Using a screwdriver, press the lamp
out toward the front.
2 Turn the bulb holder to the left and
remove it.
3 Remove and replace the bulb.
460de182
Lighted vanity mirrors
*
10 watt bulb
1 Remove the bulb housing Ð use a
screwdriver if necessary.
2 Replace the bulb.460de181
Footwell lamps
*
5 watt bulb
1 Press the lamp out using a screw-
driver.
2 Replace the bulb.Glove compartment lamp 5 watt bulb
1 Press the lamp out using a screw-
driver.
2 Replace the bulb.Luggage compartment lamps One lamp each in rear tailgate section:
10 watt bulbs
1 Apply a screwdriver to the recess and
remove the lens.
2 Replace the bulb.