2001 BMW 330i TOURING ECU
[x] Cancel search: ECUPage 3 of 203

Congratulations, and thank you for choosing a BMW.
Thorough familiarity with your vehicle will provide you with enhanced control and
security when you drive it. We therefore have this request:
Please take the time to read this Owner's Manual and familiarize yourself with the
information that we have compiled for you before starting off in your new vehicle.
It contains important data and instructions intended to assist you in gaining
maximum use and satisfaction from the unique range of technical features on your
BMW. The manual also contains information on care and maintenance designed to
enhance operating safety and contribute to maintaining the value of your BMW
throughout an extended service life.
This Owner's Manual should be considered a permanent part of this vehicle. It
should stay with the vehicle when sold to provide the next owner with important
operating, safety and maintenance information.
This manual is supplemented by a Service and Warranty Information Booklet
(US models) or a Warranty and Service Guide Booklet (Canadian models).
We recommend that you read this publication thoroughly.
Your BMW is covered by the following warranties:
Ð New Vehicle Limited Warranty
Ð Limited Warranty Rust Perforation
Ð Federal Emissions System Defect Warranty
Ð Federal Emissions Performance Warranty
Ð California Emission Control System Limited Warranty
Detailed information about these warranties is listed in the Service and Warranty
Information Booklet (US models) or in the Warranty and Service Guide (Canadian
models).
We wish you an enjoyable driving experience.
BMW AG
Preface
Page 32 of 203
32n
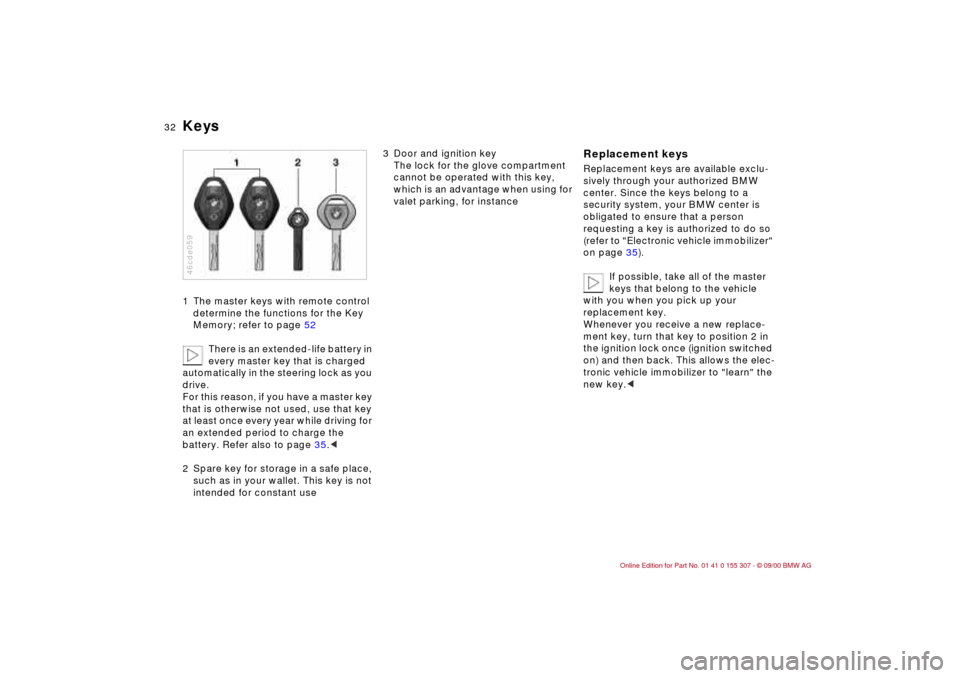
Keys1 The master keys with remote control
determine the functions for the Key
Memory; refer to page 52
There is an extended-life battery in
every master key that is charged
automatically in the steering lock as you
drive.
For this reason, if you have a master key
that is otherwise not used, use that key
at least once every year while driving for
an extended period to charge the
battery. Refer also to page 35.<
2 Spare key for storage in a safe place,
such as in your wallet. This key is not
intended for constant use 46cde059
3 Door and ignition key
The lock for the glove compartment
cannot be operated with this key,
which is an advantage when using for
valet parking, for instance
Replacement keysReplacement keys are available exclu-
sively through your authorized BMW
center. Since the keys belong to a
security system, your BMW center is
obligated to ensure that a person
requesting a key is authorized to do so
(refer to "Electronic vehicle immobilizer"
on page 35).
If possible, take all of the master
keys that belong to the vehicle
with you when you pick up your
replacement key.
Whenever you receive a new replace-
ment key, turn that key to position 2 in
the ignition lock once (ignition switched
on) and then back. This allows the elec-
tronic vehicle immobilizer to "learn" the
new key.<
Page 33 of 203
33n
IndexDataTechnologyRepairsCar careControlsOverview
Electronic vehicle immobilizer The key to securityYour BMW is equipped with a passive
anti-theft system. This electronic immo-
bilization system reduces the likelihood
of your vehicle being stolen by making
it impossible to start the engine using
any keys other than the ones furnished
with the vehicle. Your BMW center can
cancel the electronic system authoriza-
tion for individual keys (in the event of
loss, for instance). A deactivated key
can no longer be used to start the
engine.46cde060
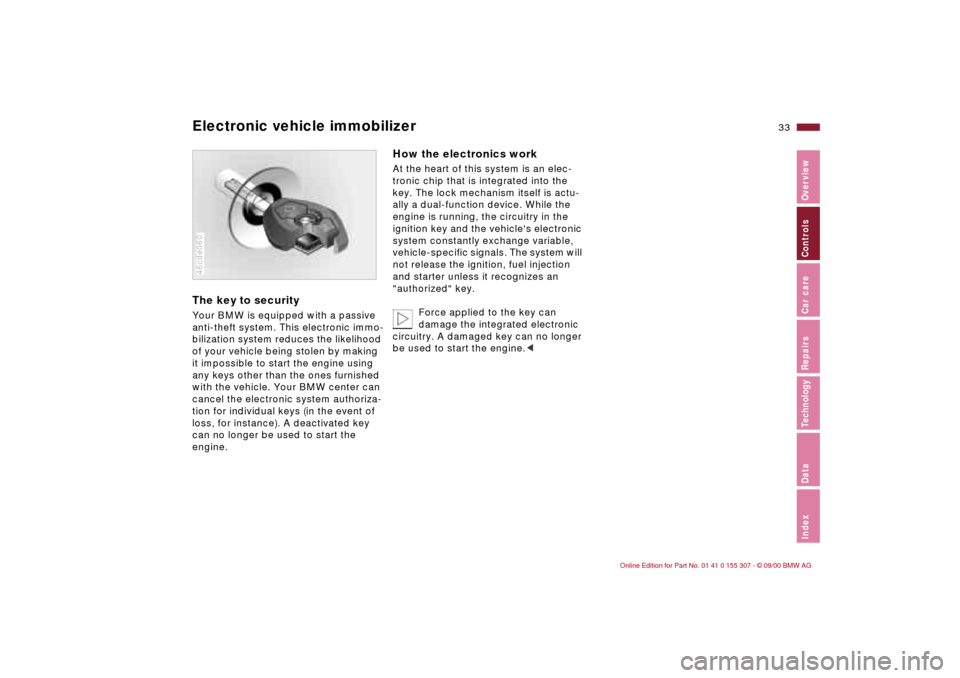
How the electronics workAt the heart of this system is an elec-
tronic chip that is integrated into the
key. The lock mechanism itself is actu-
ally a dual-function device. While the
engine is running, the circuitry in the
ignition key and the vehicle's electronic
system constantly exchange variable,
vehicle-specific signals. The system will
not release the ignition, fuel injection
and starter unless it recognizes an
"authorized" key.
Force applied to the key can
damage the integrated electronic
circuitry. A damaged key can no longer
be used to start the engine.<
Page 35 of 203
35n
IndexDataTechnologyRepairsCar careControlsOverview
Opening and closing Ð from the outside Using the remote controlThe remote control gives you an excep-
tionally convenient method for
unlocking and locking your vehicle.
Furthermore, it provides two additional
functions that only the remote control
can execute:
>Switching on the interior lamps, refer
to page 38.
With this function, you can also
"search for" your car Ð when parked
in an underground garage, for
instance.
>Opening the rear window, refer to
page 39.
The rear window will open slightly,
regardless of whether it was previ-
ously locked or unlocked.
When you unlock the vehicle, the anti-
theft system is deactivated, the alarm
system is disarmed, and the interior
lamps are turned on. When you lock the
vehicle, the systems are activated and
armed, and the lamps go off.
You can have a signal set as an
acknowledgment message that
the vehicle is closed correctly.<
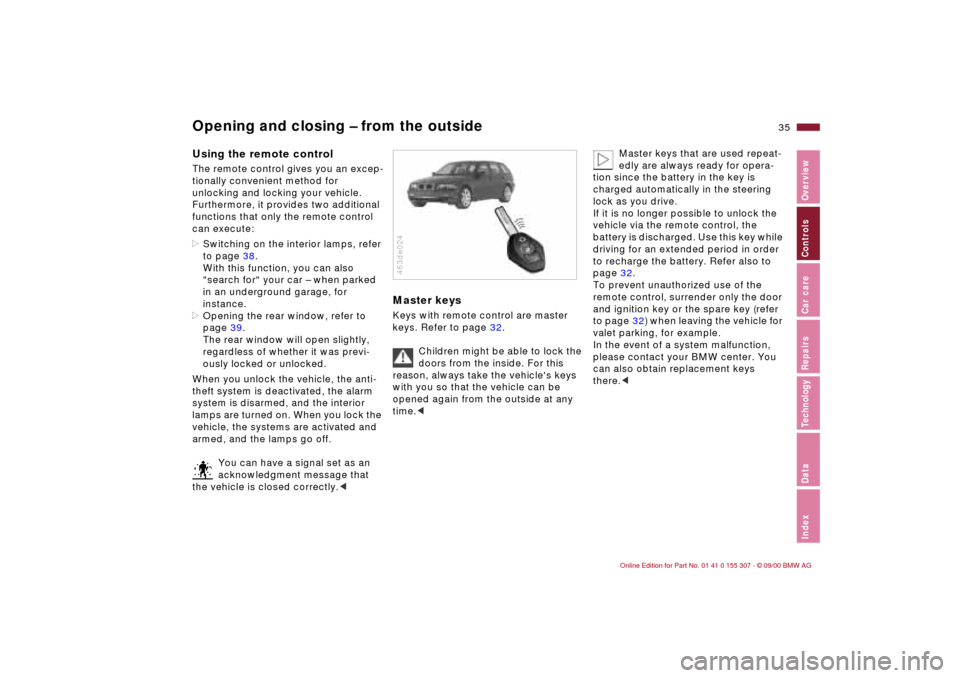
Master keysKeys with remote control are master
keys. Refer to page 32.
Children might be able to lock the
doors from the inside. For this
reason, always take the vehicle's keys
with you so that the vehicle can be
opened again from the outside at any
time.<463de024
Master keys that are used repeat-
edly are always ready for opera-
tion since the battery in the key is
charged automatically in the steering
lock as you drive.
If it is no longer possible to unlock the
vehicle via the remote control, the
battery is discharged. Use this key while
driving for an extended period in order
to recharge the battery. Refer also to
page 32.
To prevent unauthorized use of the
remote control, surrender only the door
and ignition key or the spare key (refer
to page 32) when leaving the vehicle for
valet parking, for example.
In the event of a system malfunction,
please contact your BMW center. You
can also obtain replacement keys
there.<
Page 36 of 203

36n
Opening and closing Ð from the outside To unlock the vehicle Press button 1.
Press the button once to unlock the
driver's door only; press a second time
to unlock all remaining doors as well as
the rear window and fuel filler door. Convenience opening mode Press and hold button 1. The power
windows and sliding/tilt sunroof are
opened.463de025
Locking and securingPress button 2.46cde057
Turning on the interior lampsAfter locking the vehicle, press button 2
again.Switching off the tilt alarm sensor
*
and interior motion sensor
*
Press button 2 again immediately after
locking.
For additional information, refer to
page 42.46cde057
Page 40 of 203
40n
Tailgate Cargo areaOpening the rear windowSmall items can be loaded or unloaded
quickly if the rear window is opened
separately.
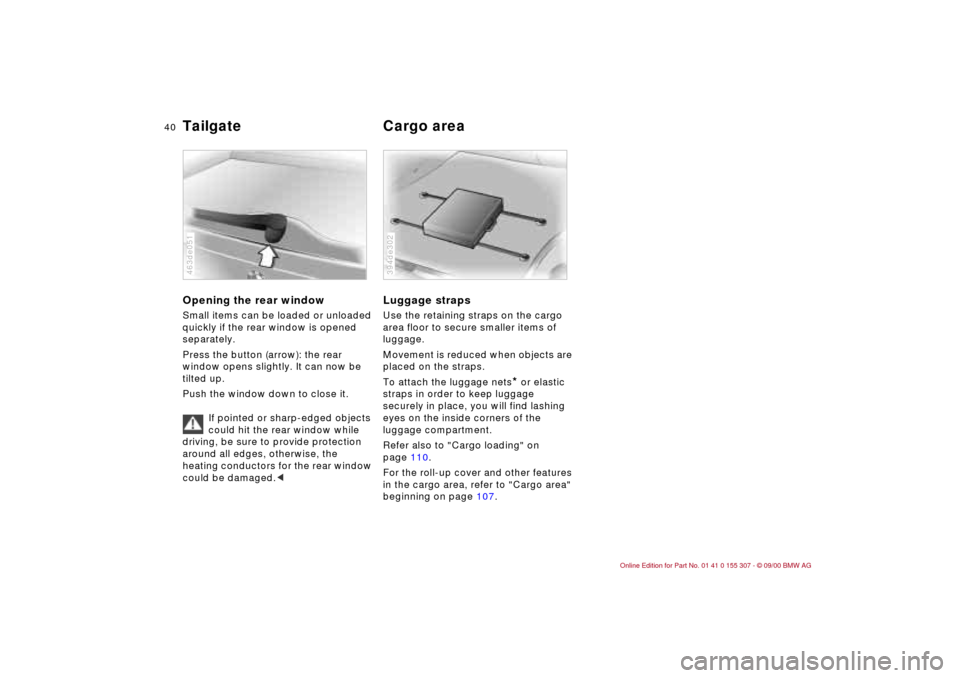
Press the button (arrow): the rear
window opens slightly. It can now be
tilted up.
Push the window down to close it.
If pointed or sharp-edged objects
could hit the rear window while
driving, be sure to provide protection
around all edges, otherwise, the
heating conductors for the rear window
could be damaged.<463de051
Luggage strapsUse the retaining straps on the cargo
area floor to secure smaller items of
luggage.
Movement is reduced when objects are
placed on the straps.
To attach the luggage nets
* or elastic
straps in order to keep luggage
securely in place, you will find lashing
eyes on the inside corners of the
luggage compartment.
Refer also to "Cargo loading" on
page 110.
For the roll-up cover and other features
in the cargo area, refer to "Cargo area"
beginning on page 107.
394de302
Page 41 of 203

41n
IndexDataTechnologyRepairsCar careControlsOverview
Alarm system
*
The conceptThe vehicle alarm system responds:
>When a door, the hood or the tailgate
is opened.
>To movement inside the vehicle
(interior motion sensor).
>To a change of the vehicle's tilt Ð if
someone attempts to steal the wheels
or tow the vehicle without authoriza-
tion, for example.
>To interruption of battery voltage.
The system responds to unauthorized
vehicle entry and attempted theft by
simultaneously activating the following:
>Sounding an acoustical alarm for
30 seconds.
>Activating the hazard warning flashers
for approx. five minutes.
>Flashing the high beams flash on and
off in rhythm with the hazard warning
flashers.
To activate and deactivate the
alarm systemWhen the vehicle is locked or unlocked
by using a key or the remote control,
the alarm system is also armed or
disarmed at the same time.
The interior motion sensor and tilt alarm
sensor are activated 30 seconds after
the last locking operation.
If the alarm system has been armed
correctly, the hazard warning flashers
flash once.
You can have one signal set as
acknowledgment when arming
and disarming.<
You can also open the rear window
when the system is armed by pressing
button 3 of the remote control (refer to
page 37). When it is closed, the rear
window is once again secured.
Indicator lamp displaysThe indicator lamp is located under the
inside rearview mirror.
>The indicator lamp flashes
continuously: the system is armed.
>The indicator lamp flashes when it
is armed: doors, the hood, tailgate
or rear window have not been prop-
erly closed. Even if you do not close
the alerted area, the remaining areas
are deadlocked, and the indicator
lamp flashes continuously after
10 seconds. However, the interior
motion sensor is not activated.
>The indicator lamp goes out when the
system is disarmed: no manipulation
or attempted intrusions have been
detected in the period since the
system was armed.463us010
Page 46 of 203
46n
For maximum safety when adjusting
the seat position, please observe the
following:
Never try to adjust your seat while
driving the vehicle. The seat could
respond with an unexpected move-
ment, and the ensuing loss of vehicle
control could lead to an accident.
Be sure that the safety belt remains
firmly against your body at all times. In
the event of a frontal impact, a loose lap
belt could slide over the hips, leading to
abdominal injury. In addition, the safety
belt's restraint effectiveness is reduced
if the belt is worn loosely.
While driving, do not recline the back-
rest too far (this applies to the
passenger side especially), because
otherwise there is the danger of sliding
underneath the safety belt during an
accident, thereby negating the safety
belt's protection.<
Correct sitting postureTo reduce strain on the spinal column,
sit all the way back in the seat and rest
your back fully against the backrest.
The ideal sitting posture is when your
head forms a straight line with your
spine.
For long-distance driving, you may wish
to increase the backrest angle slightly
to reduce muscular tension. You should
be able to grasp the steering wheel at
its highest point with your arms slightly
bent.
After a seat adjustment, adjust the
height of the safety belt also. Refer to
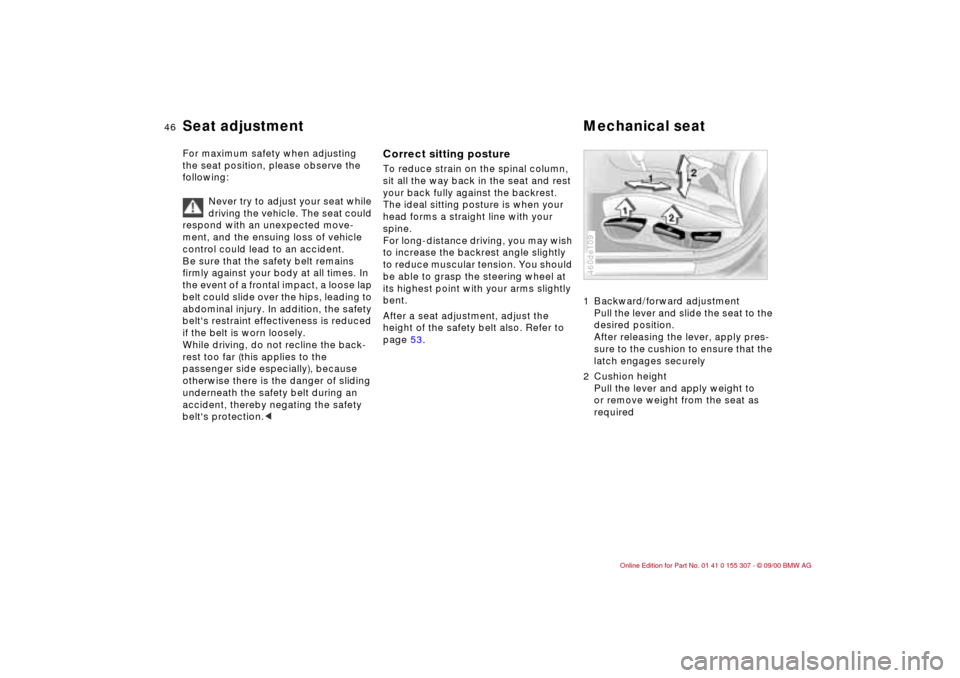
page 53.1 Backward/forward adjustment
Pull the lever and slide the seat to the
desired position.
After releasing the lever, apply pres-
sure to the cushion to ensure that the
latch engages securely
2 Cushion height
Pull the lever and apply weight to
or remove weight from the seat as
required
460de109
Seat adjustment Mechanical seat