Page 55 of 203

55n
IndexDataTechnologyRepairsCar careControlsOverview
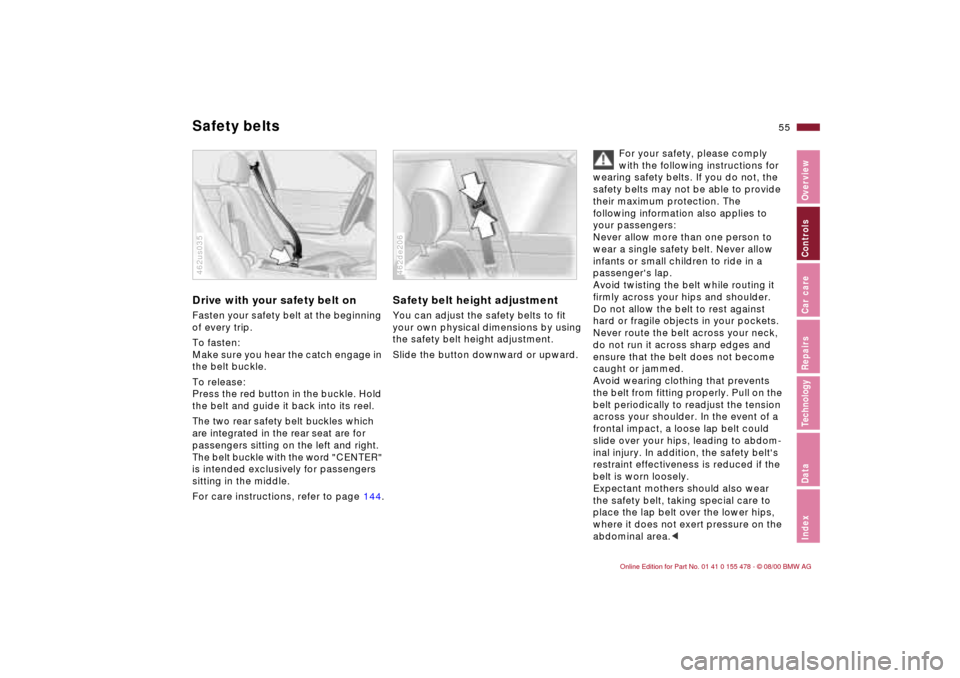
Drive with your safety belt onFasten your safety belt at the beginning
of every trip.
To fasten:
Make sure you hear the catch engage in
the belt buckle.
To release:
Press the red button in the buckle. Hold
the belt and guide it back into its reel.The two rear safety belt buckles which
are integrated in the rear seat are for
passengers sitting on the left and right.
The belt buckle with the word "CENTER"
is intended exclusively for passengers
sitting in the middle.
For care instructions, refer to page 144.
462us035
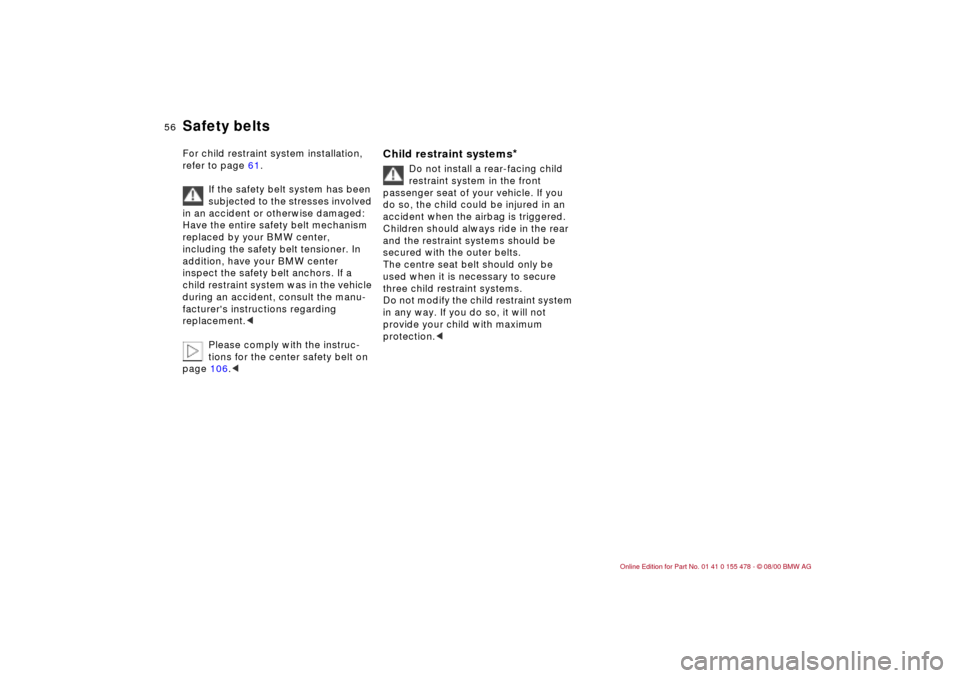
Safety belt height adjustmentYou can adjust the safety belts to fit
your own physical dimensions by using
the safety belt height adjustment.
Slide the button downward or upward.462de206
For your safety, please comply
with the following instructions for
wearing safety belts. If you do not, the
safety belts may not be able to provide
their maximum protection. The
following information also applies to
your passengers:
Never allow more than one person to
wear a single safety belt. Never allow
infants or small children to ride in a
passenger's lap.
Avoid twisting the belt while routing it
firmly across your hips and shoulder.
Do not allow the belt to rest against
hard or fragile objects in your pockets.
Never route the belt across your neck,
do not run it across sharp edges and
ensure that the belt does not become
caught or jammed.
Avoid wearing clothing that prevents
the belt from fitting properly. Pull on the
belt periodically to readjust the tension
across your shoulder. In the event of a
frontal impact, a loose lap belt could
slide over your hips, leading to abdom-
inal injury. In addition, the safety belt's
restraint effectiveness is reduced if the
belt is worn loosely.
Expectant mothers should also wear
the safety belt, taking special care to
place the lap belt over the lower hips,
where it does not exert pressure on the
abdominal area.<
Safety belts
Page 56 of 203

56n
Safety beltsFor child restraint system installation,
refer to page 61.
If the safety belt system has been
subjected to the stresses involved
in an accident or otherwise damaged:
Have the entire safety belt mechanism
replaced by your BMW center,
including the safety belt tensioner. In
addition, have your BMW center
inspect the safety belt anchors. If a
child restraint system was in the vehicle
during an accident, consult the manu-
facturer's instructions regarding
replacement.<
Please comply with the instruc-
tions for the center safety belt on
page 106.<
Child restraint systems
*
Do not install a rear-facing child
restraint system in the front
passenger seat of your vehicle. If you
do so, the child could be injured in an
accident when the airbag is triggered.
Children should always ride in the rear
and the restraint systems should be
secured with the outer belts.
The centre seat belt should only be
used when it is necessary to secure
three child restraint systems.
Do not modify the child restraint system
in any way. If you do so, it will not
provide your child with maximum
protection.<
Page 59 of 203
59n
IndexDataTechnologyRepairsCar careControlsOverview
Airbagscenter. Labels in the door opening
should indicate the status of your rear
seat side airbags. If you are uncertain of
their status, or wish to have the airbags
activated or deactivated, please
contact your BMW center.<
Even when all these guidelines are
observed, there is still a small residual
risk of injuries to the face, hands and
arms occurring in isolated instances.
The ignition and inflation noise may
induce a mild temporary hearing loss in
sensitive individuals.
For additional information concerning
the airbag system, refer to pages 146
and 175.This is the right way for a child to sit in
a child restraint when rear side airbags
(arrow) are provided.
462us012
This is the right way for a larger child to
sit wearing the safety belt when rear
side airbags (arrow) are provided.462us013
Page 60 of 203
60n
Transporting children safelyLATCH attachment of the child
seat Remove the cover cap on the outer
mount by pulling it toward the front.
When reattaching it, make sure that the
recess points upward.
To remove the cover cap easily, flip the
rear backrest forward halfway. (Refer to
page 106).460de300
The illustration shows the mounts for a
LATCH child-restraint system in the
right rear seat.462de278
To mount the LATCH child-
restraint system, please follow the
manufacturer's operating and safety
precautions.<
Page 65 of 203

65n
IndexDataTechnologyRepairsCar careControlsOverview
Parking brake To engageThe parking brake is designed primarily
to prevent the vehicle from rolling when
it is parked. It operates against the rear
wheels.
The lock engages automatically when
you lift the lever, and the indicator lamp
in the instrument panel comes on when
the ignition key is in position 2. Refer to
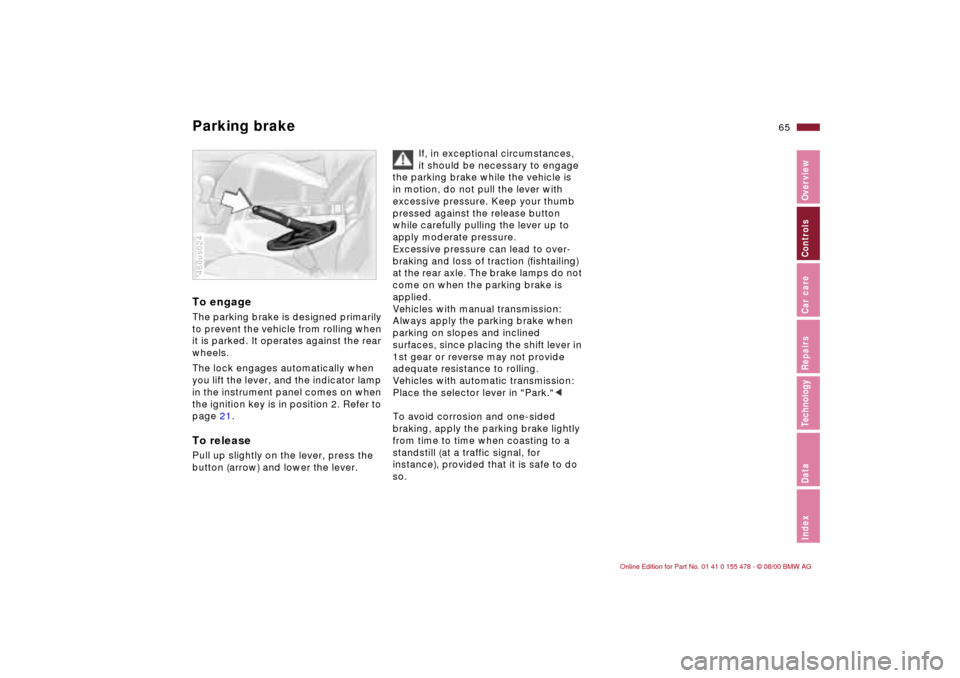
page 21.To releasePull up slightly on the lever, press the
button (arrow) and lower the lever.460us024
If, in exceptional circumstances,
it should be necessary to engage
the parking brake while the vehicle is
in motion, do not pull the lever with
excessive pressure. Keep your thumb
pressed against the release button
while carefully pulling the lever up to
apply moderate pressure.
Excessive pressure can lead to over-
braking and loss of traction (fishtailing)
at the rear axle. The brake lamps do not
come on when the parking brake is
applied.
Vehicles with manual transmission:
Always apply the parking brake when
parking on slopes and inclined
surfaces, since placing the shift lever in
1st gear or reverse may not provide
adequate resistance to rolling.
Vehicles with automatic transmission:
Place the selector lever in "Park."<
To avoid corrosion and one-sided
braking, apply the parking brake lightly
from time to time when coasting to a
standstill (at a traffic signal, for
instance), provided that it is safe to do
so.
Page 67 of 203

67n
IndexDataTechnologyRepairsCar careControlsOverview
Automatic transmission with Steptronic
*
You have the option of driving with a
normal automatic transmission or
switching to manual.
When you move the selector lever from
the "D" position to the left into the M/S
range, the performance-oriented shift
programs of the automatic transmission
are engaged. As soon as you even
begin to move the selector lever toward
the "+" or tap "Ð", Steptronic shifts the
gear and manual operation becomes
active. Whenever you want to use the
automatic mode again, move the
selector lever to the right into posi-
tion "D."
The automatic transmission with Step-
tronic is equipped with Adaptive Trans-
mission Control (ATC). ATC reacts with
precision to your individual driving style
and the current driving conditions. It is
for this reason that various shift
programs are used.
You will find additional information
about ATC in the chapter called
"Advanced Technology" on page 174.
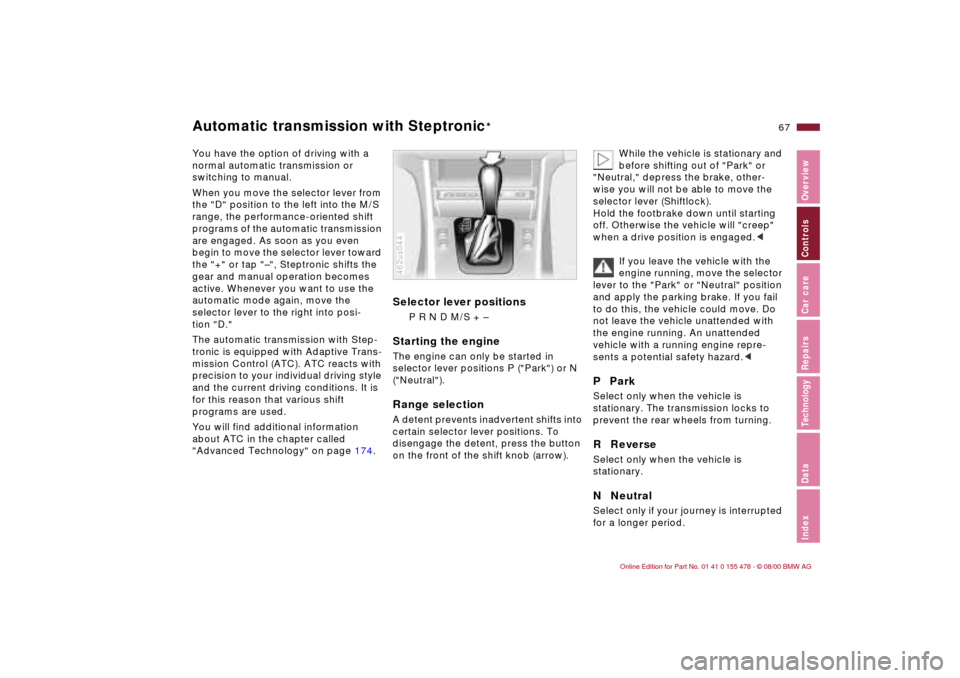
Selector lever positions
P R N D M/S + Ð
Starting the engineThe engine can only be started in
selector lever positions P ("Park") or N
("Neutral").Range selectionA detent prevents inadvertent shifts into
certain selector lever positions. To
disengage the detent, press the button
on the front of the shift knob (arrow).462us044
While the vehicle is stationary and
before shifting out of "Park" or
"Neutral," depress the brake, other-
wise you will not be able to move the
selector lever (Shiftlock).
Hold the footbrake down until starting
off. Otherwise the vehicle will "creep"
when a drive position is engaged.<
If you leave the vehicle with the
engine running, move the selector
lever to the "Park" or "Neutral" position
and apply the parking brake. If you fail
to do this, the vehicle could move. Do
not leave the vehicle unattended with
the engine running. An unattended
vehicle with a running engine repre-
sents a potential safety hazard.<
P ParkSelect only when the vehicle is
stationary. The transmission locks to
prevent the rear wheels from turning.R ReverseSelect only when the vehicle is
stationary.N NeutralSelect only if your journey is interrupted
for a longer period.
Page 69 of 203

69n
IndexDataTechnologyRepairsCar careControlsOverview
Automatic transmission with Steptronic
*
In the following situations, the Step-
tronic "thinks" for you in the manual
mode:
>In order to prevent the engine from
overrevving, the transmission shifts
automatically to the next higher gear
just before the engine speed cutoff
point.
>If you do not do anything to inter-
vene, it will automatically downshift
at lower speeds.
>In the kickdown mode, the transmis-
sion shifts down to the lowest gear
which is possible, depending on the
engine speed.
>Depending on the situation Ñ when
driving in adverse winter conditions,
for example Ñ you may also start out
in 2nd or 3rd gear.
Possible displays
P R N D SD M1 M2 M3 M4 M5
Electronic transmission control
module
If the indicator lamp comes on,
there is a malfunction in the
transmission system.
46cus005
Bring the vehicle to a stop. Move the
transmission selector lever to "P." Set
the parking brake and turn the engine
off (ignition key to position 0).
Wait a few seconds, then start the
engine.
If the indicator lamp goes out after a
few seconds, normal transmission
performance has been restored. You
may continue to drive as usual.
If the indicator lamp does not go out,
you can place the selector lever in all
positions. However, the vehicle will now
only operate in 3rd and 4th gear.
If this happens, avoid extreme engine
loads and consult the nearest BMW
center.
Do not work in the engine
compartment when a drive gear
(forward or reverse) is engaged. If you
do this, the vehicle could move.<
For towing or jump-starting, refer to the
information beginning on page 168.
Page 72 of 203

72n
Washer/Wiper system Rear window defroster Cleaning headlamps
*
When the vehicle's lighting system is
switched on, the headlamps will also be
cleaned every fifth timecleaning wind-
shield is activated.
Do not use the washers if there
is any danger that the fluid will
freeze on the windshield. If you do so,
your vision could be obscured. Use an
antifreeze agent. Refer to page 134.
Do not use the washers if the reservoir
is empty, otherwise, the washer pump
could be damaged.
*
automatically when the ignition key is in
position 2.The illustration shows the button set-up
for vehicles equipped with automatic
climate control. For other layouts, refer
to page 90.To activatePress the button: as long as the indi-
cator lamp remains on, the rear window
defroster continues at high output
(rapid thaw).
After the indicator lamp goes out, the
defroster continues operating at
reduced power for a limited period
before deactivating automatically. 462us036
To deactivatePress the button if the indicator lamp is
on.