2001 BMW 330Ci COUPE ECO mode
[x] Cancel search: ECO modePage 68 of 203

68n
Automatic transmission with Steptronic
*
D Drive (automatic shift program)This position is designed for driving
under all normal operating conditions.
All forward gears are available, the
Adaptive Transmission Control (ATC) is
fully operational."Kickdown"In the "Kickdown" mode, you achieve
maximum performance. To activate this
mode, depress the accelerator pedal
beyond the full-throttle position, at
which a resistance point must be
overcome.
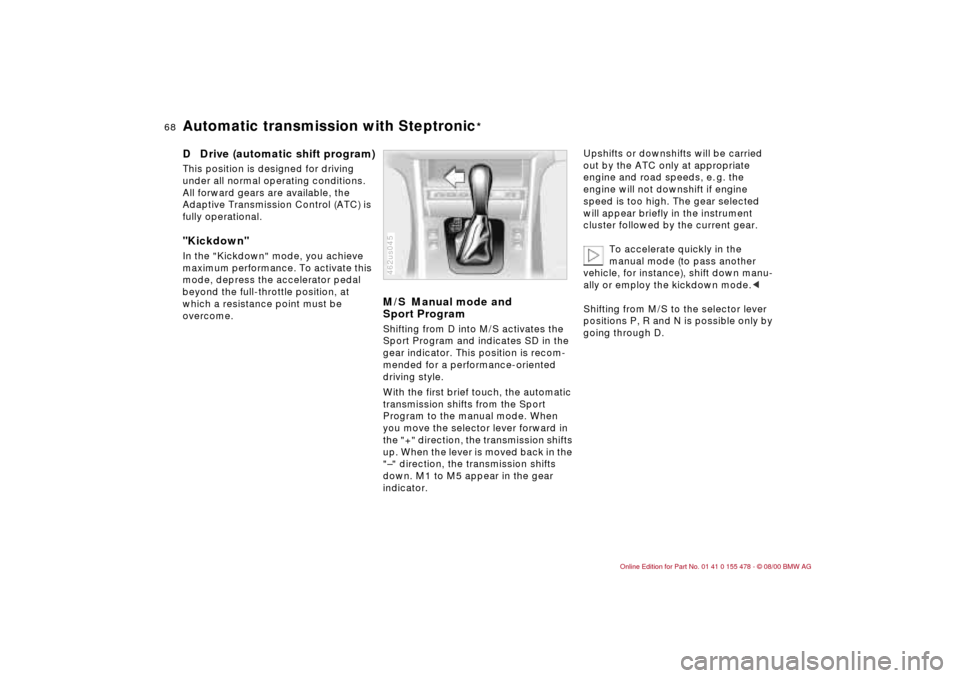
M/S Manual mode and
Sport ProgramShifting from D into M/S activates the
Sport Program and indicates SD in the
gear indicator. This position is recom-
mended for a performance-oriented
driving style.
With the first brief touch, the automatic
transmission shifts from the Sport
Program to the manual mode. When
you move the selector lever forward in
the "+" direction, the transmission shifts
up. When the lever is moved back in the
"Ð" direction, the transmission shifts
down. M1 to M5 appear in the gear
indicator.462us045
Upshifts or downshifts will be carried
out by the ATC only at appropriate
engine and road speeds, e. g. the
engine will not downshift if engine
speed is too high. The gear selected
will appear briefly in the instrument
cluster followed by the current gear.
To accelerate quickly in the
manual mode (to pass another
vehicle, for instance), shift down manu-
ally or employ the kickdown mode.<
Shifting from M/S to the selector lever
positions P, R and N is possible only by
going through D.
Page 69 of 203

69n
IndexDataTechnologyRepairsCar careControlsOverview
Automatic transmission with Steptronic
*
In the following situations, the Step-
tronic "thinks" for you in the manual
mode:
>In order to prevent the engine from
overrevving, the transmission shifts
automatically to the next higher gear
just before the engine speed cutoff
point.
>If you do not do anything to inter-
vene, it will automatically downshift
at lower speeds.
>In the kickdown mode, the transmis-
sion shifts down to the lowest gear
which is possible, depending on the
engine speed.
>Depending on the situation Ñ when
driving in adverse winter conditions,
for example Ñ you may also start out
in 2nd or 3rd gear.
Possible displays
P R N D SD M1 M2 M3 M4 M5
Electronic transmission control
module
If the indicator lamp comes on,
there is a malfunction in the
transmission system.
46cus005
Bring the vehicle to a stop. Move the
transmission selector lever to "P." Set
the parking brake and turn the engine
off (ignition key to position 0).
Wait a few seconds, then start the
engine.
If the indicator lamp goes out after a
few seconds, normal transmission
performance has been restored. You
may continue to drive as usual.
If the indicator lamp does not go out,
you can place the selector lever in all
positions. However, the vehicle will now
only operate in 3rd and 4th gear.
If this happens, avoid extreme engine
loads and consult the nearest BMW
center.
Do not work in the engine
compartment when a drive gear
(forward or reverse) is engaged. If you
do this, the vehicle could move.<
For towing or jump-starting, refer to the
information beginning on page 168.
Page 71 of 203

71n
IndexDataTechnologyRepairsCar careControlsOverview
Washer/Wiper system1 Intermittent mode or rain
sensor
*
Intermittent mode:
You can use rotary dial 6 to select from
four wipe intervals.
In addition, the wipe interval is varied
automatically depending on road
speed.
Rain sensor:
The rain sensor is positioned on the
windshield, directly ahead of the inte-
rior rearview mirror. When the rain
sensor is activated, the windshield
wiper is controlled automatically,
depending on the degree of wetness on
the windshield (in both snow and rain).
You do not have to be concerned with
switching the windshield wiper on or off
or adjusting the wipe interval between 46cde095
intermittent and full wipe. Instead, you
can concentrate fully on the traffic
conditions. This is especially important
under adverse weather conditions.
To activate the rain sensor:
From ignition key position 1 and up, you
can move the lever to position 1. The
wipers travel once across the wind-
shield, regardless of the weather.
You can leave the lever permanently in
position 1. It is then only necessary to
activate the rain sensor from ignition
key position 1 and up. To do this,
>turn rotary dial 6 briefly or
>use cleaning windshield 5.
To adjust the sensitivity of the rain
sensor:
Turn rotary dial 6.
Deactivating the rain sensor:
Put lever in position 0.
Turn the rain sensor off when
passing through an automatic car
wash. Failure to do so could result in
damage caused by undesired wiper
activation.<
2 Normal wiper speedWhen the vehicle is stationary, the
wipers switch automatically to intermit-
tent wipe (not on vehicles with rain
sensor).3 Fast wiper speedWhen the vehicle is stationary, the
wipers operate at normal speed (not
on vehicles with rain sensor).5 Cleaning windshieldThe system sprays washer fluid against
the windshield and activates the wipers
for a brief period.
If you pull the lever only briefly, the
system sprays washer fluid onto the
windshield without activating the
wipers.
Page 76 of 203

76n
Fuel gauge Temperature gauge Service Interval Display When you switch on the ignition, the
indicator lamp comes on briefly to
confirm that the system is operational.
Once the indicator lamp stays on
continuously, there are still approx.
2 gallons (8 liters) of fuel remaining in
the fuel tank.
For fuel tank capacity, refer to page 187.
If the tilt of the vehicle varies (extended
driving in mountainous areas, for
example), there may be slight fluctua-
tions of the needle.
Fill the fuel tank well before it is
empty. Driving to the last drop of
fuel can result in damage to the engine
and/or the catalytic converter.<462us020
BlueThe engine is still cold. Drive at
moderate engine and vehicle speeds.RedWhen you switch on the ignition, the
indicator lamp comes on briefly to
confirm that the system is operational.
If the lamp comes on while operating
the vehicle: the engine is overheated.
Stop and switch the engine off immedi-
ately and allow it to cool down.Between the blue and red zonesNormal operating range. It is not
unusual for the needle to rise as far as
the edge of the red zone in response to
high outside temperatures or severe
operating conditions. Checking coolant
level: refer to page 137.460de082
Remaining distance for serviceThe displays shown in the illustration
appear for a few seconds when the
ignition key is in position 1 or after the
engine is started.
The next service due appears with the
message OILSERVICE or INSPECTION,
together with the distance remaining
before the next scheduled service.
The computer bases its calculations of
the remaining distance on the previous
driving style.
A flashing message and a "Ð" in front of
the number mean that the service
interval has already been exceeded by
the distance shown on the display.
Please contact your BMW center for an
appointment.46cus006
Page 77 of 203

77n
IndexDataTechnologyRepairsCar careControlsOverview
The following information and/or condi-
tions are indicated using symbols,
starting with the ignition key position 2,
until the condition has been corrected.
1 Inspect the low beam and high beam
headlamps, as well as the side lamps
2 Door open
3 Luggage compartment lid open
4 Check brake and tail lamps.
When you open the driver's door after
stopping with the lights still on, a
warning signal sounds for LIGHTS ON.462de272
Mode selectionFrom ignition key position 1 on, you can
call up information from the computer
using the button in the turn signal lever.
Every time you press the button briefly
in the direction of the steering column,
you can call up a new function for
display.
The displays appear in the following
order:
Time, outside temperature, average fuel
consumption, cruising range, average
vehicle speed.
From ignition key position 1 on, the last
active setting is displayed.46cde096
Check Control Computer
Page 78 of 203

78n
ComputerClockIf you wish to have a permanent time
display, you can make this adjustment
in the radio display (refer to the Radio
Owner's Manual).
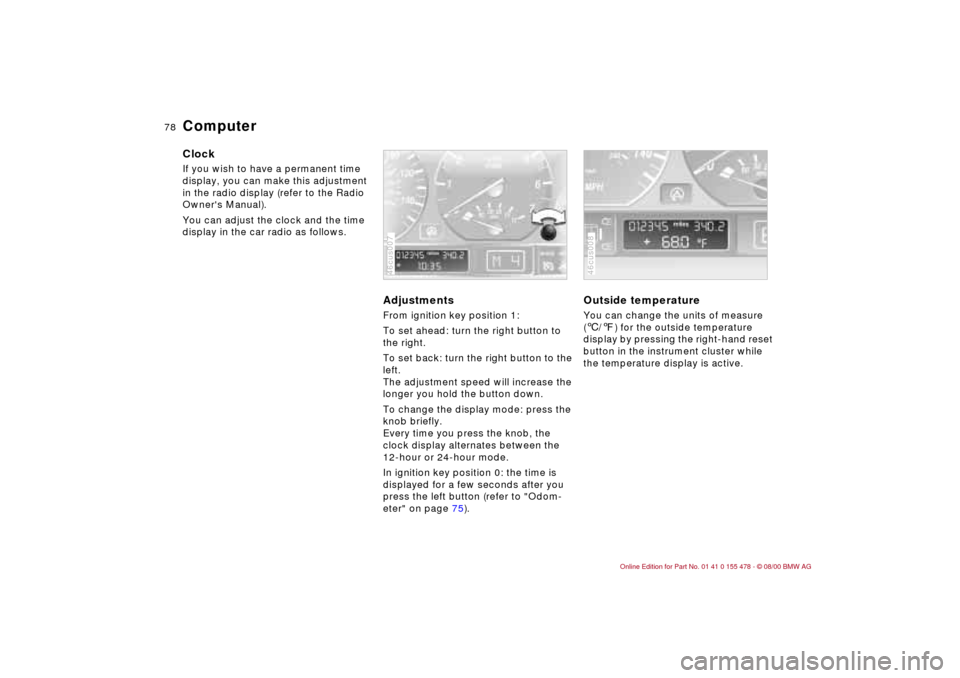
You can adjust the clock and the time
display in the car radio as follows.
Adjustments From ignition key position 1:
To set ahead: turn the right button to
the right.
To set back: turn the right button to the
left.
The adjustment speed will increase the
longer you hold the button down.
To change the display mode: press the
knob briefly.
Every time you press the knob, the
clock display alternates between the
12-hour or 24-hour mode.
In ignition key position 0: the time is
displayed for a few seconds after you
press the left button (refer to "Odom-
eter" on page 75).46cus007
Outside temperature You can change the units of measure
(6/7) for the outside temperature
display by pressing the right-hand reset
button in the instrument cluster while
the temperature display is active.46cus008
Page 83 of 203

83n
IndexDataTechnologyRepairsCar careControlsOverview
ASC+T DSC
*
Reactivating the ASC+TPress the button again; the indicator
lamp goes out.
The laws of physics cannot be
repealed, even with ASC+T. It will
always be the driver's responsibility to
drive in a manner that matches road
conditions. We therefore urge you to
avoid using the additional safety margin
of the system as an excuse for taking
risks.<
For additional details concerning
ASC+T, please refer to the chapter
"Advanced Technology" on page 175.
The ConceptDSC maintains vehicle stability, even in
critical driving situations.
The system optimizes vehicle stability
during acceleration and when starting
from a full stop, as well as optimizing
traction. In addition, it recognizes
unstable vehicle conditions, such as
understeering or oversteering, and, as
far as is possible within the laws of
physics, helps keep the car on a steady
course by reducing the engine spped
and brake applications to the individual
wheels.
The DSC is operational every time you
start the engine. DSC contains the
functions of ADB and CBC, refer to
page 116.
The ADB (automatic differential braking)
copies the function of conventional
differential and transverse lock through
brake intervention, and increases trac-
tion whenever conditions merit, e. g.
when driving on snow-covered roads.
If the DSC is switched off the ADB will
still be in ready mode.
Indicator lamp
The indicator lamp on the instru-
ment panel will go out shortly
after the ignition has been
started. Refer to pages 21 and 22.
If the indicator lamp flashes:
ASC+T or DSC control the drive and
braking forces.
The indicator lamp stays lit:
DSC has been switched off via the
button; ADB is operational.
ADB intervention not indicated.
The indicator lamp and the
brake warning lamp will light up
continously:
The DSC, ADB and DBC have
been turned off with the switch
or are defective.
The vehicle will remain completely
operational, however, without DSC. In
the event of a fault, please see your
BMW center. Refer to pages 21 and 22.
Indicator and warning lamps for
Canadian models.
Page 91 of 203

91n
IndexDataTechnologyRepairsCar careControlsOverview
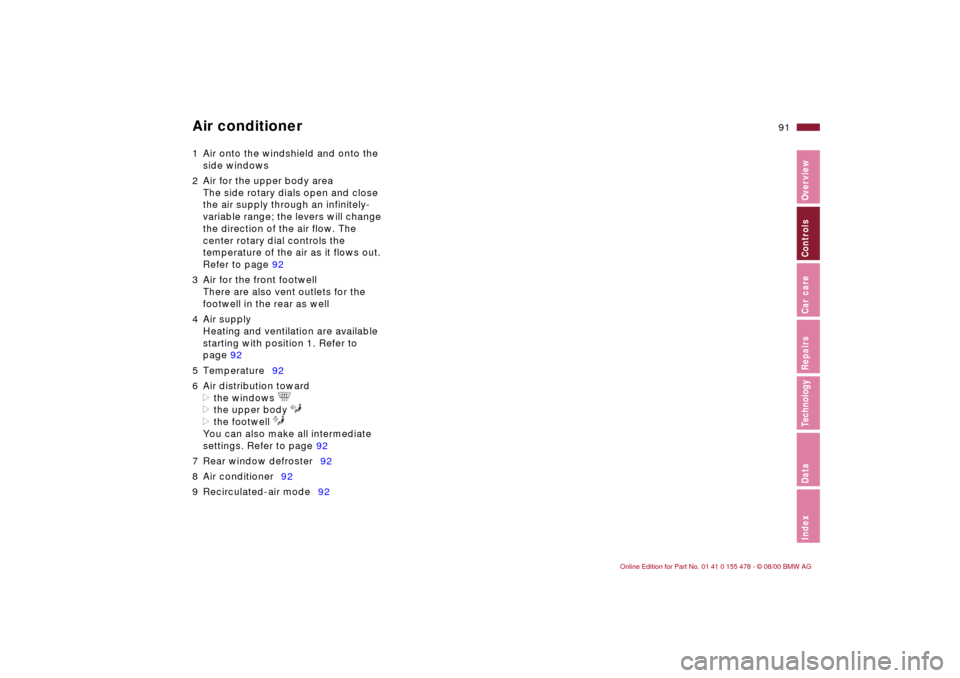
Air conditioner1 Air onto the windshield and onto the
side windows
2 Air for the upper body area
The side rotary dials open and close
the air supply through an infinitely-
variable range; the levers will change
the direction of the air flow. The
center rotary dial controls the
temperature of the air as it flows out.
Refer to page 92
3 Air for the front footwell
There are also vent outlets for the
footwell in the rear as well
4 Air supply
Heating and ventilation are available
starting with position 1. Refer to
page 92
5 Temperature92
6 Air distribution toward
>the windows
>the upper body
>the footwell
You can also make all intermediate
settings. Refer to page 92
7 Rear window defroster92
8 Air conditioner92
9 Recirculated-air mode92