2001 BMW 330Ci CONVERTIBLE ECU
[x] Cancel search: ECUPage 116 of 215

116n
Roof-mounted luggage rack for the hardtop
*
AnchorsAccess to the anchors:
To open the cover (arrow), please use
the tool included with the roof-rack
system.
A special roof-rack system is available
for your BMW as an optional extra.
Please comply with the precautions
included with the installation instruc-
tions.
Because roof racks raise the center of
gravity of the vehicle when loaded, they
exercise a major effect on its handling
and steering response. You should
therefore always remember not to
exceed the approved roof weight, the
approved gross vehicle weight or the 46cde097
axle loads when loading the rack. Perti-
nent specifications are listed under
"Technical Data," page 198.
Make sure that the load is not too
heavy, and distribute it evenly.
Always load the heaviest pieces first (on
the bottom). Be sure that objects do not
project into the opening path of the
luggage compartment lid.
Secure the roof luggage correctly and
securely to prevent it from shifting or
being lost during driving (danger to
following traffic).
Drive smoothly and avoid sudden
acceleration or braking. Do not corner
at high speeds.
The roof load increases aerodynamic
resistance, which in turn increases fuel
consumption and places additional
stress on the vehicle itself.
Page 122 of 215

122n
Antilock Brake System (ABS)The concept ABS enhances active safety by helping
to prevent the wheels from locking
under braking. This is because locked
wheels are dangerous. When the front
wheels slide, the driver loses steering
control over the vehicle. Traction loss at
the rear wheels can cause the rear end
to break into an uncontrolled skid.
The system can achieve the shortest
braking distances possible under most
conditions (on straight-aways and in
curves, on asphalt, ice, wet road
surfaces, etc.).
ABS is designed to meet two essential
requirements during every brake appli-
cation:
>To help provide vehicle stability.
>To help maintain steering control and
maneuverability Ð on all types of road
surfaces (asphalt, concrete, mud, wet
road surfaces, snow, ice).
Braking with ABSAt about 6 mph (10 km/h), the system
becomes operative. Whenever the
vehicle's speed drops below approx.
4 mph (6 km/h), the ABS is deactivated.
This means that the wheels can lock in
the final phase of a panic stop Ð a factor
of no significance in actual use.
If you are in a situation that requires full
braking, you will exploit the full benefits
of the ABS system if you apply maxi-
mum brake pressure ("panic stop").
Since the vehicle maintains steering
responsiveness, you can nevertheless
avoid possible obstacles with a
minimum of steering effort.
The ABS system closed-loop control
circuit cycles in fractions of a second.
A pulsation at the brake pedal, together
with the sounds associated with the
hydraulic controls, tells you that the
brake system is within its maximum
limit range and reminds you that you
should adapt road speed to the road
conditions.
On road surfaces that have a loose
surface layer on a firm base with good
traction (on gravel or snow, for
example), or when snow chains are
mounted, braking distances may be
longer than with locked wheels. Nevertheless, ABS possesses the
advantage of vehicle stability and
steering response.
Information for your safetyNot even ABS can suspend the laws of
physics. ABS cannot prevent the
consequences of brake applications
with inadequate clearances for safety
between vehicles, when exceeding the
speed limit, or the risks involved when
aquaplaning occurs. Responsibility for
these types of situations remains in the
hands (and at the feet) of the driver. You
should never allow the added safety of
ABS to lull you into a false sense of
security, or mislead you into taking
increased risks.
Do not make any modifications to
the ABS system.
Service procedures on ABS are to be
performed by authorized technicians
only.<
Page 131 of 215

131n
IndexDataTechnologyRepairsCar careControlsOverview
Hardtop
*
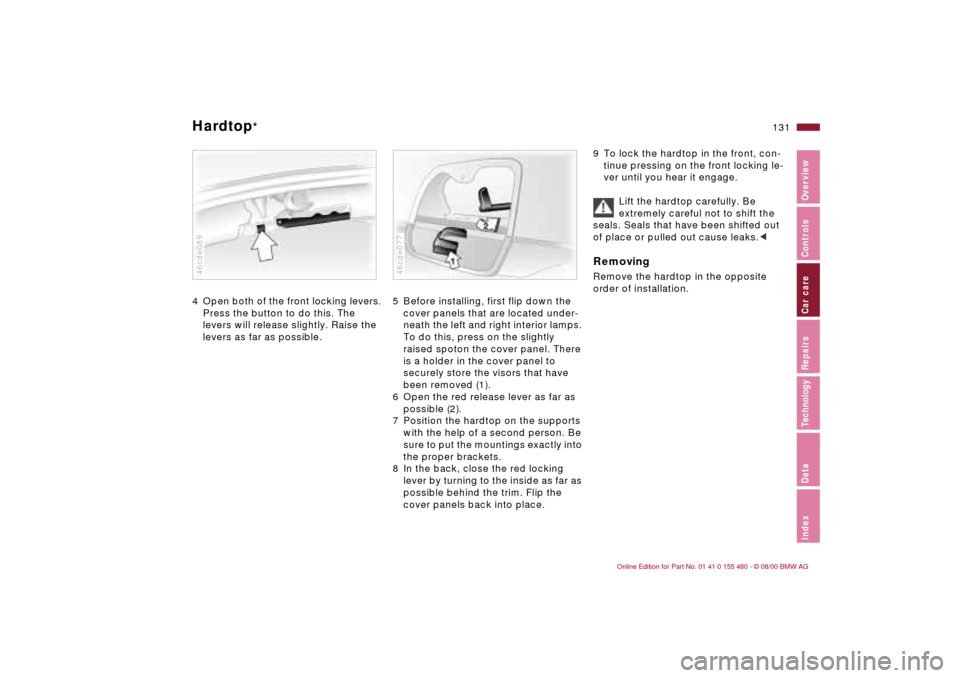
4 Open both of the front locking levers.
Press the button to do this. The
levers will release slightly. Raise the
levers as far as possible.46cde089
5 Before installing, first flip down the
cover panels that are located under-
neath the left and right interior lamps.
To do this, press on the slightly
raised spoton the cover panel. There
is a holder in the cover panel to
securely store the visors that have
been removed (1).
6 Open the red release lever as far as
possible (2).
7 Position the hardtop on the supports
with the help of a second person. Be
sure to put the mountings exactly into
the proper brackets.
8 In the back, close the red locking
lever by turning to the inside as far as
possible behind the trim. Flip the
cover panels back into place.46cde077
9 To lock the hardtop in the front, con-
tinue pressing on the front locking le-
ver until you hear it engage.
Lift the hardtop carefully. Be
extremely careful not to shift the
seals. Seals that have been shifted out
of place or pulled out cause leaks.cRemovingRemove the hardtop in the opposite
order of installation.
Page 141 of 215

141n
IndexDataTechnologyRepairsCar careControlsOverview
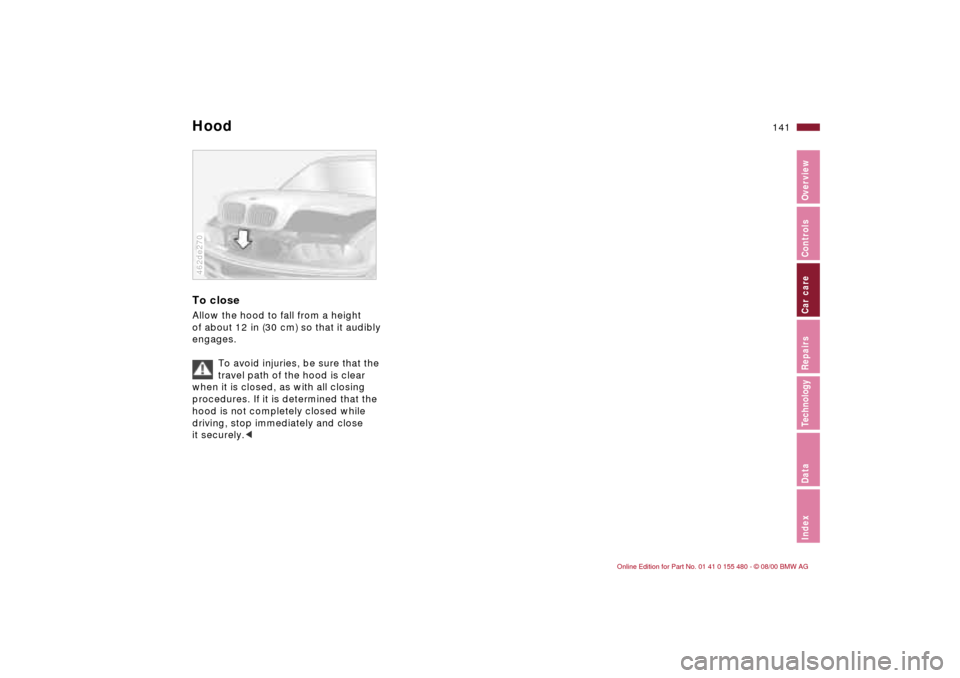
HoodTo closeAllow the hood to fall from a height
of about 12 in (30 cm) so that it audibly
engages.
To avoid injuries, be sure that the
travel path of the hood is clear
when it is closed, as with all closing
procedures. If it is determined that the
hood is not completely closed while
driving, stop immediately and close
it securely.<462de270
Page 155 of 215

155n
IndexDataTechnologyRepairsCar careControlsOverview
Caring for your vehicleCare of upholstery materials Depressions in the upholstery that
result from everyday use can be
brushed smooth by brushing against
the nap with a lightly dampened brush.
The tendency of the pile to lie in a
particular direction on velour upholstery
is not a quality defect. Just as with
home textiles or clothing, this cannot be
avoided.
Lint on upholstery materials, textile or
leather remnants that have been worn
into the upholstery may be removed
with a lint brush or a Velcro brush. A
cleaning glove is available for particu-
larly "stubborn" lint. Stains and fairly
large areas of dirt should be cleaned off
without delay, using lukewarm water
and an interior cleaner, stain remover or
appropriate cleaning fluid. Brush the
fabric afterwards to restore its appear-
ance.
If the vehicle will be stored for an
extended period or if it is exposed to
intense sunlight, cover all the seats or
the windows to prevent fading.
Use the cleaning and car-care
products available at your BMW
center.<
The buildup of an electrostatic charge
on the seat covers, particularly if
atmospheric humidity is low, can give
the occupants an unpleasant electric
shock if they touch metal body parts
after leaving the vehicle. Although this
is not dangerous in any way, it can be
avoided by touching a bare or polished
metal part of the vehicle while getting
out.
Leather care The leather
* upholstery used by BMW
is a natural product of the highest
quality, processed using state-of-the-
art methods to ensure that it will main-
tain its high quality for years to come,
provided that it is properly cared for.
Because this product is manufactured
using natural materials, you must make
allowance for its special characteristics
and for the peculiarities of its use and
care.
Regular periodic cleaning and care are
essential, as dust and road dirt act as
abrasives in the pores and creases of
the material. This leads to wear spots
and premature brittleness on the sur-
face of the leather. We therefore sug-
gest that you clean the leather with a
vacuum cleaner or cloth at frequent
intervals.
For cleaning, use BMW leather cleaning
foam.
Since dirt and grease gradually attack
the protective layer of the leather, the
cleaned surfaces should be treated
with BMW leather care agent. This also
acts as an antistatic agent.
For protection against dampness or
moisture, treat the leather with a
BMW impregnating agent.
Page 174 of 215

174n
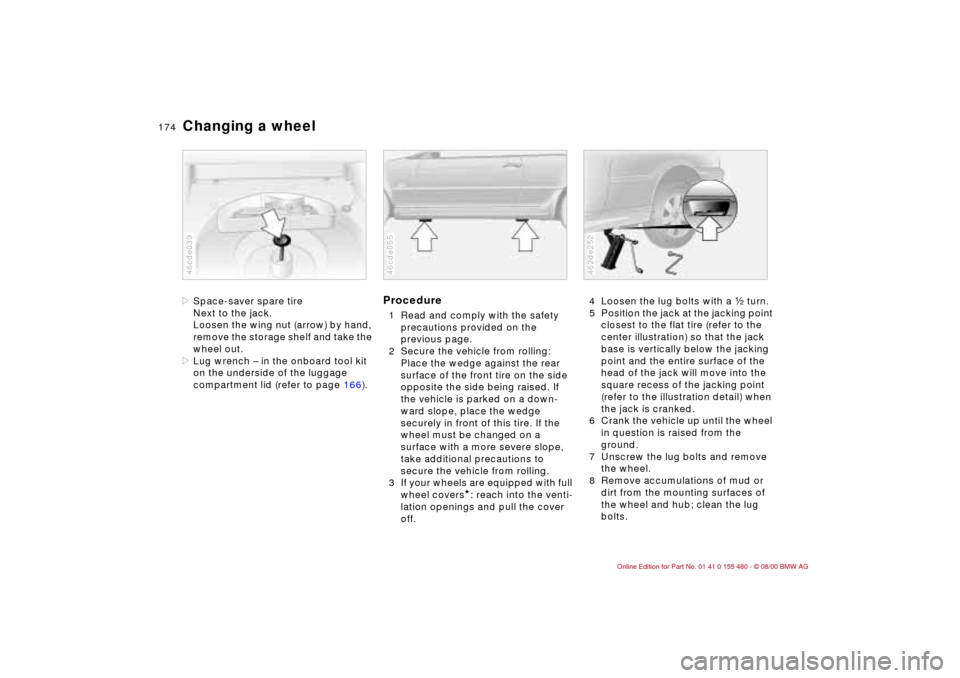
Changing a wheel>Space-saver spare tire
Next to the jack.
Loosen the wing nut (arrow) by hand,
remove the storage shelf and take the
wheel out.
>Lug wrench Ð in the onboard tool kit
on the underside of the luggage
compartment lid (refer to page 166).46cde039
Procedure1 Read and comply with the safety
precautions provided on the
previous page.
2 Secure the vehicle from rolling:
Place the wedge against the rear
surface of the front tire on the side
opposite the side being raised. If
the vehicle is parked on a down-
ward slope, place the wedge
securely in front of this tire. If the
wheel must be changed on a
surface with a more severe slope,
take additional precautions to
secure the vehicle from rolling.
3 If your wheels are equipped with full
wheel covers
*: reach into the venti-
lation openings and pull the cover
off.
46cde055
4 Loosen the lug bolts with a g turn.
5 Position the jack at the jacking point
closest to the flat tire (refer to the
center illustration) so that the jack
base is vertically below the jacking
point and the entire surface of the
head of the jack will move into the
square recess of the jacking point
(refer to the illustration detail) when
the jack is cranked.
6 Crank the vehicle up until the wheel
in question is raised from the
ground.
7 Unscrew the lug bolts and remove
the wheel.
8 Remove accumulations of mud or
dirt from the mounting surfaces of
the wheel and hub; clean the lug
bolts.462de252
Page 175 of 215

175n
IndexDataTechnologyRepairsCar careControlsOverview
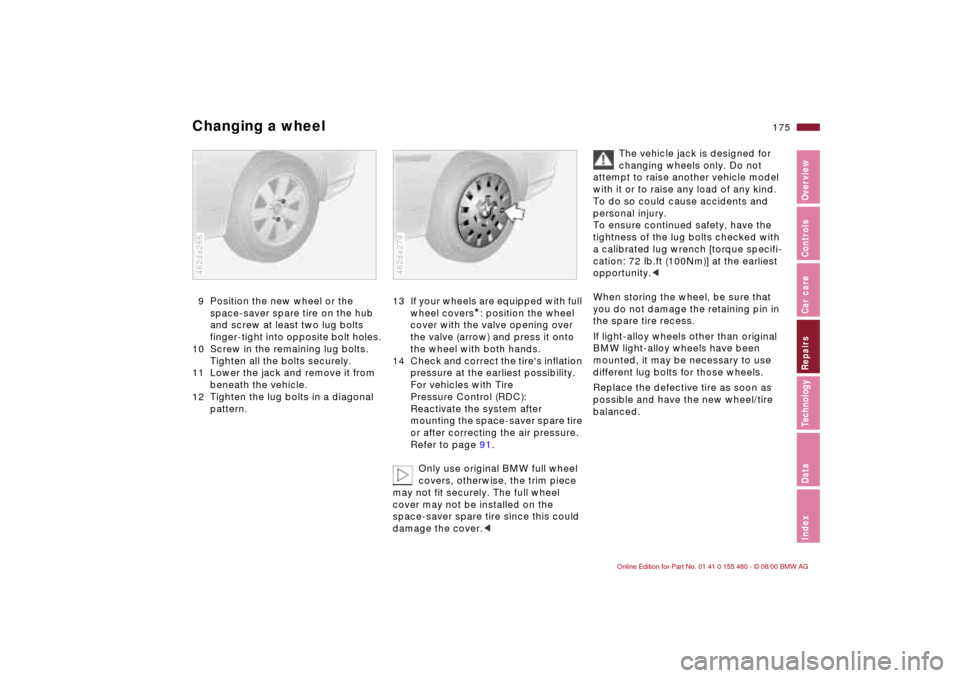
Changing a wheel9 Position the new wheel or the
space-saver spare tire on the hub
and screw at least two lug bolts
finger-tight into opposite bolt holes.
10 Screw in the remaining lug bolts.
Tighten all the bolts securely.
11 Lower the jack and remove it from
beneath the vehicle.
12 Tighten the lug bolts in a diagonal
pattern.462de266
13 If your wheels are equipped with full
wheel covers
*: position the wheel
cover with the valve opening over
the valve (arrow) and press it onto
the wheel with both hands.
14 Check and correct the tire's inflation
pressure at the earliest possibility.
For vehicles with Tire
Pressure Control (RDC):
Reactivate the system after
mounting the space-saver spare tire
or after correcting the air pressure.
Refer to page 91.
Only use original BMW full wheel
covers, otherwise, the trim piece
may not fit securely. The full wheel
cover may not be installed on the
space-saver spare tire since this could
damage the cover.<
462de279
The vehicle jack is designed for
changing wheels only. Do not
attempt to raise another vehicle model
with it or to raise any load of any kind.
To do so could cause accidents and
personal injury.
To ensure continued safety, have the
tightness of the lug bolts checked with
a calibrated lug wrench [torque specifi-
cation: 72 lb.ft (100Nm)] at the earliest
opportunity.<
When storing the wheel, be sure that
you do not damage the retaining pin in
the spare tire recess.
If light-alloy wheels other than original
BMW light-alloy wheels have been
mounted, it may be necessary to use
different lug bolts for those wheels.
Replace the defective tire as soon as
possible and have the new wheel/tire
balanced.
Page 178 of 215

178n
BatteryRemoval and installation
Do not disconnect the battery
when the engine is running. If you
do so, the ensuing voltage surge will
damage the vehicle's onboard
electronics.
Do not make any modifications in the
wires to the positive terminal. If you do
so, the protective function of the safety
battery terminal is no longer ensured.
Repair and disposal must be performed
by trained technicians only.<
When removing the battery, disconnect
the cable on the negative terminal first,
then the cable on the positive terminal.
Loosen the center adjusting screw on
the battery retaining strap (use the
screwdriver included with the onboard
tool kit) and disconnect the strap.
When installing a battery, connect the
positive terminal first, then connect the
negative terminal.
When installing a battery, be sure
that it is mounted properly and that
the retaining bracket is installed with the
center adjustment screw. If this is not
done, the battery will not be adequately
secured in case of an accident.<
Charging the battery Charge the battery in the vehicle only
when the engine is not running.
Before doing any work on the
electrical system, be sure to
unclamp the cable from the battery's
negative terminal. Failure to do so can
result in short circuits, a fire or personal
injury.<
If you plan to park the vehicle for longer
than 4 weeks, disconnect the battery
from the vehicle electrical system by
disconnecting the cable at the negative
terminal. Have the battery recharged
with an appropriate battery charger.
If the vehicle is parked for more than
12 weeks, remove the battery, recharge
it and store it in a cool yet frost- and
dust-free area. During storage, have the
battery recharged every 3 months.
Also, recharge the battery before it is
reinstalled. If this is not done, the
battery will not be serviceable. Every
time the battery is discharged, espe-
cially over extended periods, its service
life is reduced.
Return used batteries to a
recycling center or your BMW
center. Maintain the battery in an
upright position for transport and
storage. Secure the battery to prevent it
from tilting during transport.<
Storage periods during which the
battery is disconnected are not
taken into consideration by the Service
Interval Display for changing the brake
fluid.
For this reason, be sure that the brake
fluid is changed every two years,
regardless of the information displayed.
Please read the pertinent information
on page 148.<