Page 57 of 109
PERIODIC MAINTENANCE AND MINOR REPAIR
6-7
6
EAU03037*
Cowling CTo remove
1. Remove panel D and the right
grab bar by removing the bolts.
2. Remove the cowling by removing
the bolt.To install
1. Place the cowling in the original
position and install the bolt.
2. Install the grab bar and then the
panel by installing the bolts.
EAU03053
Spark plugsRemoval
1. Remove the spark plug caps.
1. Cowling C
2. Bolt (´ 2)
3. Right grab bar
4. Panel D
1. Bolt (´ 3)
1. Spark plug cap (´ 2 on each side)
E_4tv_Periodic.fm Page 7 Wednesday, September 1, 1999 11:12 AM
Page 58 of 109

PERIODIC MAINTENANCE AND MINOR REPAIR
6-8
6 2. Use the spark plug wrench in the
tool kit to remove the spark plugs
as shown.Inspection
The spark plug is an important engine
component and is easy to inspect. The
condition of the spark plug can indicate
the condition of the engine.
Normally, all spark plugs from the
same engine should have the same
color on the white insulator around the
center electrode. The ideal color at this
point is a medium-to-light tan color for a
motorcycle that is being ridden normal-
ly. If one spark plug shows a distinctly
different color, there could be some-
thing wrong with the engine.Do not attempt to diagnose such prob-
lems yourself. Instead, take the motor-
cycle to a Yamaha dealer. You should
periodically remove and inspect the
spark plugs because heat and deposits
will cause any spark plug to slowly
break down and erode. If electrode ero-
sion becomes excessive, or if carbon
and other deposits are excessive, you
should replace the spark plug with the
specified plug.
1. Spark plug wrench
Specified spark plug:
CR9E (NGK) or
U27ESR-N (DENSO)
E_4tv_Periodic.fm Page 8 Wednesday, September 1, 1999 11:12 AM
Page 59 of 109

PERIODIC MAINTENANCE AND MINOR REPAIR
6-9
6Installation
1. Measure the electrode gap with a
wire thickness gauge and, if nec-
essary, adjust the gap to specifica-
tion.
2. Clean the gasket surface. Wipe off
any grime from the threads.
3. Install the spark plug and tighten it
to the specified torque.
NOTE:@ If a torque wrench is not available when
you are installing a spark plug, a good
estimate of the correct torque is 1/4 to
1/2 turn past finger tight. Have the
spark plug tightened to the specified
torque as soon as possible. @4. Install the spark plug caps.
EAU01765*
Engine oilOil level inspection
1. Place the motorcycle on a level
place and hold it in an upright posi-
tion. Warm up the engine for sev-
eral minutes.NOTE:@ Be sure the motorcycle is positioned
straight up when checking the oil level.
A slight tilt toward the side can result in
false readings. @
a. Spark plug gap
Spark plug gap:
0.7 ~ 0.8 mm
Tightening torque:
Spark plug:
12.5 Nm (1.25 m·kg)
1. Oil level window
2. Maximum level mark
3. Minimum level mark
E_4tv_Periodic.fm Page 9 Wednesday, September 1, 1999 11:12 AM
Page 60 of 109

PERIODIC MAINTENANCE AND MINOR REPAIR
6-10
6 2. With the engine stopped, check
the oil level through the level win-
dow located at the lower part of
the right side crankcase cover.
NOTE:@ Wait a few minutes until the oil level
settles before checking. @3. The oil level should be between
maximum and minimum marks. If
the level is low, fill the engine with
sufficient oil to reach the specified
level.Engine oil and oil filter cartridge re-
placement
1. Remove cowling A. (See page 6-5
for removal and installation proce-
dures.)
2. Remove the cowling stay.
3. Warm up the engine for several
minutes.
4. Stop the engine. Place an oil pan
under the engine and remove the
oil filler cap.
5. Remove the drain bolt and drain
the oil.6. Remove the oil filter by using an oil
filter wrench.
NOTE:@ An oil filter wrench is available at a
nearby Yamaha dealer. @7. Reinstall the drain bolt and tighten
it to the specified torque.
1. Engine oil filler cap
1. Engine oil drain boltLeft side view
1. Oil filter cartridge
2. Oil filter wrenchTightening torque:
Drain bolt:
43 Nm (4.3 m·kg)
E_4tv_Periodic.fm Page 10 Wednesday, September 1, 1999 11:12 AM
Page 61 of 109

PERIODIC MAINTENANCE AND MINOR REPAIR
6-11
68. Apply a light coat of engine oil to
the O-ring of the new oil filter.
NOTE:@ Make sure the O-ring is seated proper-
ly. @9. Install the oil filter and tighten it to
the specified torque with an oil fil-
ter wrench.NOTE:When installing the oil filter, tighten it to
the proper torque by using a torque
wrench.
10. Fill the engine with sufficient oil to
reach the specified level. Install
the oil filler cap and tighten it.
EC000066
CAUTION:@ l
Do not put in any chemical addi-
tives. Engine oil also lubricates
the clutch and additives could
cause clutch slippage.
l
Be sure no foreign material en-
ters the crankcase.
@
11. Start the engine and warm it up for
several minutes. While warming
up, check for oil leakage. If oil
leakage is found, stop the engine
immediately and check for the
cause.NOTE:@ After the engine is started, the oil level
indicator light should go off if the oil is at
the specified level. @
EC000067
CAUTION:@ If the indicator light flickers or re-
mains on, immediately stop the en-
gine and consult with a Yamaha
dealer. @12. Install the cowling stay and cowl-
ing.
1. O-ring
Tightening torque:
Oil filter:
17 Nm (1.7 m·kg)
Recommended oil:
See page 8-1.
Oil quantity:
Total amount:
3.5 L
Periodic oil change:
2.6 L
With oil filter replacement:
2.9 L
E_4tv_Periodic.fm Page 11 Wednesday, September 1, 1999 11:12 AM
Page 62 of 109

2. Check the coolant level in the res-
ervoir tank")
PERIODIC MAINTENANCE AND MINOR REPAIR
6-12
6
EAU03024
Cooling system1. Remove the seat. (See page 3-14
for seat removal and installation
procedures.)
2. Check the coolant level in the res-
ervoir tank when the engine is cold
as the coolant level will vary with
engine temperature. The coolant
level should be between the maxi-
mum and minimum marks.
3. If the level is low, add coolant or
distilled water to raise it to the
specified level.
4. Install the seat.
ECA00041
CAUTION:@ Hard water or salt water is harmful
to the engine. You may use soft wa-
ter if you can’t get distilled water. @NOTE:@ l
If water is added, have a Yamaha
dealer check the antifreeze con-
tent of the coolant as soon as pos-
sible.
l
The radiator fan operation is com-
pletely automatic. It is switched on
or off according to the coolant tem-
perature in the radiator.
@5. If your motorcycle overheats, see
page 6-41 for details.
1. Maximum level mark
2. Minimum level mark
Coolant reservoir capacity:
0.55 L
E_4tv_Periodic.fm Page 12 Wednesday, September 1, 1999 11:12 AM
Page 63 of 109

3. Remo")
PERIODIC MAINTENANCE AND MINOR REPAIR
6-13
6
EAU03025
Changing the coolant1. Put the motorcycle on a level place.
2. Remove the seat. (See page 3-14
for removal and installation proce-
dures.)
3. Remove cowling C. (See page 6-7
for removal and installation proce-
dures.)
4. Remove the bolts and the coolant
reservoir.
5. Drain the coolant from the coolant
reservoir.
6. Remove cowlings A and B. (See
page 6-5 for removal and installa-
tion procedures.)7. Remove the fuel tank bolts, then
lift the fuel tank upward. (Do not
remove the fuel hoses.)
EW000071
WARNING
@ l
Support the fuel tank carefully
during this procedure.
l
Do not tilt the fuel tank too
much or pull it too hard because
the fuel hose connections may
become loose causing fuel
leakage.
@
8. Remove the right air intake duct by
loosening and removing the screw
clamps.
1. Bolt (´ 2)
2. Coolant reservoir
1. Bolt (´ 2)
1. Screw clamp (´ 2)
2. Right air intake duct
E_4tv_Periodic.fm Page 13 Wednesday, September 1, 1999 11:12 AM
Page 64 of 109

PERIODIC MAINTENANCE AND MINOR REPAIR
6-14
6 9. Remove the radiator cap.
EW000067
WARNING
@ Do not remove the radiator cap
when the engine is hot. @10. Place a container under the en-
gine.
11. Remove the water pump drain bolt
and drain the coolant.
12. Remove the cylinder drain bolts
and drain the coolant.13. Install the water pump drain bolt
and cylinder drain bolts and tight-
en to the specified torque.
14. Pour the recommended coolant
into the radiator until it is full.
ECA00041
CAUTION:@ Hard water or salt water is harmful
to the engine. You may use soft wa-
ter if you can’t get distilled water. @15. Install the radiator cap.
16. Run the engine several minutes to
recheck the coolant level in the ra-
diator. If it is low, fill with more
coolant until it reaches the top of
the radiator.
17. Check for coolant leakage.
1. Radiator cap
1. Water pump drain bolt
2. Cylinder drain bolt (´ 2)
Tightening torque:
Drain bolt:
10 Nm (1.0 m·kg)
Recommended anti-freeze:
High quality ethylene glycol anti-
freeze containing corrosion inhib-
itors for aluminum engines.
Antifreeze and water mix ratio:
1:1
Total amount:
1.95 L
Coolant reservoir capacity:
0.55 L
E_4tv_Periodic.fm Page 14 Wednesday, September 1, 1999 11:12 AM
 1
1 2
2 3
3 4
4 5
5 6
6 7
7 8
8 9
9 10
10 11
11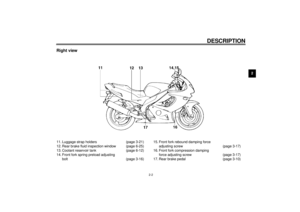 12
12 13
13 14
14 15
15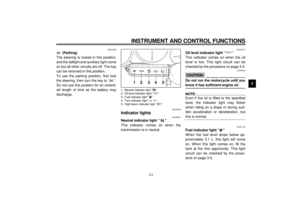 16
16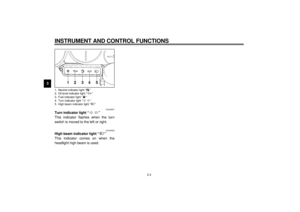 17
17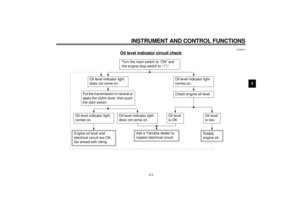 18
18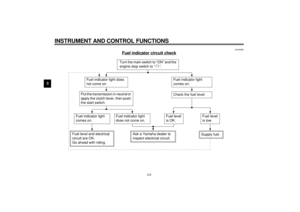 19
19 20
20 21
21 22
22 23
23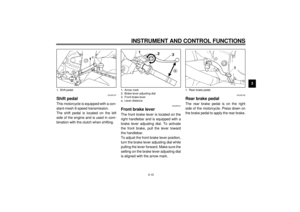 24
24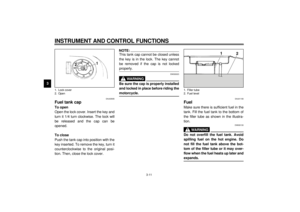 25
25 26
26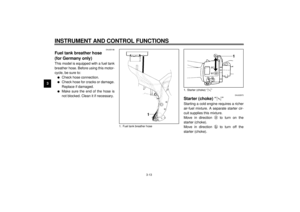 27
27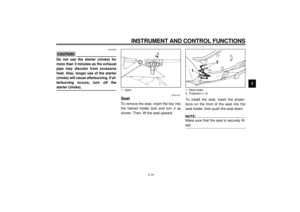 28
28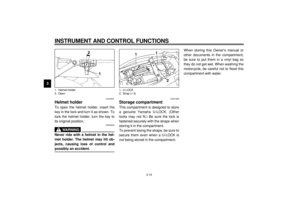 29
29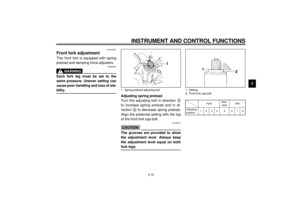 30
30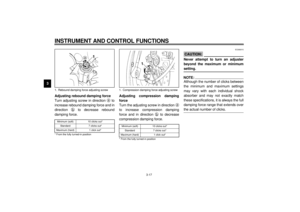 31
31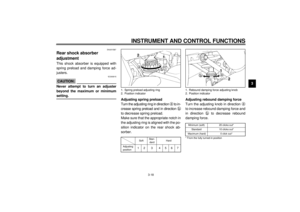 32
32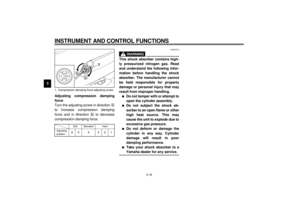 33
33 34
34 35
35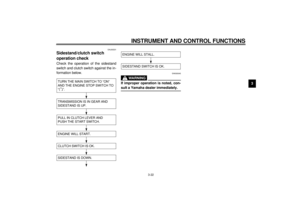 36
36 37
37 38
38 39
39 40
40 41
41 42
42 43
43 44
44 45
45 46
46 47
47 48
48 49
49 50
50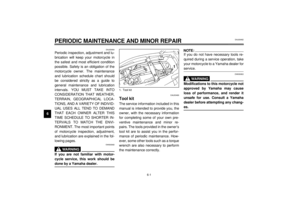 51
51 52
52 53
53 54
54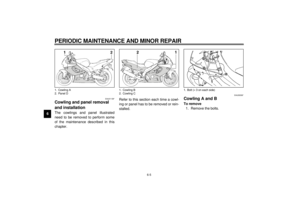 55
55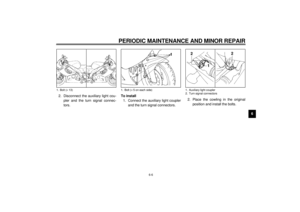 56
56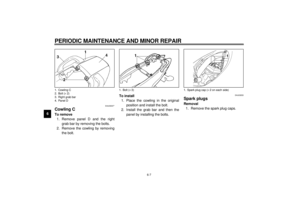 57
57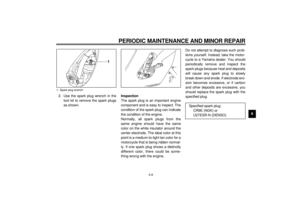 58
58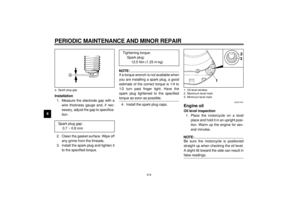 59
59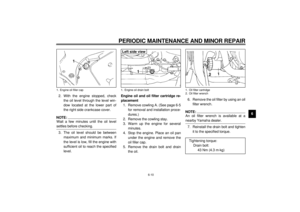 60
60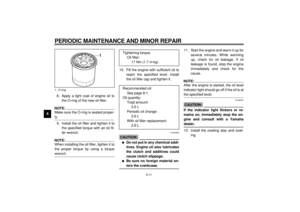 61
61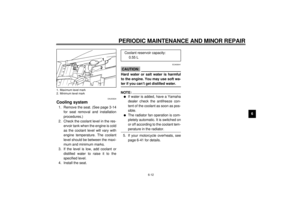 62
62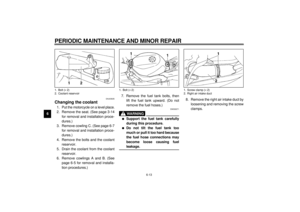 63
63 64
64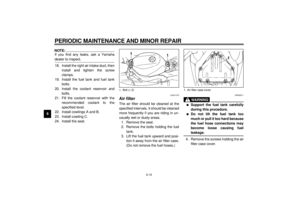 65
65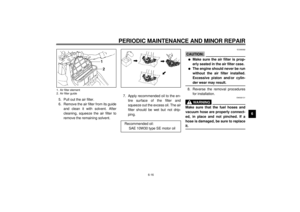 66
66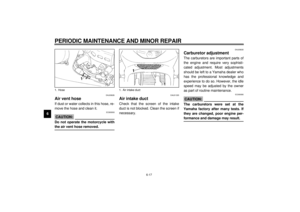 67
67 68
68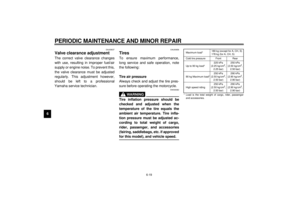 69
69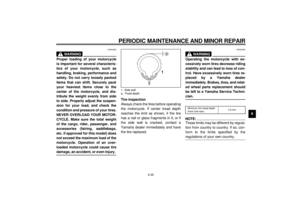 70
70 71
71 72
72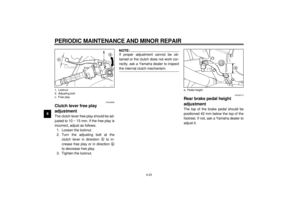 73
73 74
74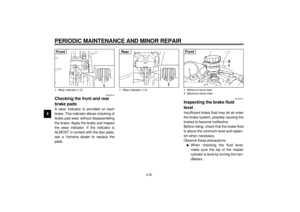 75
75 76
76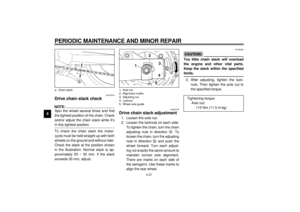 77
77 78
78 79
79 80
80 81
81 82
82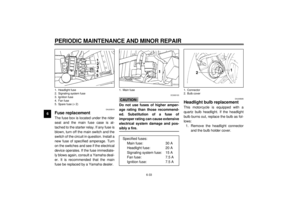 83
83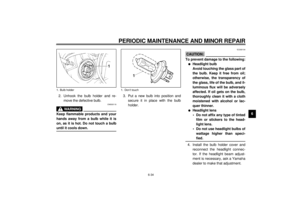 84
84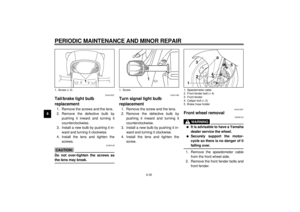 85
85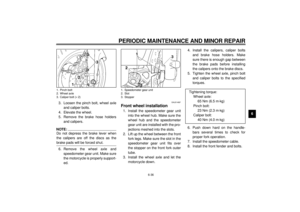 86
86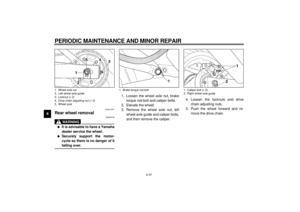 87
87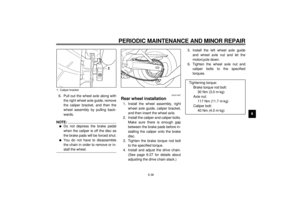 88
88 89
89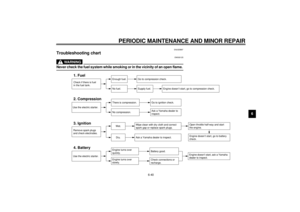 90
90 91
91 92
92 93
93 94
94 95
95 96
96 97
97 98
98 99
99 100
100 101
101 102
102 103
103 104
104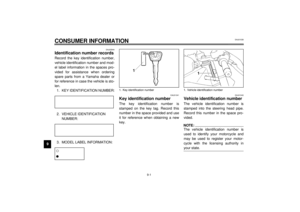 105
105 106
106 107
107 108
108