2000 YAMAHA XVZ1300TF recommended oil
[x] Cancel search: recommended oilPage 77 of 121
PERIODIC MAINTENANCE AND MINOR REPAIR
7-11
7
EAU01703
Engine oilOil level inspection
1. Place the motorcycle on a level
place and hold it in an upright posi-
tion. Warm up the engine for seve-
ral minutes.NOTE:@ Be sure the motorcycle is positioned
straight up when checking the oil level.
A slight tilt toward the side can result in
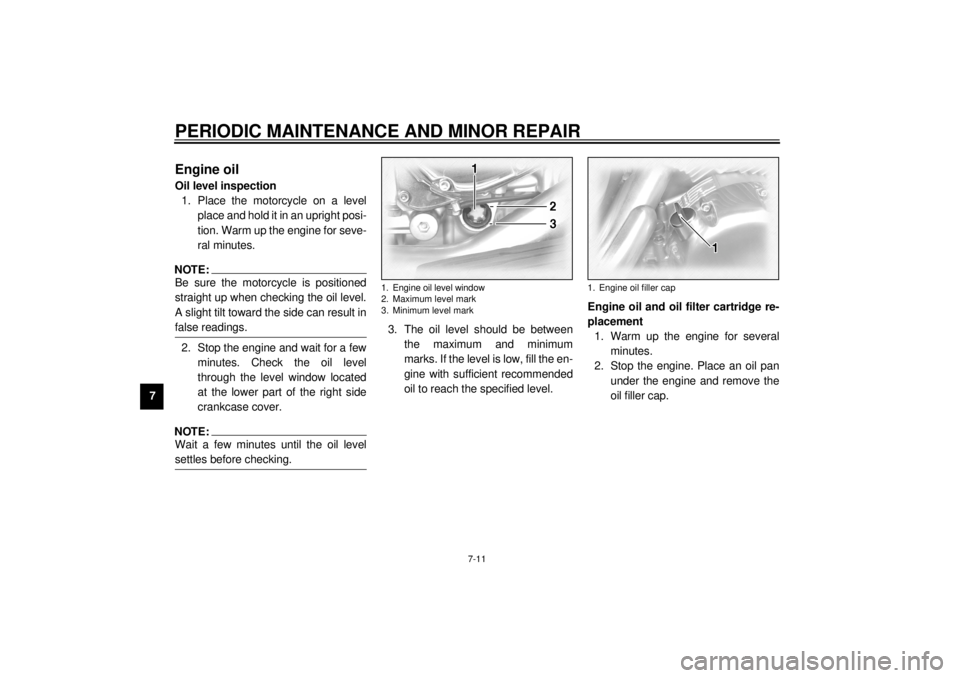
false readings. @2. Stop the engine and wait for a few
minutes. Check the oil level
through the level window located
at the lower part of the right side
crankcase cover.NOTE:@ Wait a few minutes until the oil level
settles before checking. @
3. The oil level should be between
the maximum and minimum
marks. If the level is low, fill the en-
gine with sufficient recommended
oil to reach the specified level.Engine oil and oil filter cartridge re-
placement
1. Warm up the engine for several
minutes.
2. Stop the engine. Place an oil pan
under the engine and remove the
oil filler cap.1. Engine oil level window
2. Maximum level mark
3. Minimum level mark
1. Engine oil filler cap
E_5jc_Periodic.fm Page 11 Saturday, October 16, 1999 1:10 PM
Page 79 of 121
PERIODIC MAINTENANCE AND MINOR REPAIR
7-13
78. Fill the engine with sufficient rec-
ommended oil. Install the oil filler
cap and tighten it.
EC000066
CAUTION:@ l
Do not put in any chemical addi-
tives. Engine oil also lubricates
the clutch and additives could
cause clutch slippage.
l
Be sure no foreign material en-
ters the crankcase.
@
9. Start the engine and warm it up for
several minutes. While warming
up, check for oil leakage. If oil
leakage is found, stop the engine
immediately and check for the
cause.NOTE:@ After the engine is started, the oil level
indicator light should go off if the oil is at
the specified level. @
EC000067
CAUTION:@ If the indicator light flickers or re-
mains on, immediately stop the en-
gine and consult with a Yamaha
dealer. @
EAU01220
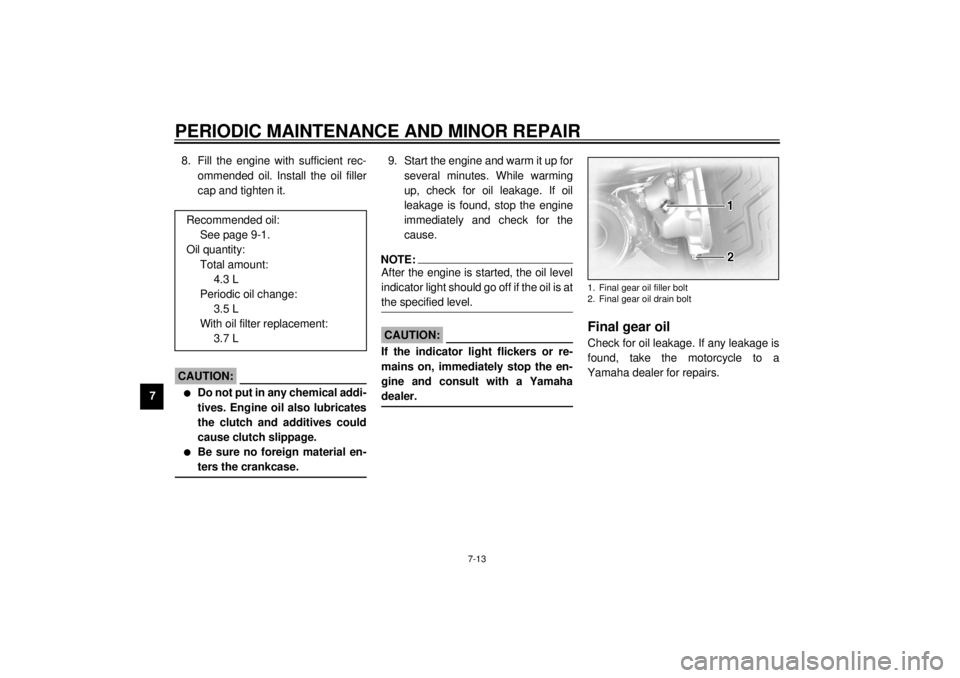
Final gear oilCheck for oil leakage. If any leakage is
found, take the motorcycle to a
Yamaha dealer for repairs. Recommended oil:
See page 9-1.
Oil quantity:
Total amount:
4.3 L
Periodic oil change:
3.5 L
With oil filter replacement:
3.7 L1. Final gear oil filler bolt
2. Final gear oil drain bolt
E_5jc_Periodic.fm Page 13 Saturday, October 16, 1999 1:10 PM
Page 92 of 121
PERIODIC MAINTENANCE AND MINOR REPAIR
7-26
7
l
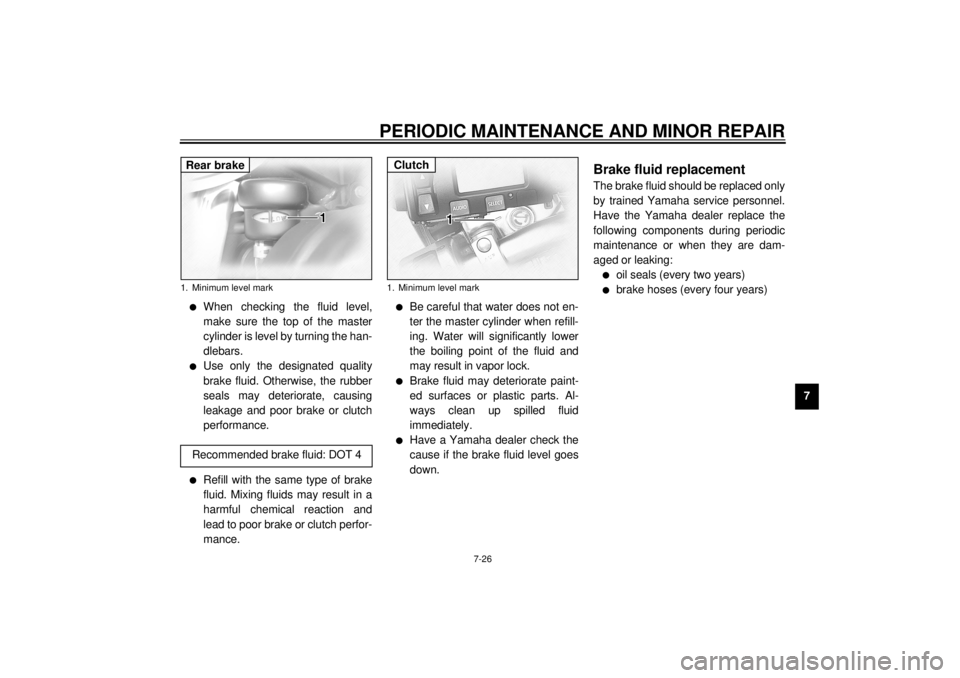
When checking the fluid level,
make sure the top of the master
cylinder is level by turning the han-
dlebars.
l
Use only the designated quality
brake fluid. Otherwise, the rubber
seals may deteriorate, causing
leakage and poor brake or clutch
performance.
l
Refill with the same type of brake
fluid. Mixing fluids may result in a
harmful chemical reaction and
lead to poor brake or clutch perfor-
mance.
l
Be careful that water does not en-
ter the master cylinder when refill-
ing. Water will significantly lower
the boiling point of the fluid and
may result in vapor lock.
l
Brake fluid may deteriorate paint-
ed surfaces or plastic parts. Al-
ways clean up spilled fluid
immediately.
l
Have a Yamaha dealer check the
cause if the brake fluid level goes
down.
EAU00742
Brake fluid replacementThe brake fluid should be replaced only
by trained Yamaha service personnel.
Have the Yamaha dealer replace the
following components during periodic
maintenance or when they are dam-
aged or leaking:l
oil seals (every two years)
l
brake hoses (every four years)
1. Minimum level mark
Recommended brake fluid: DOT 4Rear brake
1. Minimum level markClutch
E_5jc_Periodic.fm Page 26 Saturday, October 16, 1999 1:10 PM
Page 93 of 121
PERIODIC MAINTENANCE AND MINOR REPAIR
7-27
7
EAU02984
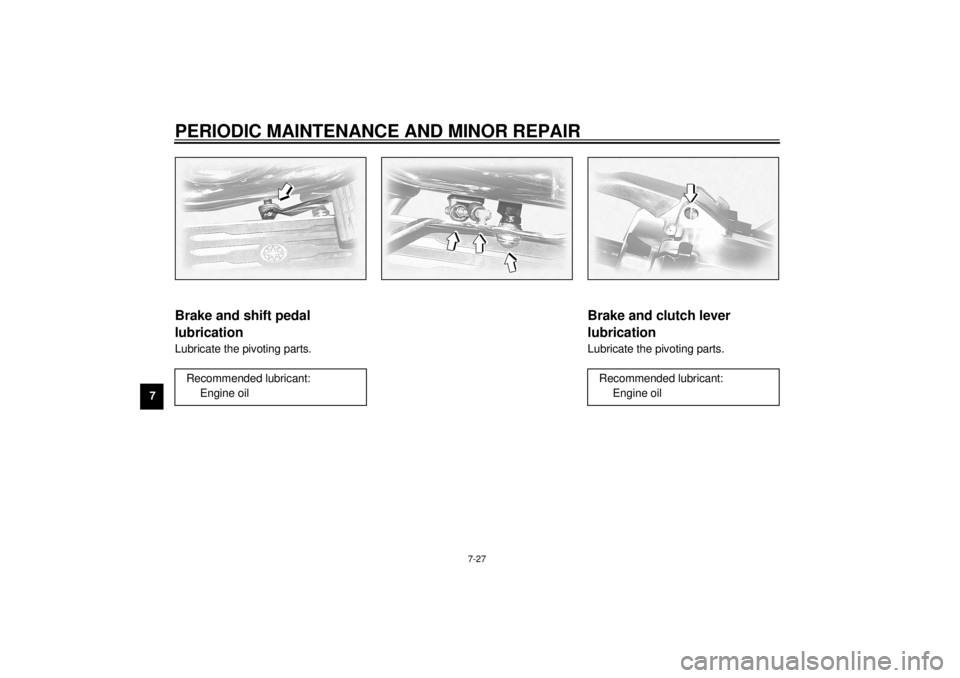
Brake and shift pedal
lubricationLubricate the pivoting parts.
EAU02985
Brake and clutch lever
lubricationLubricate the pivoting parts.
Recommended lubricant:
Engine oil
Recommended lubricant:
Engine oil
E_5jc_Periodic.fm Page 27 Saturday, October 16, 1999 1:10 PM
Page 94 of 121
PERIODIC MAINTENANCE AND MINOR REPAIR
7-28
7
EAU02986
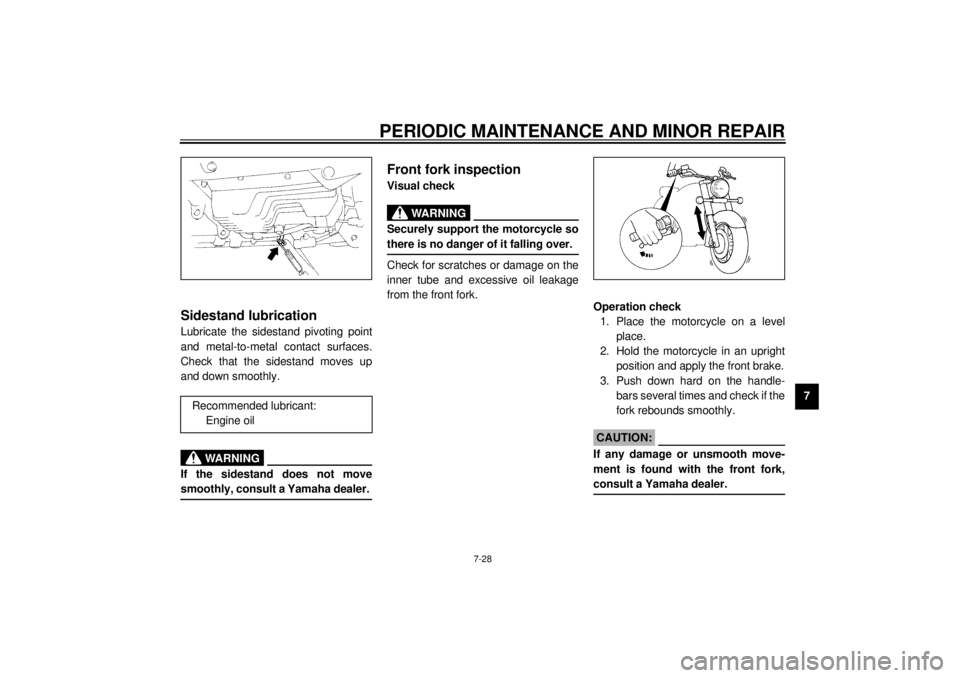
Sidestand lubricationLubricate the sidestand pivoting point
and metal-to-metal contact surfaces.
Check that the sidestand moves up
and down smoothly.
EW000113
WARNING
@ If the sidestand does not move
smoothly, consult a Yamaha dealer. @
EAU02939
Front fork inspectionVisual check
EW000115
WARNING
@ Securely support the motorcycle so
there is no danger of it falling over. @Check for scratches or damage on the
inner tube and excessive oil leakage
from the front fork.
Operation check
1. Place the motorcycle on a level
place.
2. Hold the motorcycle in an upright
position and apply the front brake.
3. Push down hard on the handle-
bars several times and check if the
fork rebounds smoothly.
EC000098
CAUTION:@ If any damage or unsmooth move-
ment is found with the front fork,
consult a Yamaha dealer. @
Recommended lubricant:
Engine oil
E_5jc_Periodic.fm Page 28 Saturday, October 16, 1999 1:10 PM
Page 111 of 121
9-1
9
EAU01038
9-SPECIFICATIONSSpecifications
Model XVZ1300TF
Dimensions
Overall length 2,705 mm
Overall width 900 mm
Overall height 1,565 mm (except for D)
1,380 mm (for D)
Seat height 750 mm
Wheelbase 1,705 mm
Minimum ground clearance 155 mm
Minimum turning radius 3,500 mm
Basic weight (with oil and full
fuel tank)
394 kg
Engine
Engine type Liquid cooled 4-stroke, DOHC
Cylinder arrangement V-type 4-cylinder
Displacement 1,294 cm
3
Bore ´ stroke 79 ´ 66 mm
Compression ratio 10:1
Starting system Electric starter
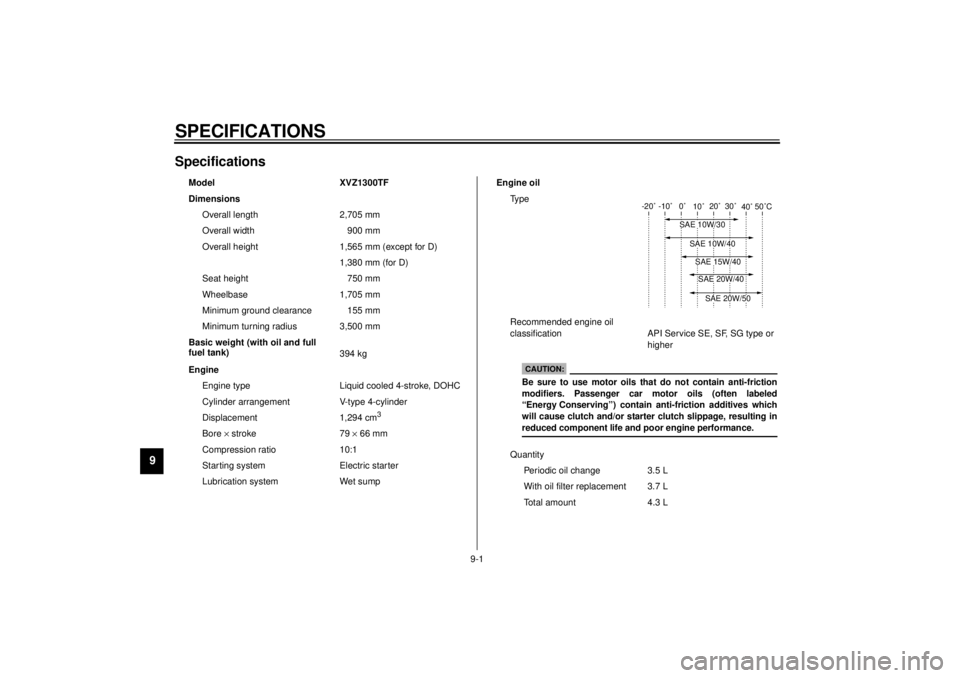
Lubrication system Wet sumpEngine oil
Ty p e
Recommended engine oil
classification API Service SE, SF, SG type or
higher
Quantity
Periodic oil change 3.5 L
With oil filter replacement 3.7 L
Total amount 4.3 L
-20˚ -10˚ 0˚
10˚20˚ 30˚
40˚50˚C
SAE 10W/30
SAE 15W/40SAE 20W/40SAE 20W/50
SAE 10W/40
CAUTION:Be sure to use motor oils that do not contain anti-friction
modifiers. Passenger car motor oils (often labeled
“Energy Conserving”) contain anti-friction additives which
will cause clutch and/or starter clutch slippage, resulting in
reduced component life and poor engine performance.
E_5jc_Spec.fm Page 1 Saturday, October 16, 1999 1:12 PM
Page 120 of 121
INDEX
Making mode settings.............................. 4-5
Model label ............................................ 10-2NNeutral indicator light ............................... 3-4OOil level indicator light .............................. 3-3
Overdrive indicator light ........................... 3-4PPanel C ................................................... 7-8
Panel D ................................................... 7-8
Panel E.................................................... 7-9
Parking .................................................... 6-5
Pass switch ............................................. 3-9
Periodic maintenance and lubrication ...... 7-3
Pre-operation check list ............................ 5-1RRadio operation ..................................... 4-12
Rear brake pedal ................................... 3-11
Rear brake pedal height adjustment ...... 7-23
Rear shock absorber adjustment ........... 3-21
Recommended shift points
(for Switzerland only)............................. 6-4
Rider seat .............................................. 3-15
Right view................................................ 2-2SSaddlebags and travel trunk .................. 3-17
Shifting .................................................... 6-3
Shift pedal ............................................. 3-11
Sidestand .............................................. 3-21
Sidestand/clutch switch operation
check .................................................. 3-22
Sidestand lubrication ............................. 7-28
Spark plug inspection ............................ 7-10
Specifications .......................................... 9-1
Speedometer .......................................... 3-5
Starter (choke) knob.............................. 3-15
Starting a warm engine ........................... 6-3
Starting the engine .................................. 6-1
Start switch ........................................... 3-10
Steering inspection................................ 7-29
Storage ................................................... 8-4TThrottle cable free play inspection ......... 7-18
Tips for reducing fuel consumption .......... 6-4
Tires...................................................... 7-19
Tool kit .................................................... 7-1
Troubleshooting .................................... 7-34
Troubleshooting charts .......................... 7-35
Turn indicator lights ................................. 3-3
Turn signal and tail/brake light bulb
replacement ........................................ 7-33
Turn signal switch ................................... 3-9VValve clearance adjustment .................. 7-18
Vehicle identification number................. 10-1WWheels .................................................. 7-21
E_5jcIX.fm Page 2 Saturday, October 16, 1999 1:12 PM