Page 62 of 97

PERIODIC MAINTENANCE AND MINOR REPAIR
6-16
6 Tire inspection
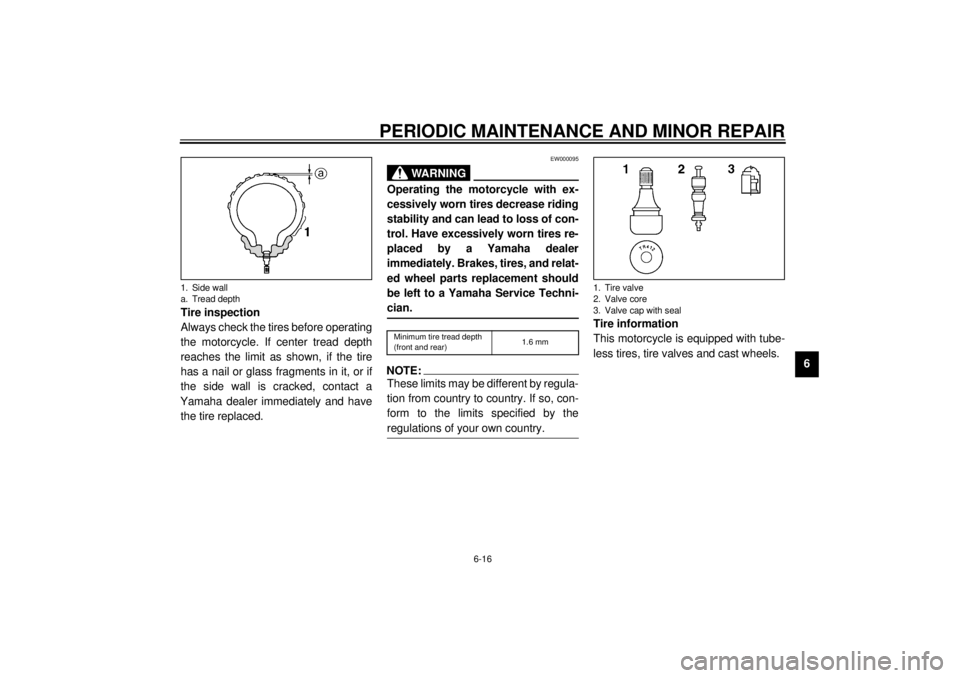
Always check the tires before operating
the motorcycle. If center tread depth
reaches the limit as shown, if the tire
has a nail or glass fragments in it, or if
the side wall is cracked, contact a
Yamaha dealer immediately and have
the tire replaced.
EW000095
WARNING
@ Operating the motorcycle with ex-
cessively worn tires decrease riding
stability and can lead to loss of con-
trol. Have excessively worn tires re-
placed by a Yamaha dealer
immediately. Brakes, tires, and relat-
ed wheel parts replacement should
be left to a Yamaha Service Techni-
cian. @CE-26ENOTE:@ These limits may be different by regula-
tion from country to country. If so, con-
form to the limits specified by the
regulations of your own country. @
Tire information
This motorcycle is equipped with tube-
less tires, tire valves and cast wheels.
1. Side wall
a. Tread depth
Minimum tire tread depth
(front and rear)1.6 mm
1. Tire valve
2. Valve core
3. Valve cap with seal
Page 65 of 97
PERIODIC MAINTENANCE AND MINOR REPAIR
6-19
6
EAU00713
Brake light switch adjustmentThe rear brake light switch is activated
by the brake pedal and is properly ad-
justed when the brake light comes on
just before braking takes effect. To ad-
just the rear brake light switch, hold the
switch body so it does not rotate while
turning the adjusting nut.
Turn the adjusting nut in direction
a to
make the brake light come on earlier.
Turn the adjusting nut in direction
b to
make the brake light come on later.
EAU01160
Checking the front and rear
brake padsWear indicator grooves are provided
on each brake pad. These indicators
allow checking of brake pad wear with-
out disassembling the brake. Inspect
the grooves. If they have almost disap-
peared, ask a Yamaha dealer to re-
place the pads.
1. Brake light switch
2. Adjusting nut
1. Wear indicator groove (´ 6)
1. Wear indicator groove (´ 2)
Page 66 of 97

PERIODIC MAINTENANCE AND MINOR REPAIR
6-20
6
EAU00733
Inspecting the brake fluid
levelInsufficient brake fluid may let air enter
the brake system, possibly causing the
brakes to become ineffective.
Before riding, check that the brake fluid
is above the minimum level and replen-
ish when necessary.
Observe these precautions:l
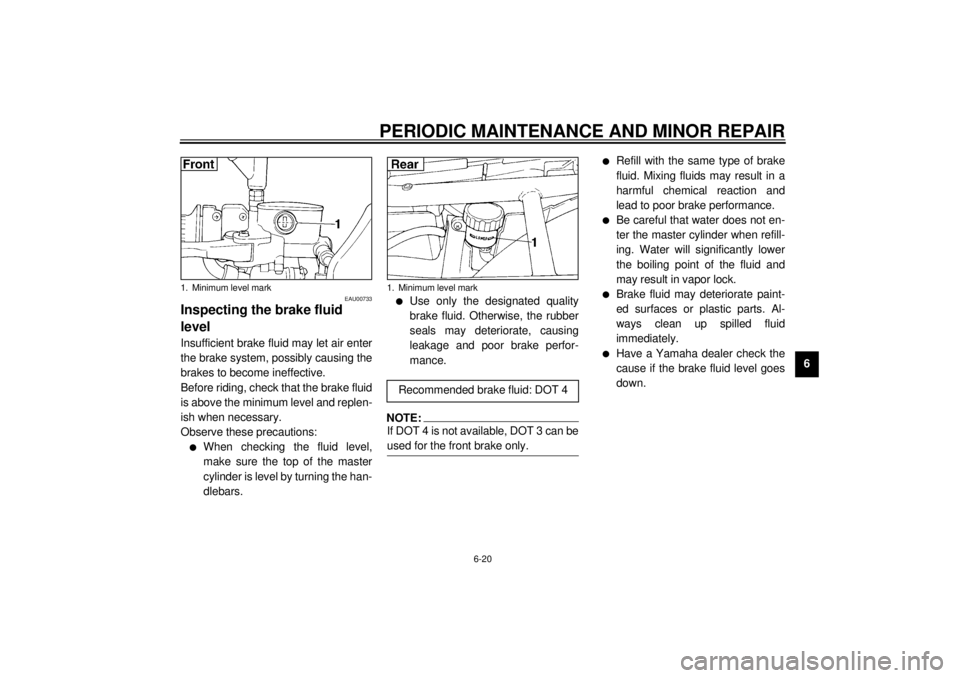
When checking the fluid level,
make sure the top of the master
cylinder is level by turning the han-
dlebars.
l
Use only the designated quality
brake fluid. Otherwise, the rubber
seals may deteriorate, causing
leakage and poor brake perfor-
mance.
NOTE:@ If DOT 4 is not available, DOT 3 can be
used for the front brake only. @
l
Refill with the same type of brake
fluid. Mixing fluids may result in a
harmful chemical reaction and
lead to poor brake performance.
l
Be careful that water does not en-
ter the master cylinder when refill-
ing. Water will significantly lower
the boiling point of the fluid and
may result in vapor lock.
l
Brake fluid may deteriorate paint-
ed surfaces or plastic parts. Al-
ways clean up spilled fluid
immediately.
l
Have a Yamaha dealer check the
cause if the brake fluid level goes
down.
1. Minimum level mark
1. Minimum level markRecommended brake fluid: DOT 4
Page 67 of 97

PERIODIC MAINTENANCE AND MINOR REPAIR
6-21
6
EAU00742
Brake fluid replacementThe brake fluid should be replaced only
by trained Yamaha service personnel.
Have the Yamaha dealer replace the
following components during periodic
maintenance or when they are dam-
aged or leaking:l
oil seals (every two years)
l
brake hoses (every four years)
EAU02962
Cable inspection and
lubrication
EW000112
WARNING
@ Damage to the outer housing of ca-
bles may lead to internal rusting and
interfere with the cable movement.
Replace damaged cables as soon as
possible to prevent unsafe condi-
tions. @Lubricate the cables and cable ends. If
a cable does not operate smoothly, ask
a Yamaha dealer to replace it.
EAU00773
Throttle cable and grip
lubricationThe throttle twist grip assembly should
be greased at the time that the cable is
lubricated, since the grip must be re-
moved to get at the end of the throttle
cable. After removing the screws, hold
the end of the cable up in the air and
put in several drops of lubricant. With
the throttle grip disassembled, coat the
metal surface of the grip assembly with
a suitable all-purpose grease.
Recommended lubricant:
Engine oil
Page 68 of 97
PERIODIC MAINTENANCE AND MINOR REPAIR
6-22
6
EAU02984
Brake and shift pedal
lubricationLubricate the pivoting parts.
EAU02985
Brake and clutch lever
lubricationLubricate the pivoting parts.
EAU02965
Center and sidestand
lubricationLubricate the pivoting and mating
joints.
Check to see that the center and side-
stand move up and down smoothly.
EW000114
WARNING
@ If the center and/or sidestand does
not move smoothly, consult a
Yamaha dealer. @
Recommended lubricant:
Engine oil
Recommended lubricant:
Engine oil
Recommended lubricant:
Engine oil
Page 69 of 97

PERIODIC MAINTENANCE AND MINOR REPAIR
6-23
6
EAU02939
Front fork inspectionVisual check
EW000115
WARNING
@ Securely support the motorcycle so
there is no danger of it falling over. @Check for scratches or damage on the
inner tube and excessive oil leakage
from the front fork.
Operation check
1. Place the motorcycle on a level
place.
2. Hold the motorcycle in an upright
position and apply the front brake.
3. Push down hard on the handle-
bars several times and check if the
fork rebounds smoothly.
EC000098
CAUTION:@ If any damage or unsmooth move-
ment is found with the front fork,
consult a Yamaha dealer. @
EAU00794
Steering inspectionPeriodically inspect the condition of the
steering. Worn out or loose steering
bearings may be dangerous. Place a
stand under the engine to raise the
front wheel off the ground. Hold the
lower end of the front forks and try to
move them forward and backward. If
any free play can be felt, ask a Yamaha
dealer to inspect and adjust the steer-
ing. Inspection is easier if the front
wheel is removed.
EW000115
WARNING
@ Securely support the motorcycle so
there is no danger of it falling over. @
Page 74 of 97
PERIODIC MAINTENANCE AND MINOR REPAIR
6-28
6 3. Remove the brake hose holders
and the calipers by removing the
bolts.
NOTE:@ Do not depress the brake lever when
the disc and caliper are separated. @
4. Loosen the pinch bolt and wheel
axle.
5. Elevate the front wheel by placing
a suitable stand under the engine.
6. Remove the wheel axle. Make
sure the motorcycle is properly
supported.
1. Bolt (´ 3)
2. Brake hose holder
3. CaliperLeft
Right
1. Pinch bolt
2. Wheel axle
Page 75 of 97
PERIODIC MAINTENANCE AND MINOR REPAIR
6-29
6
EAU01469
Front wheel installation1. Install the speedometer gear unit
into the wheel hub. Make sure the
wheel hub and the speedometer
gear unit are installed with the pro-
jections meshed into the slots.
2. Lift up the wheel between the front
fork legs. Make sure the slot in the
speedometer gear unit fits over
the stopper on the front fork outer
tube.
3. Install the wheel axle and let the
motorcycle down.4. Install the calipers and caliper
bolts. Make sure there is enough
gap between the brake pads be-
fore installing the calipers onto the
brake discs.
5. Tighten the wheel axle, pinch bolt
and caliper bolts to the specified
torque.6. Push down hard on the handle-
bars several times to check for
proper fork operation.
7. Install the speedometer cable.
Tightening torque:
Wheel axle:
59 Nm (5.9 m·kg)
Pinch bolt:
19 Nm (1.9 m·kg)
Caliper bolt:
40 Nm (4.0 m·kg)