2000 YAMAHA XJ600N fuel
[x] Cancel search: fuelPage 61 of 101

L
6-13
PERIODIC MAINTENANCE AND MINOR REPAIR
/Net/layout8/layout_G2/work/Imai_work/OM-PS/AA9156_XJ600SN-E6/English/E-6.frame
EAU00637
Valve clearance adjustment
The correct valve clearance changes
with use, resulting in improper fuel/air
supply or engine noise. To prevent this,
the valve clearance must be adjusted
regularly. This adjustment however,
should be left to a professional
Yamaha service technician.
EAU00647
Tires
To ensure maximum performance,
long service, and safe operation, note
the following:
Tire air pressure
Always check and adjust the tire pres-
sure before operating the motorcycle.
EW000082
Tire inflation pressure should be
checked and adjusted when the
temperature of the tire equals the
ambient air temperature. Tire infla-
tion pressure must be adjusted ac-
cording to total weight of cargo,
rider, passenger, and accessories
(fairing, saddlebags, etc. if approved
for this model), and vehicle speed.
Maximum load* XJ600S: 184 kg
XJ600N: 187 kg
Cold tire pressure Front Rear
Up to 90 kg*200 kPa
(2.00 kg/cm
2,
2.00 bar)225 kPa
(2.25 kg/cm2,
2.25 bar)
90 kg load ~
Maximum load*200 kPa
(2.00 kg/cm
2,
2.00 bar)250 kPa
(2.50 kg/cm2,
2.50 bar)
High speed riding200 kPa
(2.00 kg/cm
2,
2.00 bar)250 kPa
(2.50 kg/cm2,
2.50 bar)
* Load is the total weight of cargo, rider, passenger
and accessories.
Page 82 of 101

R
6-34
PERIODIC MAINTENANCE AND MINOR REPAIR
/Net/layout8/layout_G2/work/Imai_work/OM-PS/AA9156_XJ600SN-E6/English/E-6.frame
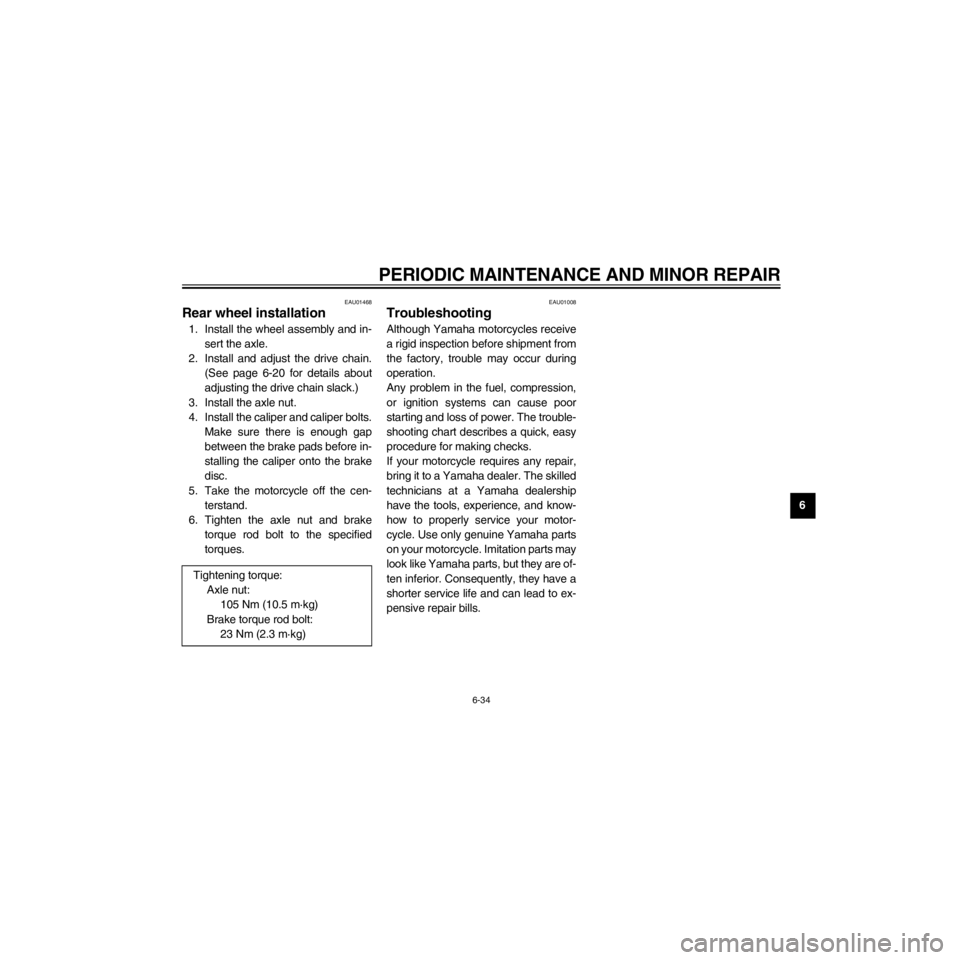
EAU01468
Rear wheel installation
1. Install the wheel assembly and in-
sert the axle.
2. Install and adjust the drive chain.
(See page 6-20 for details about
adjusting the drive chain slack.)
3. Install the axle nut.
4. Install the caliper and caliper bolts.
Make sure there is enough gap
between the brake pads before in-
stalling the caliper onto the brake
disc.
5. Take the motorcycle off the cen-
terstand.
6. Tighten the axle nut and brake
torque rod bolt to the specified
torques.
Tightening torque:
Axle nut:
105 Nm (10.5 mákg)
Brake torque rod bolt:
23 Nm (2.3 mákg)
EAU01008
Troubleshooting
Although Yamaha motorcycles receive
a rigid inspection before shipment from
the factory, trouble may occur during
operation.
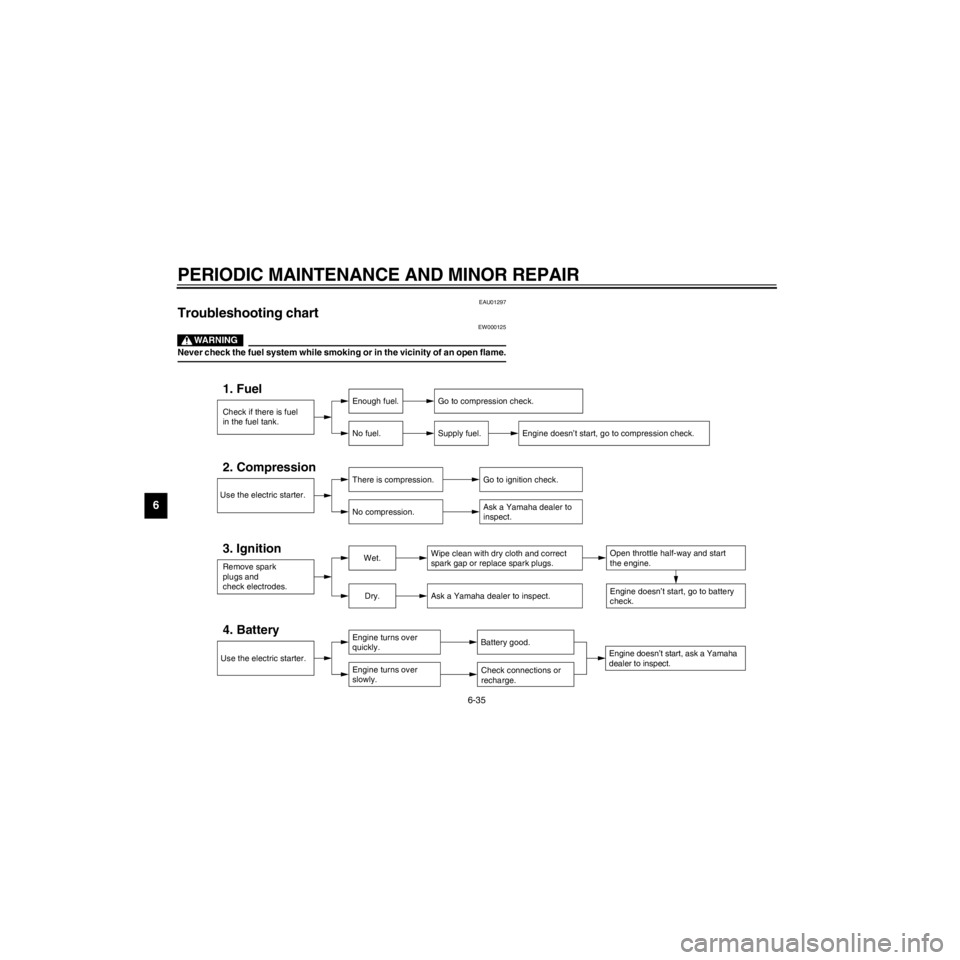
Any problem in the fuel, compression,
or ignition systems can cause poor
starting and loss of power. The trouble-
shooting chart describes a quick, easy
procedure for making checks.
If your motorcycle requires any repair,
bring it to a Yamaha dealer. The skilled
technicians at a Yamaha dealership
have the tools, experience, and know-
how to properly service your motor-
cycle. Use only genuine Yamaha parts
on your motorcycle. Imitation parts may
look like Yamaha parts, but they are of-
ten inferior. Consequently, they have a
shorter service life and can lead to ex-
pensive repair bills.
Page 83 of 101

L
6-35
PERIODIC MAINTENANCE AND MINOR REPAIR
/Net/layout8/layout_G2/work/Imai_work/OM-PS/AA9156_XJ600SN-E6/English/E-6.frame
EAU01297
Troubleshooting chart
EW000125
Never check the fuel system while smoking or in the vicinity of an open flame.
Check if there is fuel
in the fuel tank.
1. FuelEnough fuel.
No fuel.Go to compression check.
Supply fuel.
Use the electric starter.
2. CompressionThere is compression.
No compression.Go to ignition check.
Ask a Yamaha dealer to
inspect.
Remove spark
plugs and
check electrodes.
3. IgnitionWet.
Dry.Wipe clean with dry cloth and correct
spark gap or replace spark plugs.
Ask a Yamaha dealer to inspect.
Engine doesnÕt start, go to battery
check.
Open throttle half-way and start
the engine.
Use the electric starter.
4. BatteryEngine turns over
quickly.
Engine turns over
slowly.Battery good.
Check connections or
recharge.
Engine doesnÕt start, ask a Yamaha
dealer to inspect.
Engine doesnÕt start, go to compression check.
Page 86 of 101

R
7-2
MOTORCYCLE CARE AND STORAGE
/Net/layout8/layout_G2/work/Imai_work/OM-PS/AA9156_XJ600SN-E6/English/E-7.frame
ECA00010
CAUTION:
lAvoid using strong acidic wheel
cleaners, especially on spoked
wheels. If you do use such
products for hard-to-remove
dirt, do not leave it on any long-
er than instructed, then thor-
oughly rinse it off with water,
immediately dry the area and
apply a corrosion protection
spray.
lImproper cleaning can damage
windshields, cowlings, panels
and other plastic parts. Use
only a soft, clean cloth or
sponge with mild detergent and
water to clean plastic.
lDo not use any harsh chemical
products on plastic parts. Be
sure to avoid using cloths or
sponges which have been in
contact with strong or abrasive
cleaning products, solvent or
thinner, fuel (gasoline), rust re-
movers or inhibitors, brake flu-
id, antifreeze or electrolyte.
lDo not use high-pressure wash-
ers or steam-jet cleaners since
they cause water seepage and
deterioration in the following ar-
eas: seals (of wheel bearings,
swingarm bearings, forks and
brakes), electric components
(couplers, connectors, instru-
ments, switches and lights),
breather hoses and vents.
lFor motorcycles equipped with
a windshield: Do not use strong
cleaners or hard sponges as
they will cause dulling or
scratching. Some cleaning
compounds for plastic may
leave scratches on the wind-
shield. Test the product on a
small hidden part of the wind-
shield to make sure they do not
leave any marks. If the wind-
shield is scratched, use a quali-
ty plastic polishing compound
after washing.
After riding in the rain, near the sea or
on salt-sprayed roads
Since sea salt or salt sprayed on the
roads in the winter are extremely corro-
sive in combination with water, carry
out the following steps after each ride
in the rain, near the sea or on salt-
sprayed roads. (Salt sprayed in the
winter may remain on the roads well
into spring.)
Page 88 of 101

R
7-4
MOTORCYCLE CARE AND STORAGE
/Net/layout8/layout_G2/work/Imai_work/OM-PS/AA9156_XJ600SN-E6/English/E-7.frame
ECA00013
CAUTION:
lApply spray oil and wax spar-
ingly and wipe off any excess.
lNever apply oil or wax on rub-
ber and plastic parts, but treat
them with a suitable care prod-
uct.
lAvoid using abrasive polishing
compounds as they wear away
the paint.
NOTE:
Consult a Yamaha dealer for advice on
what products to use.
Storage
Short-term
Always store your motorcycle in a cool,
dry place and, if necessary, protect it
against dust with a porous cover.
ECA00014
CAUTION:
lStoring the motorcycle in a
poorly ventilated room or cov-
ering it with a tarp while it is still
wet will allow water and humidi-
ty to seep in and cause rust.
lTo prevent corrosion, avoid
damp cellars, stables (because
of the presence of ammonia)
and areas where strong chemi-
cals are stored.Long-term
Before storing your motorcycle for sev-
eral months:
1. Follow all the instructions in the
ÒCareÓ section of this chapter.
2. Drain the carburetor float cham-
bers by loosening the drain bolts;
this will prevent fuel deposits from
building up. Pour the drained fuel
into the fuel tank.
3. Only for motorcycles equipped
with a fuel cock which has an
ÒOFFÓ position: Turn the fuel cock
to ÒOFFÓ.
4. Fill up the fuel tank and add fuel
stabilizer (if available) to prevent
the fuel tank from rusting and the
fuel from deteriorating.
5. Perform the following steps to pro-
tect the cylinders, piston rings, etc.
from corrosion.
a. Remove the spark plug caps and
spark plugs.
b. Pour a teaspoonful of engine oil
into each spark plug bore.
Page 91 of 101

L
8-1
SPECIFICATIONS
/Net/layout8/layout_G2/work/Imai_work/OM-PS/AA9156_XJ600SN-E6/English/E-8.frame
Specifications
Model XJ600S / XJ600N
Dimensions
Overall length 2,170 mm
Overall width 735 mm
Overall height
XJ600S 1,205 mm
XJ600N 1,090 mm
Seat hight 770 mm
Wheelbase 1,445 mm
Ground clearance 150 mm
Minimum turning radius 2,700 mm
Basic weight (with oil and full fuel tank)
XJ600S 213 kg
XJ600N 210 kg
Engine
Engine type Air-cooled 4-stroke, DOHC
Cylinder arrangement Forward-inclined parallel
4-cyclinder
Displacement 598 cm
3
Bore´ Stroke 58.5 ´ 55.7 mm
Compression ratio 10:1
Starting system Electric starter
Lubrication system Wet sump
Engine oil
Ty p e
Recommended engine oil
classiÞcation API Service SE, SF, SG type or
higher
Quantity
Periodic oil change 2.3 L
With oil Þlter replacement 2.6 L
Total amount 3.1 L
-20û -10û 0û
10û20û 30û
40û50ûC
SAE 10W/30
SAE 15W/40
SAE 20W/40
SAE 20W/50
SAE 10W/40
CAUTION:
Be sure to use motor oils that do not contain anti-friction
modifiers. Passenger car motor oils (often labeled
ÒEnergy ConservingÓ) contain anti-friction additives which
will cause clutch and/or starter clutch slippage, resulting in
reduced component life and poor engine performance.
EAU01038
Page 92 of 101

R
8-2
SPECIFICATIONS
/Net/layout8/layout_G2/work/Imai_work/OM-PS/AA9156_XJ600SN-E6/English/E-8.frame
Air filterDry type element
Fuel
Type Regular unleaded gasoline
Fuel tank capacity 17.0 L
Reserve amount 3.5 L
Carburetor
Ty p e´quantity BDS28 ´ 4
Manufacturer MIKUNI
Spark plug
Type/Manufacturer CR8E / NGK
U24ESR-N / DENSO
Gap 0.7 ~ 0.8 mm
Clutch typeWet, multiple-disc
Transmission
Primary reduction system Spur gear
Primary reduction ratio 2.225
Secondary reduction system Chain drive
Secondary reduction ratio 3.000 (except for CH, A)
2.875 (for CH, A)
Number of drive chain
sprocket teeth (rear/front) 48/16 (except for CH, A)
46/16 (for CH, A)
Transmission type Constant mesh 6-speedOperation Left foot operation
Gear ratio
1st 2.733
2nd 1.778
3rd 1.333
4th 1.074
5th 0.913
6th 0.821
Chassis
Frame type Double cradle
Caster angle 25°
Tr a i l 9 7 m m
Tire
Front
Type Tubeless
Size 110 / 80-17 57H
Manufacturer/model MICHELIN / MACADAM 50
DUNLOP / D103FA
Rear
Type Tubeless
Size 130 / 70-18 63H
Manufacturer/model MICHELIN / MACADAM 50
DUNLOP / D103A
Page 99 of 101

L
INDEX
/Net/layout8/layout_G2/work/Imai_work/OM-PS/AA9156_XJ600SN-E6/English/EEIX.frame
A
Air filter .................................................6-10
B
Battery ..................................................6-25
Brake and clutch lever lubrication ........6-23
Brake and shift pedal lubrication ..........6-22
Brake fluid replacement ........................6-20
Brake light switch adjustment ...............6-17
C
Cable inspection and lubrication ..........6-22
Carburetor adjustment ..........................6-11
Care ........................................................7-1
Center and sidestand lubrication ..........6-23
Checking the front and rear brake
pads ...................................................6-18
Clutch lever ............................................3-9
Clutch lever free play adjustment .........6-15
Controls/Instruments (XJ600N) ..............2-6
Controls/Instruments (XJ600S) ..............2-3
D
Dimmer switch ........................................3-7
Drive chain lubrication ..........................6-21
Drive chain slack adjustment ................6-21
Drive chain slack check ........................6-20
E
Engine break-in ......................................5-5
Engine oil ................................................6-7
Engine stop switch .................................3-9
F
Front brake lever ................................. 3-10
Front fork inspection ............................ 6-24
Front wheel installation ........................ 6-31
Front wheel removal ............................ 6-31
Fuel ...................................................... 3-12
Fuel cock ............................................. 3-13
Fuel tank breather hose
(for Germany only) ............................ 3-12
Fuel tank cap ....................................... 3-11
Fuse replacement ................................ 6-26
G
Give safety the right of way ................... 1-1
H
Handlebar switches ............................... 3-7
Dimmer switch ................................. 3-7
Engine stop switch ........................... 3-9
Hazard switch .................................. 3-8
Horn switch ...................................... 3-8
Lights switch .................................... 3-9
Pass switch ...................................... 3-7
Start switch ...................................... 3-9
Turn signal switch ............................ 3-8
Hazard switch ........................................ 3-8
Headlight bulb replacement
(for XJ600N) ...................................... 6-29
Headlight bulb replacement
(for XJ600S) ...................................... 6-27
Helmet holders ..................................... 3-15
High beam indicator light ....................... 3-3
Horn switch ............................................ 3-8
I
Identification number records ................ 9-1
Idle speed adjustment .......................... 6-12
Indicator lights ........................................ 3-3
High beam indicator light .................. 3-3
Neutral indicator light ....................... 3-3
Oil level indicator light ...................... 3-3
Turn indicator lights .......................... 3-3
Inspecting the brake fluid level ............ 6-19
K
Key identification number
(for XJ600N) ........................................ 9-1
Key identification number
(for XJ600S) ........................................ 9-1
L
Left view (XJ600N) ................................ 2-4
Left view (XJ600S) ................................. 2-1
Lights switch .......................................... 3-9
Luggage strap holders ......................... 3-16
M
Main switch ............................................ 3-1
Model label ............................................ 9-2
N
Neutral indicator light ............................. 3-3