Page 157 of 235
L/C 100_U193
2000 L/C 100 (OM60866U) IN CASE OF AN EMERGENCY
If your vehicle will not start194
. . . . . . . . . . . . . . . . . . . . . . . . . . . . . . . . . . .
If your engine stalls while driving197
. . . . . . . . . . . . . . . . . . . . . . . . . . . . .
If you cannot increase the engine speed198
. . . . . . . . . . . . . . . . . . . . . .
If your vehicle overheats198
. . . . . . . . . . . . . . . . . . . . . . . . . . . . . . . . . . . .
If you have a flat tire199
. . . . . . . . . . . . . . . . . . . . . . . . . . . . . . . . . . . . . . . . .
If your vehicle needs to be towed208
. . . . . . . . . . . . . . . . . . . . . . . . . . . . .
If you cannot shift automatic transmission
selector lever
212
. . . . . . . . . . . . . . . . . . . . . . . . . . . . . . . . . . . . . . . . . . . . . .
If you lose your keys212
. . . . . . . . . . . . . . . . . . . . . . . . . . . . . . . . . . . . . . . . SECTION
4
Page 163 of 235

L/C 100_U199
2000 L/C 100 (OM60866U)
CAUTION
Do not attempt to remove the radiator
cap when the engine and radiator are
hot. Serious injury could result from
scalding hot fluid and steam blown
out under pressure.
7. After the engine coolant temperature
has cooled to normal, again check the
coolant level in the reservoir. If neces-
sary, bring it up to half full again. Seri-
ous coolant loss indicates a leak in the
system. You s hould have it checked as
soon as possible at your Toyota dealer. If you have a flat tire—
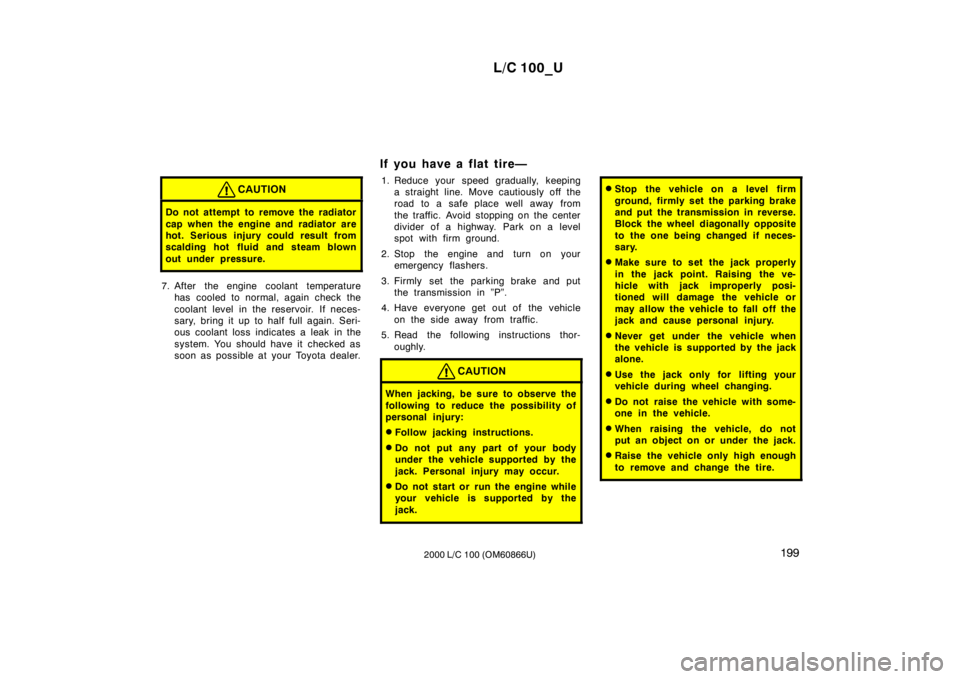
1. Reduce your speed gradually, keeping a straight line. Move cautiously off the
road to a safe place well away from
the traffic. Avoid stopping on the center
divider of a highway. Park on a level
spot with firm ground.
2. Stop the engine and turn on your emergency flashers.
3. Firmly set the parking brake and put the transmission in ”P”.
4. Have everyone get out of the vehicle on the side away from traffic.
5. Read the following instructions thor- oughly.
CAUTION
When jacking, be sure to observe the
following to reduce the possibility of
personal injury: �Follow jacking instructions.
� Do not put any part of your body
under the vehicle supported by the
jack. Personal injury may occur.
� Do not start or run the engine while
your vehicle is supported by the
jack.
�Stop the vehicle on a level firm
ground, firmly set the parking brake
and put the transmission in reverse.
Block the wheel diagonally opposite
to the one being changed if neces-
sary.
� Make sure to set the jack properly
in the jack point. Raising the ve-
hicle with jack improperly posi-
tioned will damage the vehicle or
may allow the vehicle to fall off the
jack and cause personal injury.
� Never get under the vehicle when
the vehicle is supported by the jack
alone.
� Use the jack only for lifting your
vehicle during wheel changing.
� Do not raise the vehicle with some-
one in the vehicle.
� When raising the vehicle, do not
put an object on or under the jack.
� Raise the vehicle only high enough
to remove and change the tire.
Page 164 of 235
L/C 100_U
200 2000 L/C 100 (OM60866U)
NOTICE
Do not continue driving with a de-
flated tire. Driving even a short dis-
tance can damage a tire beyond re-
pair.
1. Get the required tools and spare
tire.
1 Tool bag
2 Jack
3 Spare tire
To prepare yourself for an emergency, you
should familiarize yourself with the use of
the jack, each of the tools and their stor-
age locations.
When storing the jack, put it in place and
secure to prevent it from flying forward
during a collision or sudden braking.Turn the jack joint by hand.
To remove: Turn the joint in direction 1
until the jack is free.
To store: Turn the joint in direction 2 until
the jack is firmly secured to prevent it
flying forward during a collision or sudden
braking.
— R eq u ired to o ls an d sp are
tire
Page 165 of 235
L/C 100_U201
2000 L/C 100 (OM60866U)
To remove the spare tire under the lug-
gage compartment:
1. Put a jack handle, jack handle exten- sions and jack handle end together as
shown in the illustration.
1 Jack handle end
2 Jack handle extension
3 Jack handleWhen connecting a jack handle extension
with a jack handle end, use a Phi llips−
head screwdriver or jack handle to tighten
the bolts on the joints as shown in the
illustration. When connecting the jack han-
dle with extension, tighten the wing bolt
on the joint securely. Make sure the hol-
low meets the bolt on every joint when
you tighten the bolts.
NOTICE
Tighten all the joints securely. Other-
wise, the extension may come off and
it may damage the paint or vehicle
body.
2. Remove the access hole cover on the rear bumper with a flat −bladed screw-
driver.
To protect the paint, place several sheets
of paper over the paintwork.
Page 167 of 235

L/C 100_U203
2000 L/C 100 (OM60866U)
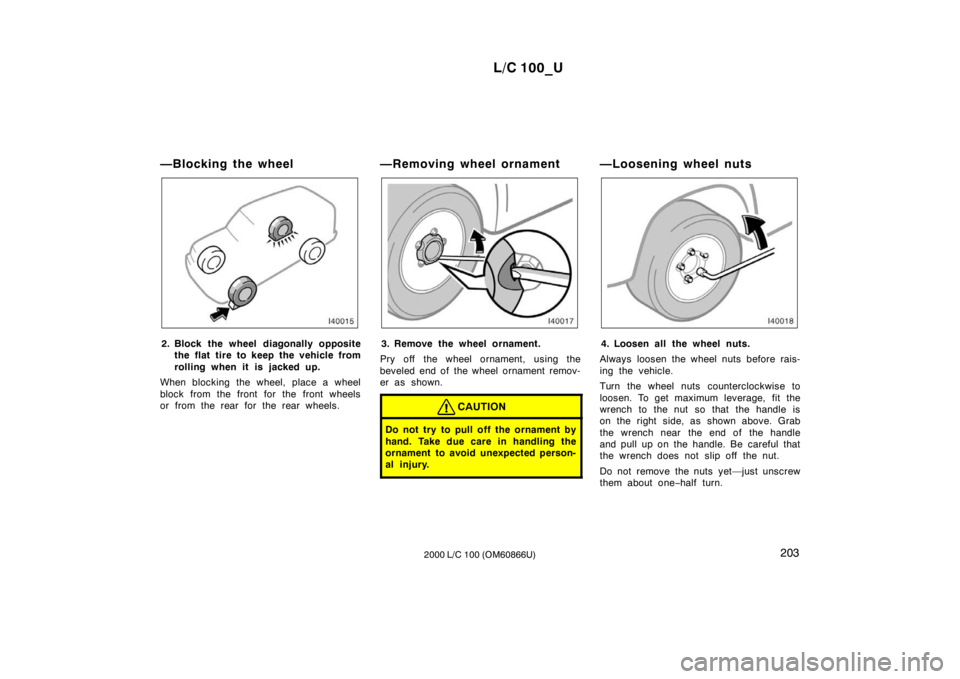
—Blocking the wheel
2. Block the wheel diagonally opposite
the flat tire to keep the vehicle from
rolling when it is j acked up.
When blocking the wheel, place a wheel
block from the front for the front wheels
or from the rear for the rear wheels. —Removing wheel ornament3. Remove the wheel ornament.
Pry off the wheel ornament, using the
beveled end of the wheel ornament remov-
er as shown.
CAUTION
Do not try to pull off the ornament by
hand. Take due care in handling the
ornament to avoid unexpected person-
al injury.
—Loosening wheel nuts
4. Loosen all the wheel nuts.
Always loosen the wheel nuts before rais-
ing the vehicle.
Turn the wheel nuts counterclockwise to
loosen. To get maximum leverage, fit the
wrench to the nut so that the handle is
on the right side, as shown above. Grab
the wrench near the end of the handle
and pull up on the handle. Be careful that
the wrench does not slip off the nut.
Do not remove the nuts yet—just unscrew
them about one −half turn.
Page 169 of 235

L/C 100_U205
2000 L/C 100 (OM60866U)
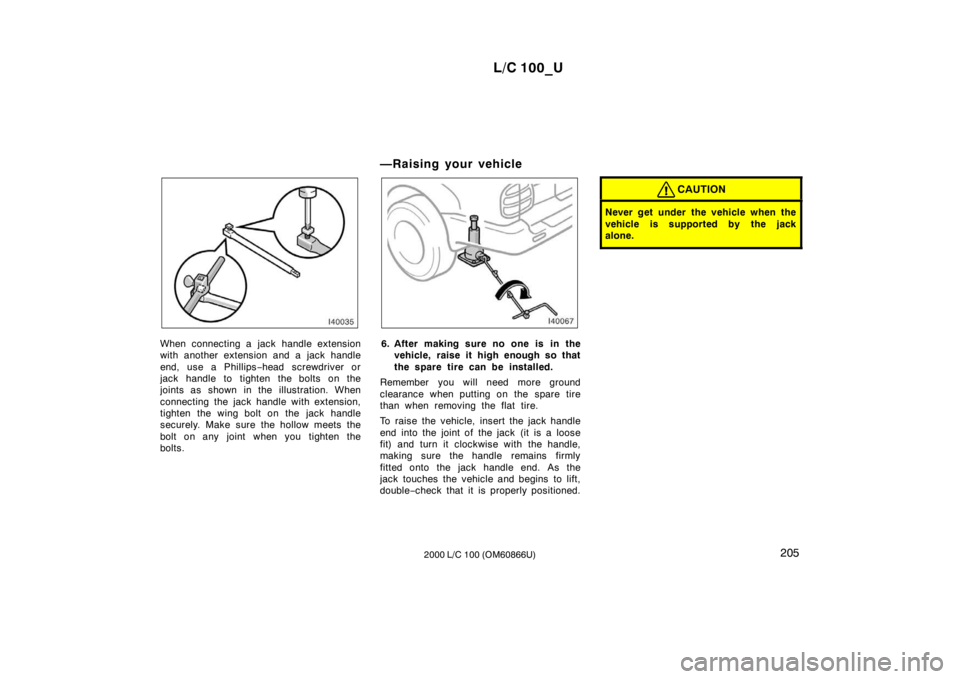
When connecting a jack handle extension
with another extension and a jack handle
end, use a Ph illips−head screwdriver or
jack handle to tighten the bolts on the
joints as shown in the illustration. When
connecting the jack handle with extension,
tighten the wing bolt on the jack handle
securely. Make sure the hollow meets the
bolt on any joint when you tighten the
bolts. —Raising your vehicle6. After making sure no one is in the
vehicle, raise it high enough so that
the spare tire can be installed.
Remember you will need more ground
clearance when putting on the spare tire
than when removing the flat tire.
To raise the vehicle, insert the jack handle
end into the joint of the jack (it is a loose
fit) and turn it clockwise with the handle,
making sure the handle remains firmly
fitted onto the jack handle end. As the
jack touches the vehicle and begins to lift,
double −check that it is properly positioned.
CAUTION
Never get under the vehicle when the
vehicle is supported by the jack
alone.
Page 170 of 235
L/C 100_U
206 2000 L/C 100 (OM60866U)
—Changing wheels
7. Remove the wheel nuts and change
tires.
Lift the flat tire straight off and put it
aside.
Roll the spare wheel into position and
align the holes in the wheel with the bolts.
Then lift up the wheel and get at least the
top bolt started through its hole. Wiggle
the tire and press it back over the other
bolts.Before putting on wheels, remove any cor-
rosion on the mounting surfaces with a
wire brush or such. Installation of wheels
without good metal −to −metal contact at the
mounting surface can cause wheel nuts to
loosen and eventually cause a wheel to
come off while driving. Therefore after the
first 1600 km (1000 miles), check to see
that the wheel nuts are tight. —Reinstalling wheel nuts8. Reinstall all the wheel nuts finger
tight.
Reinstall the wheel nuts (tapered end in-
ward) and tighten them as much as you
can by hand. Press back on the tire and
see if you can tighten them more.
Page 172 of 235

L/C 100_U
208 2000 L/C 100 (OM60866U)
—After changing wheels
11. Check the air pressure of the re- placed tire.
Adjust the air pressure to the specification
designated in Section 8. If the pressure is
lower, drive slowly to the nearest service
station and fill to the correct pressure.
Do not forget to reinstall the tire inflation
valve cap as dirt and moisture could get
into the valve core and possibly cause air
leakage. If the cap is missing, have a new
one put on as soon as possible.
12. Restow all the tools, jack and flat tire securely.
As soon after changing wheels as pos-
sible, tighten the wheel nuts to the torque
specified in Section 8 with a torque
wrench. Have a technician repair the flat
tire.
This is the same procedure for changing
or rotating your tires.
CAUTION
Before driving, make sure all the
tools, jack and flat tire are securely
in place in their storage location to
reduce the possibility of personal in-
jury during a collision or s udden
braking.
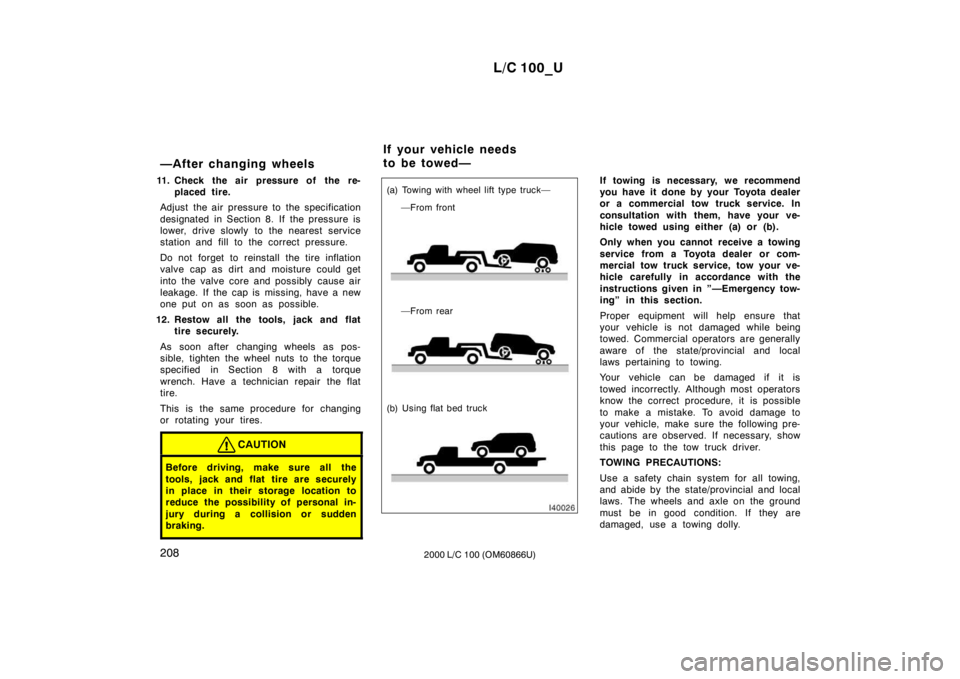
(a) Towing with wheel lift type truck—
—From rear
(b) Using flat bed truck —From front
If towing is necessary, we recommend
you have it done by your Toyota dealer
or a commercial tow truck service. In
consultation with them, have your ve-
hicle towed using either (a) or (b).
Only when you cannot receive a towing
service from a Toyota dealer or com-
mercial tow truck service, tow your ve-
hicle carefully in accordance with the
instructions given in ”—Emergency tow-
ing” in this section.
Proper equipment will help ensure that
your vehicle is not damaged while being
towed. Commercial operators are generally
aware of the state/provincial and local
laws pertaining to towing.
Your vehicle can be damaged if it is
towed incorrectly. Although most operators
know the correct procedure, it is possible
to make a mistake. To avoid damage to
your vehicle, make sure the following pre-
cautions are observed. If necessary, show
this page to the tow truck driver.
TOWING PRECAUTIONS:
Use a safety chain system for all towing,
and abide by the state/provincial and local
laws. The wheels and axle on the ground
must be in good condition. If they are
damaged, use a towing dolly.
If your vehicle needs
to be towed—